Navigate to
The Ultimate Guide to Agile User Story Mapping
- 9 mins read
-
By Marjan Venema
- Updated on February 19, 2024
What is Story Mapping?
Story mapping is a visual technique used in Agile project management to create a shared understanding of the project scope and requirements. It’s a collaborative approach that allows cross-functional teams to define and prioritize work in a user-centric manner.
Let’s Dive:
Story Mapping in Agile – What Is (User) Story Mapping?
Story Mapping or User Story Mapping is a technique used in product discovery: outlining a new product or a new feature for an existing product.
The result is a Story Map: all the user stories arranged in functional groups. This helps you keep your eye on the big picture while also providing all the details of the whole application.
What’s the Purpose of Story Mapping?
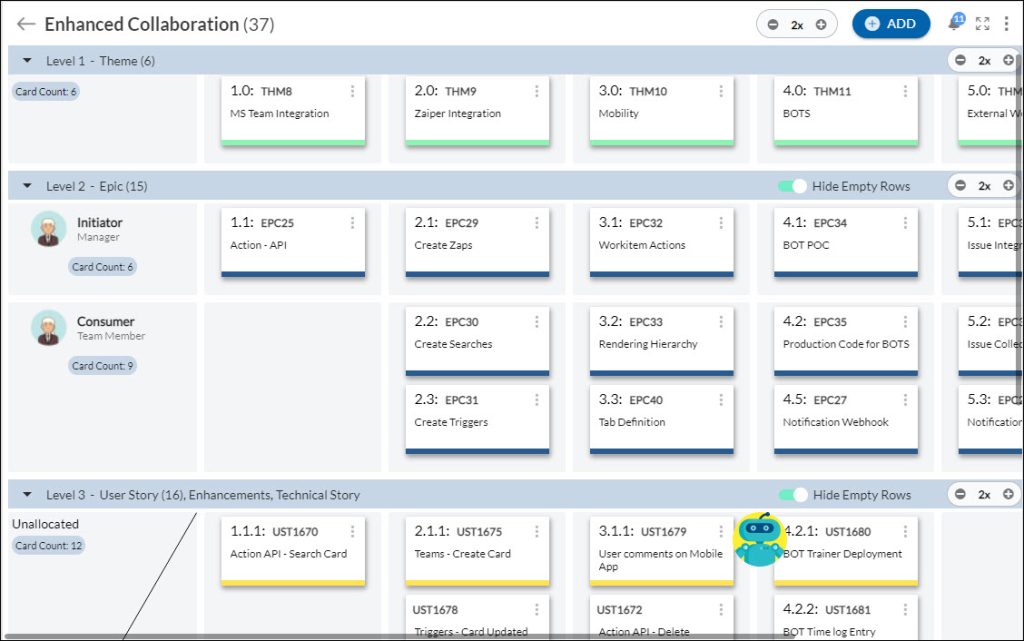
What Agile Values and Principles does Story Mapping Support?
What agile values and principles does story mapping support? Story Mapping supports two values of the Agile Manifesto. “Customer collaboration over contract negotiation” and “Responding to change over following a plan”.
You get the best results when you collaborate with a (future) user or a domain expert. Someone who is intimately familiar with the work that your application is to support and the problems it’s to solve.
Using Story Mapping, it’s easy to respond to change. Because when you add a new user story, or you change or remove an existing one, it’s easy to spot what else needs to be added, changed, or removed.
Who Created Story Mapping?

Jeff Patton first described Story Mapping in his “It’s All in How You Slice it” article in 2005 when he’d already been using it for a couple of years. But he didn’t call it Story Mapping then. He coined that term in his “The New User Story Backlog Is a Map” article of 2008. He also wrote a book about it: “User Story Mapping: Discover the Whole Story, Build the Right Product”.
Why Use Story Mapping? – What Problems Does Story Mapping Solve?
When you finish your product discovery, you’ll likely put the user stories into the backlog of a Scrum or Kanban board.
That’s fine to drive the development effort once you’ve decided on the build order.
However, the backlog management capabilities of these tools fall short for product and release management. Simply because the backlog is shown as a long, flat list. The filtering, labeling, and coloring you can do, helps a bit, but you never get the whole picture.
Story Mapping solves this by arranging user stories in a simple helpful layout.
What (Other) Benefits Do You Get Out of Story Mapping?
1. Everyone can easily understand the whole application—generally the most difficult part of software development. The Story Map tells the story of what your application solves and how it does it for anyone who’s interested. Everyone can participate in creating it.
2. You keep the big picture of your application in full view—losing the big picture is a common complaint in agile teams.
3. Putting together and having a Story Map visible encourages iterative and incremental development.
Having the big picture at your fingertips
1. Shows you where a user story fits in the whole system in a single glance.
2. Helps you decide what to build first. A Story Map makes it easy to pick and choose user stories from different features that together will provide meaningful value. This means you can confidently determine the scope of and build an MVP or a useful release.
3. Means you can more easily avoid building something that doesn’t work. You won’t get lost or forget important parts that would effectively render it unusable, like a car without brakes. For example, because you delayed low-value stories that your high-value stories depend on.
4. Lets you walk the Story Map to test it for gaps: spot more easily where something is missing.
5. Lets you make prioritization decisions taking the context of the whole system into account.
6. Means you’ll avoid staring yourself blind on a single-user story.
When you create a physical Story Map, you get some more benefits.
1. The map becomes a focal point for collaboration and helps shared understanding.
2. The full context provided by the map helps to quickly size user stories relative to each other.
3. You can add smaller stickies to user story cards to add extra information or mark stories for the current and next iteration.
Pitfalls and Mistakes
The most important pitfalls and mistakes with Story Mapping.
Working without a customer or someone intimately familiar with their work You need to collaborate with someone that uses or will use your product to support their work. Without their input and perspective, you’ll be guessing at what’s important and what’ll provide real value. You’ll be playing a hit and miss game and will likely waste development effort.
No goal, no problem to solve Working without a problem to solve, a goal to reach, you have nothing to guide your decisions and you’ll have no idea when you’re done. Leading to wasted effort, or at least to expending effort on something at the wrong time.
Not keeping the map visible Out of sight, out of mind. Without the Story Map serving as a visible reminder of your application’s big picture, veering off course is all too easy. As is the danger of getting lost in the weeds: getting caught up in the details of a single story that are irrelevant for the whole. This hurts even more, when those details would take more effort than the value of the story merits.
While a physical Story Map is preferable for the extra benefits it provides, with so many remote teams nowadays, you won’t always have that luxury. But you can still keep it highly visible. You can for example have a dedicated, large monitor showing the map in every location where you have team members.
How to Create a Story Map in 6 Steps (With Examples)?
1. Start With the Big Boulders
Identify the big stories, the broad user activities that your application needs to support. They’re big stories because they have many steps. These steps don’t need to have a specific order or workflow. In fact, many user activities have steps that a user will do at different times and on different schedules. Write each activity on a card.
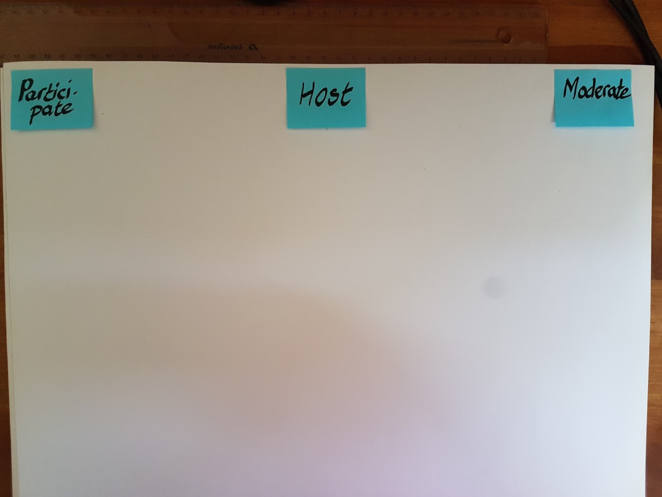
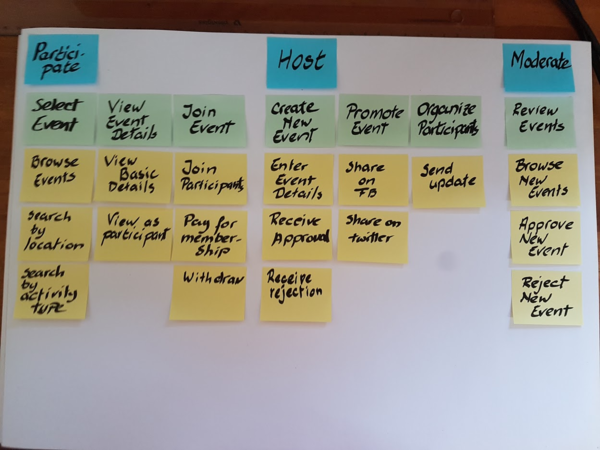
Arrange them in an order that makes sense to the user. If someone talks about doing one activity and then another, arrange them in that order. If activities aren’t done one after the other, simply use the order the user talks about them. That’ll help telling the story of the application to others. Let’s say you’re building a Fun Events Club site. Visitors can look for fun events to join. Members can join and host events. And the team behind the site serve as moderators and check if new events are within the guidelines. The big boulders of this site, the user-activities, could then look like this.
2. Crack Your Boulders Open
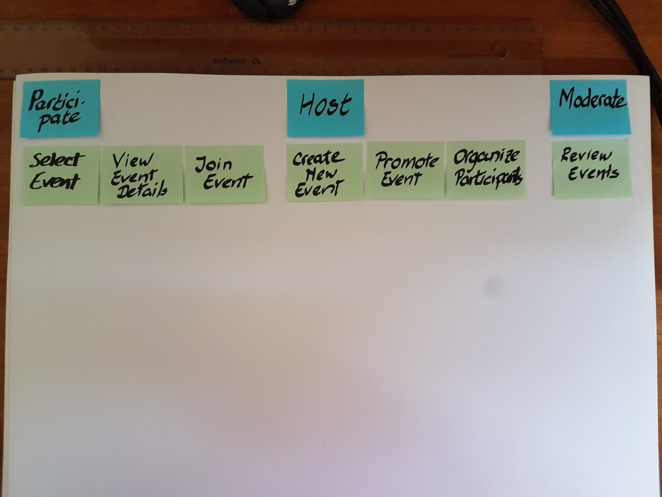
Break down the story of each user activity into smaller stories, the user tasks. Put the user tasks under the activity they belong to and arrange them in the same direction as the activities and in the order that makes sense to the user. For the Fun Events Club, that looks like this.
You now have what’s called the backbone of your Story Map.
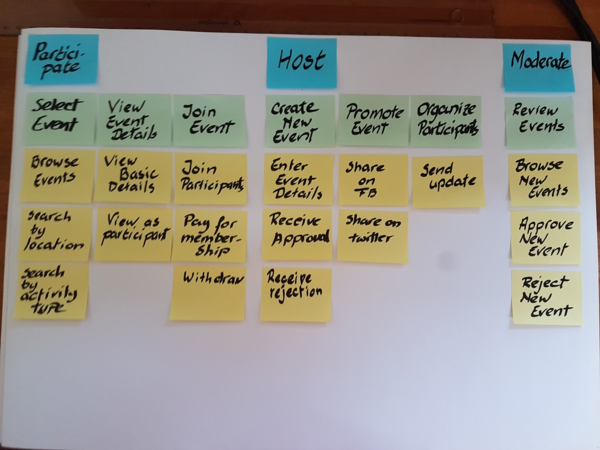
Most user tasks have steps or independent subtasks of their own. You put these subtasks under (if you were going horizontally) the user task to which they belong.
That looks like this.
Both user tasks and subtasks become the user stories you’ll implement. After all, a user still needs to select an event from a list to view its details or join it immediately.
3. Find the Pebbles That Got Away
Walk the map from beginning to end with someone else at your side. This can be a user, a developer, a tester, or someone else with a stake in the application. Talk about the (types of) user of your application and how they’re using your application. It’s a sort of rubber duck debugging for your Story Map. And it’ll quite naturally bring out things you’ve missed. Either because you think of them yourself, or because your companion points them out. It turns out that for the Fun Events Club, we missed quite a few.
When you’re walking the map with someone, take the opportunity to annotate the Story Map with other information you hear. Pain points in the current system, opportunities a user’s been waiting for. Edge cases and constraints you need to take into account. Write them on a sticky and stick them on the relevant card.
4. Put Your Pebbles in Line
There’s little sense in prioritizing the user activities. Apart from activities that won’t be used daily, it’s highly likely that something from each activity is needed to create a working whole. So focus on prioritizing user tasks and subtasks within each activity. Added advantage is that you don’t need to think about the relative importance of tasks belonging to different activities. In our Fun Events Club example, the subtasks are already in order of importance. A bit of premature optimization by your author.
5. Sculpt a Valuable First Boulder From Your Pebble Piles
Select the tasks from each activity that are essential to create a first version that works end-to-end even if it’s still in a very rudimentary way. That’s your MVP, your Minimum Viable Product.
6. Continue Sculpting
Plan your subsequent releases by prioritizing the remaining tasks. It’s entirely up to you how you want to move forward. You can opt to prioritize the highest value stories from several or even all user activities. You can also opt to focus on a single activity and prioritize all but the lowest valued stories.
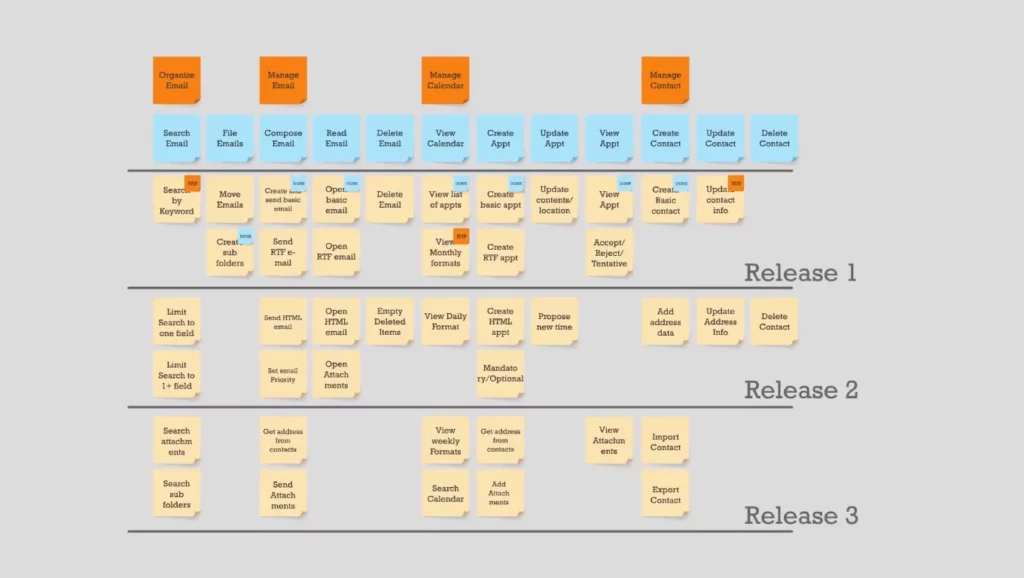
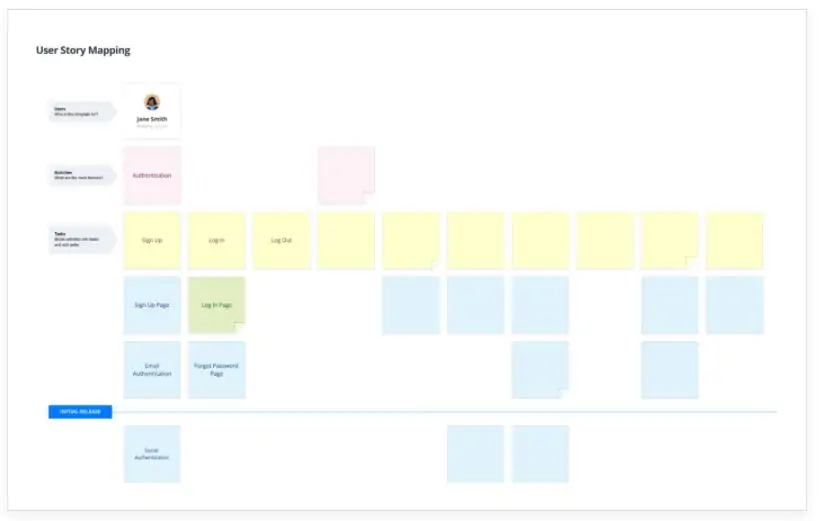
And maybe the business people in your company want to take other aspects into consideration. They are in the best position to decide what features and stories make a good release. Rather than drawing lines between the stories to mark which ones go into subsequent releases, you can also rearrange the map to show releases as horizontal spans of stories.
src: moqups.com
The last step is optional because, ideally, adaptive management should forgo the need to control and micromanage, preferring to define the “what” and not care about the specifics of the “how”. But since a transition to an adaptive style might be hard and even scary, the creation of a project task list might be used to smooth such a transition.
Using Story Mapping With Existing Applications
Story Mapping is not just for new applications. You can use it for existing applications as well.
To help you understand what an application does and recreate its big picture so you can take advantage of having that when moving forward.
And of course to map out new features and put them in context with the existing application.
If you can’t (aren’t allowed) to build a full Story Map of the existing application first, at least get all the existing user activities in place.
This’ll give you the context for new features.
And it’ll also give you a place to put the tasks you need to add or change in existing user activities. For example, when you create a new feature to send out targeted emails. You’ll need to add selecting multiple contacts in the existing contacts list. And you’ll probably need to add some extra filtering capabilities there as well.
Become a Storyteller
Remember the pain of having to prioritize stories in a long, flat backlog?
And how difficult it was to explain the application to other people?
You know now how Story Mapping can help you. To prioritize stories and assemble releases that deliver meaningful value. And to tell the story of your application as users will use it. Simply by walking the Story Map.
So, make your future self happy, and take advantage of Story Mapping.
FAQ
What is included in a user story?
What are epics?
What is story mapping?
What tools do you need for story mapping?
How long does story mapping take?
About Author:
Signup for updates!
Agile 101
Guide to Marketing Project Management
This comprehensive guide equips marketing professionals and stakeholders with the foundational knowledge and practical steps to navigate Marketing Project Management effectively.
What is an Agile Epic? Benefits of Using Them
Learn what an Agile epic is, how it can streamline project management, and the benefits of incorporating epics into your Agile workflow.
Is Hybrid Agile Right for your Team? Here’s what you need to know
Explore the suitability of Hybrid Agile for your project needs in our comprehensive article. We delve into the benefits, considerations, and key factors to help you determine if this approach aligns with your organization’s goals and project requirements.
What is Hybrid Agile Project Management? A Short Guide
Discover the power of Hybrid Agile project management: achieve flexibility and structure for successful project execution. Learn how to harness this dynamic approach.
Dynamic System Development Method (DSDM)
Dynamic Systems Development Method, DSDM for short, seeks to do what came to be known as ‘Agile’ well before the manifesto was written. Learn more about its philosophy, principles, pillars, and practices.
Scrum is an agile project management framework that prioritizes collaboration and iterative development for efficient results.
Scrum of Scrums: A Starting Point to Scaling Agile
Scrum of scrums is an approach to coordinate multiple scrum teams working together. Learn how it works, how to get started and how it differs from competing approaches.
Pair programming is a programming method in which two people work together on a single program. The first person is the “Driver”, who writes the code, the other person is the “Navigator” who reviews each line of code as it is typed, checking for errors. They exchange their roles on a regular basis.
Speed up your Agile planning and execution!
Signup for a FREE Trial of Nimble Agile

