
In this article, we will help you understand the Card Field Editor.
|
Skip Ahead to: |
Overview
Card field Editor (earlier known as Iform Editor) has been designed in a tabular format to ease the process of adding or modifying attributes for a card type. After you add a Card Type, you may add and modify card attributes by double-clicking the card type from the Card types list (Admin Settings >> Card Settings).
Card Field Editor Tabs
The Card Field Editor is divided into 4 tabs:-
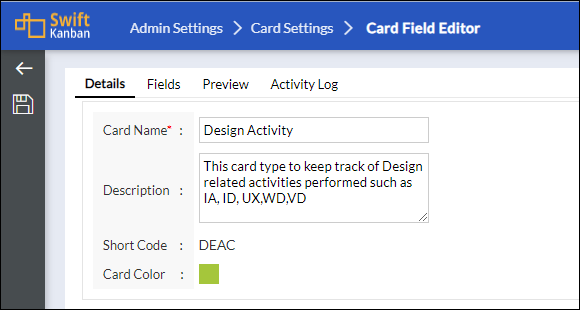
1. Details: You can edit the card name and description.
2. Fields – It is a tabular representation of the fields of that selected card type. Each row represents a field in the card. You can add, delete, or reposition the fields just by clicking their respective buttons. You can also select to view or not view the field in the List view of the card type.
The existing fields in the card type are- Title, Description, etc., and metric-related fields. These are system fields or attributes that appear by default. You can add new fields and also modify fields.
3. Preview – You can get a preview of how the Detail view of a card type will look after you add or remove fields in the card type. It consists of two types of previews-
- Popup Preview
- Full Preview
4. Activity Log – The Activity Log maintains logs for every change, which will enable you to track the changes made in the configuration of card types.
Adding Custom Fields
Tips: We have an exciting in-app Learning Enabler, called Challenges that would help you learn and create a custom field interactively. Please navigate to Help & Support > Challenges from the top-level menu and try out the Challenges.
To capture information based on your needs, you can add new fields and configure them. On adding, the field will appear in the Detail view of the card.
For default fields (ID, Title, Description, Priority, Class of Service, Size, Current Owner, and metrics-related fields), you cannot modify any fields, except the Include in List View option. Additionally, for the Description field, you can set it as Mandatory or Non-mandatory.
Note: Some default attributes like ID, Title, Description, and Current Owner can’t be disabled.
To add and configure fields:
1. In the List of Card Types view, double-click the card type to which you want to add a field/attribute.
2. To add a field, click the Add icon. A blank field row is added below.

3. From the Available Field Types section in the drop-down, select the Field Type (for example, Integer) in the new field. The blank row now displays the Field Type i.e. New Integer Field in red.
Currently, seven field types are supported:
| Field Type | Maximum Number of Instances in a Card Type |
| Single-Line Text | 10 |
| Multi-line Text | 10 |
| Regular Text | 40 |
| Integer | 50 |
| Decimal | 50 |
| Boolean | 25 |
| Date | 25 |
Note: If you select Multi-Line Text for a field, then that field will not appear in the card pop-up. But it will be displayed in the List View.
4. Click to select and define the field properties for the new field. Enter appropriate values to configure the field. The Field Type and List Position are displayed by default.
- Enter the name of the field in the Field Label. Note that these special characters i.e. #,@,%,/,,&,$,?,*,|,:,<,>,-,’ – are not allowed in field label. Select the attributes for the new field as explained below. To save the newly created field, click the Save icon in the Side toolbar.
- To mark the field mandatory, select Yes in the Mandatory option, else select No.
- To make the field available to capture information, select No in the Disable option for the field to appear in the card type.
- For the field to be listed in the List view of the card type, select Yes in the ‘Include in List View’ option, else select No. For example, Project > Backlog » Issues displays the Issues List View with the field columns displayed in the order defined in the List View.
- In the Input method, to enable users to enter a value, select Manual Entry. To enable users to select values from the available list, select Static List. (The list of values can be maintained by editing the required Master List at Admin > Settings » Master Lists View
- List Position -To select the position or modify the position for an already displaying column, double-click the List Position cell for the column/field. Enter the value. If the position is already selected for another field, modify the position of that field. Ensure that the position does not repeat for any other field and the position values are sequentially correct.
5. You can click the Preview tab on the toolbar to preview the modified layout of the card type.
6. Save it by clicking the Save icon in the Side toolbar.
After you add custom fields for a card type in the Admin level, they will also be available at the Board level. You need to select them for that card type in the Board and enable them to be available. See the Design Card Sticky section on the Settings page
Delete Card Attributes
You may delete a card attribute i.e. a field even if their cards are created for that card type and text is entered in that field. You cannot delete default card attributes such as ID, Title, Description, Priority, Class of Service, Size, Current Owner, etc., and metrics-related fields.
To delete a card attribute:
1. Navigate to Admin Settings>> Card Settings.
2. In the List of Card Types view, double-click the card type from which you want to delete a field/attribute. Select the Fields section under the Card Field Editor view, all fields are listed.
3. Click the Delete Icon on the field row you want to delete as shown below. This deletes the field.
![]()