
In this article, we will help you understand how to configure card types.
|
Skip Ahead to: Enable/Disable Card Type on the Board Create Card Type (Account Admins only) |
Overview
Your organization may have card types other than the default card types created in the application. With a Manager role on the board, you can enable the card types on the Kanban Board. These will be listed in the List of Card Types view.
Navigation
To view the Card Types that are available for your Board –
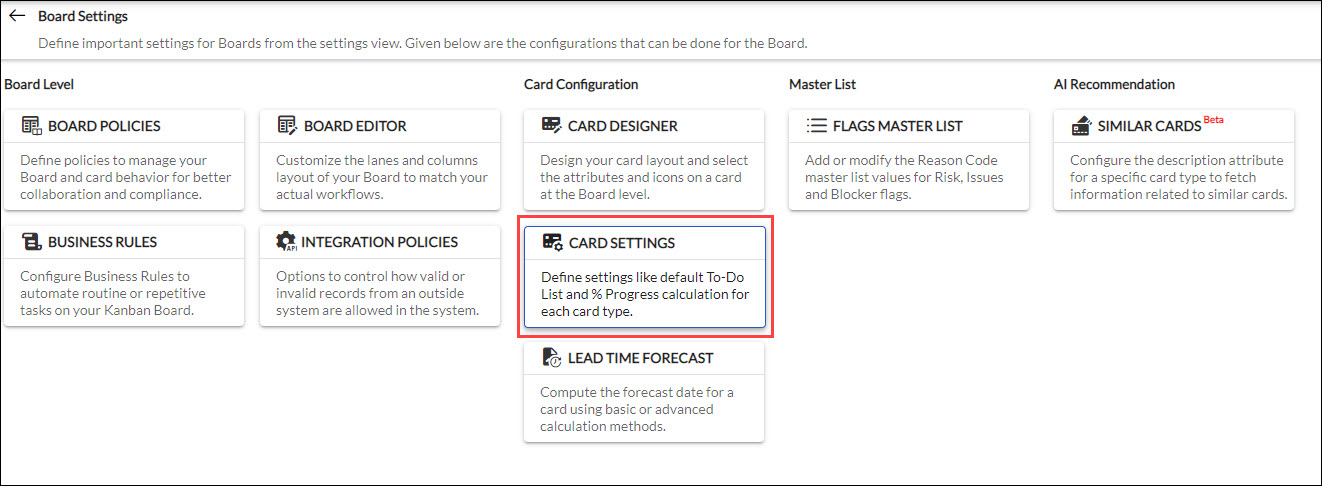
- Click the Board Settings
 icon on the top menu bar. The Board Settings page is displayed.

- Click the CARD SETTINGS tile.
From the List of Card Types view, you can:
- Enable/Disable Card Type on the Board
- Change Card Type Color
- Create Card Type (Account Admins only)
- Configure Card Type Preferences
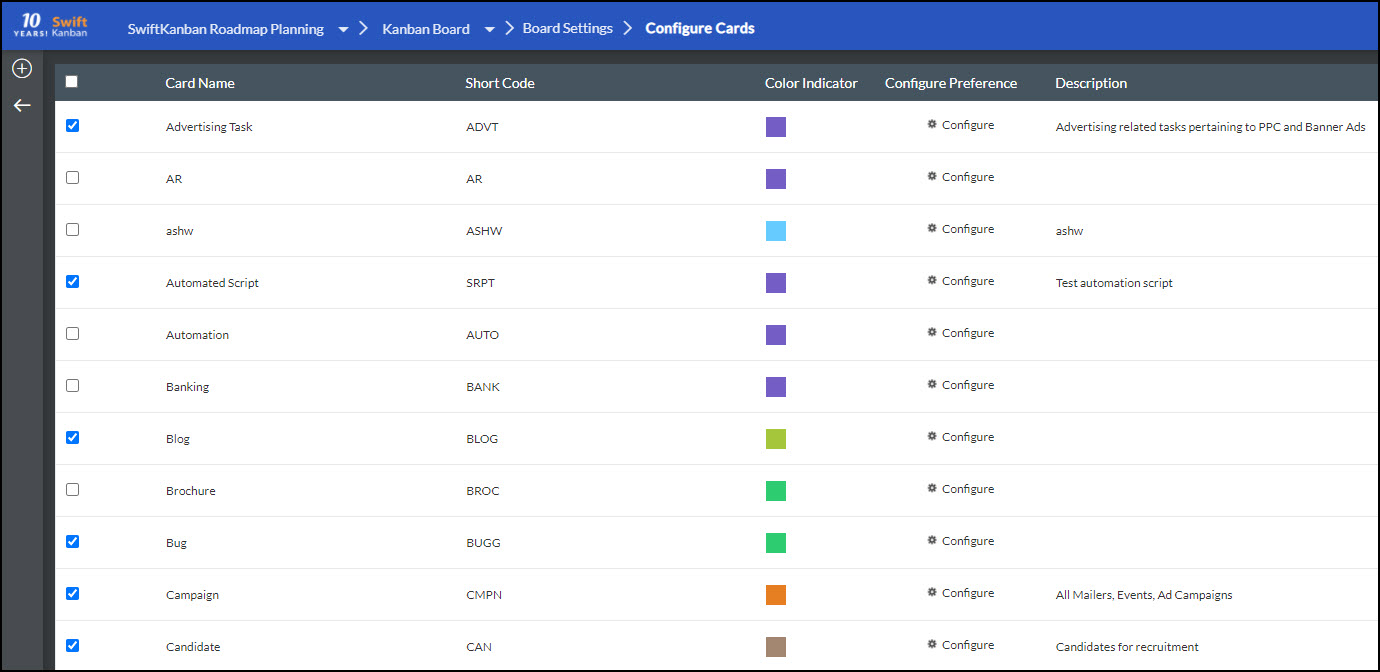
Enable/Disable Card Type on the Board
From the List of Card-Types view, click the check box for the required card type. If you want to enable all card types for your SwiftKanban board, select the check box on the column header.
You will now see the card type in the list when adding a new card, and also the legend in the Legends menu on the board on navigating to your board again.
To deactivate a card type for a particular board, from the List of Card-Types view, clear the selection for the required card type. Clear the check box on the column header, to deactivate all the card types at one go.
Note: You won’t be able to deactivate a card type if cards of that card type are available on the Board including the backlog board.
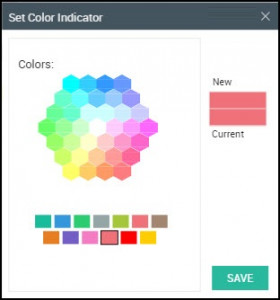
Change Card Type Color
To change the card type color for your board, double-click the card color in the Card Types view and select a color from the color palette. On returning to the board, the new color is seen for the card type.
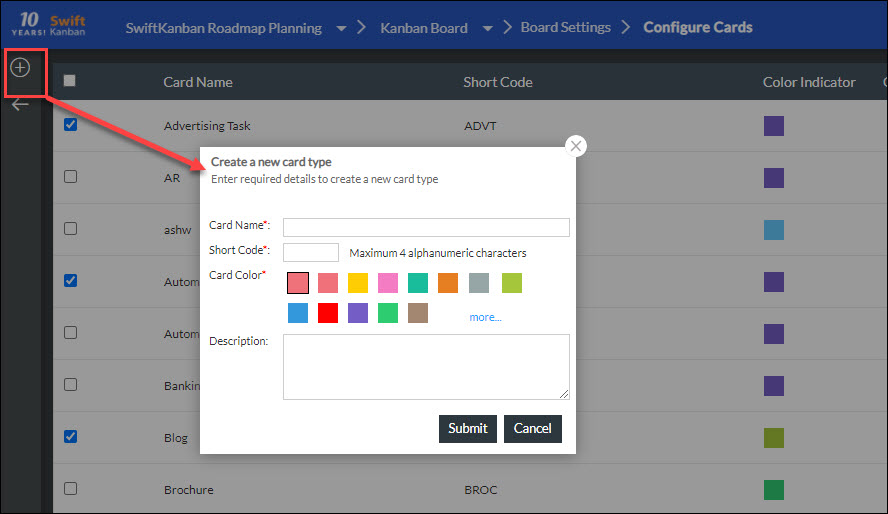
Create Card Type
With an Admin role, you can create a card type from a Kanban Board, besides creating from the Admin Settings. On creating a card type from the board, you can enable it for the board, change the card color, and define a default To-Do list for it. However, to define the layout, list view, custom fields, etc., you will have to configure the card type from the Admin Settings view.
- To create a Card Type, if you are on the board, click the Board Settings icon, and then click the Card Settings tile on the Board Settings page.
- Now, click the Create icon in the List of Card Types view. Enter the Card Name, etc. Note that the export process for cards will fail for MS Excel export if the card type name contains any of these special characters – [ ]? / *. This is a limitation of Microsoft Excel in that it does not accept worksheet names containing these characters.
- Select the card color from the palette and click Submit.
Configure Card Type Preferences
Over here you can predefine To-Do’s for a card, select the % progress preference, and manage the attributes that help you to hide/unhide for a card type.
Managing Attributes
Using the “Manage Attributes” tab under Card Settings, you can select and deselect the attributes to be displayed for a particular card type at the Board level. By default, for each card type the attributes are kept selected.
As per your requirement, you can come to this tab and configure the Standard Attributes, Custom Common Attributes, or Common Attributes. Also, you can deselect the attributes that you wish not to display for the particular card type.
Note: The factory-shipped attributes and mandatory attributes cannot be deselected.
The attributes that you select or deselect in this tab will be available throughout your Board. For example, in card pop-ups, filters, legends, card listing, export-import, and REST APIs.

Add a Default Description
You can set a default description for your card types. You can enter 60000 characters here which includes links, images, tables, etc. This can be important information or you can set a default structure in which you want your team members to add the description for each card type.
Card Inactive Setting
Ensure greater control over card types with the Do not allow further card creation for this card type setting under the new Card Inactive Setting. This option helps you deactivate specific card types that are no longer needed, preventing future card creations from using those card types.
Design Card Carousel
You can define the card carousel to see the card attributes you prefer to track on the card and in the order, these should appear. Every board can have its configuration on the card carousel.
To navigate to the Card Designer view page, click the Board Settings ![]() icon on the top menu. The Board Settings page is displayed. Under the Card Configuration category, click the CARD DESIGNER tile.
icon on the top menu. The Board Settings page is displayed. Under the Card Configuration category, click the CARD DESIGNER tile.
![]()

Using the Card Type option, personalize the design of each card to suit its specific purpose. To view an attribute with its values, select it in the Card Attributes menu on the right side of the screen. To hide it, clear the selection. To change the order, just drag the attribute and drop it in between the two attributes as you want. Make the changes once the previous change is saved successfully.
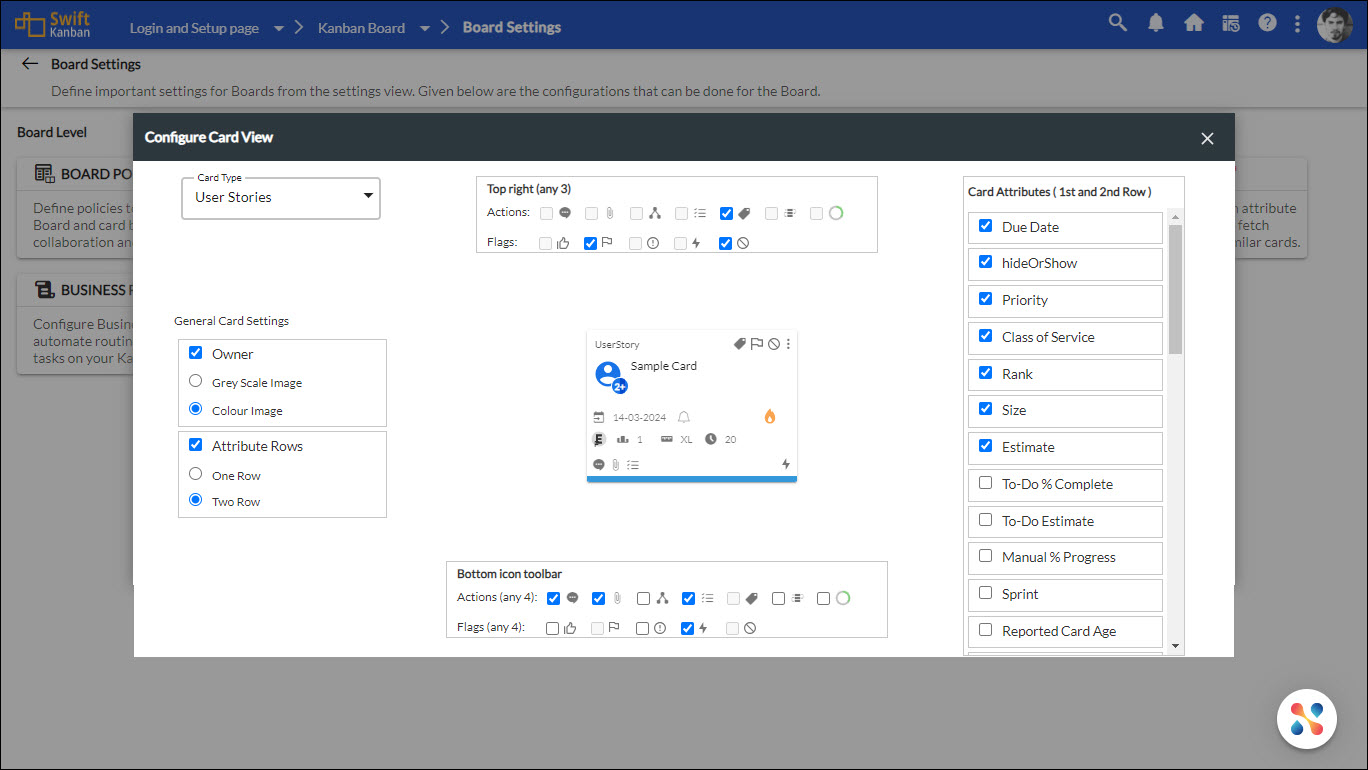
To view actions and flags on a card, select the checkboxes in the top and bottom icon toolbar. The Actions are shown on the first half of the last row of the card. The Flags are shown on the second half of the last row of the card. A total of 8 flags and actions can be shown in this row (four flags and four actions). The bottom icons can be shown by selecting them in the bottom toolbar whereas the top icons can be shown by selecting them in the top toolbar.
The sample card gives a preview, which refreshes automatically after every change. The changes are reflected when you return to the board.
Note that the default enterprise settings of the card carousel are inherited onto the board. If the board has changed the configuration, the same will reflect, overriding the enterprise settings. For example, if the Admin has hidden the ‘Rank’ for the Enterprise and you still see the attribute on your board, it means that it is not hidden for your board.