In this article, we will help you understand how to integrate SwiftKanban with Zapier.
|
Skip Ahead to: |
Overview
Have you ever wanted to create a card on your Kanban board based on an email or calendar invite you received? Have you ever wanted to create a task on your calendar from a card you are assigned to on your Kanban board? With Zapier integration, now you can do just that. Zapier supports over 2000 applications – and SwiftKanban is now one of them!
For example, you can automate a few actions in SwiftKanban like the card is automatically getting added every time you receive an email from your users for an enhancement or defect. Also think of a scenario, when you instantly get a notification in any other Zapier-supported application when a card is added, updated, or archived in SwiftKanban.
All these are possible when you integrate SwiftKanban with another application via Zapier and create a Zap to automate repetitive tasks.
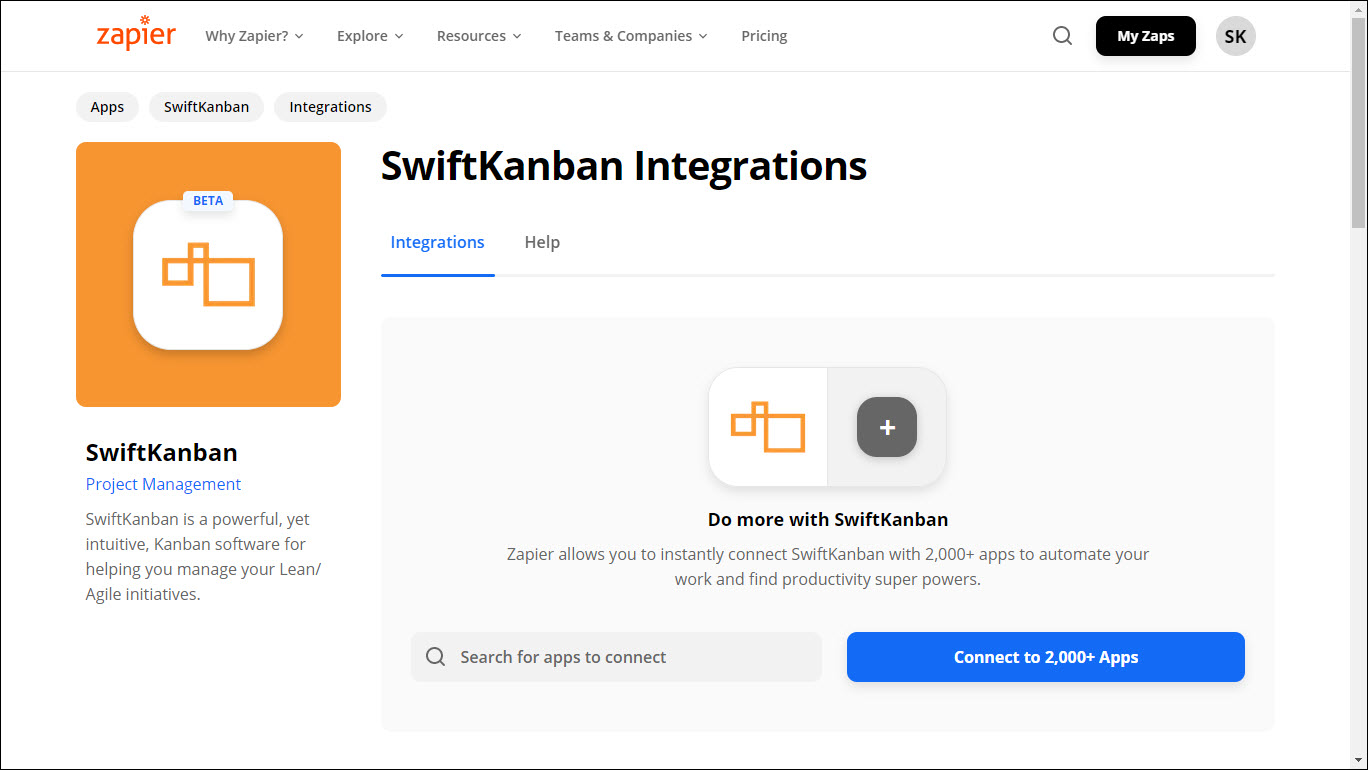
SwiftKanban app in Zapier includes various Triggers, Actions, and Search options. To know more about Zapier and how it works, click here.
How to Get Started with SwiftKanban on Zapier
About SwiftKanban’s Integration
- Admin/owner permissions – You don’t need extra permissions to access any SwiftKanban Boards via Zapier if you have proper access permissions provided in your SwiftKanban Application. For example, the boards in SwiftKanban for which you have only read access won’t let you create cards or update them.
- Paid/versioned account – Any plan (free or paid) and any version of SwiftKanban can access the integration. If you don’t have a SwiftKanban account, then click here to open a SwiftKanban account.
Connecting with Zapier
Every time you try to connect an app with SwiftKanban using Zapier, you need to create a Zap. To create a Zap, you can use any of the Trigger Events, Action commands, or Search options to perform an action on SwiftKanban Board via Zapier. Begin by performing the registration process for Zapier. To know more about registration, actions, and triggers, click here. Similarly, if you want to know more about searches, click here.
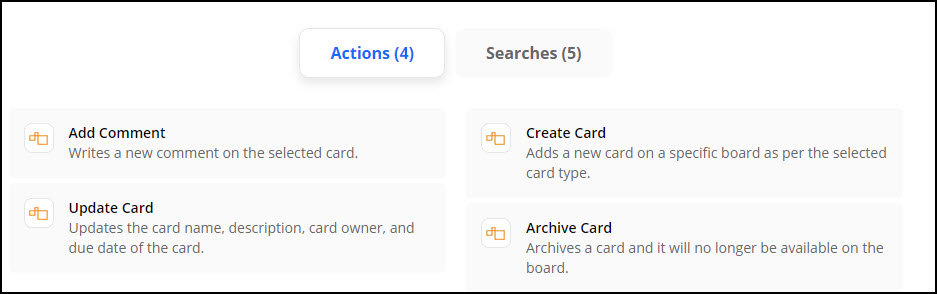
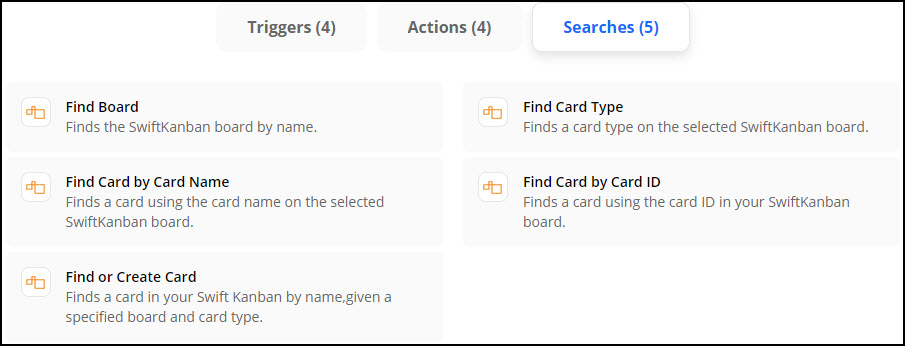
The list of Actions and Searches for SwiftKanban via Zapier is mentioned below.
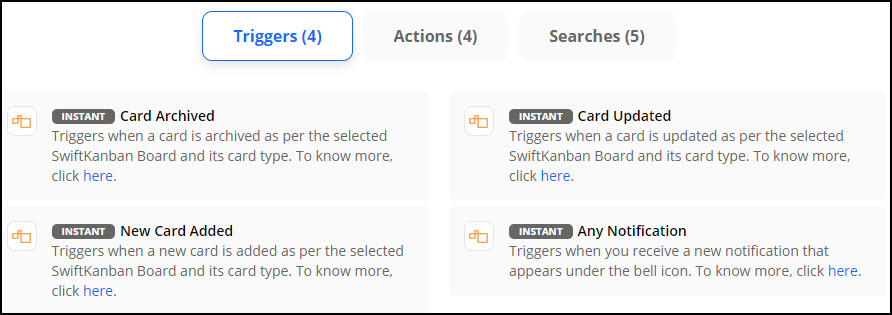
- Triggers: A trigger is an event in an app that starts the Zap. Once you set up a Zap, Zapier will monitor the app for that event. For the save Gmail attachments to Dropbox example, you can receive a lot of emails through your Gmail account, but the Zap isn’t triggered until an email contains an attachment. To know more about triggers used in Zapier, click here.
 Note:
Note:
To learn more about setting the notification in SwiftKanban, click here.
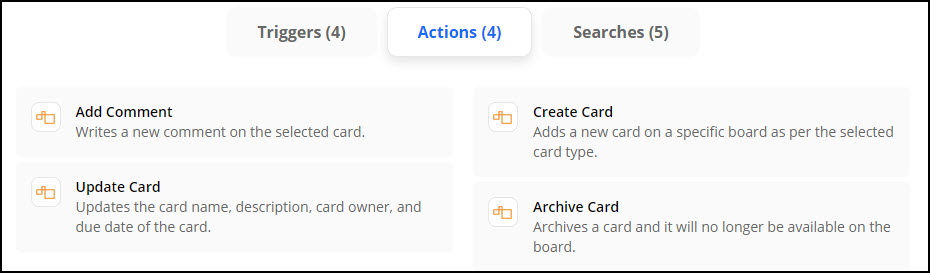
The trigger works only if you have purchased the Publish-Subscribe license. To get the license for your account, get in touch with our [email protected] today! - Actions: An action is an event that completes the Zap. For the save Gmail attachments to Dropbox example, the action is uploading the attachment from your email to Dropbox. To know more about actions used in Zapier, click here.
- Searches: Search actions let you find info in one app and use it later in the same workflow. To know more about searches used in Zapier, click here.
To understand the steps in connecting SwiftKanban with Zapier let’s consider the scenario where we need to use the Create Card Action to automate creating a card whenever an email in your Gmail is marked as Starred.
- Sign in to your Zapier account and click the MAKE A ZAP icon on the left sidebar tool.
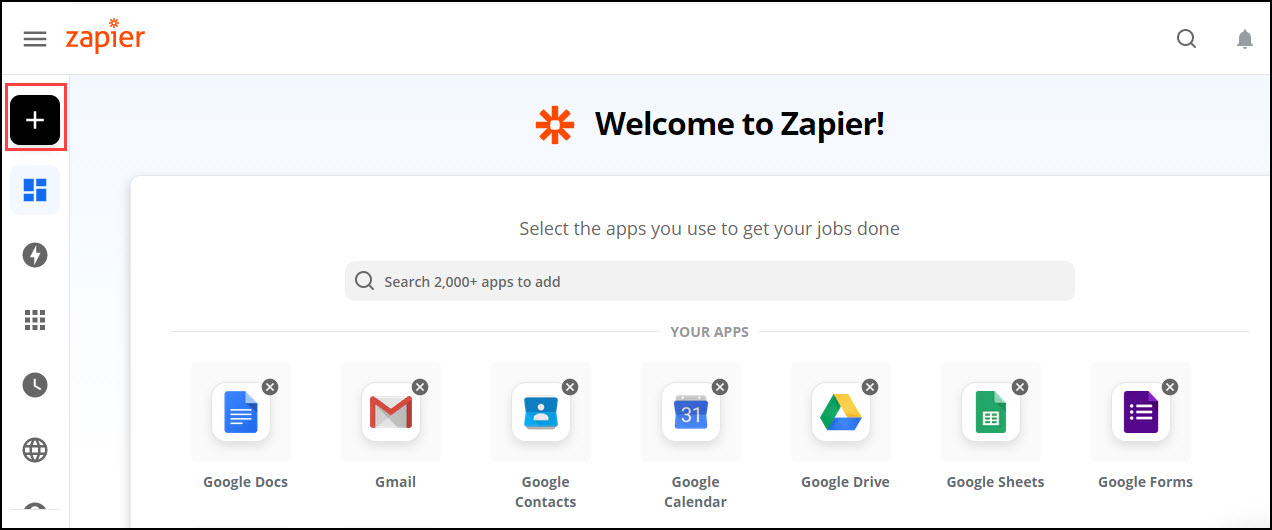
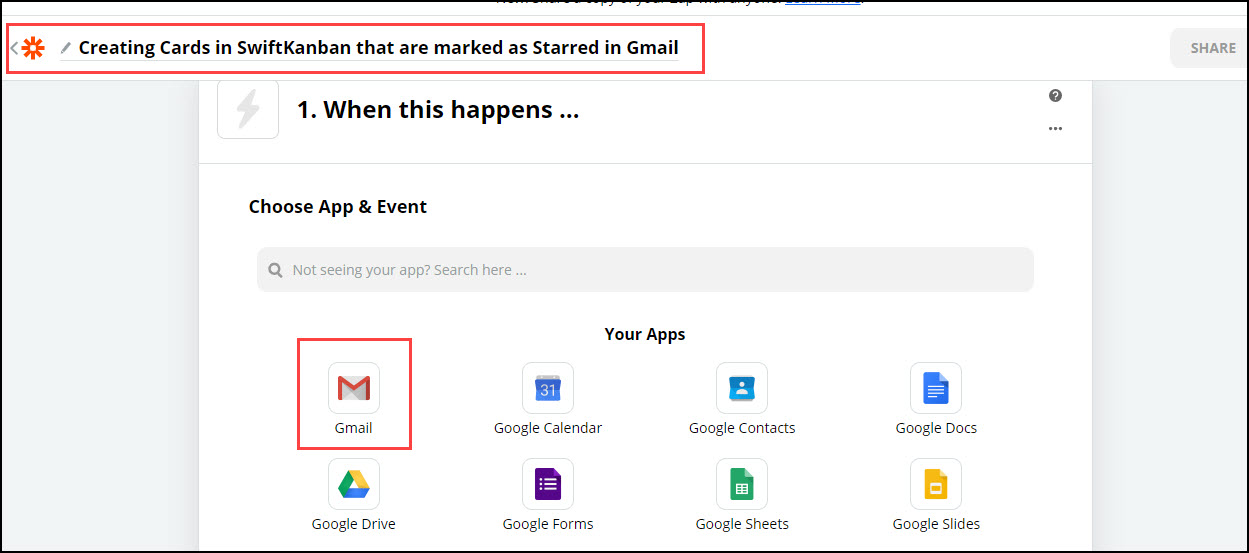
- Name your Zap at the top (Like Creating Cards in SwiftKanban that are marked as Starred in Gmail mentioned in the screenshot below) and select the app with which you want to connect the SwiftKanban app.
Note: The first app that you select is known as Trigger i.e. from where we need to fetch the inputs. To know more about the trigger, click here.
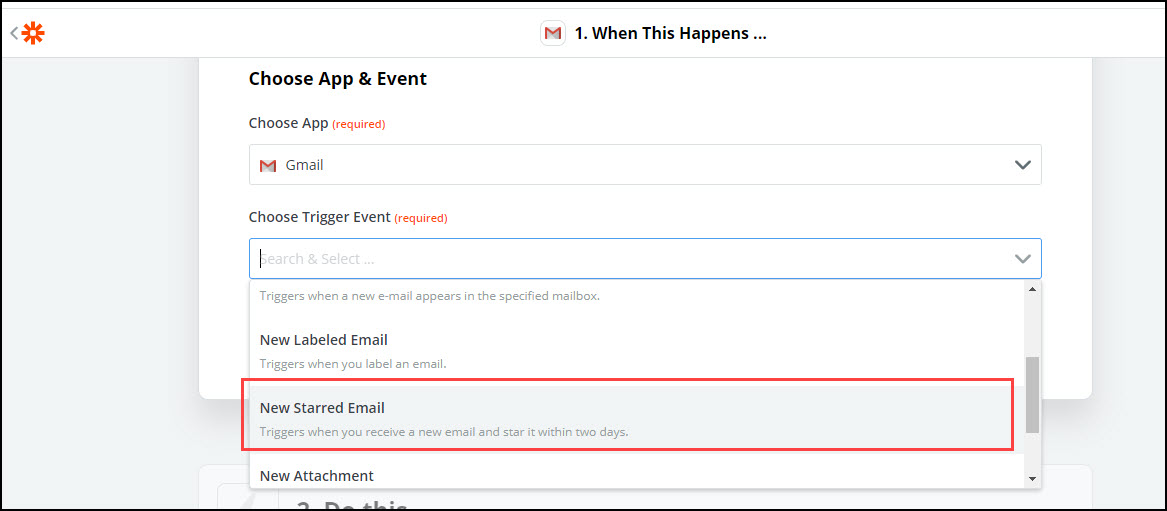
- Next, select the Trigger event i.e. when this zap should work. In terms of Zapier, it is the “event in an app that starts your Zap”. In our example, it is the “New Starred Email” and click Continue.
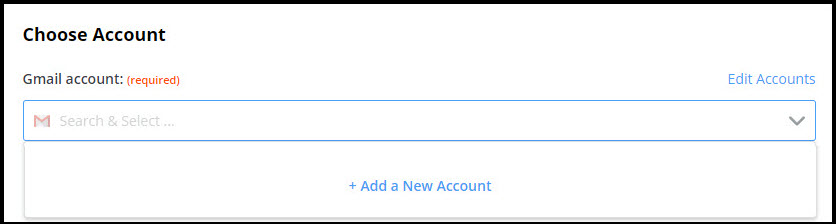
- Then, add your Gmail account and click the Continue button.
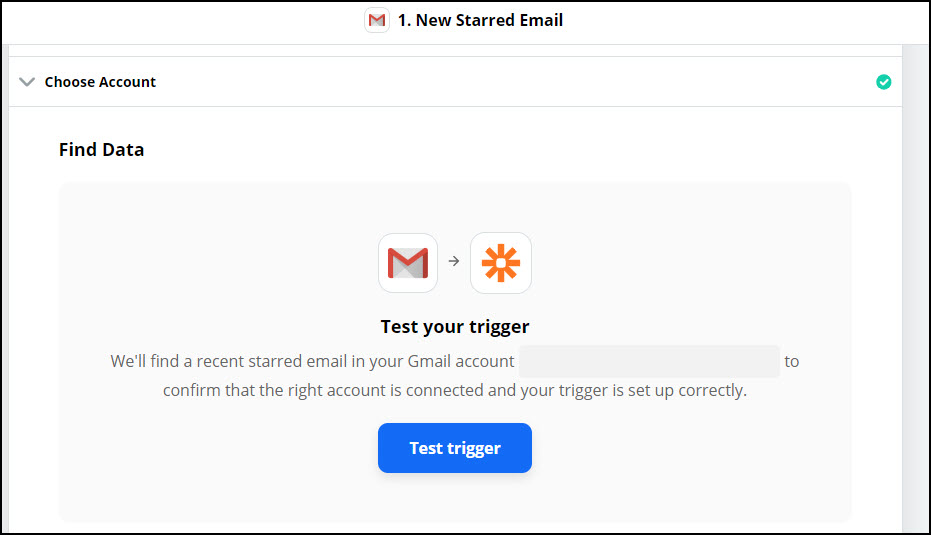
- Next, Zapier will take you to Test your trigger step where it will perform a test on your trigger. Click Test Trigger and then Continue.
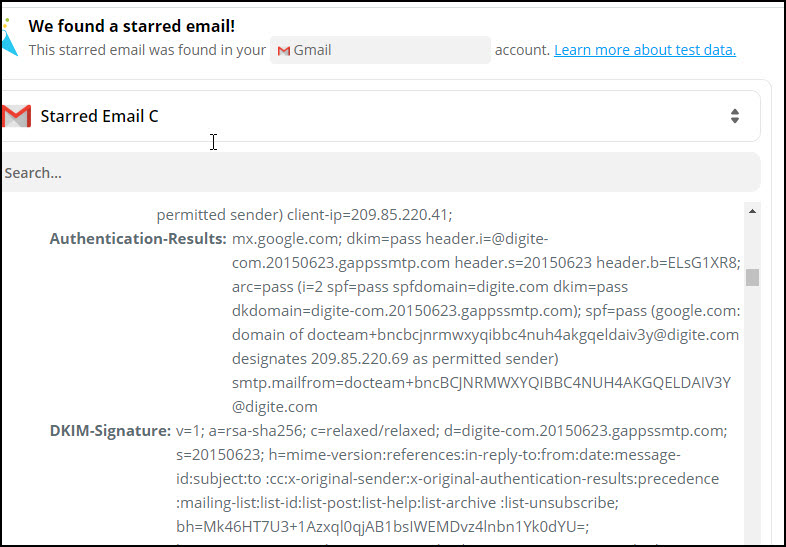
- Once the Test trigger step is performed, the Zapier test for a starred email in your Gmail ID and check if the trigger works as per your steps.
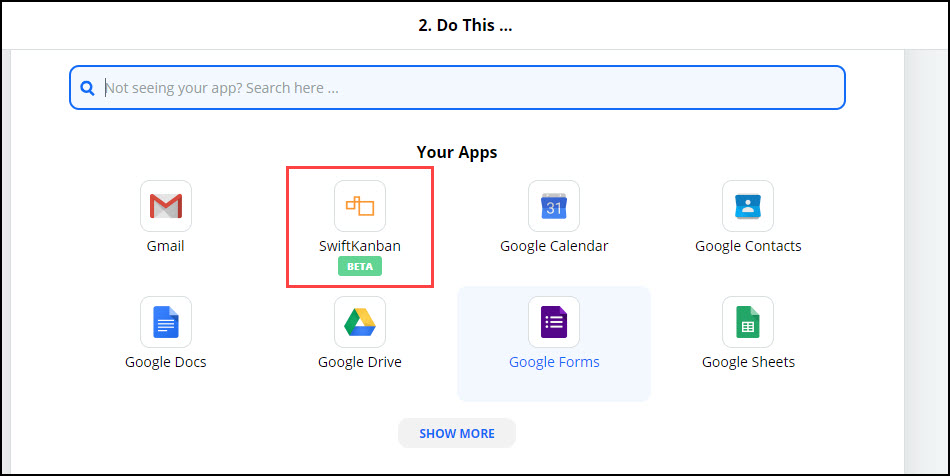
- Now, select the SwiftKanban app from the available options or you can search the same in your search bar.
Note: If you can’t find out SwiftKanban in the apps, please contact your Zapier Support Team to ensure SwiftKanban has not been blocked in your account.
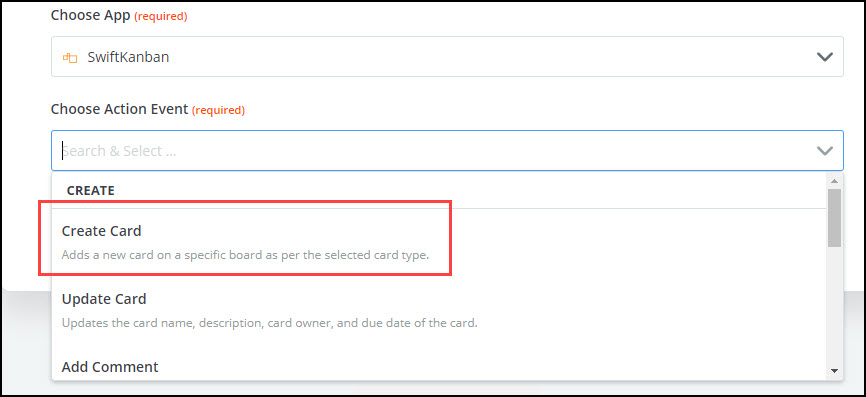
- Next, select the action event, in our example, it is the Create Card and click Continue.
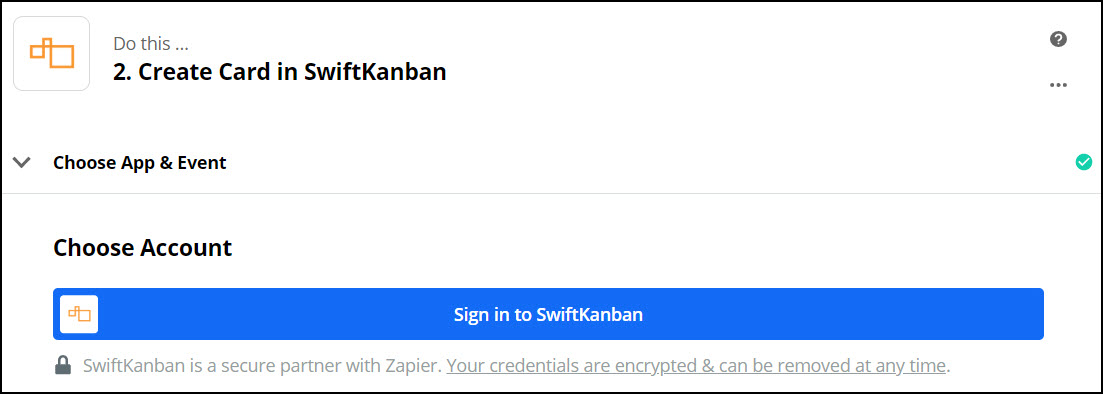
- After you select your action event, you need to select the SwiftKanban account. Over here, you need to connect your SwiftKanban account, if you are adding your account for the first time; else the same will be listed in this option.
- When you click Add a New Account, the following Connect an Account window opens, Add the required information as per the HELP text given beside each field and press Yes. Continue button.
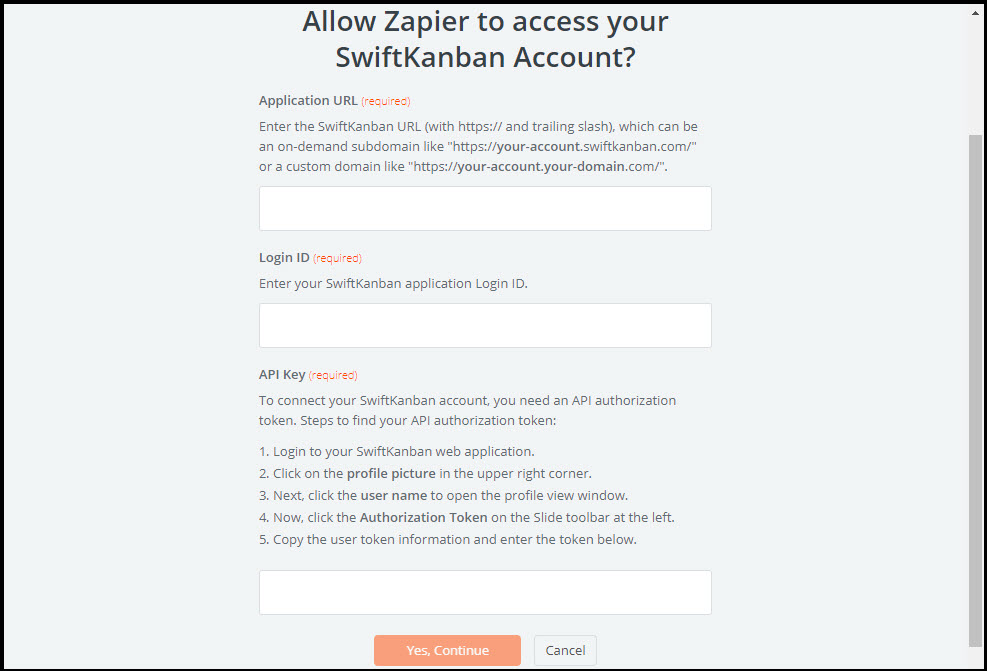 Note: To know more about finding your API authorization token, click here.
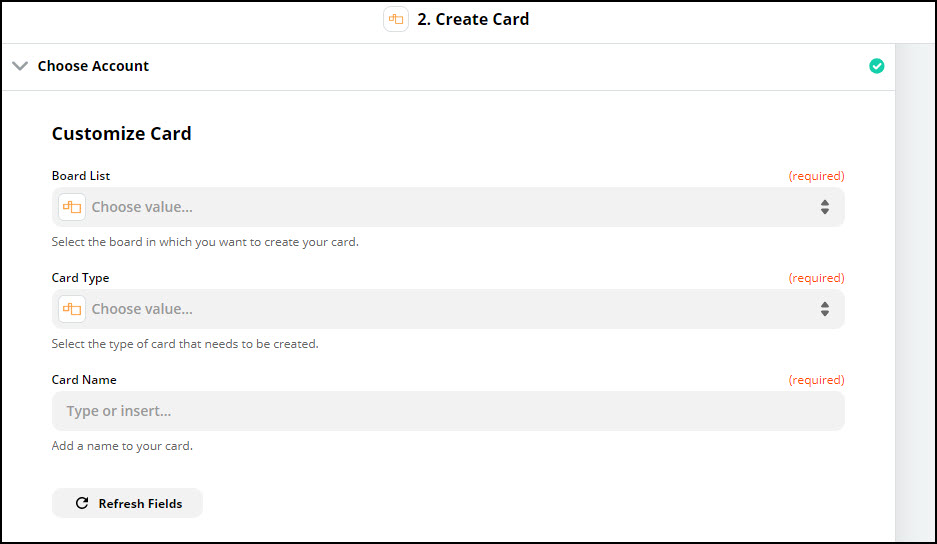
 - Next, select the Board (List of Open boards to which you are invited), card type (User Stories, Defect, and so on), and the name that you want to add for your card (enter or use any of the available options) and click Continue.
- Finally, click TEST & CONTINUE. If no issues found, it prompts Test was successful; else it throws an error.

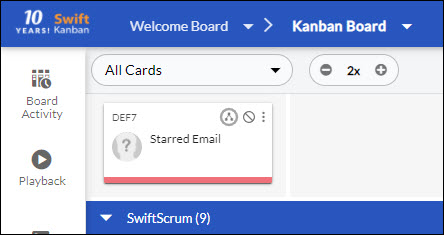
- Now every time you mark an email as starred in your inbox, the Zap you have configured will automatically replicate this information in a newly created card as per the selected Card Type in the chosen Kanban Board. It will have the card name as the title of the card.
- Finally, if you want your Zap to be working whenever you Starred an email in your Gmail account, you need to turn on your zap.

Similarly, you can use the other available options in Zapier for your SwiftKanban app and automate your daily tasks by creating as many Zaps as you want. To know more about the available options, click on each option Triggers, Action, and Search, and check the images.
We have demonstrated using one of the Triggers to create a Zap in the following GIF for your ease.