In this article, we will help you understand how to Define Smart Lanes.
|
Skip Ahead to: |
Overview
SwiftKanban provides you the ability to not just add a simple horizontal lane, rather let you define ‘Smart Lanes’. Each smart lane can have the same or different value stream and can be defined based on one of the many card attributes like Class Of Service, Priority, Size, Card Type or even Team Members, etc.
When you move a card from one Smart Lane to another, the card attribute changes automatically and vice versa. Smart Lanes adds tremendous flexibility and visualization to the Kanban board. You can define WIP limits for each Smart lane and any WIP violation is highlighted visually.
To define Smart Lanes in your Kanban board:
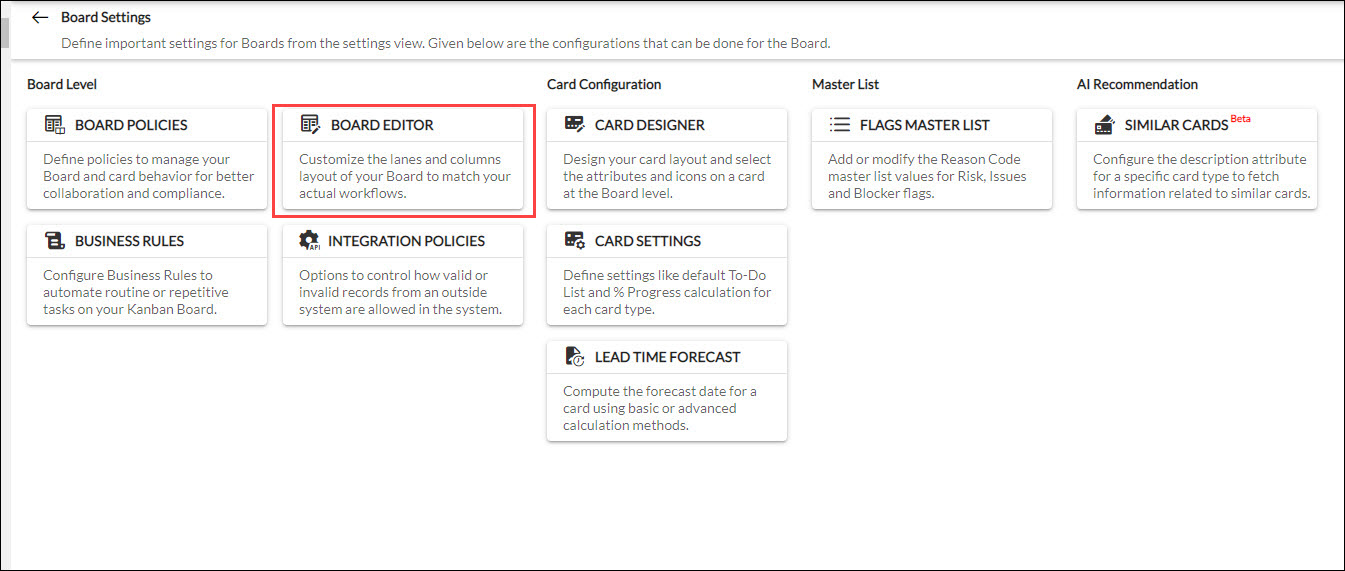
- Click the Board Settings icon on the top menu bar. The Board Settings page is displayed.

- Click the Board Editor tile. The Board Editor page is displayed.
- Click the Define Smart Lane
 icon on the toolbar.
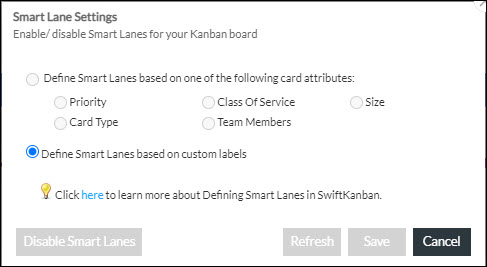
- In the Smart Lane Settings window, to enable the Smart Lane, click the Enable Smart Lanes button.
You can define Smart Lanes in two ways:-
- Define Smart Lanes based on one of the following card attributes:- You can define Smart Lanes based on one of the many card attributes. Select one of the many attributes based on which you would like to generate Smart Lanes e.g. Class of Service. This will generate one horizontal lane for each value of the Class Of Service attribute. You can change attributes, as long as there are no ‘live’ cards on the board.
- Define Smart Lanes based on custom labels:- If you want to define Smart Lanes in your specific way, you can select this option and click Save to save the settings. This enables an Add icon on a default lane, using which you can add multiple horizontal Smart Lanes.
- Click ‘Save’ to save the settings and navigate back to the Board Editor view to make more changes.
Note: If you have disabled the Smart Lane in the Smart Lane Settings window, and then created cards on the Board, the Enable Smart Lane button will be disabled and grayed out till that Board has a single card. To enable that button, you must first ensure that there is no card on that Board.
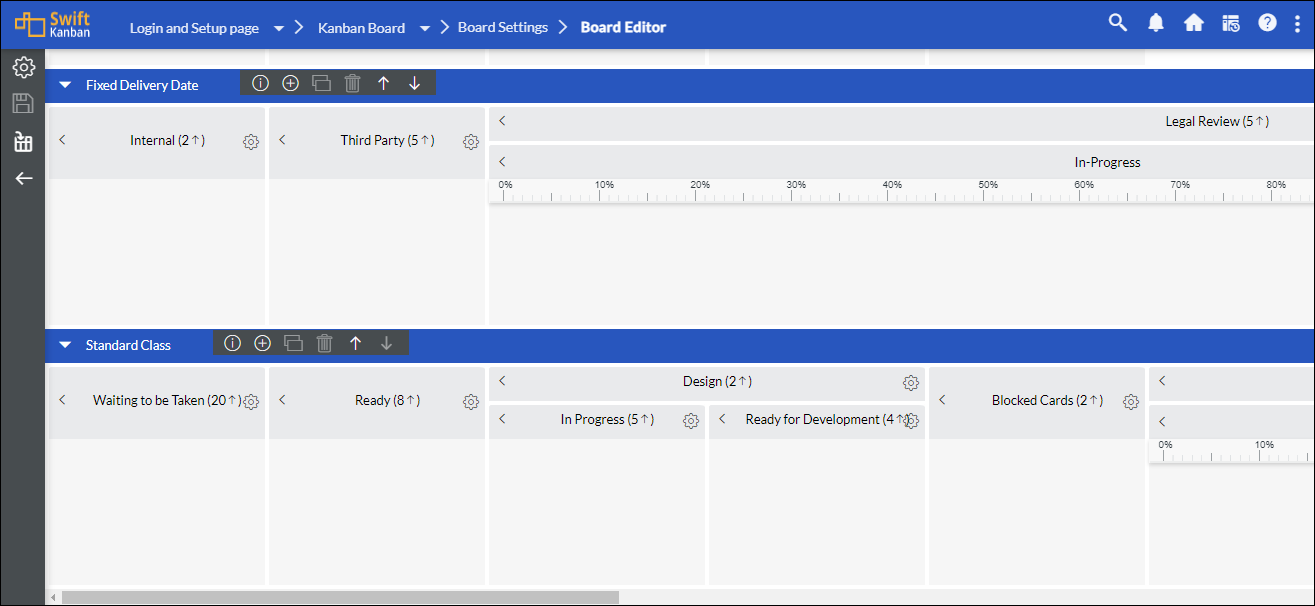
For Smart Lanes defined based on card attributes, the Board Editor view now displays horizontal lanes for each value of the attribute. For example, Class of Services (CoS) has values values-Expedite, Fixed Delivery Date, Standard Class, and Intangible Class. There will be four workflows representing each of these values. To change the name of the lane, click the Lane header. Enter the new name and description. Define a WIP limit, if you want to limit the cards flowing in the entire lane. Click Submit to save the lane properties.
For Smart Lanes defined based on custom labels, the Board Editor displays the default process with additional icons i.e. Add and Delete icons on the lane toolbar. Click the Add icon to define another Smart Lane and enter a name of your choice for the lane. The lane will not be associated with any card attribute. Enter a description and define a WIP limit. Click Submit to save the lane properties.
A lane will be created below the default lane. You can rename the lanes by clicking the lane header and also copy a lane by clicking the Copy icon to create new lanes with similar properties. While copying a swimlane, any of the colors applied to any column will also be copied to the newly created swimlane. Ensure that you save the changes for every lane. Thus, you can create Smart Lanes if you want to manage work classified under any ad-hoc value such as department or customer. You can disable the smart lanes if you do want the smart logic, provided you don’t have any ‘live’ cards on the board. Move the cards on the board to the backlog or archive them. Go to the Board Editor view and you can now disable the Smart Lanes. For modifying the process from Card-attribute-enabled Smart Lanes to Custom-Label-enabled Smart Lanes, see Modifying the Smart Lane Definition section on this page.
Configuring Lanes
For the default process or after you have defined Smart Lanes, you can configure the lanes based on the value stream required for each class of service. To configure the lanes, see Configuring Lanes.
Copying an Existing Lane Definition
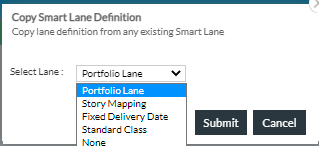
You can copy a value stream i.e. lane settings from an already defined Smart Lane by clicking the Copy from an existing lane icon on the toolbar of the Smart Lane. Once you create a lane, if you want that to be the same as any other lane of the same Board, then you can use this feature.
To use this feature, perform the following steps on the Board Editor page:
1. Click the Copy from an existing lane icon of the lane where you want the change to happen.

Note: If the lane already has cards in it, then the Copy from an existing lane icon will be disabled.
2. Select the lane from which the lane settings have to be copied and click Submit.
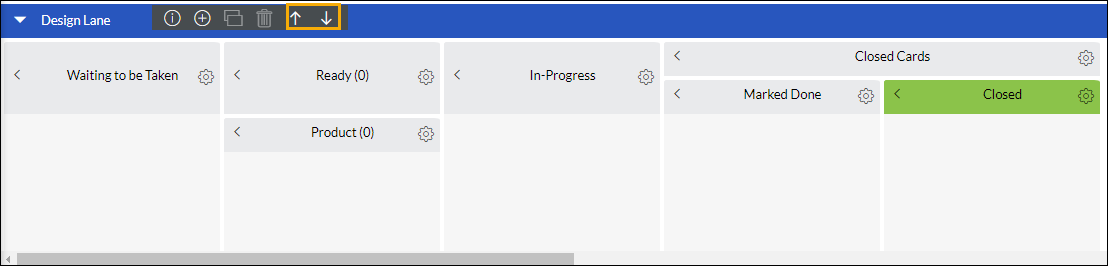
Reorganizing the Smart Lanes
If you need to arrange the Smart Lanes in a particular order, click the Move Up and Move Down icons. If you click the Move Down icon on a lane, the lane will be moved one lane below. If you click the Move Up icon, the lane will be moved one lane above.
Modifying the Smart Lane Definition
To modify a board process if you have already created Smart Lanes, ensure that you have no ‘live’ cards on the board. In the Board Editor view, click the Smart Lane Settings icon and click the Disable Smart Lanes button in the Smart Lane Settings window. To avoid any rework of defining a value stream you want to retain, in the Confirmation window, you can select the value stream you want to carry forward to the new board. The list also displays the default Kanban Board if you want to recreate the board. Click Yes to proceed. Now, click the Smart Lane Settings icon again in the Board Editor view and click the Enable Smart Lanes button. You can now select a new option to define Smart Lanes.
You can modify the option from Card attribute-enabled Smart Lanes to Custom label-enabled Smart Lanes even if there are live cards on the board. This flexibility allows you a free hand to change the process whenever you want to enable free card movement across lanes. For example, if you have changed from Card Type to Custom Labels, subsequently, you can move cards across lanes.
You can change from Custom Label-defined Smart Lanes to Card Attribute-defined Smart Lanes if there are no live cards on the board. Move the cards to the backlog or archive them. When changing from Custom Label-defined Smart Lanes to Card attribute-defined Smart Lane, you need to choose the lane definition of an existing lane, based on which the new lanes will be generated. Changing the Smart Lane attribute will regenerate lanes for each value of the selected attribute.
Expand and Collapse Smart Lanes
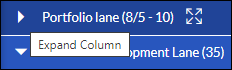
With multiple Smart Lanes, it may be cumbersome to scroll up and down to configure and view lanes. You can click the Collapse Column icon to collapse other Smart Lanes while you work on the required Smart Lane.
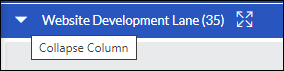
You may expand the lane later by clicking the Expand Column icon to view the entire workflow.