
In this article, we will help you understand how to add comments and attachments to a card.
|
Skip Ahead to: Add/Reply to Comments in the Item View Add/Reply to Comments from the Board Add Comments to Multiple Cards using Batch Update Track and Add Comments in Exported Cards |
Overview
As a self-organizing team, you need to constantly communicate and negotiate in projects. In SwiftKanban, every card has its own space for communicating. So when a team comes across a blocker or needs to collaborate on a particular work, communication happens in the context of work.
In the Comments & Attachments tab, any comments that you add while using the flags such as Issue, Risk, and Block are shown with the prefix of flag type. The prefix helps you differentiate between the normal comments and the flag’s comment.
Example: Issue: <Comment>
To effectively collaborate on cards, you can:
- Have a threaded discussion on a card where you can start a new comment thread or contribute to a discussion.
- Track a discussion anytime, related to a work item, from the board or the backlog.
Similarly, you can drag and drop attachments, or view download and delete attachments to the Attachments section of your card for better visualization.
Adding/Replying to Comments in the Item View
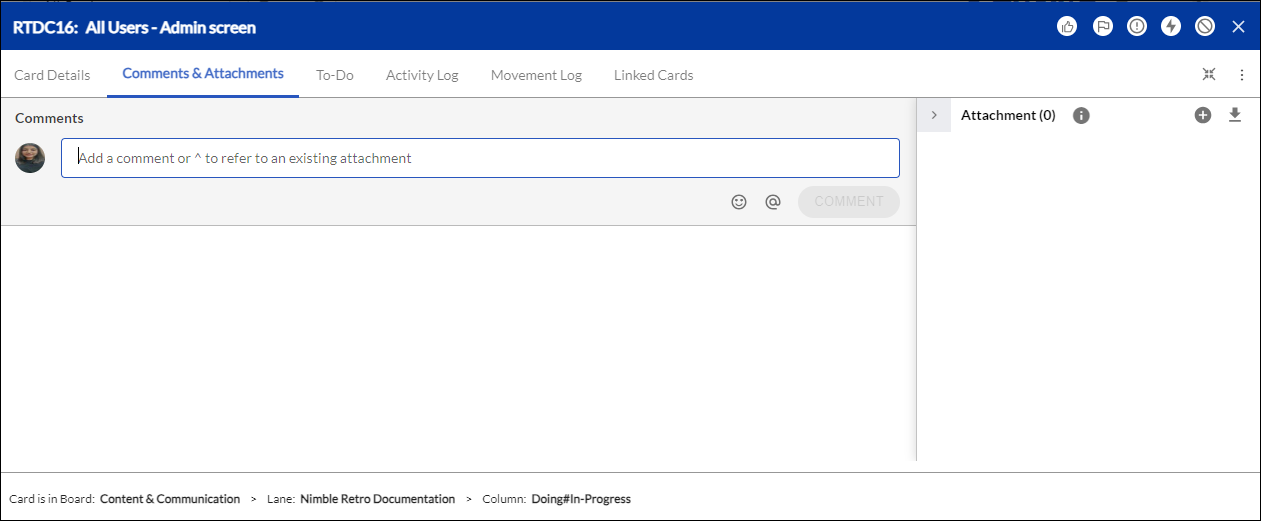
Enter your comment and click Save. The comment is displayed with your name and the date and time stamp and in the sequence – from latest to earlier date.
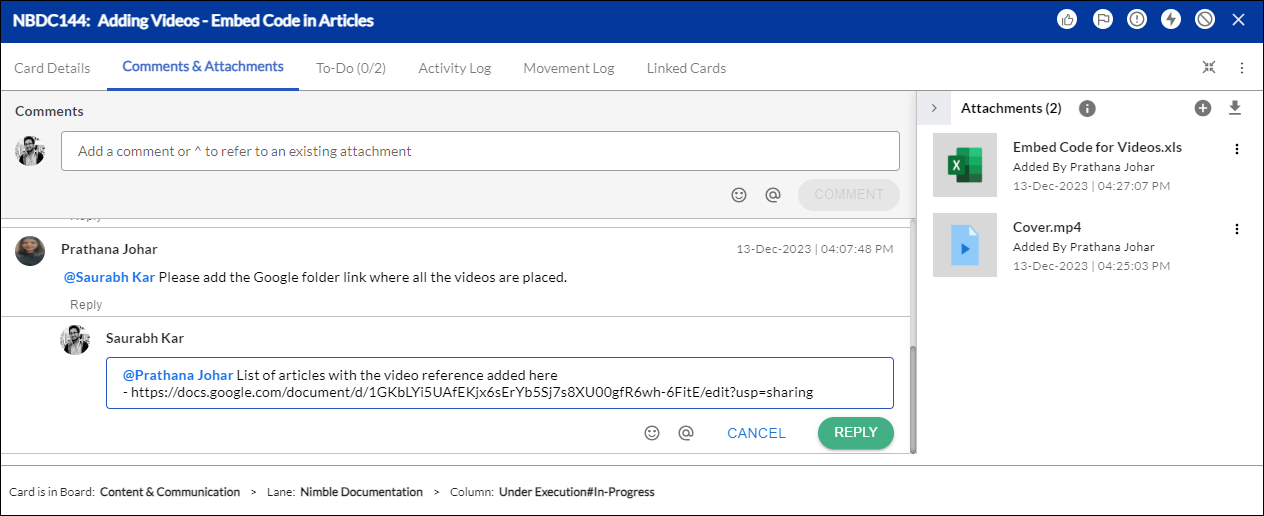
To reply to a comment, click the Reply button for a comment.
To start a new thread, enter the comment. Use the @ symbol to tag anyone on the comment and click Save. The threaded comments are displayed in a structured manner.
Note:
- You can enter your comments as long as 12000 characters. As you type, the remaining characters are shown below the text box. Click Save. A comment can be canceled while entering but once saved, comments can be edited but not deleted.
- You can set the option to receive notifications so that you get notified when a team member has posted a comment on a card assigned to you or replied to a comment that you posted on any card.
Adding/Replying To Comments from the Board
Tips: We have an exciting in-app Learning Enabler, called Challenges that would help you learn and add a comment to the card interactively. Please navigate to Help & Support > Challenges from the top-level menu and try out the Challenges.
To add a comment to a card from the Kanban Board, navigate to your Kanban board. Mouse over the card and click the Comments icon on the required card. You can even click the card title and then navigate to the Comments & Attachments tab. Here, you can enter the comment in the Comments section of your card.

Note: If the Comments icon is disabled. It can be enabled through the Card Designer at the Admin or Board level.
The comment is displayed with your name and the date and time stamp and in the sequence – from latest to earlier date.
To reply to a comment, click the Reply button for a comment.
The latest comments added to the card will be shown when you hover over the card while on the board, displaying the member who commented and the date and time when commented.
Adding Comments to Multiple Cards using Batch Update
You can simultaneously add the same comments to the multiple cards using the Batch Update feature. To know how to use the Batch Update to add comments, see the following information:
1. Right-click on the Kanban Board and select Batch Update from the menu list.
2. Click the multiple cards to select them for the batch update. Note: Alternatively, you can perform the above step by pressing the Ctrl key and selecting cards. Once selected, right-click on the board and select Batch Update. The selected cards have an orange color at their top-right corner.
3. In the footer menu, select the Add Comment option and enter the texts in the Comment field.

4. Click Save. The texts will be added to the Comments & Attachments tab of all the selected cards. Note: You can add comments maximum of up to 50 cards simultaneously.
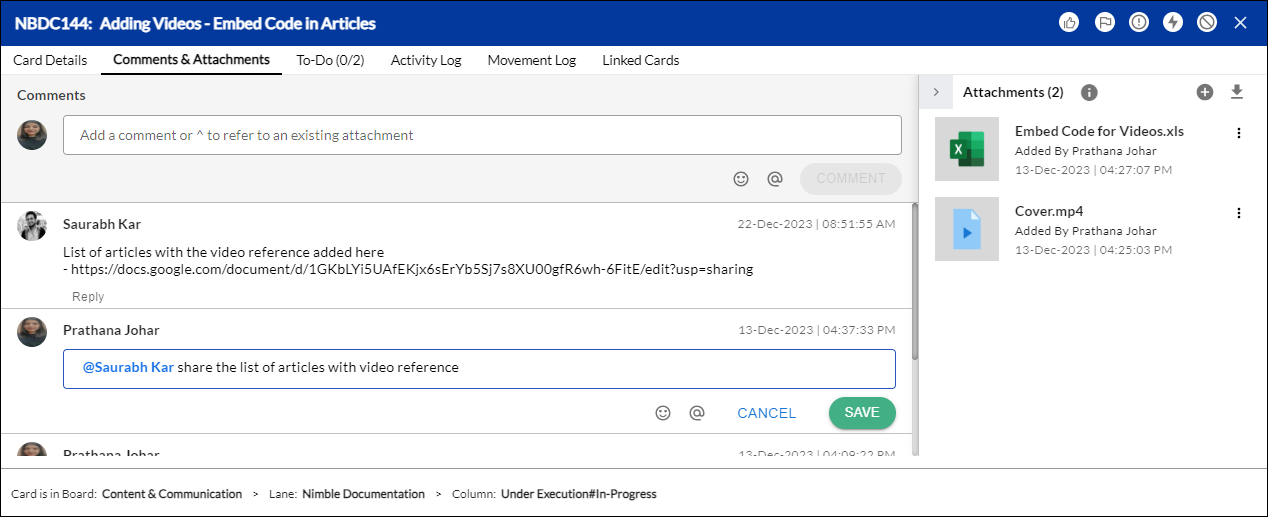
Editing Your Comments
You can edit the comments you added earlier for any card to make any required corrections. The edited comment is shown with the new timestamp when the comment was edited.
Besides, the comments you added for collaborating, you can also:
- Edit the comment that you have added in the Add Comments / WIP Limit violation reason window when you pull a card to the next column violating the WIP limit. The comment has to be entered when the board policy is set accordingly.
- Edit the comment that you entered when blocking and unblocking a card.
To edit the comment:
- On the Kanban board, hover on the card and click the Edit icon. Make the changes and click Save.
- Similarly, in the Card Detail view, go to the Comments & Attachments tab, click the Edit icon for the required comment, make the changes, and click Save.
Track and Add Comments in Exported Cards
When you export cards to your system to view and edit locally, the comments are also exported.
In the exported file, you can:
- View the Comments Thread
- Add Comments
View Comments
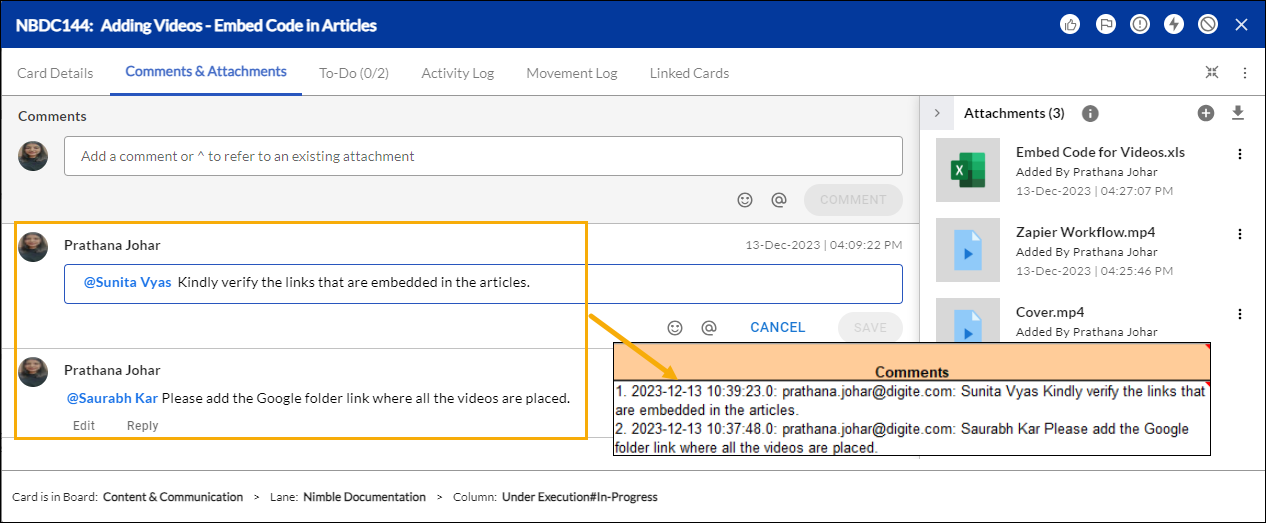
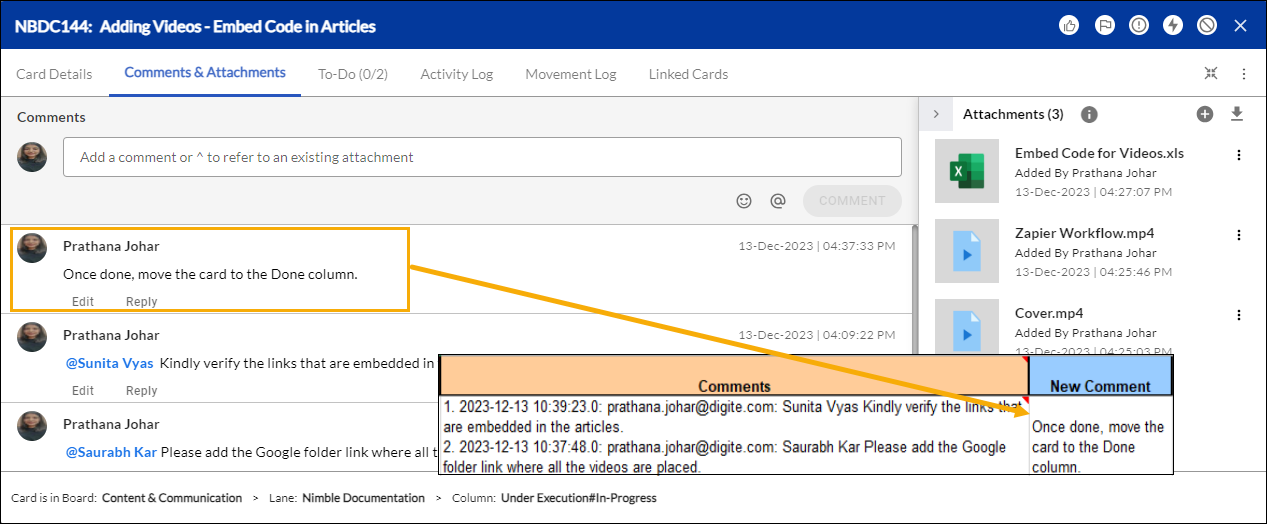
To view the comments for a card, go to the Comments & Attachments tab. The comment is in the following format
‘Sr. No: Date :Timestamp: Login Id of the user who commented: Comment’.
For eg. 1. 2012-02-03 14:41:21:0: [email protected]: Resolved issue
The comments are in descending order of the date the comment was added or replied to.
Below is an example of a threaded discussion as viewed in the exported Excel file. New comments added will also be updated for the card. You can see the new comment in the Detail view and from the board.
Add Comments
To add a comment for a card, go to the New Comment column for the card in the exported Excel sheet or the CSV file depending on which format you chose to download.
Enter the text in the cell/after the comma following the Comments column for the required card. Save and import the file. For details on exporting and importing a file, see the Exporting and Importing Cards page.
Mentioning your Teammates in Comments
‘Mention’ your teammates in a comment, whenever you want to share, discuss, or want them to take an action. Keeping teammates connected enhances collaboration in a much better way.
To reference a teammate in a comment, either from the Edit Card view or the Detail view, start with the “@” symbol. As you type the name, a drop-down menu appears that allows you to select from your list of team-mates with matching text. (List is displayed based on the occurrence of text in the user names.) Click the name in the list, and then type your comment and save.
Similarly add more teammates starting with @. Teammates you mention in your comments will be notified by mail and in the Notification widget, linking them to the card.
Managing Card Attachments
You can leverage the attachment functionality in SwiftKanban to attach documents (including text files, spreadsheets, and image files) to cards, and use them for future reference. Attaching multiple files has also been easy as you can drag-and-drop or multi-select files to attach them to a single card.
Moreover, you can also take a print screen and copy the same directly into the description field of a card.
You can manage attachments to a card in the following two ways:
- Managing attachments in the Full View (Card Field Editor) of a card
- Managing attachments in the Pop-up View of a card
Important Information
Any user with a Reader role will not be able to add attachments to a card but will be able to download any attachments from the card.
Managing Attachments in the Full View of a Card
To manage attachments in the full view of the card, perform the following tasks:
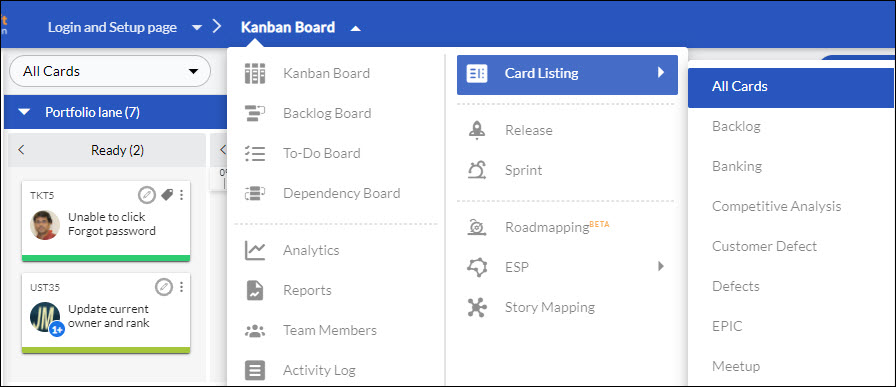
- Click the Main menu and select the Card Listing > All Cards option.
- Select the card to which you want to attach the file, and click the Edit icon on the Side toolbar. Alternatively, you can also double-click the card from the list, and in the full view, click the Edit icon on the side toolbar.
- Go to the Comments & Attachments tab of your card. The attached files are displayed in the Attachments section.
- To attach files, click the Add button, browse the desired files, and click Open. Alternatively, you can also drag and drop files to the attachment table.
Note: Whether you attach single or multiple files at a time, the total size of the attachment should not exceed 20 MB.
- To download all the attached files, click the Download All
 icon. The files will be downloaded in ZIP format.
 - To view an image without downloading, click the View icon.
- To download the individual file, under the Action column, click the Download
 icon for that file.
 - To set an attached image as the cover image for a card, click the Set as cover image icon.
- To delete the individual file, under the Action column, click the Delete
 icon.
icon. - To download an image, click the Download icon on the full view.
- Place the cursor into the description field to directly insert an image, paste the copied image, and click the Save icon on the Side toolbar.

Managing Attachments in the Pop-up View of a Card
Tips: We have an exciting in-app Learning Enabler, called Challenges that would help you learn and add attachments to the card interactively. Please navigate to Help & Support > Challenges from the top menubar and try out the Challenges.
To manage attachments in the Pop-up view of the card, perform the following tasks:
- Open the Kanban Board and click the card to which you want to attach files and a card pop-up view is displayed.
- Go to the Attachments section of the Comments & Attachments tab. The attached files are displayed in a list.
- To attach files, click the Add button, browse the desired files, and click Open. Alternatively, you can also drag and drop files to the attachment table.
- To download all the attached files, click the Download All icon. The files will be downloaded in ZIP format.
- To view an image without downloading, click the View icon.
- To download the individual file, under the Action column, click the Download icon for that file.
- To set an attached image as the cover image for a card, click the Set as cover image icon.
- To delete the individual file, under the Action column, click the Delete icon.
- To view an image without downloading, click the attached image file to display the image in full view. To download an image, click the Download icon on the full view.
- Place the cursor into the description field to directly insert an image, paste the copied image, and click the Save button.