
This article familiarises you with how to add a task on the Work Hub using the Add button and right-click option when there is a single Task Plan or multiple Task Plans available in the project.
|
Skip Ahead to: Add a Task using the ADD Button |
Overview
You can add a task from the Work Hub just like any other workitem. To do this, ensure that at least one Task Plan is open in the Task Plan listing of the project. If the open Task Plan uses the MSP scheduling type, you must have Microsoft Project (MSP) installed on your system to access and modify the MSP-based plan.
Add a Task using the ADD Button
- Click the ADD button on the toolbar.
- Select the Task from the available workitem type. The Add Task dialog box appears
- Select the Task Plan to which you want to add this task, enter the task name, and select the card owner.
- Click the ADD button.
Add a Task using Right-click
- Right-click on the desired column to which you want to add.
- Select Add Card in the shortcut menu.
- In the card placeholder, enter the task name and select the card type as Task.
- Click ENTER. The Add Task dialog box appears.
- Select the Task Plan to which you want to add this task, enter the task name, and select the card owner.
- Click the ADD button.
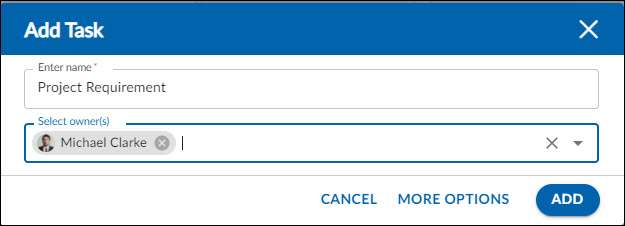
Adding a task when one Task Plan Available
When your project has only one Task Plan (as in the Simple Work Management template), any task created from the Work Hub is automatically added to that plan. In this case, the Add Task dialog box does not prompt you to select a task plan name.
Note: The Task Plan must be open to allow task creation.
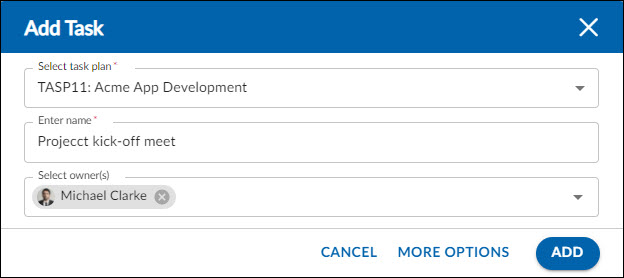
Adding a task when multiple Task Plans Available
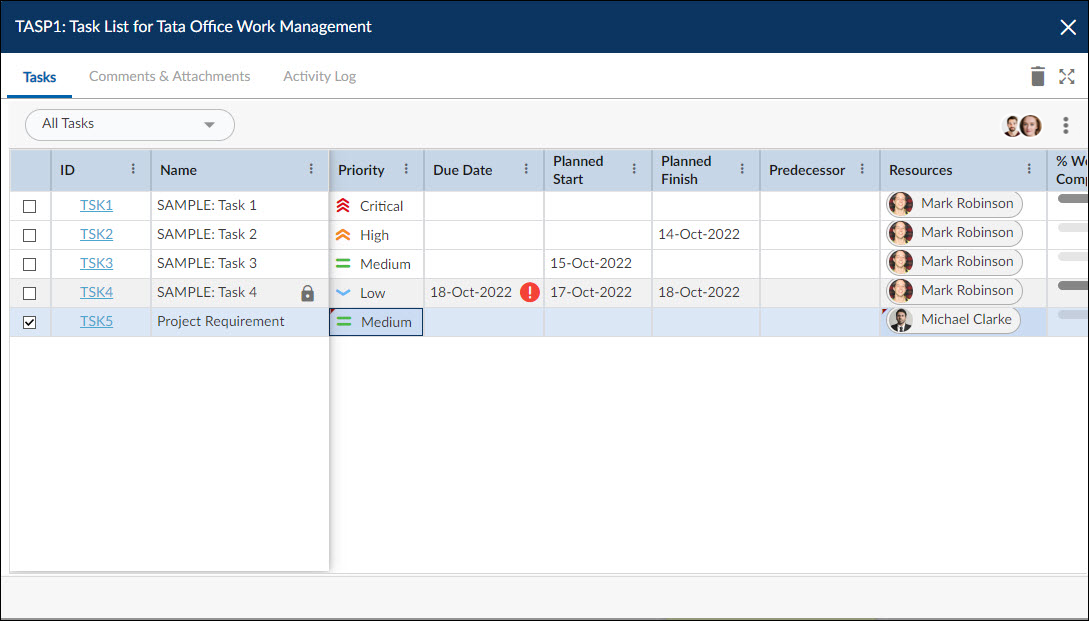
When your project has multiple Task Plans, the Add Task pop-up prompts you to select the Task Plan name while adding a task from the Work Hub. You can specify the Task Plan, task name, and owner, then click the Add button. To add more details—such as dependencies, priority, due date, Planned Finish, and Planned Start—you can click the More Options button in the pop-up.
When you create a task from the Work Hub by clicking the More Options button in the Add Task dialog box, the Task Plan opens automatically, allowing you to enter additional task details at the end of the plan.
Important Notes
- If you are creating a task to the only available Task Plan, then providing the card owner’s name is not mandatory. By default, the logged-in (current) user is set as the card owner.
- The current date is set as the Planned Start and Planned Finish date if the Task Plan is created with Simple or Advanced scheduling.
- The Planned Start and Planned Finish dates are set as blank if the Task Plan is created with the Default scheduling.
- A task can be added to any open Task Plan. In the Add Task dialog box, if a Task Plan is temporarily unavailable for editing (for example, because another user is currently making changes), a lock icon is shown to indicate that it cannot be edited at that moment. This lock icon is not shown to the user who is actively working on the Task Plan, and they can continue adding tasks from the Work Hub in real time.