
In this article, we will help you to understand how to allocate team members by the Resource Manager.
|
Skip Ahead to: |
Overview
Team Member Allocation displays the number of open requests for all the projects across the enterprise. Both the Project Manager and Resource Manager can view the total number of requests and allocations against each persona upfront. Each request includes information such as the type of persona, requested hours, duration, % of the time required (whether the resource is required for 100% of the time or 50% of the time), skills, etc.
The resource manager can allocate users based on the availability, priority, scope of the request, requests from other projects, etc.
Note: This screen is only accessible to the resource manager persona.
Navigation
- In the left navigation panel, locate and expand the Apps menu.
- Within the expanded menu, click on the Account Space.
- Hover over the People Management breadcrumb at the top of the page.
- A dropdown menu will appear. Select Team Member Allocation.
Steps to Allocate the Team Members
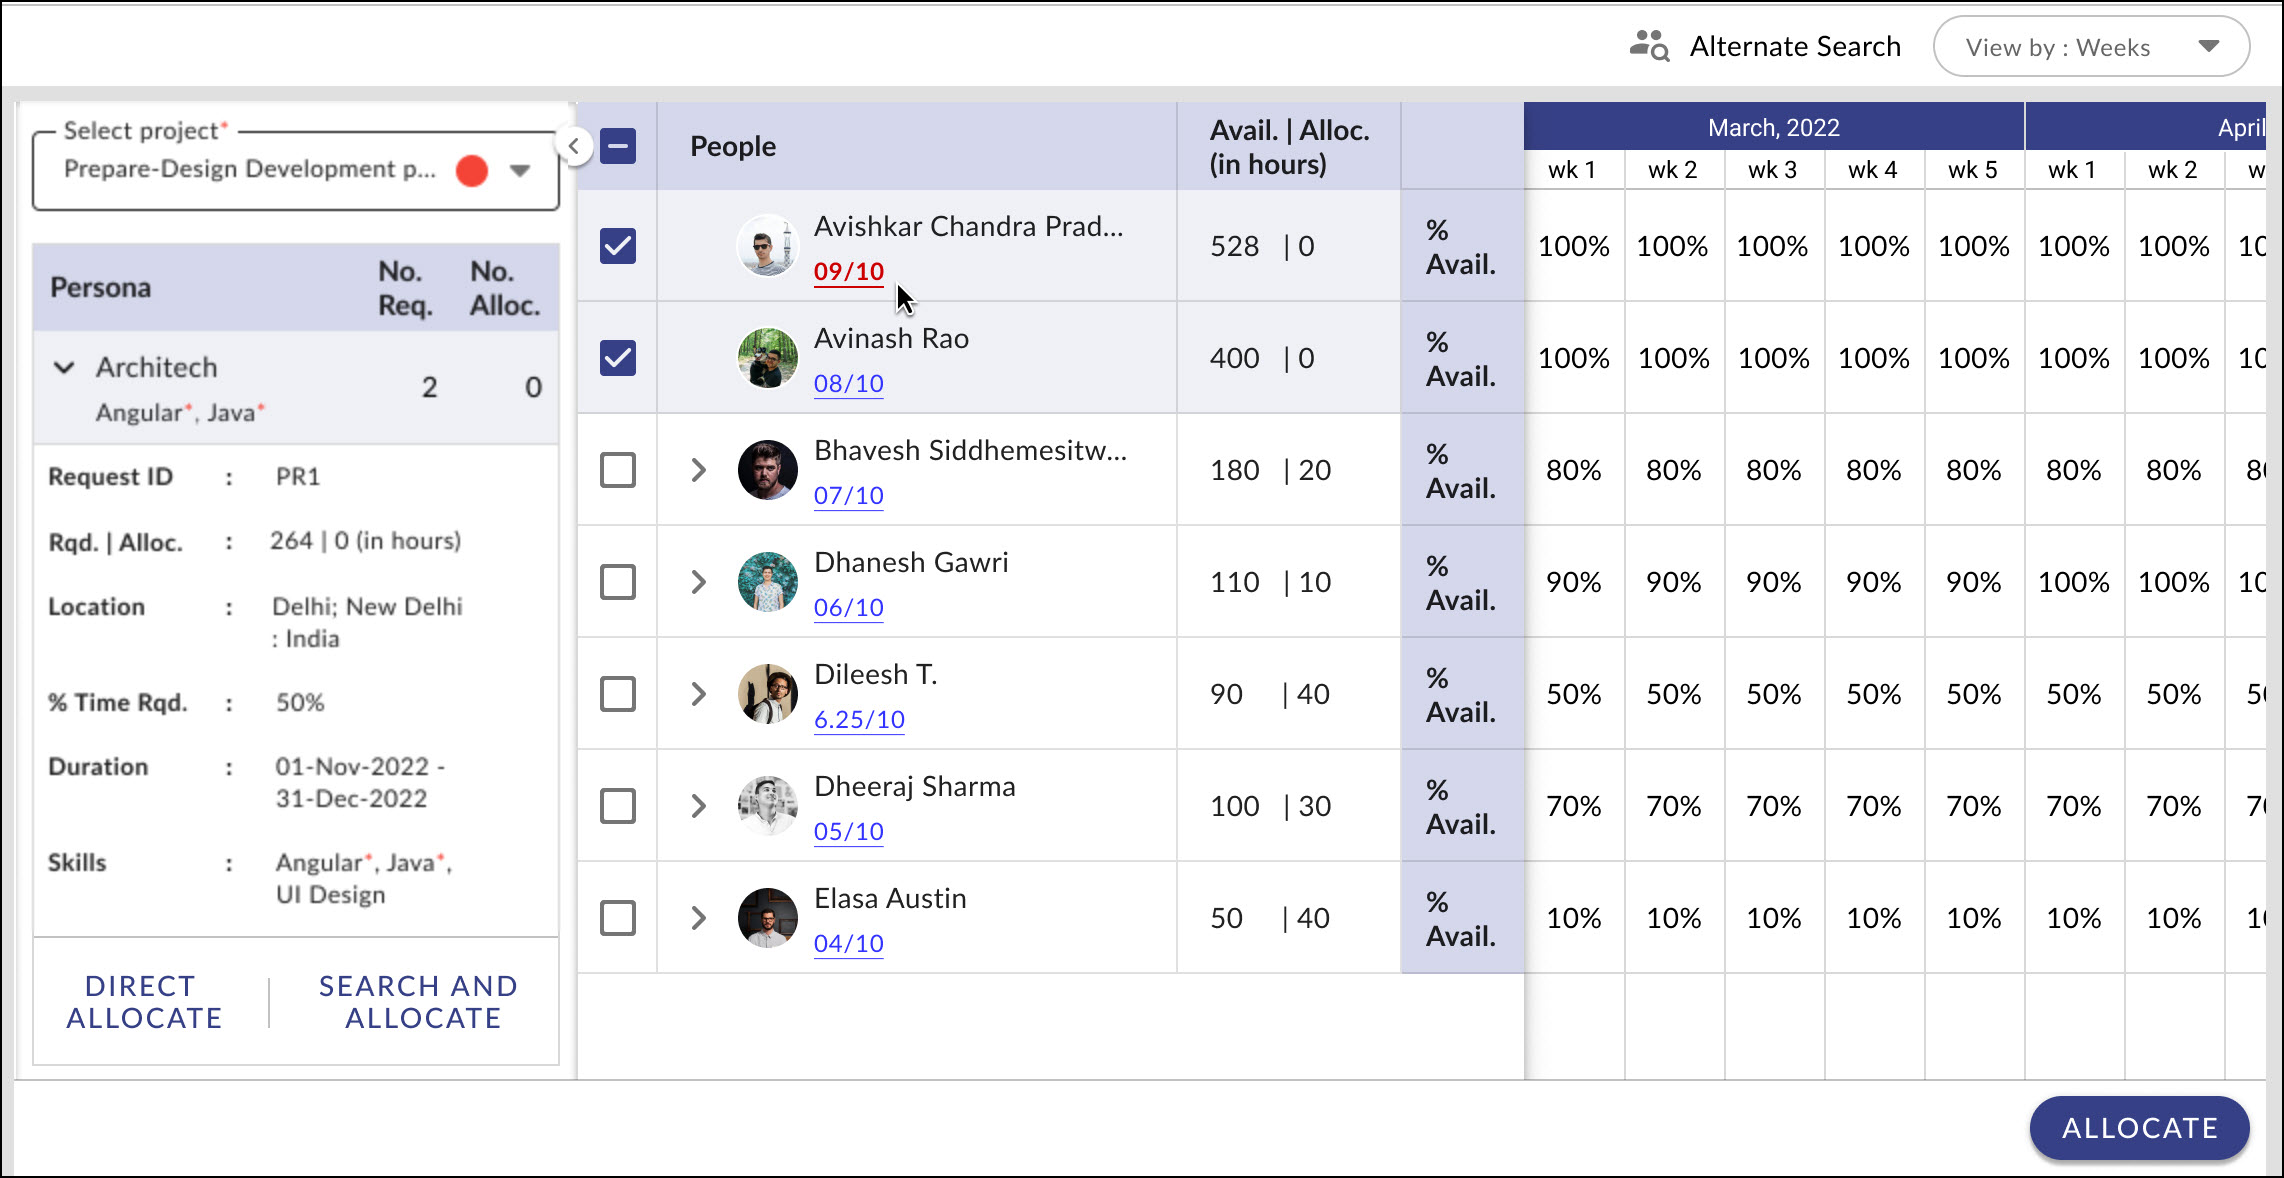
- Select the required project from the drop-down.
Note: The status of the project is indicated by color below:- Red: Project having most requests as past due
- Amber: The project has most requests due within one month
- Green: The project having the most requests due after one month
- Select the required persona/team member request and then allocate team members as shown below:
-
- Direct Allocate
- Click the DIRECT ALLOCATE button.
- Enter the user name/Email ID.
- Click the SEARCH button and a list of people with skills and persona will be displayed.
- Search and Allocate
- After clicking the SEARCH AND ALLOCATE button, a list of people with raking will be displayed.
- Direct Allocate
-
- The list of users appears on the allocation board. To know how the available and allocated hours are calculated, click here.
- Select the required user by checking the boxes next to their names on the allocation board.
- Click the ALLOCATE button at the bottom right corner. The Allocate Employee window appears.
- Click on the Edit icon and enter the fields in Allocate Employee window as explained below:
-
- Start and End Date: Enter the start and end dates to specify the user’s duration for the request.
- Time Allocated (%): Enter the percentage of time for which the user will be allocated.
- Hours: The number of hours is automatically calculated based on the employee’s availability between the start and end dates and the time allocated in percentage.
-
- Click the ALLOCATE button to allocate the user.
If you are still having trouble finding the right resource, you can use the Alternate Search or external hiring options.
For information on Direct Allocate, Search and Allocate, Alternate Allocate, and external hiring, click here.
Notes: The Open Requests Panel displays Team Member Requests by date, with the most recent requests displayed at the top.