
Start with the video first to get a better grasp of the topic!
|
Skip Ahead to: |
Overview
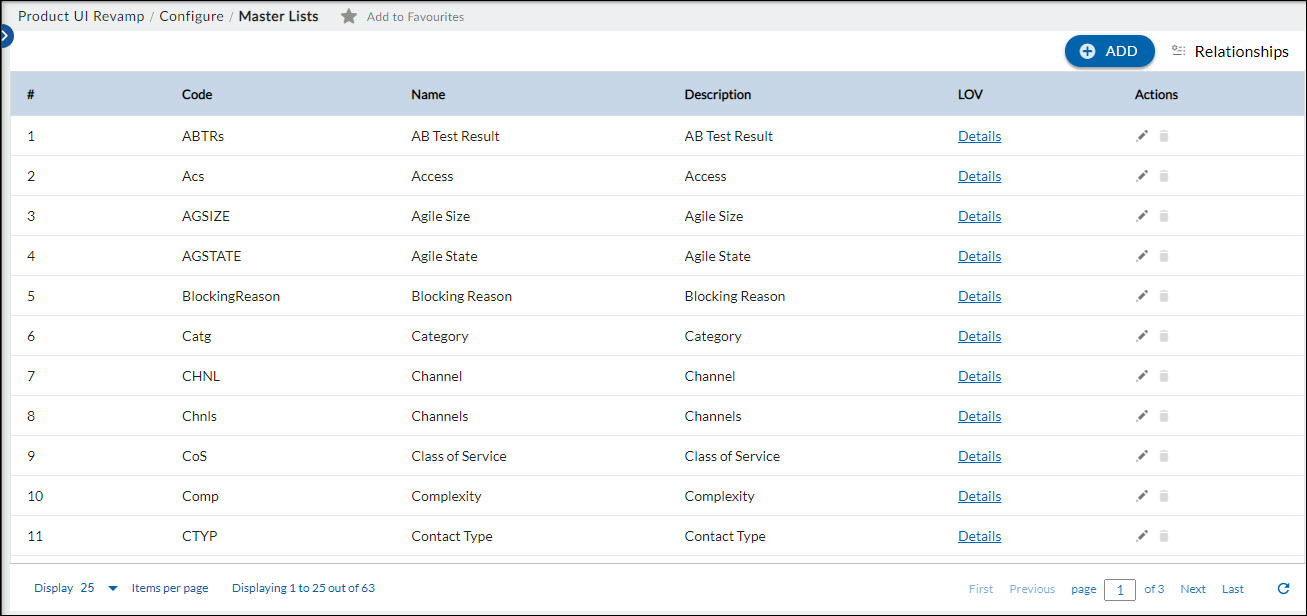
In the application, various master lists are available. The application allows maintaining these Master Lists that are activated in the organization and within projects i.e., you can add, change, or remove any values from the Master Lists.
Some Master Lists are inherited into the project. For an explanation of these master lists, see Master Lists at the Organization Level help topic.
Navigation
Navigate to the breadcrumb at the top and hover over the Project name, expand the Configure module, and select Master Lists.
Defining Master Lists in Project
Prerequisites
The Master Lists module should be available for adding and editing Master Lists in the Organization, Projects, Templates, and the roles within them.
To add a Master List, click the Add Master Lists Type icon. Enter the details: Name, Code, Description, and click on Save. You can enter the master list name of up to 1800 characters.
- In the Sort By list, select Alphabetically if you want that all Master Lists values should be displayed alphabetically in ascending order when the user has to select the field of an item. Select Index-wise if you want that all Master Lists values to be displayed in the ascending order of the Index code on adding the values to the Master Lists.
- To allow adding values to the Master Lists in projects, select Allow addition of values at the project level.
After the Master List is added, it will be listed in the Master Lists view.
Managing Master List Values
Adding Values to the Master List
- Navigate to the Detail link of the desired Master List to manage its values.
- Add a Value:
- Use the Add option to include new values.
- Enter the value Name, Description, and toggle the Active status if required.
- Select an Icon to represent the value. Icons help visually identify each value for better clarity and usability. Following are the categories you can choose icons from:
- Alphabets
- Arithmetic Operation
- Charts
- Cloud Storage
- Coding
- Colored
- Coordinate System
- Country Flag
- Currency Colored Icon
- Currency Material Icon
- Greek Letters
- Health Indicators
- Material Icons
- Measurement
- Priority
- Sizes
- Software development
- Softwares

Modifying Master List Values
- Click the Edit icon under the Actions column for the value you want to modify.
- Update the Name, Description, or Sort by as needed.
Active/Inactive: Use the Active toggle to mark values as active or inactive.
You can also export/import values from XLS, XLSM or CSV files or export the existing list for bulk updates.
Icon Usage Across the Application
Currently, icons added to Master List values are displayed in the following areas for enhanced visibility:
Project Level
- Work Hub: Provides quick visual cues for the cards on the Work Hub.
- Workitem Listing: Helps in identifying workitems more efficiently.
- Workitem Details Section: Displays icons alongside text in dropdown fields for better contextual understanding.
- Backlog Refinement: Provides quick visual cues for the cards on all the sections Backlog, Groomed Backlog and Sprint Planning
- Dashboard: Displays icons alongside text in dropdown fields in the chart setting for better contextual understanding.
Organizational Level
- Project Listing: Provides quick visual cues for the Projects
- User Listing: Provides quick visual cues for the Users in the Organization
- Dashboard: Displays icons alongside text in dropdown fields in the chart setting for better contextual understanding.
Notes:
- Values configured at the organization level will flow along with their associated icons to the project level.
- Some default Master Lists, such as SLA Type and SLA Goal Unit, cannot be modified, exported, or imported.
- Sort By can be modified only at the level where the Master Lists were created – i.e. if it was created in the Organization i.e. Administration workspace, it can be modified from Administration only, it cannot be modified in Templates or Projects.
- The following special characters are supported as Master Lists values: ~ ` ! @ # $ % ^ & * ( ) _ – + = { [ ] } \ | ; : ‘ “” < > . ? /. The comma (,) is not supported as a master list value.
See Defining Master Lists Relationship to set relationship between two Master Lists, which enables the selection of values in one Form field, depending on the value selected in another field of a workitem. This also requires fields to be associated in the required Form of the workitem.
The application provides a Dynamic List feature for Master Lists, where you can add a Form field as the parent field drop-down list which will control the child field drop-down list.
For example, when you add a transaction, you will see the two Form fields, for example, Country and States. As you select a country in the Country list, the States list will display the related states.