
In this article, we will help you to understand how to add and manage digital assets.
|
Skip Ahead to: |
Overview
The main purpose of using digital assets is to help businesses in storing all relevant information related to their customer interactions in a centralized location. It can be things like contracts, presentations, proposals, marketing collateral, or any other type of file that might be useful for tracking and managing sales.
On storing these digital assets, businesses can quickly access them whenever they want or share them with customers or team members. It can streamline communication and collaboration, improve productivity, and enhance the user experience.
Businesses can also use digital assets to enhance their marketing efforts by creating and sharing digital assets like e-books, whitepapers, or webinars to attract and engage prospects. Thus, educate them about their products or services, and convert them into loyal customers.
Note: The Digital Assets menu is only available for the Digital Asset Management template.
Navigation
In the left navigation panel, expand the Recent Projects menu and select any project. Hover over the Project breadcrumb at the top, expand the Execute module, and select Digital Assets.
Steps to Add Digital Assets
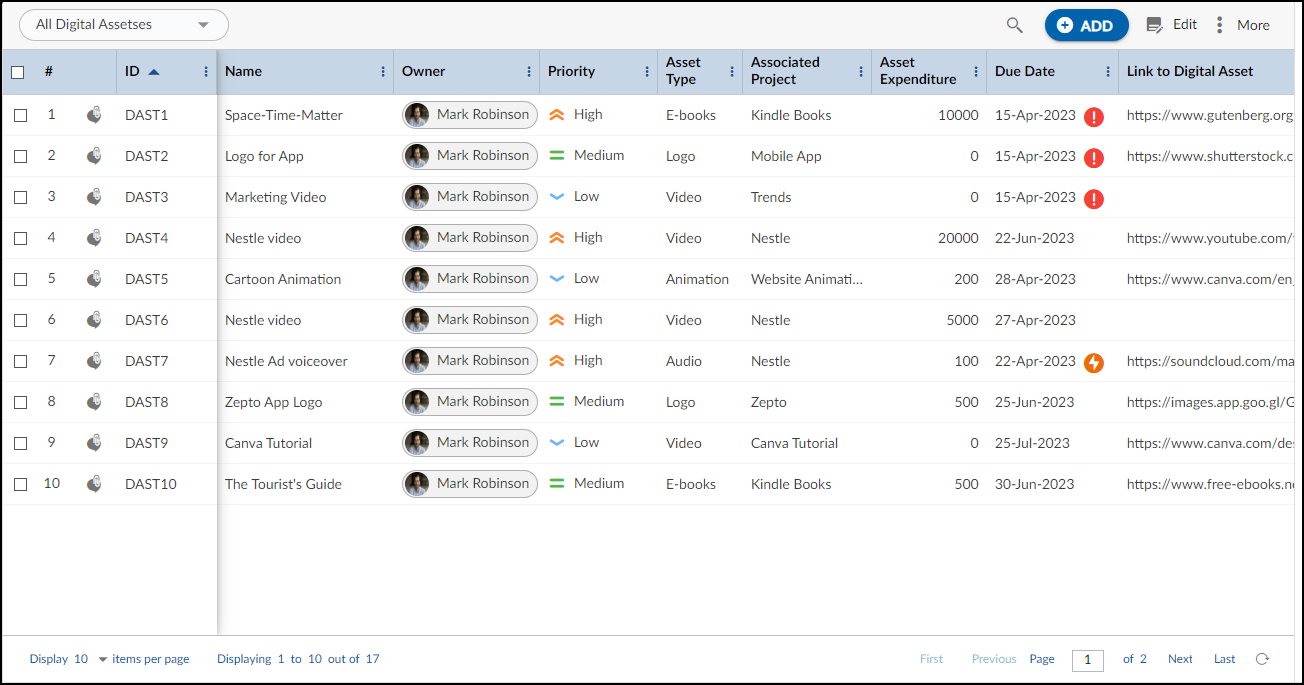
To add a Digital Asset library from the listing page,
- Click the ADD button.
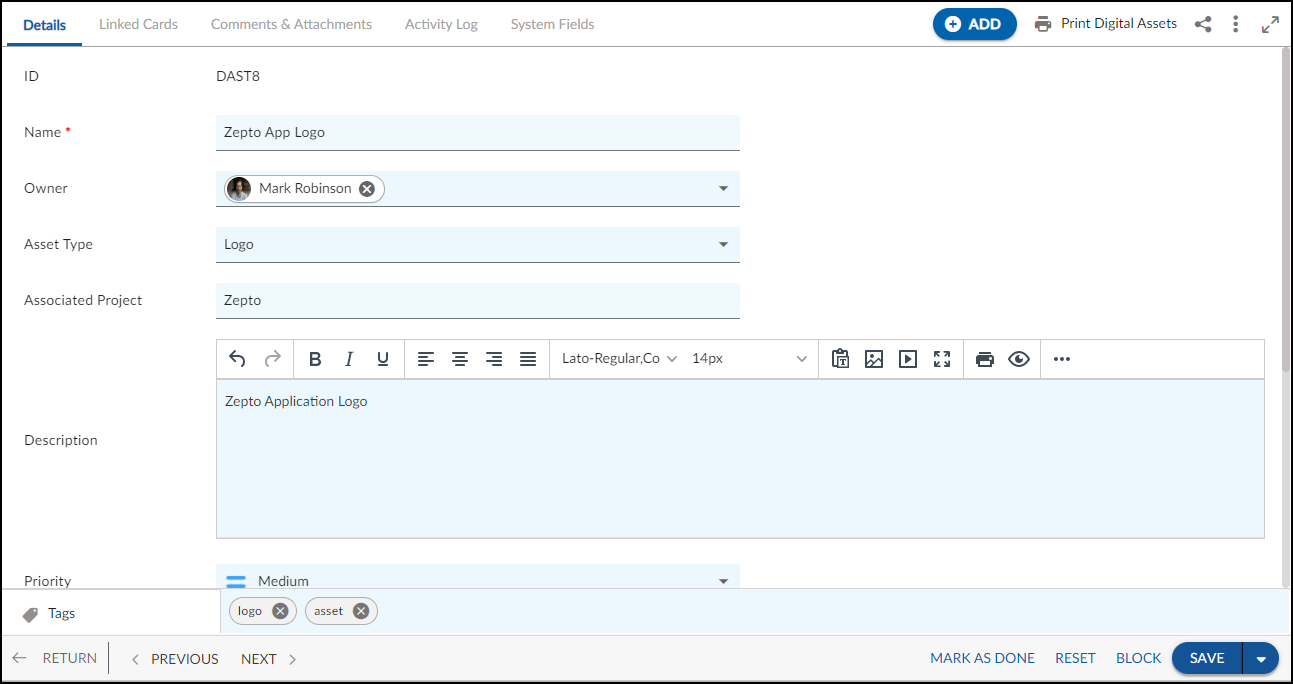
- Enter the relevant attributes to define Digital Assets.
- Name: Enter an appropriate title for the Digital Assets.
- Owner: Set an owner for the asset library.
- Priority: Set a priority for the Digital Assets.
- Asset type: Select a suitable asset type like E-books, logo, image, infographic, etc.
- Associated Project: Select an associate project for the asset library.
- Asset Expenditure: Calculate the expenditure in assets and enter the number.
- Link to Digital Asset: Enter the hyperlink that will direct you to the Digital Assets.
- Due Date: Set a due date for the asset library.
- Fill in the other remaining attributes and click the SAVE button. Then, you return to the listing page.
Default Sections in Digital Assets
The default sections appearing are Details, Comments & Attachments, and Activity Log.
- Details: The Details section displays, gathers, and tracks all information related to the Digital Assets.
- Comments & Attachments: The members can add comments related to the project item which are then listed in the Comments section. When a project item requires more data for reference, you can attach files that can be downloaded, edited, and uploaded. For more information, click here.
- Activity Log: The Activity log displays the list of operations in reverse chronological order for activities performed such as updating, closing, reopening, etc. In the Activity Log, you can view the various versions and the differences between the two versions of a workitem. For more information, click here.
Common Operations to Manage Digital Assets