
In this article, we will help you to understand how to add and manage team members in a project.
|
Skip Ahead to: |
Overview
When you create a new project, you will be the only project member. If you are an Owner or an Admin, you can invite new users to a project or the team.
You can search for Team Members based on Personas by sending an email to invite the selected user for confirmation, as required. You need team members to contribute to the project based on their roles and responsibilities. To define your team, invite them into your project to get started, and also allocate them for a specific period and in the required capacity.
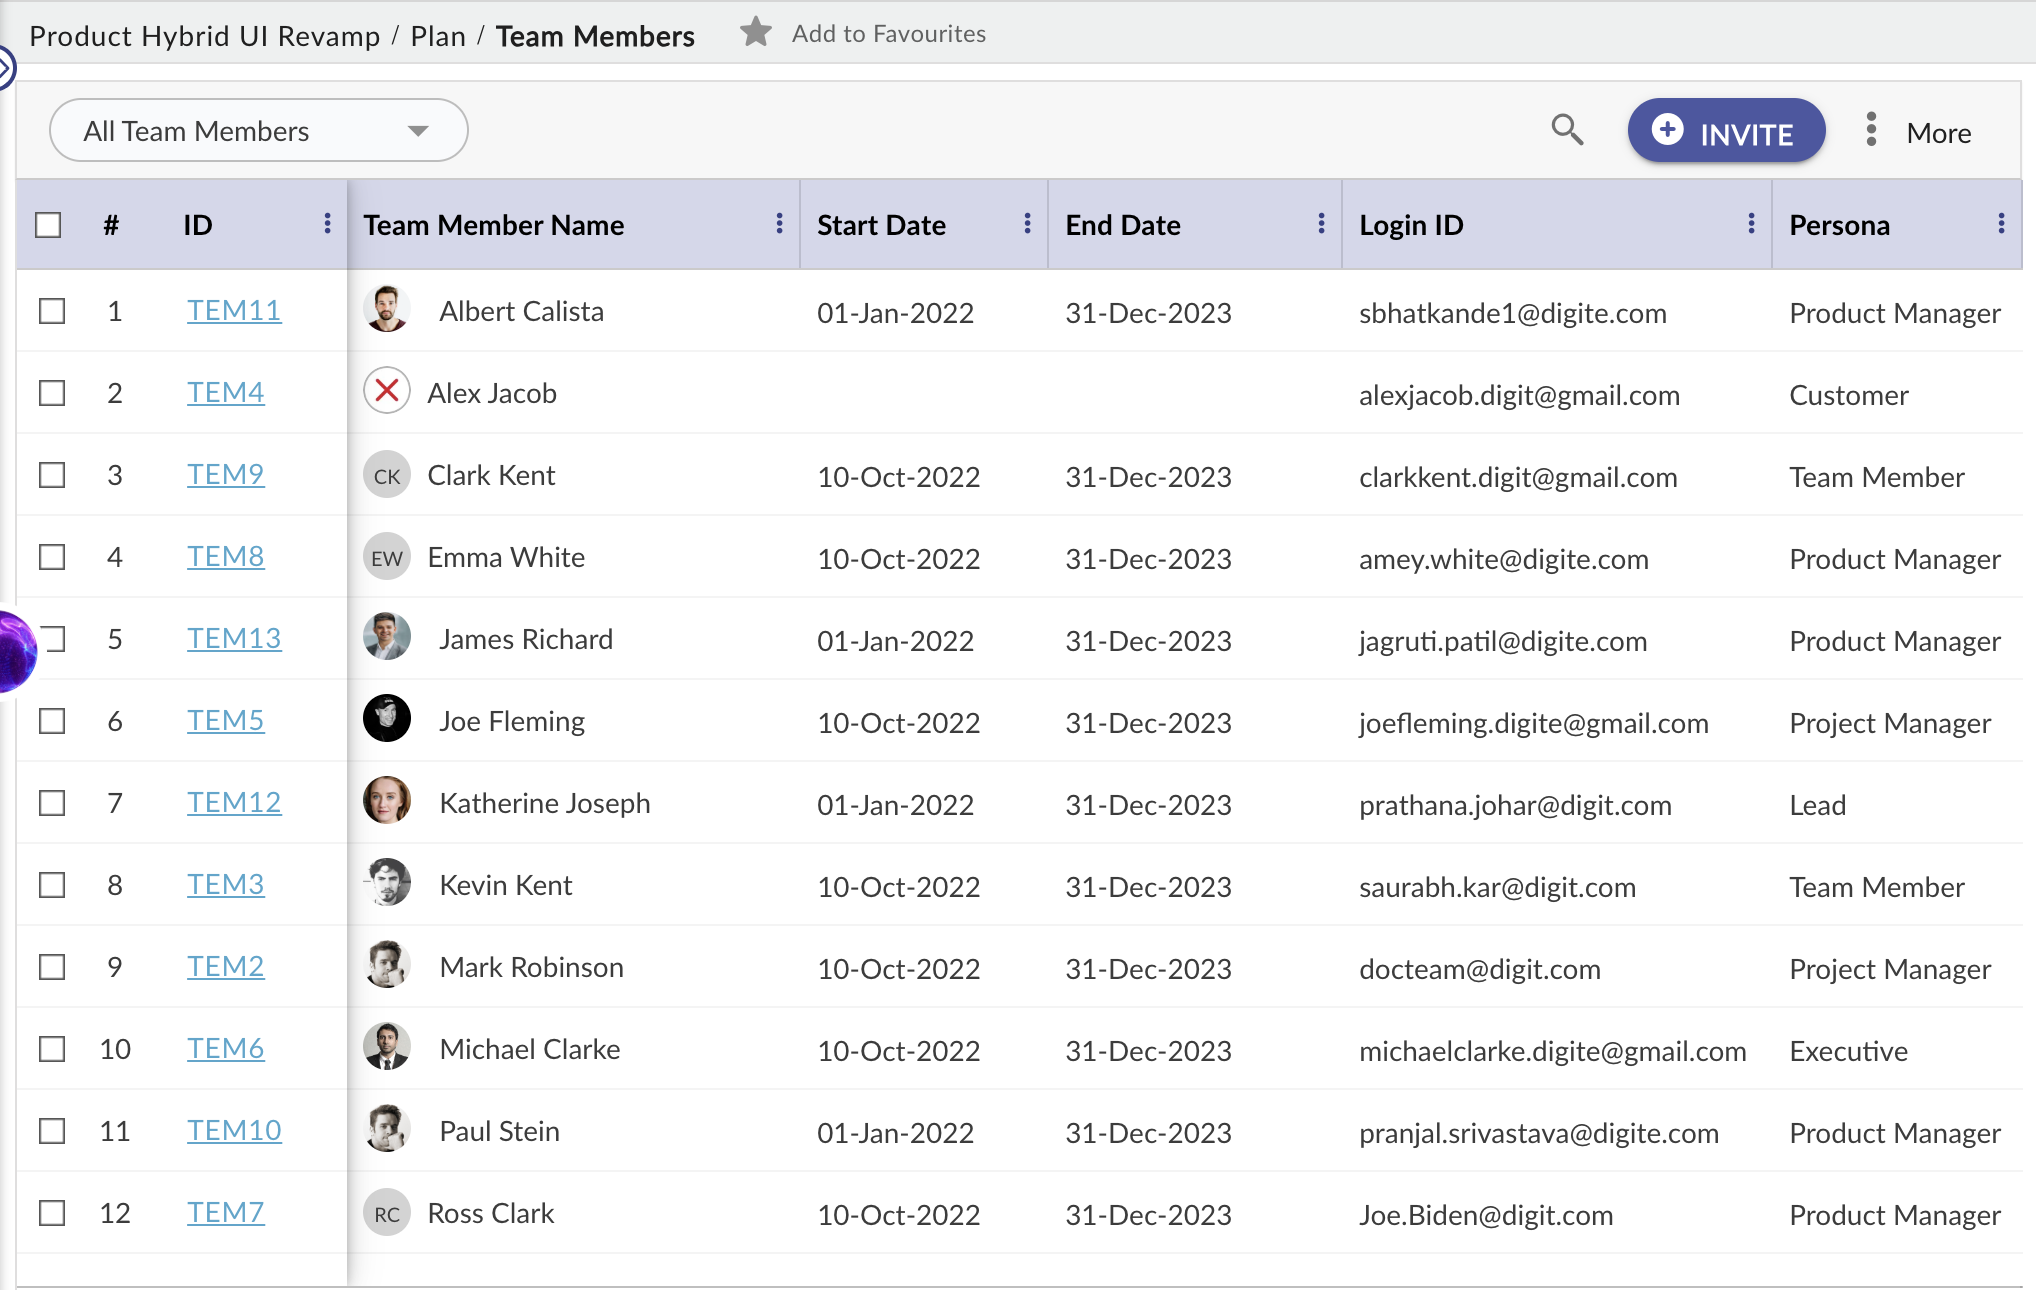
The team members belonging to the Project are listed in the Team Members window along with their skills. The details, such as their name, login ID, email address, and persona, are displayed in the listing details.
 |
Navigation
In the left navigation panel, expand the Recent Projects menu and select the required project. Hover over the Project name at the top, expand the Plan module, and select Team Members.
Inviting a New User
To invite a new user to a project:
- Click the ADD button.
- Click the INVITE USER button at the bottom of the Adding Team Members window.
- Select the persona from the drop-down list and enter the Email ID of the user.
- Click the INVITE button. The member will get an email invitation, which must be accepted by the member to join the project.
Follow similar steps to invite the user from the Left Panel and the Work Hub.
Adding Team Members
Prerequisite: Users must be available at the organizational level.
To add team members to a project:
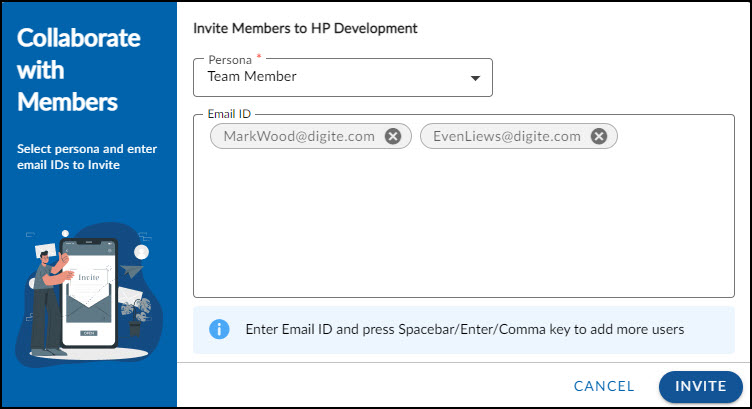
- Click the INVITE button.
- Select the persona from the drop-down that you want to allocate to that team member in the project.
- Enter the names or emails of the users that you want to invite as team members in the project. The selected member names can be seen as chips.
- Click the INVITE button to add the selected members to the project.
Follow similar steps to add the user from the Left Panel and the Work Hub.

Once the team member becomes a part of the project, the following tabs get created:
You can request a team member from your resource allocation / central team using ADD TEAM MEMBER REQUISITION.
Managing Project Allocations
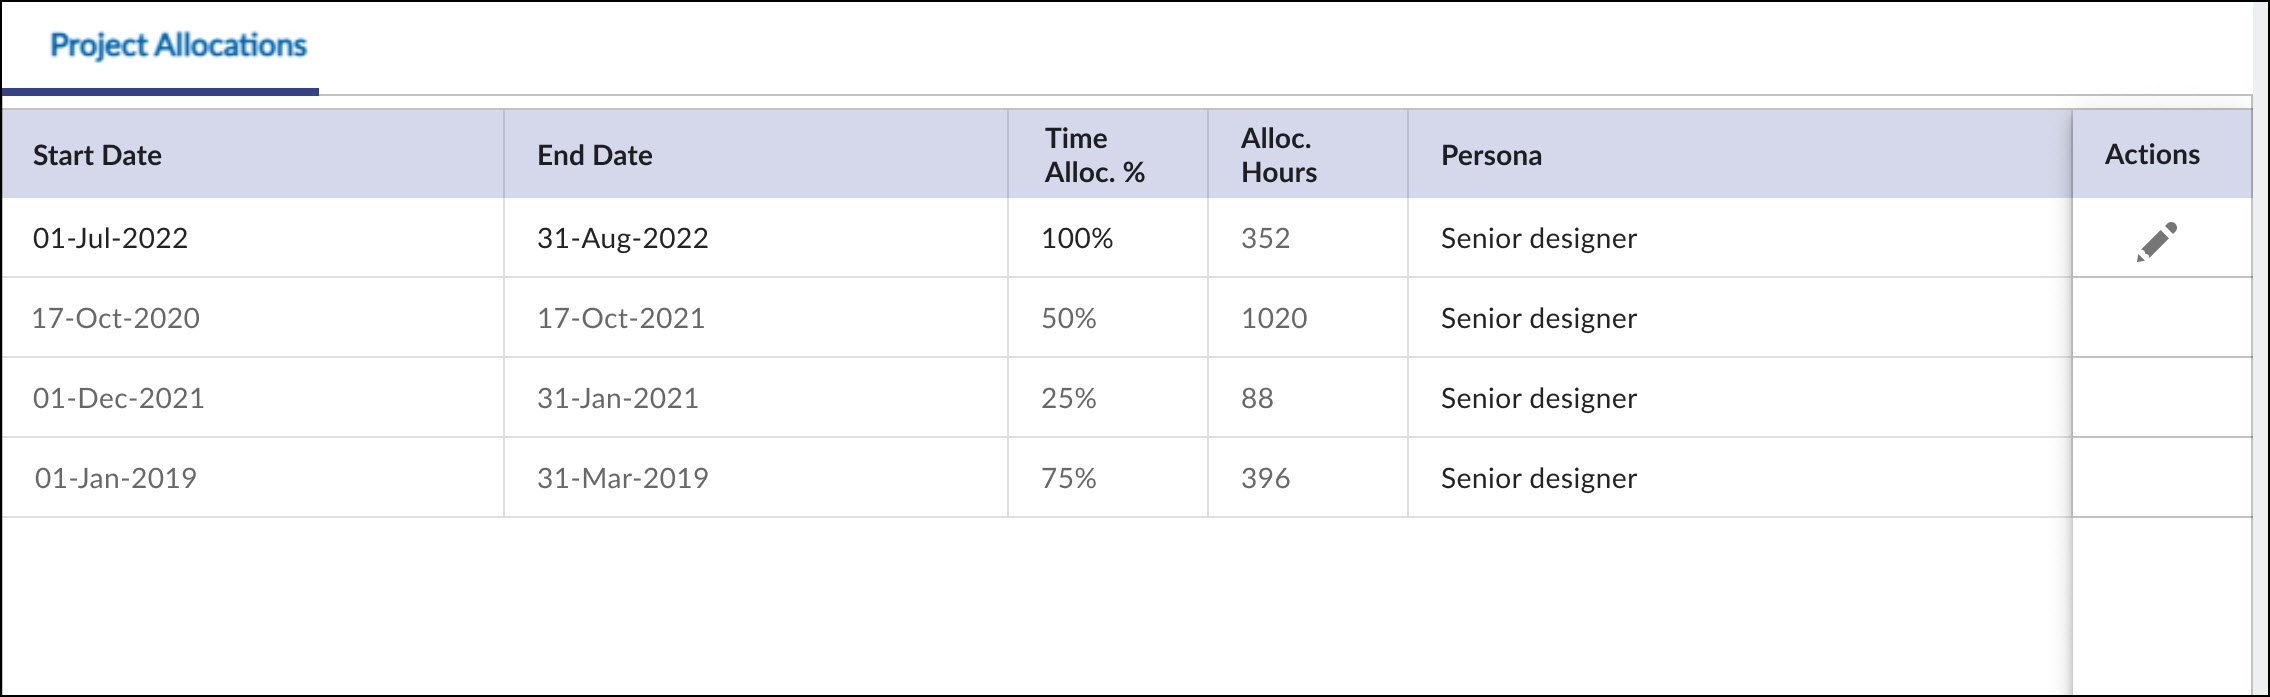
When you allocate a team member to the project, you can change the Time Allocation % by specifying different From and To dates in the Members Allocations section. The Time Allocation % helps compute the number of Allocated Hours as per the Project calendar. You can enter the Allocated Hours for a member, which in turn calculates the Time Allocation % value. You can change the date range using the Calendar icon in the From and To boxes. Any changes to the selected date range will re-calculate Allocated Effort, keeping Time Allocation % as before.
To allocate a team member to a task, click on the Add icon in the More Options under the Actions tab. Enter the Start Date, End Date, Time Allocation%, and Allocation. Hours, and Persona, and then click the SAVE button. You can always change the Start Date, End Date, Time Allocation %, and assigned Persona of the particular allocation as required (if you’re a project manager).
Each member gets allocated to the project with an allocation start/end date and Time Allocation % based on the standard Allocated Hour computation:
Allocated Hours = (Total number of working hours from the Start date and end date x Time Allocation (%) )/100
For example, a user is allocated to a project from 19th Aug 2022 to 25th Sep 2022, with a 50% allocation. Assuming that the Hrs/Day is 8 and working days are 6, the allocated hours for the user would be = ((25×8)*(50)/100)=100hrs.
Note: Team member allocation date must be between the project Start Date and End Date.
Deallocating a Team Member
To deallocate a team member from a project:
- Select the required team member.
- Click the DEALLOCATE button at the bottom right corner of the Project Allocation tab.
What Happens Next: The behavior depends on whether the selected user is assigned as a Timesheet Approver.
If the User is NOT a Timesheet Approver
- A confirmation message is displayed.
- Click Confirm to proceed.
- The user is removed from the project.
If the Team Member is Assigned as a Timesheet Approver
If the selected team member is assigned as a Timesheet Approver for one or more team members, the system prevents direct deallocation.
The Configure Timesheet Approver(s) window is displayed.
- Reassign a new approver for the affected team members.
- Ensure all required reassignments are completed.
After updating the approvers, proceed with deallocation.
Deleting a Team Member
To delete a team member from a project:
- Select the required team member.
- Click the Delete option.
What Happens Next:
If the User is NOT a Timesheet Approver
- A confirmation message is displayed: “User will no longer be available.”
- Click Delete to confirm.
- The user is removed from the project.
If the User is Assigned as a Timesheet Approver
If the selected user is assigned as a Timesheet Approver, the system prevents direct deletion.
The Configure Timesheet Approver(s) window is displayed.
In this window:
- Reassign the approver for affected team members.
- Select a new approver from available project members.
After completing reassignment:
- Proceed with deleting the user.
Note: A user assigned as a Timesheet Approver must be reassigned before they can be removed from the project.
Replacing a Team Member
Replace Team Member enables the transfer of items and privileges from one team member to another. When a team member is on leave, and that person’s assignments need to be transferred, it is simpler to replace a team member than retrieve a list of all the assigned items and manually reassign them.
You can also replace a virtual team member with a user created in the product and invited into the project.
Perform the following steps to replace a team member –
- Open the Team Members page. Click the More Options icon and select the Replace Team Member option.
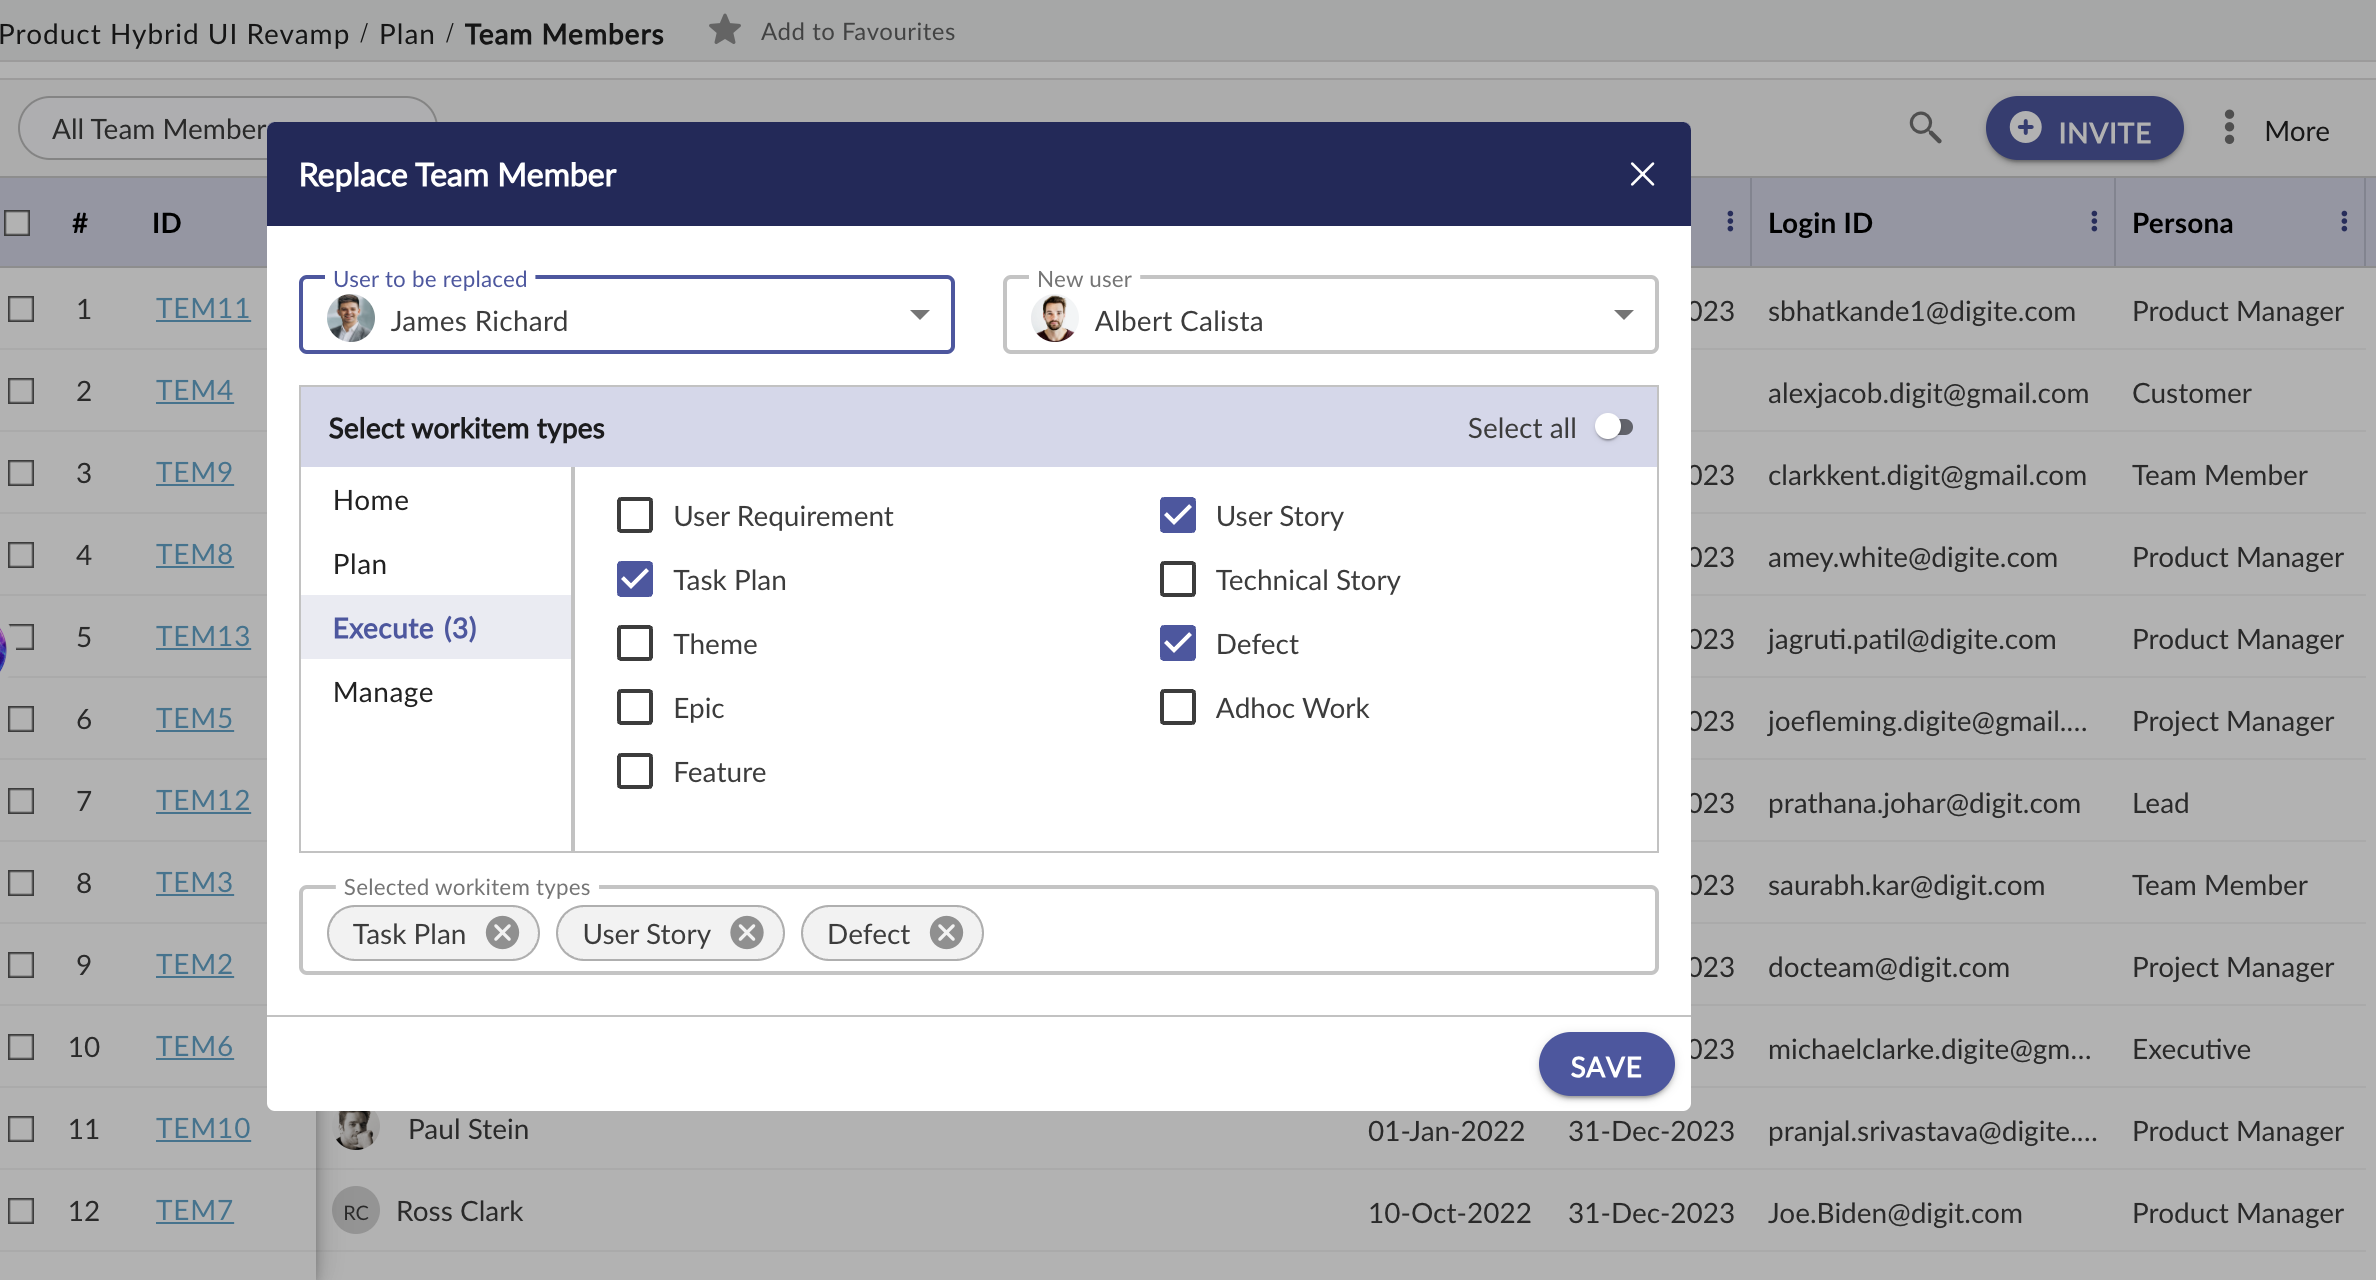
- Specify the name of the user to be replaced and the name of the new member (to be assigned).
- Only ‘Committed‘ team members invited into the project can be replaced and will appear for selection in the ‘User To be replaced‘ list. A virtual user is indicated by a # symbol prefixed to the User ID.
- From the User to be replaced list, select the team member that you want to replace.
- From the New User list, select the new team member.
- All the workitem types are grouped as per their menus. Click a menu name and select the workitem type in which you want to replace a team member. To replace team members in all the workitem types, switch on the Select All toggle.
You can replace team members for all the agile workitems (card owners and ToDo owners), workflow-based items, and Tasks in Task Plans. The team member replacement is not performed for MS Project-based Task Plans and checked-out Task Plans.
The team member replacement takes time, depending on the number of workitem types and instances in them. Once the team member replacement is done, an email is sent with the summary of the replacement operation, including the workitem type, number of instances, and failed events, if any. Also, an activity log is generated on the workitem on which the team member is replaced.
You cannot transfer the tasks allocated from one Team Member to another through this feature. To do so, check out the project in Microsoft Project Client and then reassign those tasks to the new team member.
Common Operations to Manage Team Members
- Delete
- Multi Sort
- Column Settings
- View My Access Rights