Start with the video first to get a better grasp of the topic!
|
Skip Ahead to: |
Overview
Sprint planning is an important part of the process of preparing and executing sprints as it brings the product team together to define and plan the work that needs to be accomplished. The Product Owner, Scrum Master, and Development Team will be working together on this.
During Sprint Planning, the Product Owner sets the objective or goal of the sprint and determines which backlog workitems or cards will contribute to achieving it. As the Product Owner, you need to identify and select the most suitable cards from the backlog that can be completed. It is required to estimate the time required for each workitem to ensure the development team has a clear understanding of what needs to be done.
Once Sprint Planning is completed, the Development Team should have a well-defined plan in place that includes a list of tasks, priorities, and estimated delivery. This helps the team to remain aligned, stay focused on the sprint goal, and track progress throughout the sprint.
Overall, Sprint Planning is a critical process that enables the team to plan, prioritize and prepare for the upcoming sprint effectively. It ensures that everyone is on the same page, and the team remains focused on achieving the sprint goal.
Navigation
In the left navigation panel, expand the Recent Projects menu and select any project. Hover over the Project breadcrumb at the top, expand the Agile Planning module, and select Sprint Planning.
How to Plan a Sprint?
To effectively plan a sprint, it is recommended to use the Sprint Planning menu instead of the Backlog Refinement menu, as it allows you to plan multiple sprints at once using various options.
To plan a sprint, perform the following steps –
- Select the unit of measurement for sprint capacity from the UOM for Sprint Capacity Planning.
- Select the sprint that you want to plan from the list of All Current and Future Sprints. The selected sprints will appear next to the backlog column.
- To add workitems to a sprint, simply drag the cards from the Backlog section and drop them into the required sprint column. If you need to remove a card from a sprint, drag it from the sprint column and drop it into the Backlog section.
- Ensure that the planned capacity of the sprint matches the sprint capacity by checking the figures.
- To view a summary of the last 12 releases, click the Edit Capacity icon on the sprint column. From there, you can also edit the sprint capacity, sprint date, and other details if required. To modify information for the selected sprint, click the MORE OPTIONS button.
- Once the sprint is planned, you can switch to the tree view to see the size of each workitem type in the sprint.
Note: As of now, you have the flexibility to plan the sprint from two screens – Backlog Refinement and Sprint Planning menus.
Sprint Planning Layout
The layout of the sprint planning screen is comprised of several key sections, such as the Toolbar, Backlog, and Upcoming & Current Sprint sections.
Toolbar
The toolbar in the sprint planning screen includes features such as Story Points/Card Count, Current and Future Sprints, Card View/Tree View, Add Cards, Filter, Zoom Levels, UOM for Sprint Capacity Planning, and Maximize/Restore.
![]()
All Current and Future Sprints
This drop-down enlists the present and future sprints in ascending order. You can select one or more sprints to be shown on the screen.
Card View / Tree View
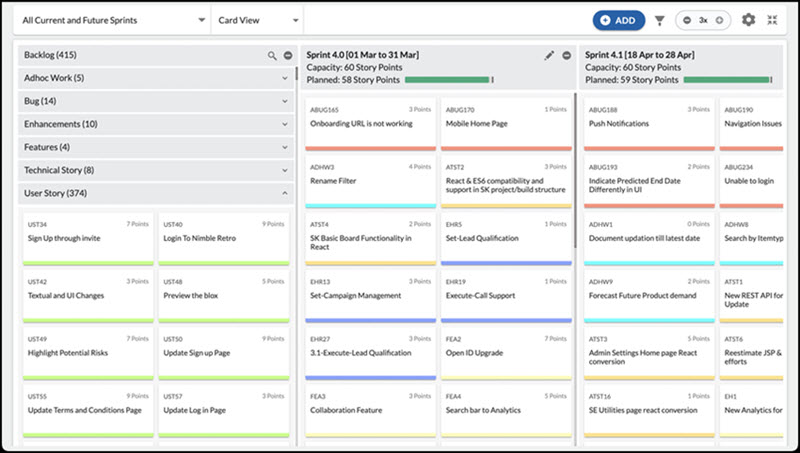
- Card View
The Card View displays all workitems/cards in a card layout, showing the card ID and title on the card. If Story Points are selected, the estimated points of the card can be seen at the top right corner of the card. The bottom line of the card displays the color configured for that card type. Clicking on a card opens it in a pop-up view where you can modify the details of the card.
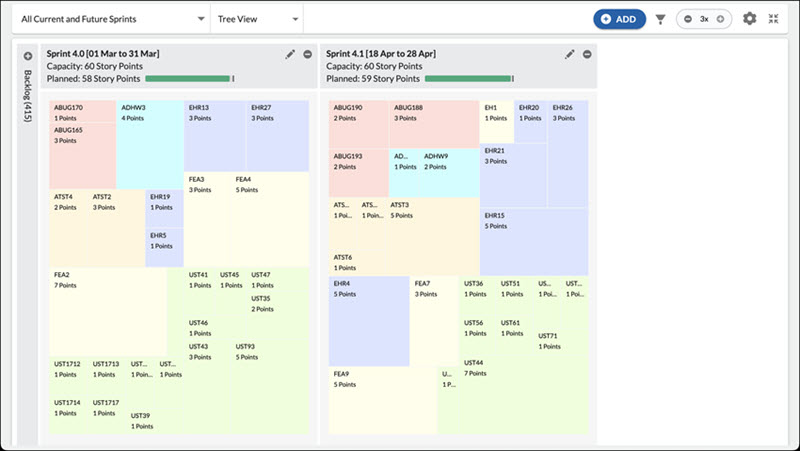
- Tree View
The Tree View provides a hierarchical display of workitems, enabling you to analyze the relative sizing of different types of workitems within a sprint. This view allows for a visual comparison of the size of all workitems that have estimated points entered. The workitems are represented by rectangles, and sprints are tiled with smaller rectangles representing their workitems.
The size of the rectangle represents the estimated points entered for that workitem, and the rectangle’s color is based on the workitem type as configured in the eForm. Hovering over a work item shows its ID, title, and estimated points.
Notes:
-
-
- When you switch to the Tree View, the backlog is automatically collapsed and disabled.
- In this view, you can only view the workitems and cannot move them.
-
Add Cards
The Add option allows you to quickly add cards of any type to the Sprint Planning board. Click the ADD button and select the card type to add a new card to the board. Learn more about it here.
Maximize/Restore
Click the Maximize icon and the full-screen mode hides the Top Panel and Menu bar of the application allowing you to have a bigger view and more focus on the Sprints. You can always restore by clicking on the Restore icon.
Zoom Levels
Zoom levels help you get better visibility of the cards. As you increase the zoom level, the size of the card will increase.
Filter
With too many cards on the board, it gets difficult to focus on priority work. You can use the Filter option on the toolbar to view only selected cards based on various filter criteria like Card Owner, Priority, Card Type, sprint, and so on. Learn more about it here.
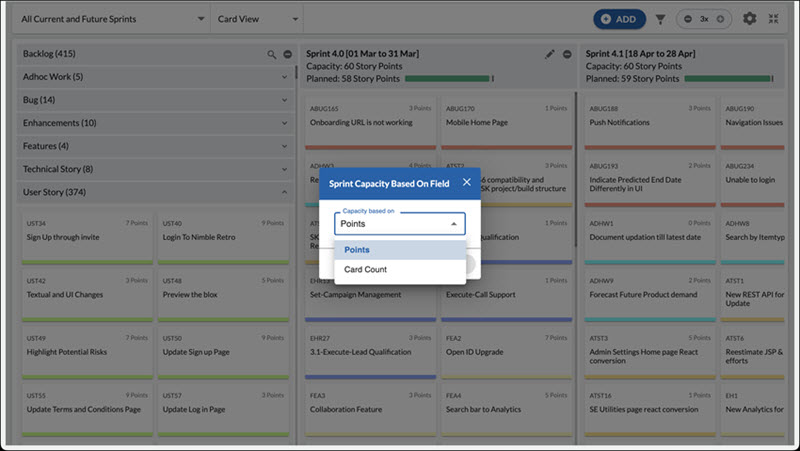
UOM for Sprint Capacity Planning
The UOM (Unit of Measurement) for Sprint Capacity Planning feature allows you to select the unit of measurement for sprint capacity planning, whether it is Story Points or Card Count.
Backlog Section
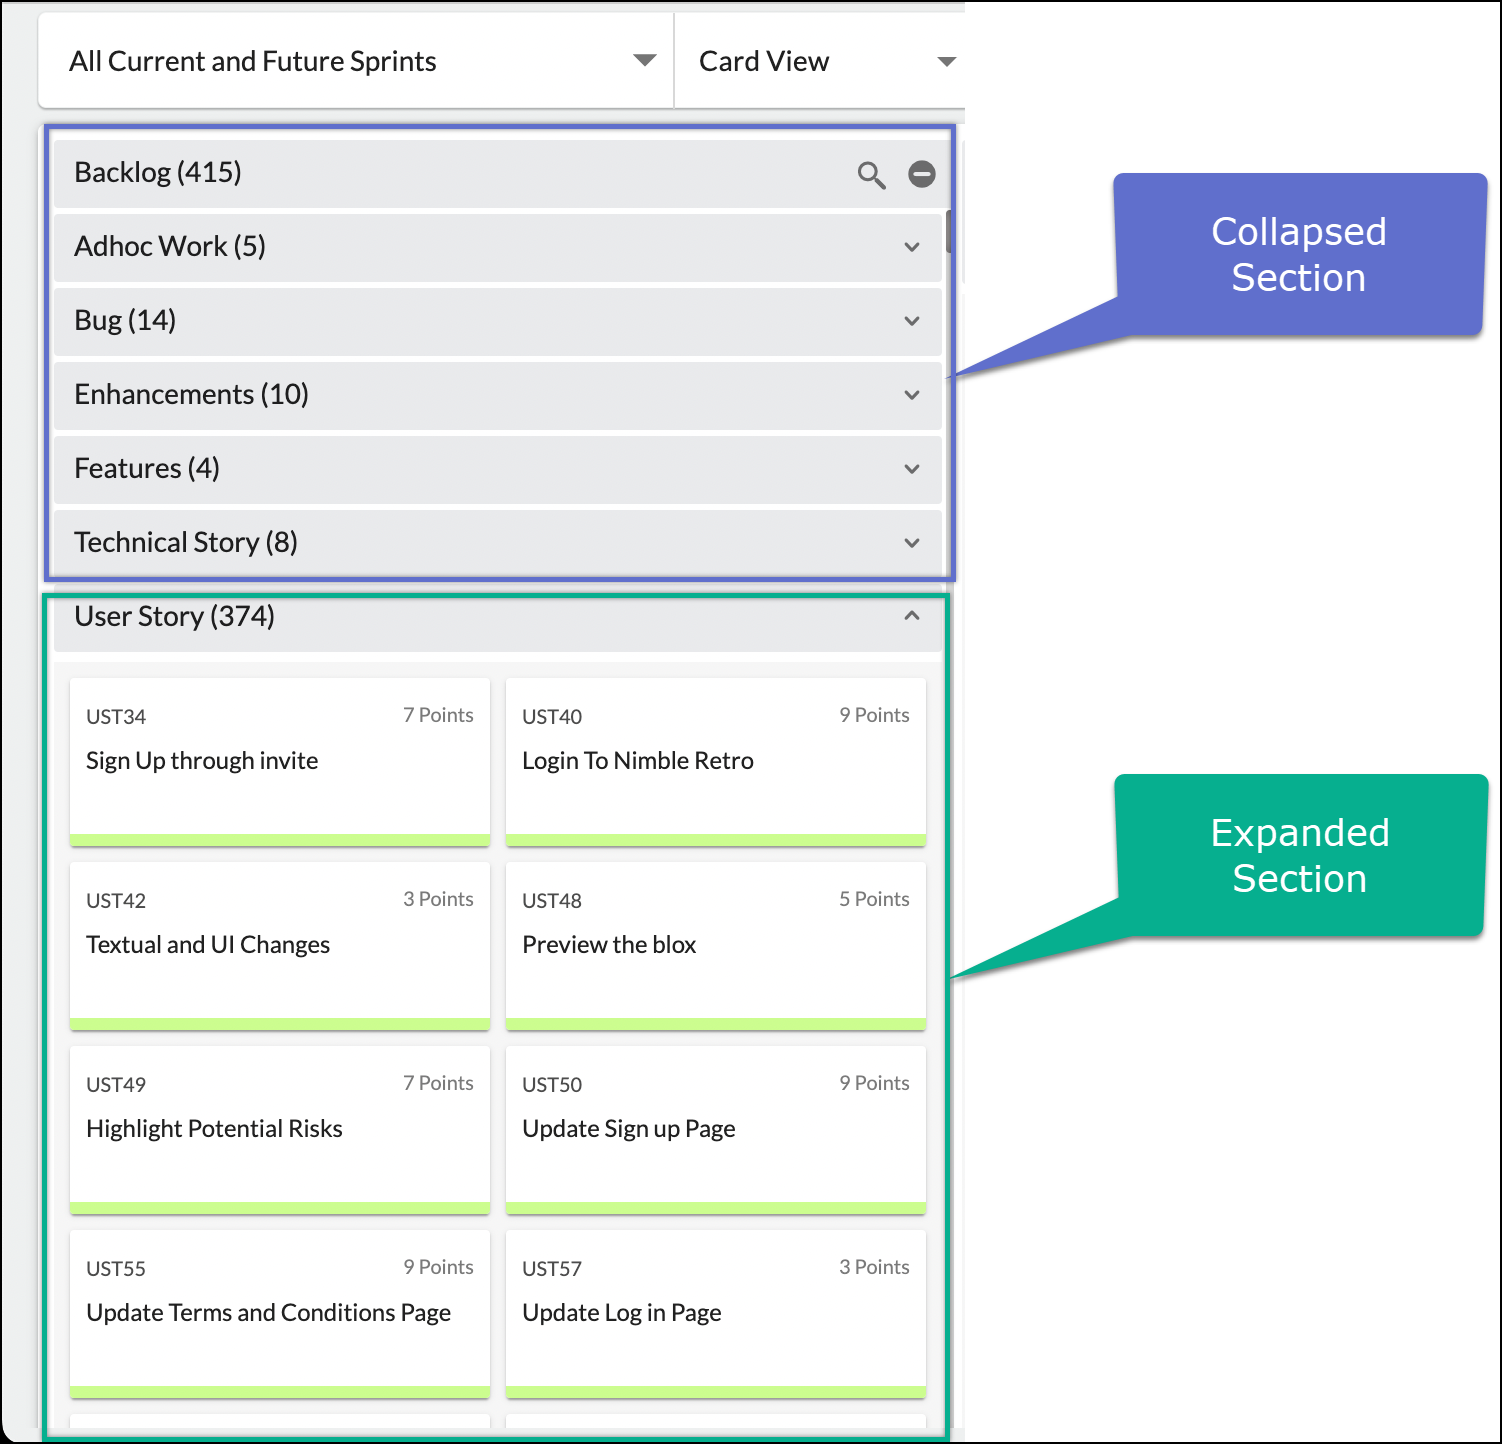
The Backlog section displays all the workitems available in the backlog stage of a project, categorized by their workitem type. You can search for a specific workitem by its name or ID using the search icon, or use the filter option to narrow down the displayed cards. Each section of a workitem type can be collapsed or expanded for convenience.
The title of each workitem type section displays the name of the workitem type and the count of work items in that category.
You can collapse the backlog or any sprint section by clicking the collapse icon at the end of it. Similarly, you can collapse a section of the backlog by clicking its collapse icon at the end of the row.
Sprint Section
The Sprint section displays all the sprints that are selected in the Current and Future Sprints drop-down. Each sprint section shows the workitems assigned to that sprint, along with important details to help you plan the sprint efficiently. It shows the following details to help you plan a sprint smoothly.
- Sprint Title
- Capacity
- Planned
- Edit Capacity
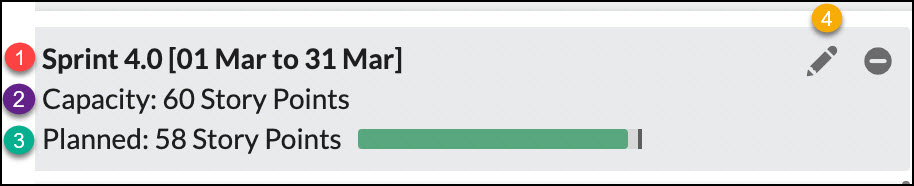
Sprint Title
The title of a sprint column displays the sprint name, start date, and end date as shown below.
Capacity
The Capacity count on a sprint header shows how many workitems/ cards (as per the option selected in the Story Point/Card Count drop-down) can be accommodated in that sprint.
If the Story Point option is selected and there are no story points assigned to the workitems in a sprint, then the capacity will be shown based on the average of the last three sprints. Or If a sprint capacity is set, then it displays that many story points.
As you add cards/workitems to a sprint, its capacity decreases, and the Planned bar reflects the available bandwidth for a sprint.
Planned
The Planned count on a sprint header shows how many cards/story points have been planned for the sprint. When you start adding workitems to a sprint, then the Planned count keeps increasing and this gets reflected in the Planned bar to let you know the updated and available bandwidth.
If you plan more workitems/story points for a sprint than its capacity, then the Planned bar turns red.
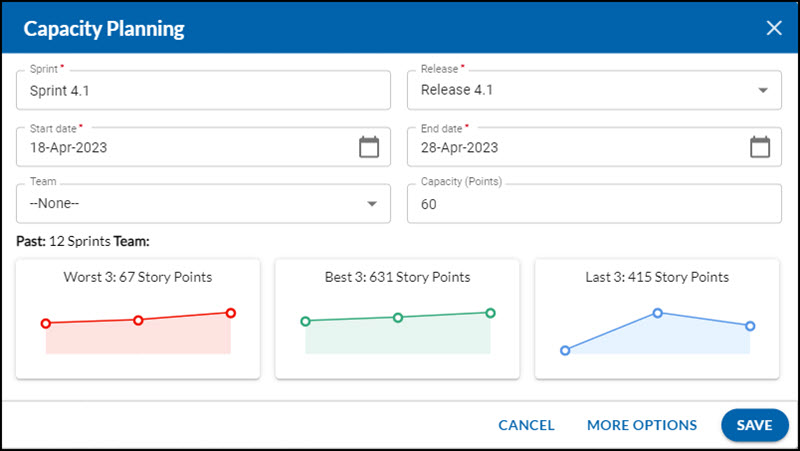
Edit Sprint Capacity
The Edit Capacity icon is located at the top-right section of the sprint column, allowing you to edit sprint information such as name, start date, end date, and capacity points. It also displays the analytics and summarization of the past 12 sprints, along with graphs to help you estimate past sprints and plan the current sprint accordingly.
It shows the following information:
- Worst 3 – The average story points of the worst three sprints (in which the team has given its least performance) among the last 12 sprints, helping you understand the team’s performance potential.
- Last 3 – The average story points of the last three sprints to help you understand the team’s recent performance.
- Best 3 – The average story points of the best three sprints (in which the team has given their best performance by delivering comparatively more story points) among the last 12 sprints, helping you understand the team’s performance potential.