
In this article, we will help you to understand how to add and manage Student applications.
|
Skip Ahead to: How to Add Student Applications |
Overview
Job, college, or internship application forms are important. Application forms are important because it helps employers or universities to gather data about candidates. Based on the collected data, they need to make informed decisions. These forms provide information about the organization for which you are applying and the type of role you want to apply for on the basis of your experience. Not only does this give individuals an edge over other candidates when applying for jobs, but it also prepares them for what to expect from an Organization and increases confidence in their work.
Note: This menu is only available for the Managing Student Life template.
Navigation
In the left navigation panel, expand the Recent Projects menu and select any project. Hover over the Project breadcrumb at the top, expand the Track module, and select Student Applications.
How to Add Student Applications
To add a Student application, follow these steps:
- Click the ADD button from the Student Application List View.
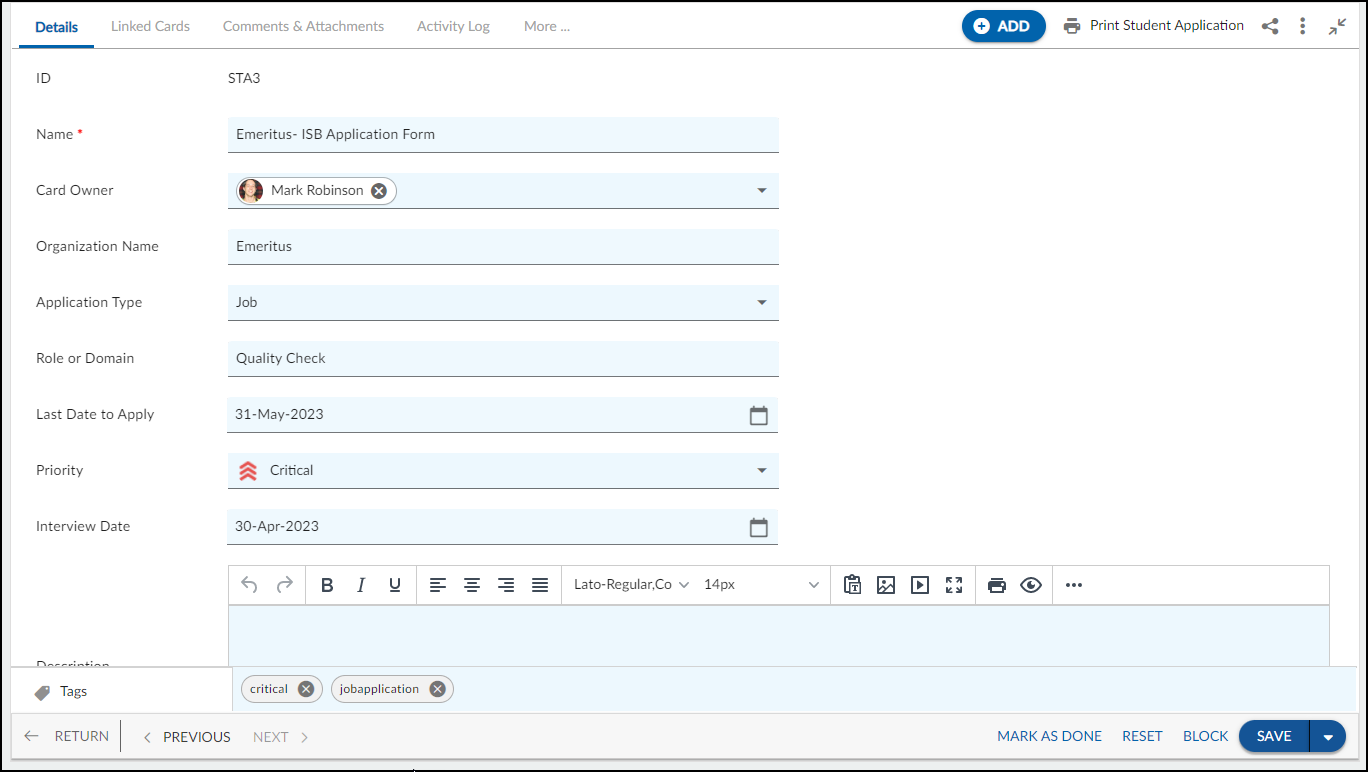
- Enter the details as explained below:
- Name: Enter a name for the Student Applications form.
- Card Owner: Select the card owner from the list.
- Organization Name: Enter the name of an Organization for which you are filling out the application form.
- Application Type: Select the application type from the drop-down such as Internship, Job, Collegeship, etc.
- Role or Domain: Enter the role or domain for which you are filling out the Student Applications form.
- Last Date to Apply: Select a suitable end date for submitting the application form.
- Priority: Set the priority of the Student applications to prioritize tasks related to the applications.
- Interview Date: Select a suitable Interview date for the Student Applications.
- Description: Add a detailed description of the Student Applications.
- Link to Application: Browse or enter an appropriate https URL to link to the application.
- Link to Website: Browse or enter an appropriate https URL to link to the website.
- Once you’re done filling in all the details, click the SAVE button. Then, you return to the listing page.
Default Sections in Student Applications
The default sections appearing for Student Applications are Details, Linked Cards, Comments & Attachments, Activity Log, and System Fields.
Once the Student Applications is created, the following tabs are visible:
- Details: The Details section displays, gathers, and tracks all information related to the Student Applications.
- Linked Cards: It helps you to set parent-child hierarchy and the relationship between themes/epics and workitems and trace them while working with them. For more information, click here.
- Comments & Attachments: The members can add comments related to the project item which are then listed in the Comments section. When a project item requires more data for reference, you can attach files that can be downloaded, edited, and uploaded. For more information, click here.
- Activity Log: The Activity log displays the list of operations in reverse chronological order for activities performed such as updating, closing, reopening, etc. In the Activity Log, you can view the various versions and the differences between the two versions of a workitem. For more information, click here.
- System Fields: All the system-generated fields or un-editable fields are listed in the System Fields segment. To know more, click here.