
This article will give you a detailed understanding of how to give project access to different personas in the project.
|
Skip Ahead to: |
Overview
Depending on the access rights and persona provided to the user, they will receive alert messages for accessing a project. With the help of these access rights, the user can navigate to the project and receive alerts or notifications that they are accessing the following project. Similarly, if you don’t have access then also you will receive an alert message. Thus, it becomes easier for you to understand your access rights.
Navigation
In the left navigation panel, expand the Apps menu and select the Account Space. Hover over the top breadcrumb, expand the People Management module, and select Project Access for Persona.
Steps to Set Project Access for Persona
To set project access for personas you need to perform the following steps:
- Click the ADD button.
- Then, the Advanced Filter page appears.
- Add the Filter name, select a suitable persona, and a brief description of the filter.
- To set the Filter criteria, in the Filter Criteria pane, define criteria in the row by selecting Form fields, conditions, and field values in the lists.
- Conditions are to be enclosed in brackets.
- To define multiple conditions, click the Add icon and select the logical operator – AND/OR. In the new row, define the nested criteria. As you click the SAVE & APPLY button, the filter name appears on the toolbar before the filter icon.
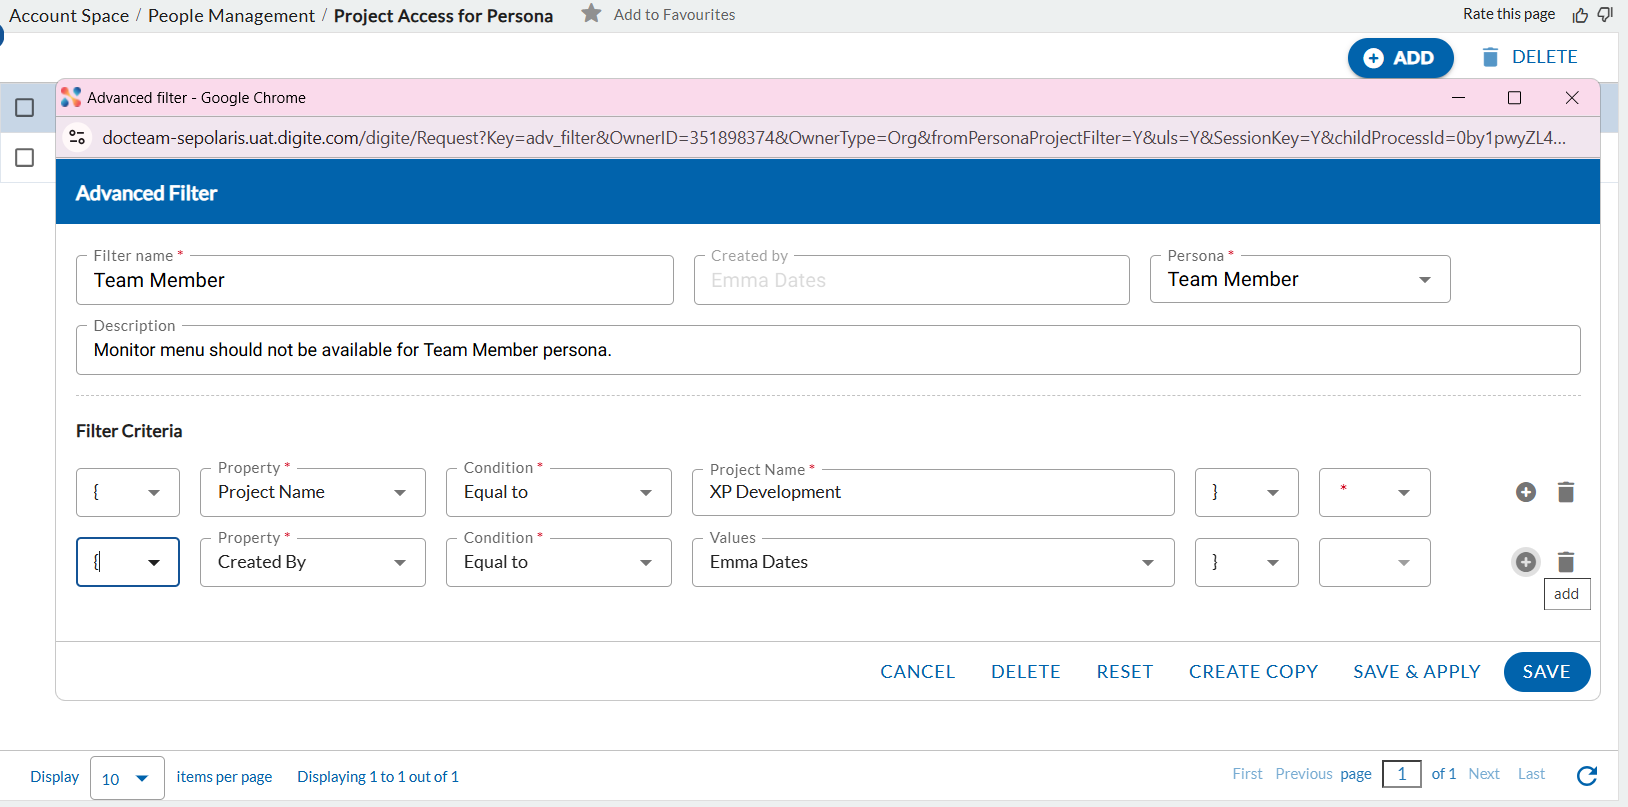
For example, to view items in a specific release and Critical priority:
-
Select ‘{‘ in the Open Bracket list column.
-
In the Property list, select any value from the drop-down such as Actual Effort, Due date, Parent Card, Release, etc.
-
From the Condition list, select any value from the drop-down such as Equal To, Not Equal To, Less than, etc.
-
From the Available Values list, click on the Search icon and select the respective value, for example, Release 10.1.
-
Select blank (for specific search using AND operator) in the Closed Bracket list. Use single or multiple open and close brackets to define an expression, as required to set a precedence within.
-
To add multiple conditions, click the Add icon.
-
In the Operator list, select AND.
-
In the new row added, define the new expression, and follow the above steps. Select blank in the Open Bracket list, Priority as Critical, and a single Closing bracket. To remove an expression, click the Delete icon for the required expression.
-
Click SAVE or SAVE AND APPLY.
Notes:
The operator precedence is into account when you specify nested brackets. For example, you can specify the criteria as ((1 or 2) and 3).
If you add rows in the editor and later delete the rows, an additional bracket is displayed in the pattern. Like, if 5 rows are added and you delete the 4th row, then the expression is read as ( ( ( ( 1 and 2 ) or 3) )or 4 ). Hence, select the open and close brackets again to match.
Other actions that you can perform on the Advanced Filter page are: DELETE the filter, RESET the filter values, and CREATE COPY to create a similar version of the filter.