
Start with the video first to get a better grasp of the Nimble Café!
|
Skip Ahead to: Receive Notifications on Nimble Café Forms Created through Forms 2.0 in Cafe |
Overview
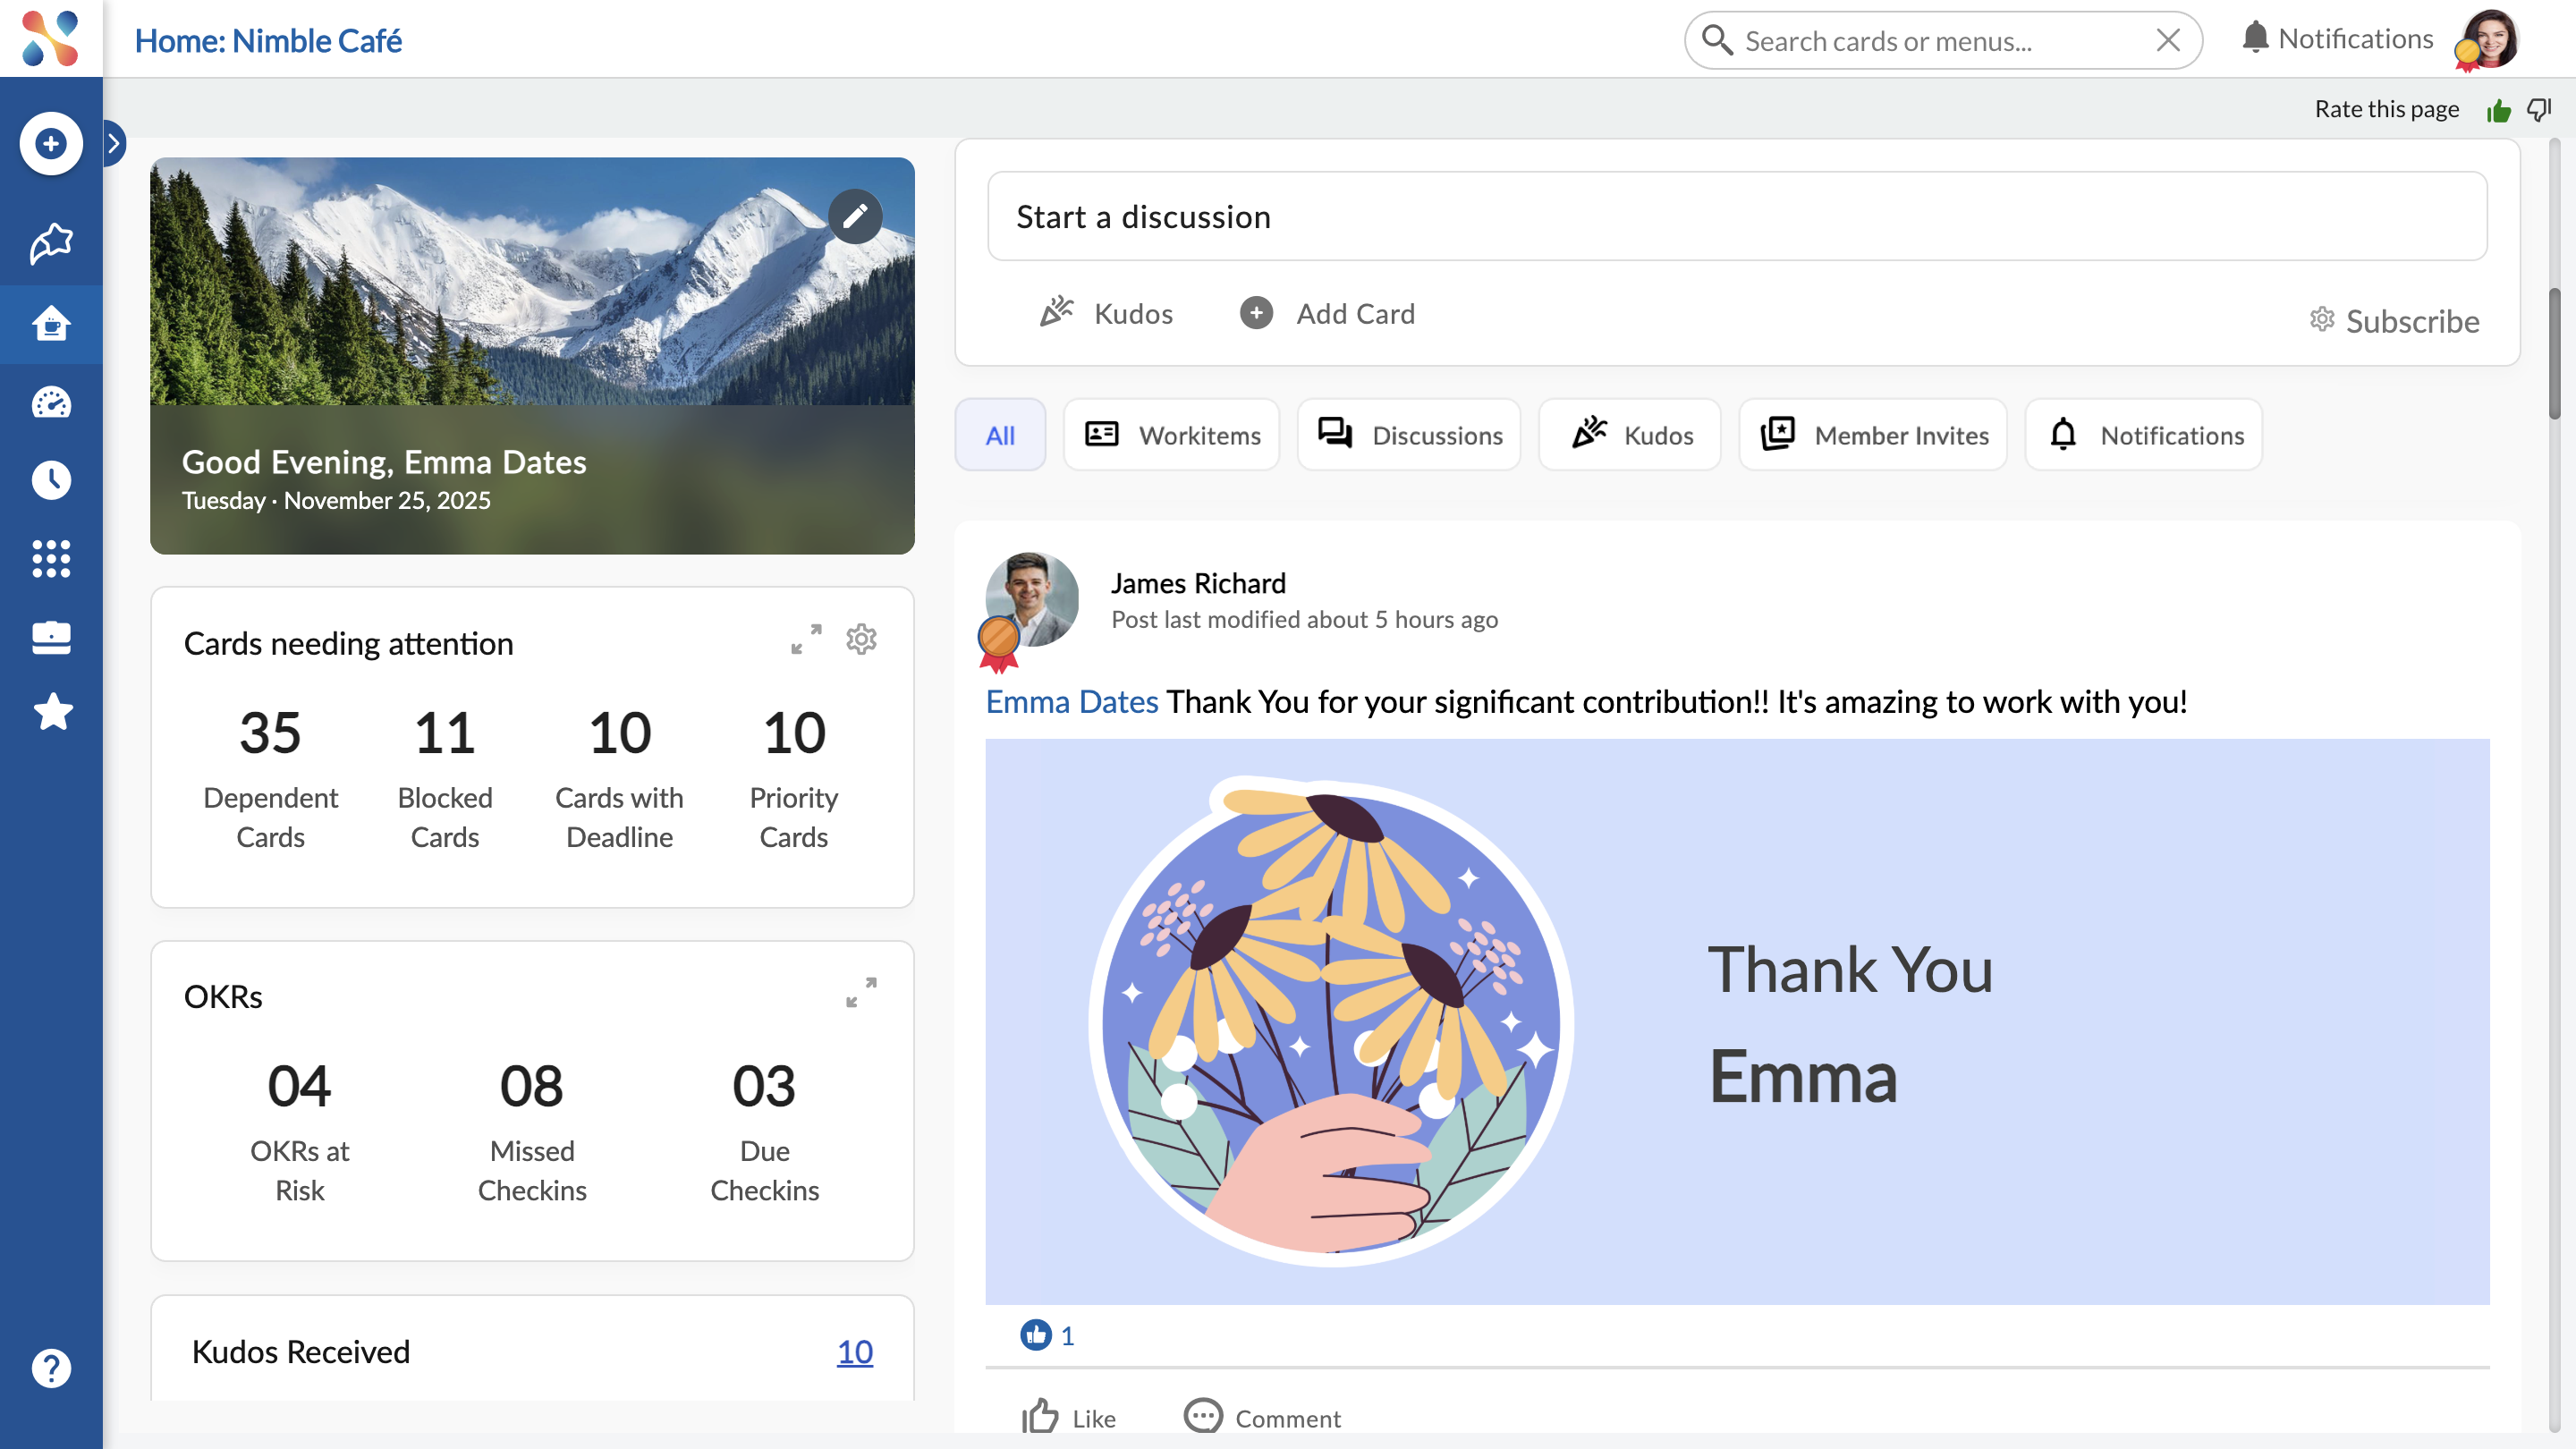
The Nimble Café gives an organized view of the workitems assigned to you with their Name, ID, Board Name, and Priority. Get quick updates on cards and customize your Café as required.
You can seamlessly collaborate with your team or individuals on a Work Item within the application. You can also express appreciation by sending them Kudos or performing quick actions, such as adding Likes or Comments to their posts.
| Note: The posts/cards in the Nimble Café are based on the last modified cards. So, the last modified card appears on top. |
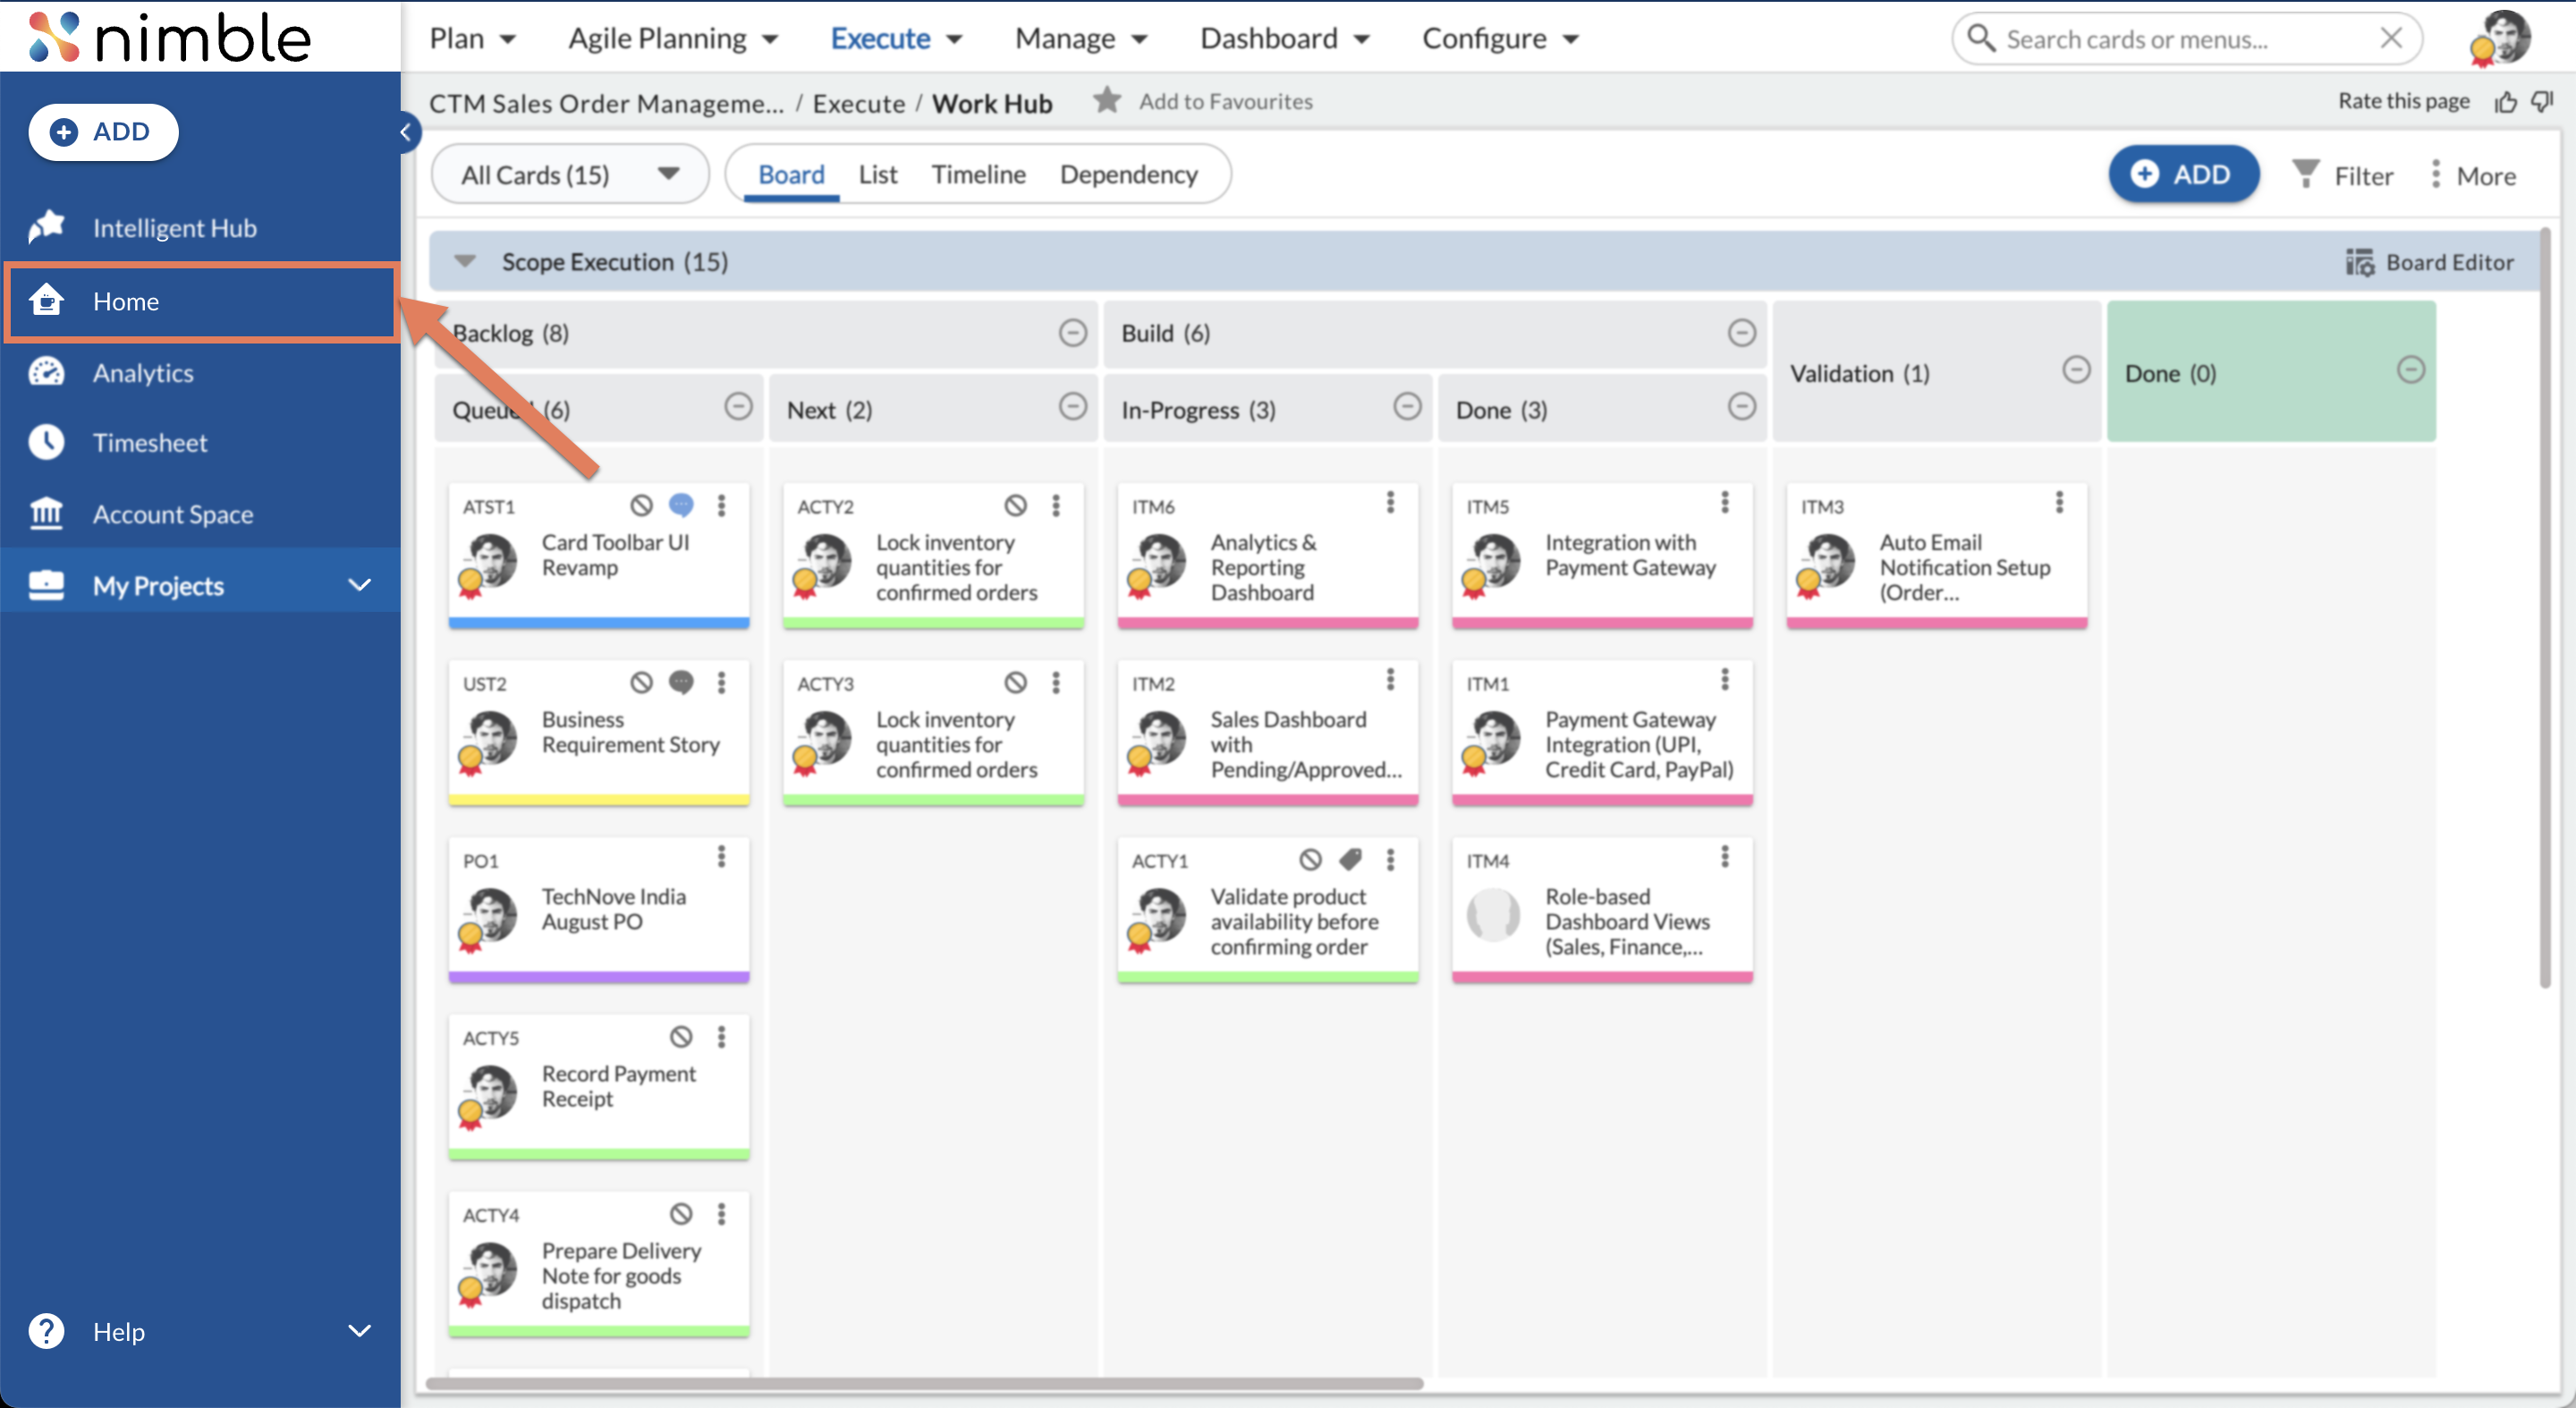
Navigation
Access Nimble Café from the left navigation → Home icon.
Cover Page
The cover area has two sections:
Steps to Add a Cover Photo
Give your Nimble Café a fresh look by adding a cover photo of your choice.
1. Click the Edit icon.
2. Choose Select Image to pick from predefined stock images, and then click POST and click the tick icon to save.
3. Choose Upload photo to add a photo from your computer.
4. Use Reposition to drag the image into place.
5. Use Remove to delete the cover photo.
Discussions
Use the right-panel Start a Discussion area instead of external chat tools.
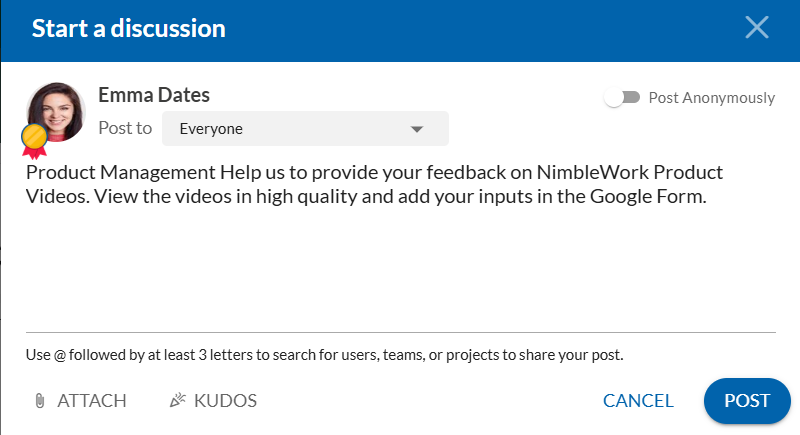
- Click Start a Discussion.
- In the popup, choose Post To: users, teams, or projects who can see the post.
- Teams include project-level and organization-level teams.
- To allow posting to everyone, enable the relevant Application Preferences and configure personas who can publish posts to everyone (Executives, Leads, QC, etc.; details in Application Preferences).

3. Enter your discussion text. Use @ to tag users, teams, or projects.
4. Use ATTACH to upload files:
-
- Single attachment → becomes the cover image automatically.
- Multiple attachments → choose which to set as cover image.
5. Click POST.

You can later edit the post body via Edit Post, but Post To remains read-only. You can view all the discussions in the Discussions panel below.
Card Updates Post
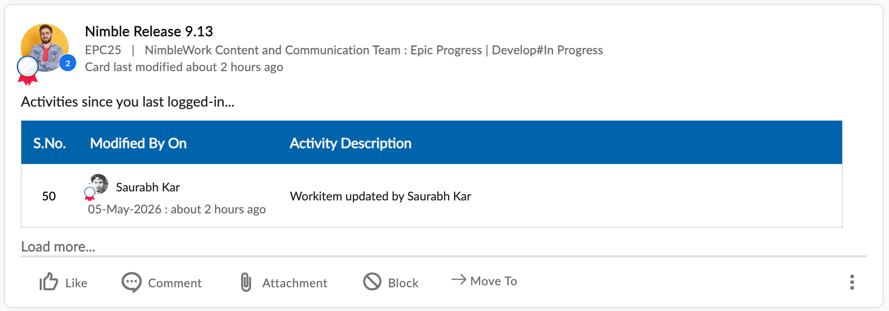
Nimble Café shows updates on cards you’re associated with—such as when you’re a card owner, To-do owner, or collaborator. It displays activities that happened since your last login, including who made the change, what was updated, and when. If a card has multiple updates, you can click Load more… to view the complete list of activity logs.
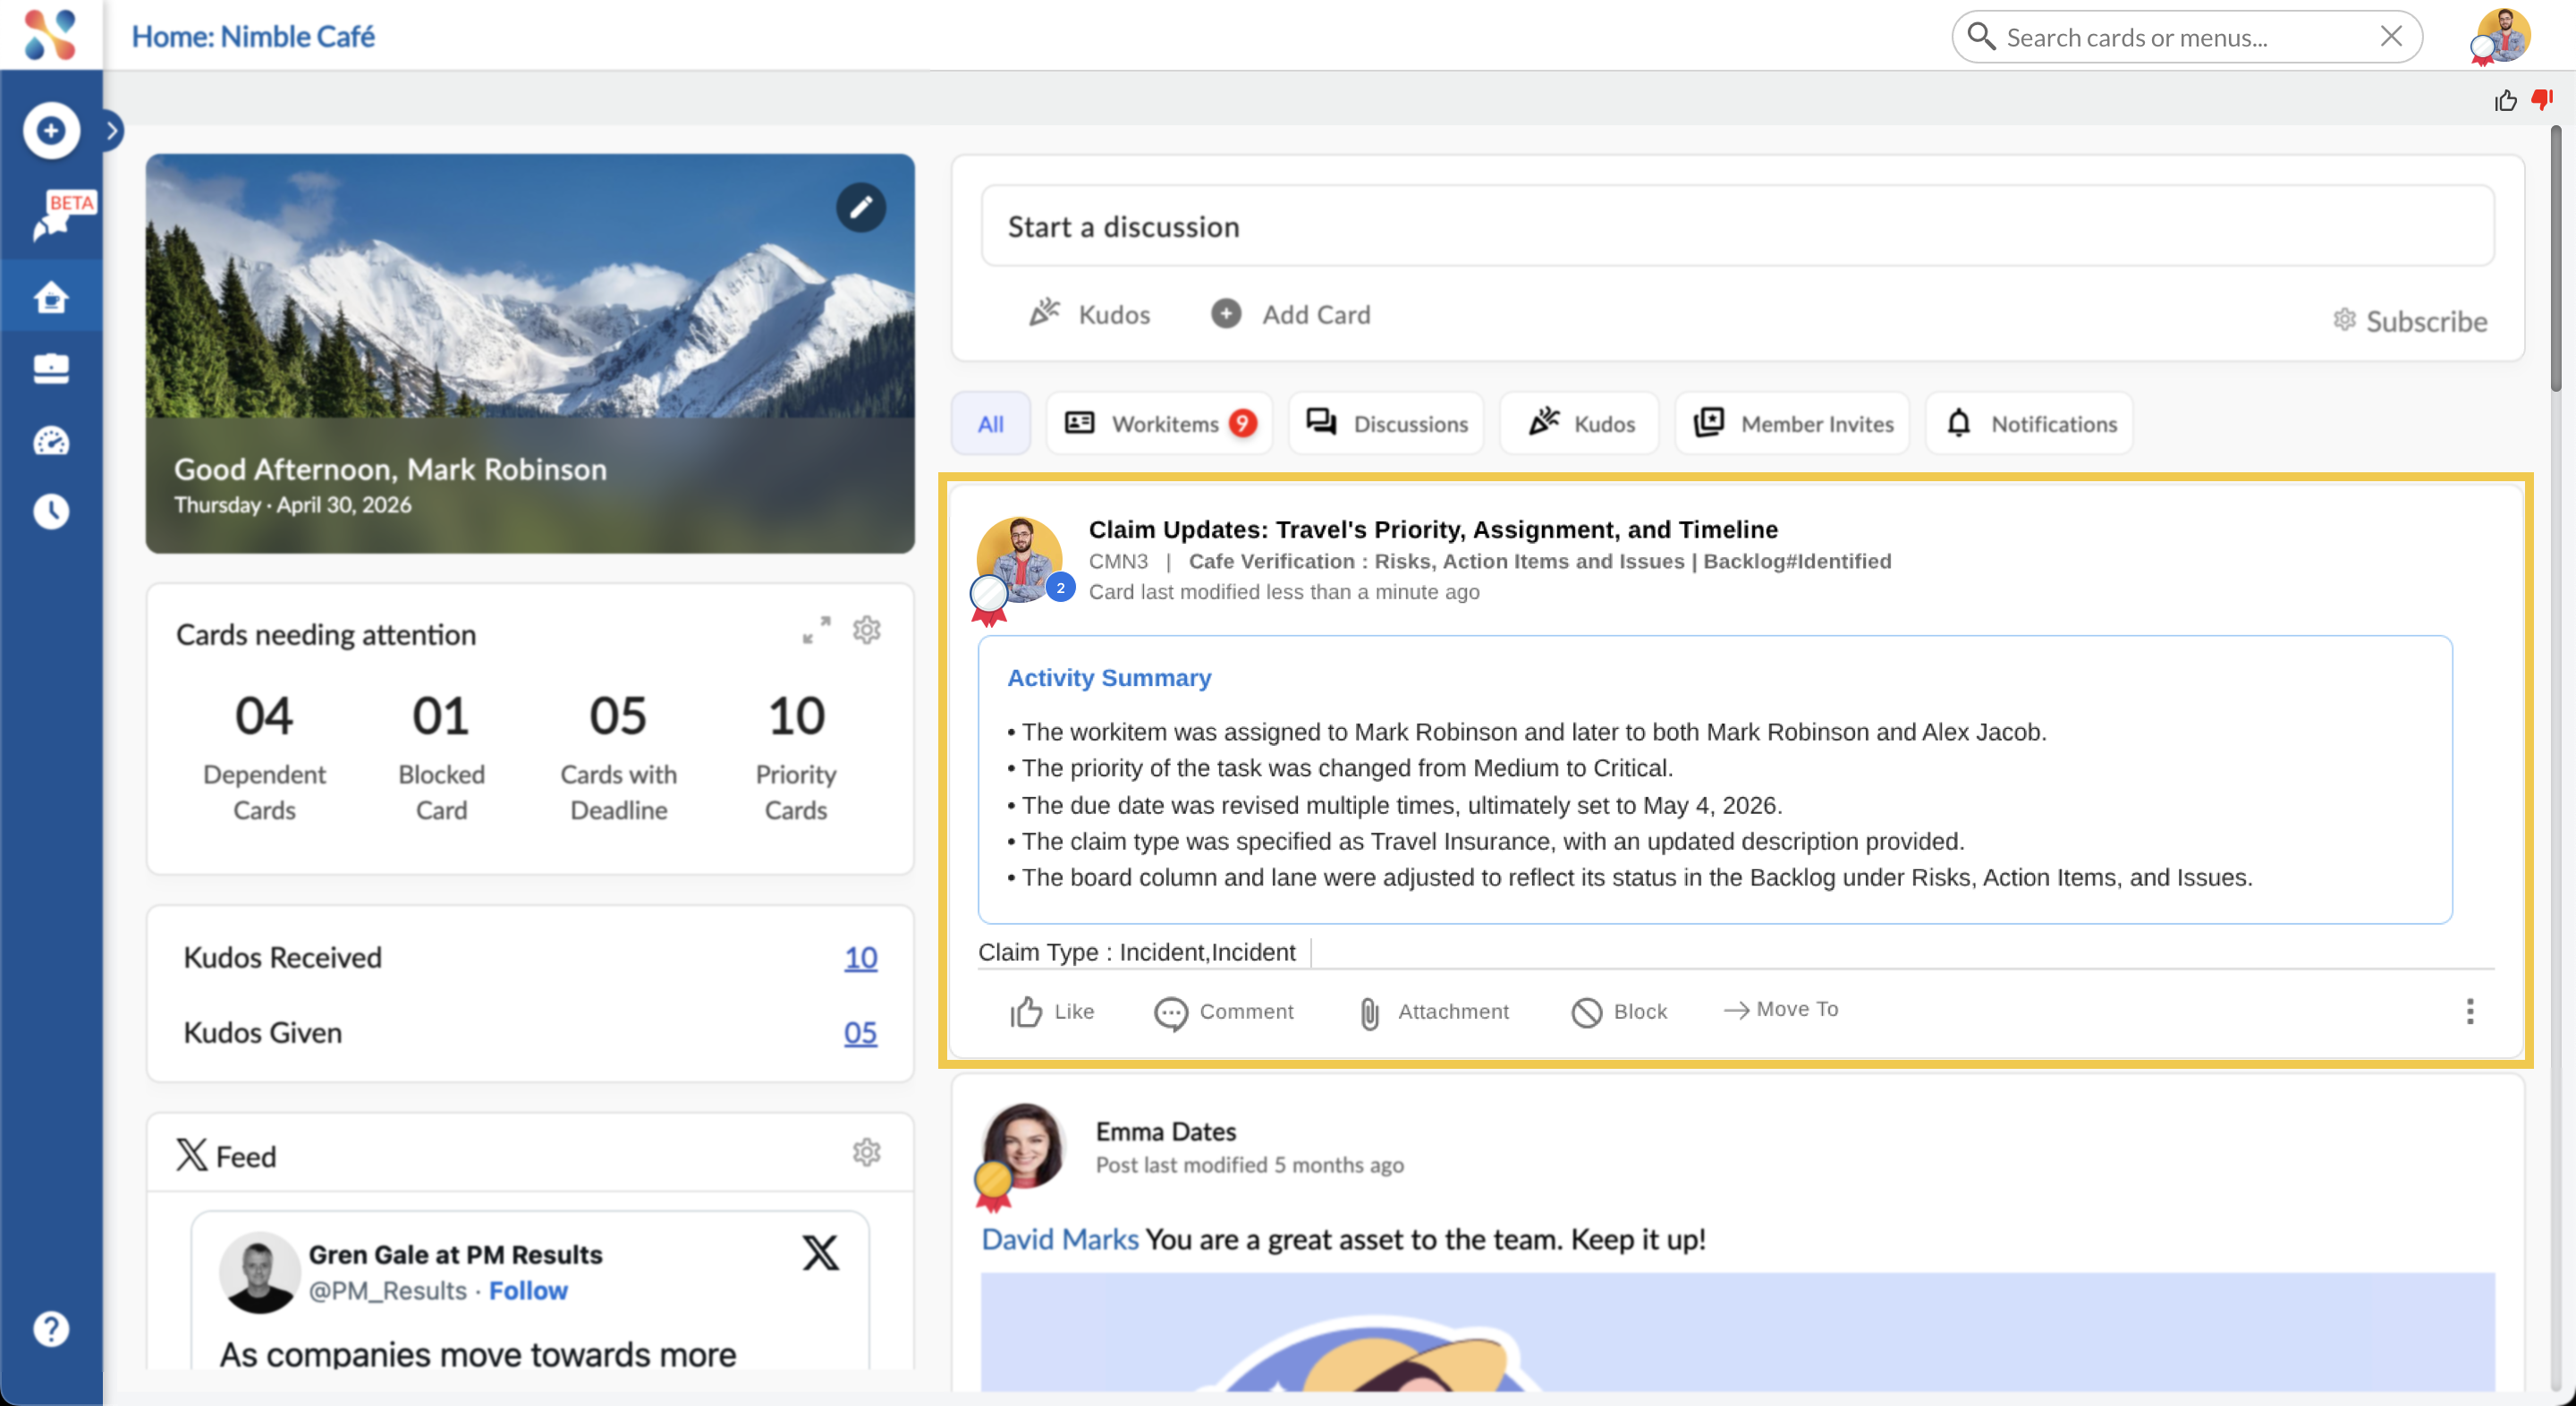
When a workitem has more than 7 updates (New), Nimble Café displays an Activity Summary to help you quickly understand key changes without going through every log. This summary is shown only once after login. After viewing it, the activity section reverts to the detailed log view, ensuring you still have full visibility of all updates whenever needed.
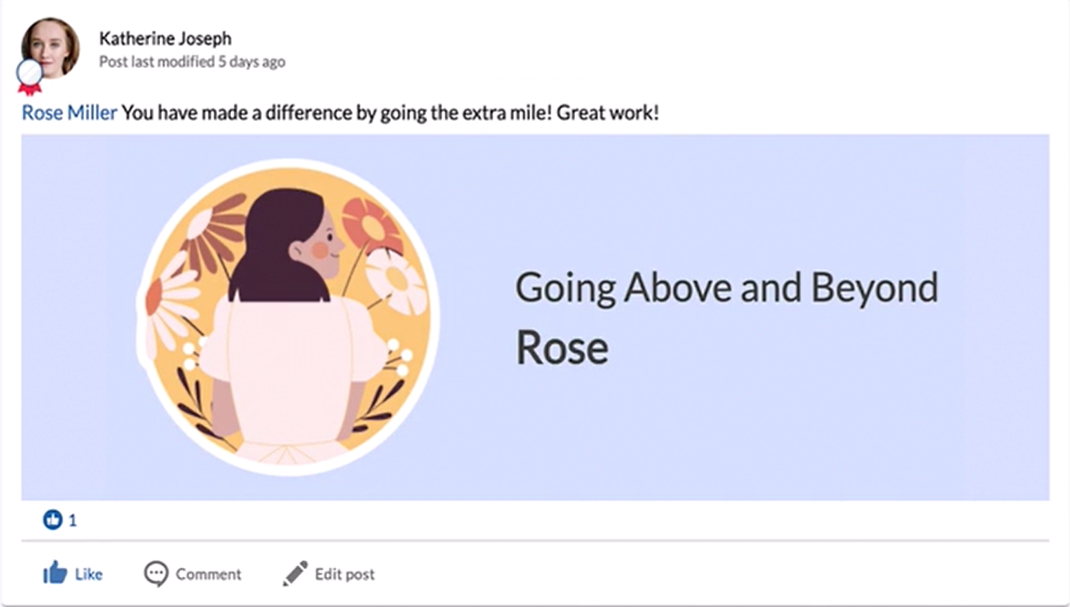
Congratulations Post
- On certification completion, you get an automatic congratulatory post from the Nimble Team.
- System-generated posts are also created for Birthdays and Work anniversaries (requires correct details in User profile → People Management).
Kudos
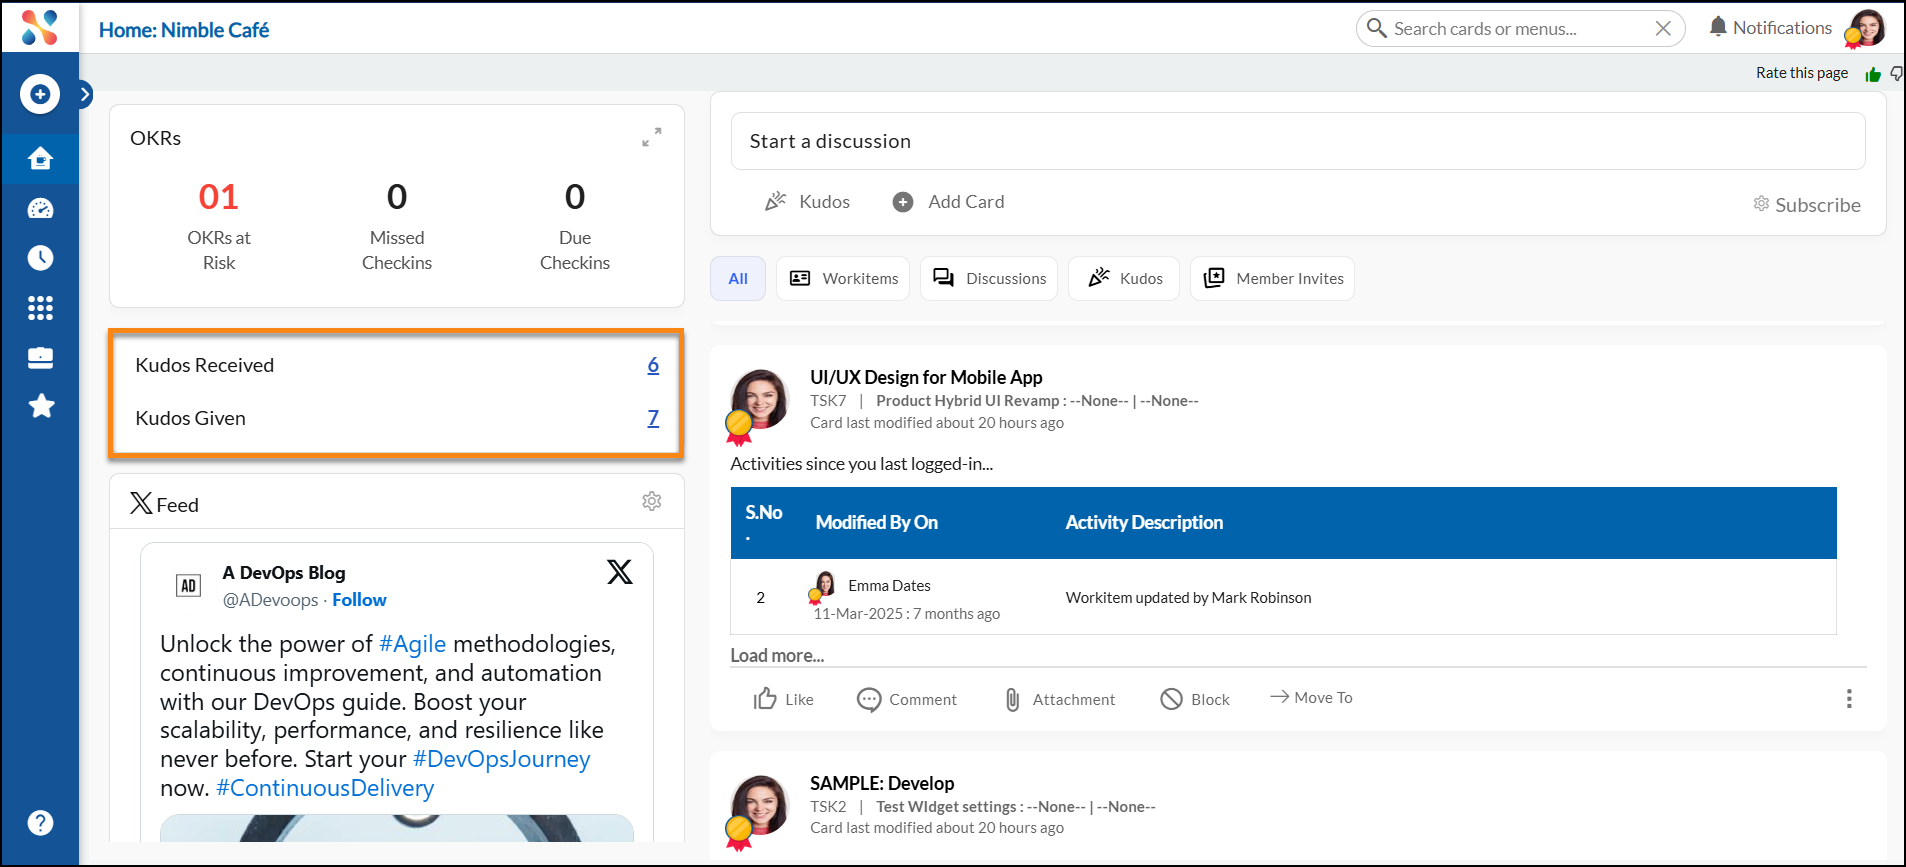
Kudo Widget
- Initially shows “Give your first Kudos” until you send one.
- Then shows:
- Kudos Given
- Kudos Received
- Clicking each shows a list of who you gave kudos to / who gave kudos to you, without needing to navigate away.
Steps to Send Kudos

- Click Kudos.
- Select recipient users or team members.
- Every Kudos sent/received gives points (details in Kudo Points help).
- Configure Post To (everyone or specific members/teams/projects).
- Ensure the relevant preference is enabled if you want it visible to everyone.
- Customize the message text.
- Add image or Custom GIF:
- Default templates like Great Job, Team Player, etc.
- When using a Kudos image, Attachment icon is disabled.
- To use a Custom GIF, click the Custom GIF option, search for the perfect GIF, and select it.

- Click PREVIEW to review.
- Click POST to share.
Actions on a Kudos / discussion post:
- Like
- Comment (add comment and click ADD COMMENT)
- Attachment (add / download / delete / set as cover image)
- Edit Post (body only; Post To remains read-only)
Steps to Create a New Workitem
Create a Workitem (card) directly from Nimble Café:

- Click Add Card.
- Fill:
- Project
- Card type
- Title
- Card Owner
- Click MORE OPTIONS for a full detail view to add more data.
- Click ADD to create.
Actions on a Workitem post:
- Like
- Comment → add comment, see count of comments, and read comments.
- Attachment → add, download, delete attachments.
- Block/Unblock:
- Click Block/Unblock
- Add block code and a blocking comment, click ADD BLOCK, then set Blocking Reason.
- Cannot block/unblock closed workitems.
- Move To:
- Use the Move To icon to select a new column and MOVE the card.
- Cannot move closed workitems.
- More Options → ToDo to open the ToDos segment and add ToDos and related details.

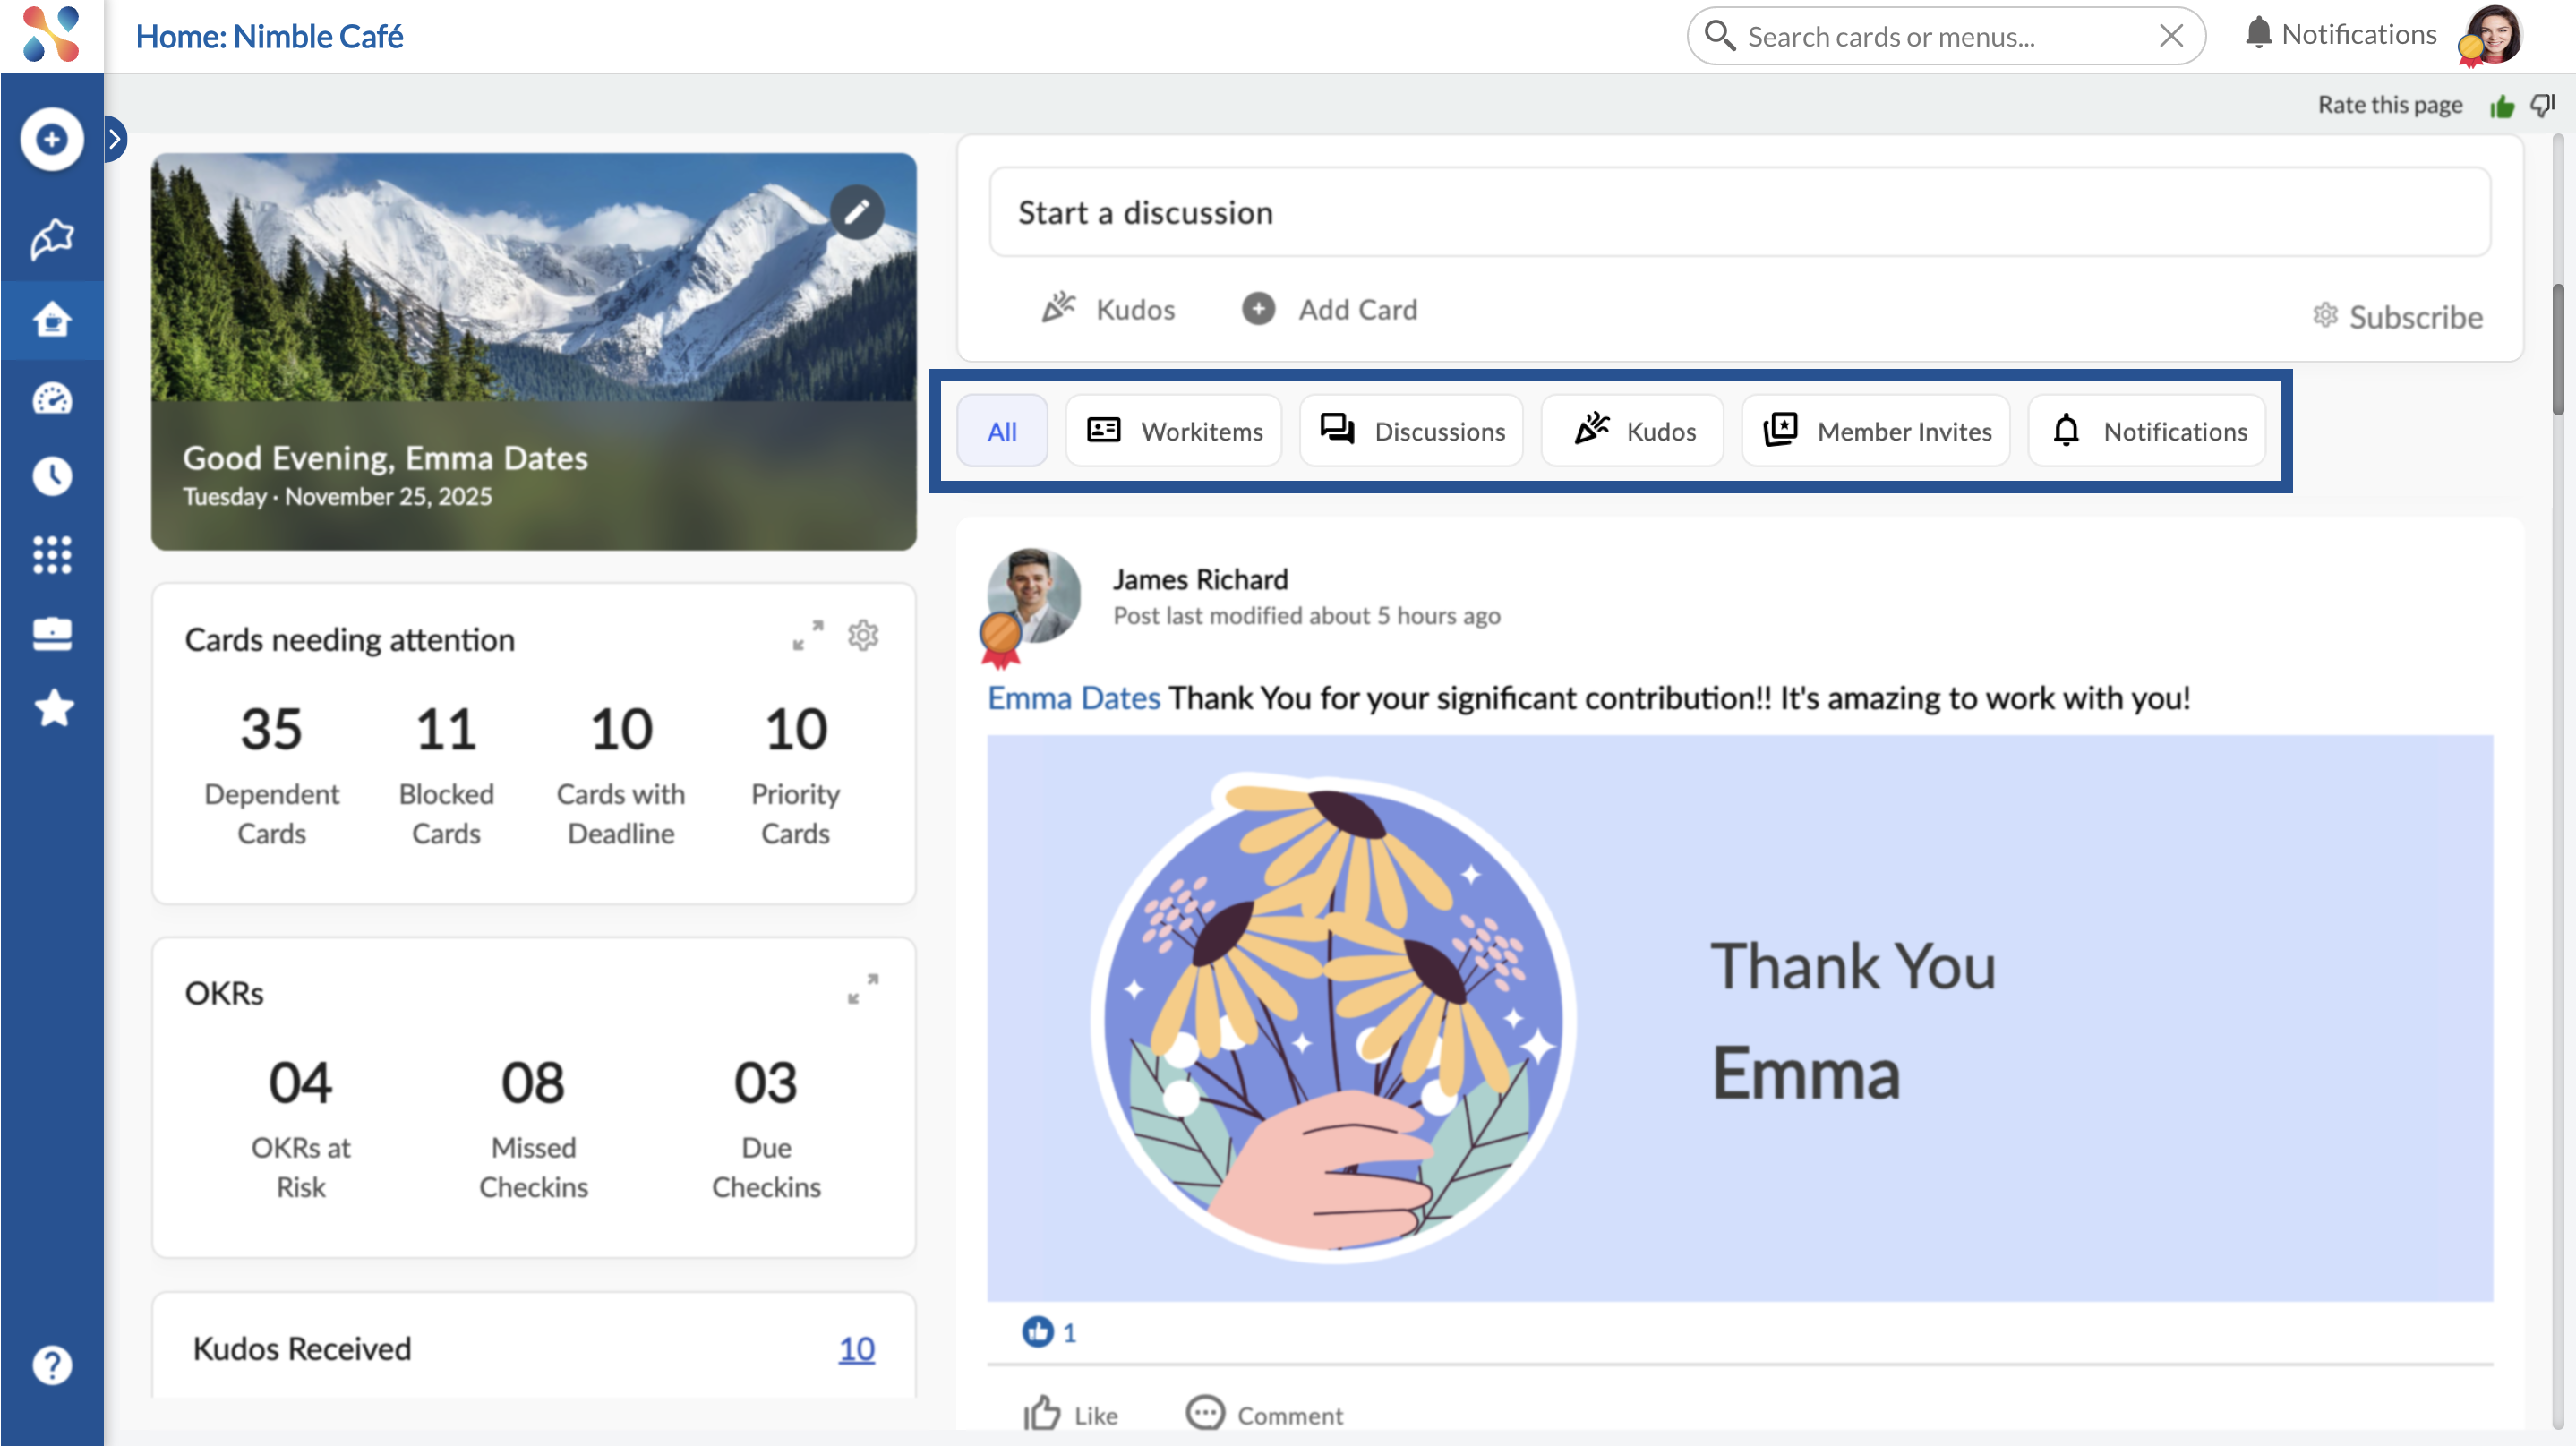
Filter
The Café Feed in Nimble offers a flexible Filter that helps you control what appears in your activity feed. You can filter the feed using the following options:
- All : Displays the full activity feed, including card updates, discussions, mentions, and other non-card activities.
- Workitems: Shows only the posts which are related to cards making it easy to track your updates.
- Discussions: Shows only posts related to discussions, helping you stay on top of all discussions.
- Kudos: Displays posts where members have given or received appreciation.
- Member Invite: Shows posts related to inviting new members.
- Notifications: Shows system-generated updates such as card mentions, assignments, updates or status changes. To control or set your notifications, learn more here.
This allows you to focus on the most relevant information and reduce distractions.
These filtering options help you personalize your feed and stay on top of the updates that matter most to you.
Notifications
The Notifications tab in Nimble Café helps you stay informed about updates that matter to you across Nimble. It brings together notifications from workitems, discussions, kudos, and member invites into a single, centralized view.
Receive Notifications on Nimble Café
The Anatomy of Notification
The key components of notification have been made simple to visualize and use:
- Notification Collapsed View
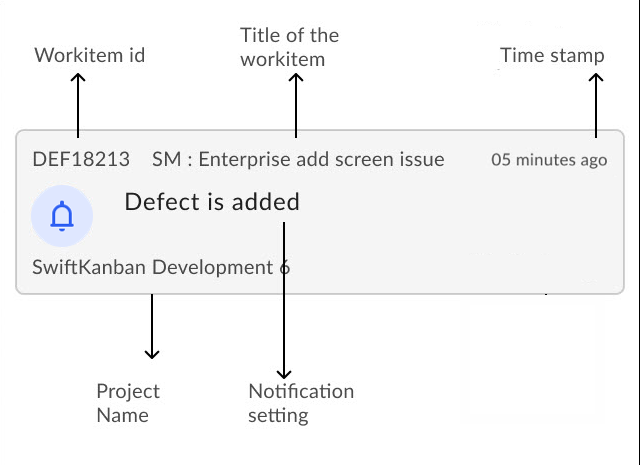
- Notification Detailed View- Click on the notification bar to view the details of the notification.
Notifications Types
- Application Notifications: The application notification allows you to view notifications for events that occurred in the project within the application. Whenever there is a notification, the notification icons are updated and you are notified.
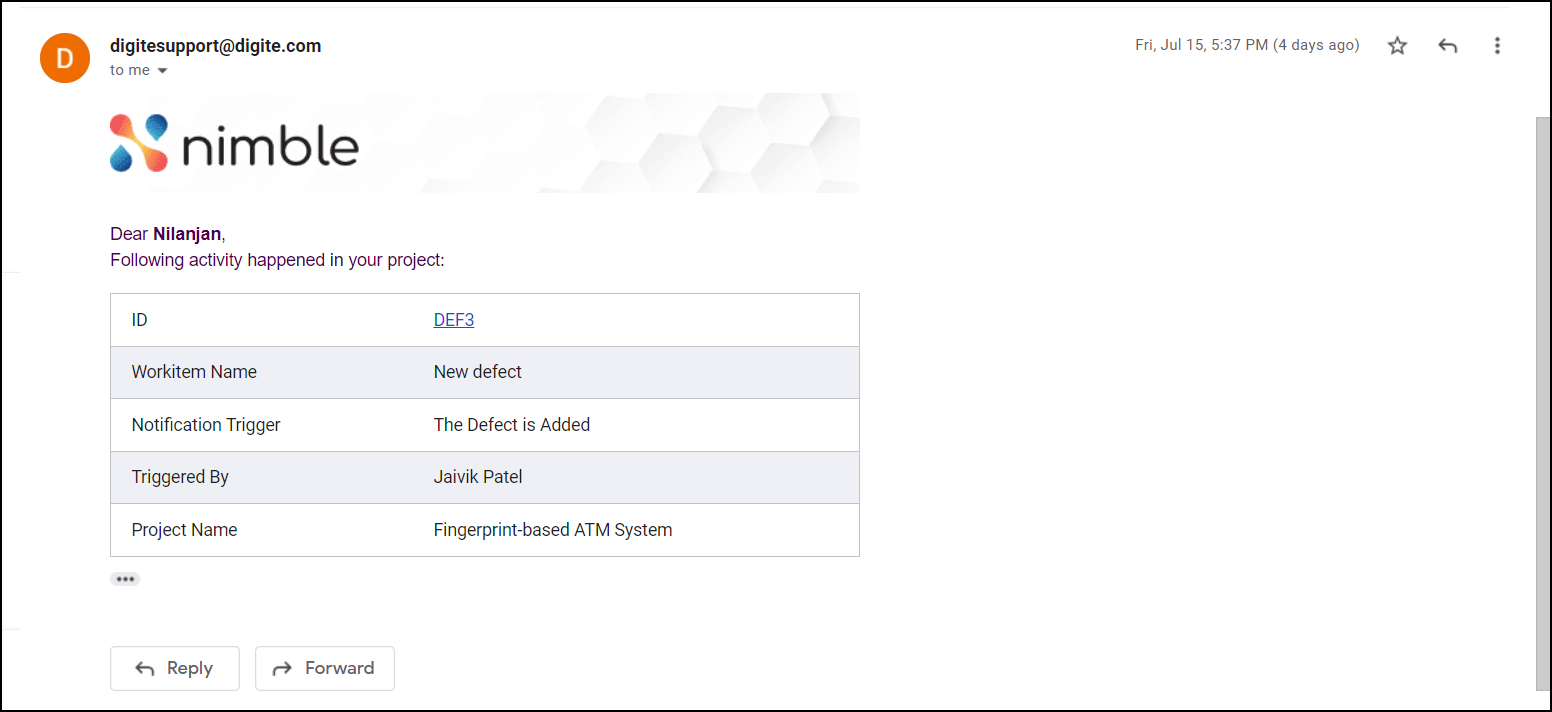
- Mail Notifications: If you set the notifications, you will receive a mail notification in your email for events that have occurred in the project.
For example, if you set the notification for every new workitem assigned to you when an event takes place in the selected project, you will receive a mail notification based on the frequency set in the plan.
Subscribe
- Click Subscribe.
- Choose Team news / Project news topics.
- Click Apply to start receiving notifications on those topics.
Forms Created through Forms 2.0 in Cafe
- Cards created via Forms 2.0 appear in Nimble Café only if the Card Owner is set on the card.
- So the Card Owner field must be enabled in the Form configuration.
- Availability of Comments, Attachments, Block, and ToDo icons on these cards depends on whether those features are enabled in the Form configuration.
- You can edit, delete, or reply to comments on these card.
View Badges on Profile Picture
To appreciate the work of every member, you can send kudos, and depending on the reward points, you can view badges on the profile picture of the users.
Kudos generate reward points:
- 2 points for each Kudos you send.
- 10 points for each Kudos you receive.
- If Kudos is sent to a team, each team member gets 10 points.
Based on total received points, badges appear on your profile picture:
- Gold: Top 5% of users by Kudos received.
- Silver: Next 15% (6–20%).
- Bronze: Next 30% (21–50%).
- No Badge: Not in the top 50%.
Badges depend on a nightly scheduler, so if badges look wrong, check that the scheduler is running.
Where badges appear:
|
|
|
|
|

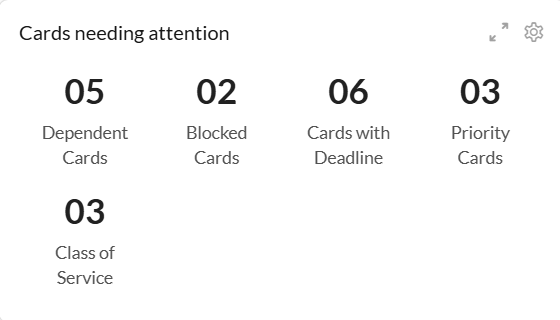
Cards Needing Attention
The CNA section surfaces cards that need attention. It has:
- Metric view (default; “No card” image if none).
- Board view for visual card layout.
- CNA Settings to control what is counted and displayed.
CNA can show:
- Blocked Cards – all open cards that are blocked.
- Dependent Cards – cards with dependencies.
- Cards with Deadline – open cards with due dates.
- Priority Cards – cards with Priority (Critical, High, Medium, Low).
- Class of Service – cards categorized by business impact.
Cards Needing Attention Settings
You configure what appears:

- Dependent Cards (Successor Card) are due in
- Default: successor cards due in 5 days.
- You can change the number of days.
- Card is blocked
- When enabled, it counts open blocked cards.
- Cards with deadline
- When enabled, you can select:
- Project
- Card type(s)
- Date attribute (due date field)
- Value (days into the future; 2-digit max)
- System shows all open cards due within that period, plus any overdue ones.
- Default: all projects, all card types, Due date attribute, 5 days.
- When enabled, you can select:

- Cards with priority
- Default: Critical priority for all card types in all projects.
- Configure:
- Project
- Card types (multi-select)
- Attribute: Priority (fixed)
- Values: selected priority levels.
- Cards with Class of Service
OKRs
The OKRs section displays the objectives and key results that are at risk and need the user’s attention. It shows the count of only the objectives and key results where the user is set as the Owner. It shows the following information –
OKRs at Risk – It shows the count of objectives and the key results that are not progressing at the expected speed and are at risk. To know about how the progress of an objective is calculated, read here.
Missed Checkins – It shows the objectives that the user missed checkin. Here, checkin on an objective means updating the current value in the key result. In other words, if the Current Value field on a key result is not updated from the last check-in day of the objective, then that OKR is counted for missed check-in, and the count of such objectives is shown here.
Due Checkins – It shows the objectives that are due for checkins on the same day. For example, if you have two objectives on your name on which Check-in Day is set as Monday, then on Monday, you will see the Due Checkin count as 2.
X Feed
Brings in external X (Twitter) feeds based on your interests.
To configure the X Feeds, do as follows:
- Click Settings in the X Feed block.
- Choose number of feeds: 5, 7, or 10.
- Enter up to 5 hashtags, separated by Space / Enter / Comma
- Example:
#humanizework,#workmanagement,#futureforward.
- Example:
- Click SAVE.
You’ll then see X posts matching those interests in Nimble Café.
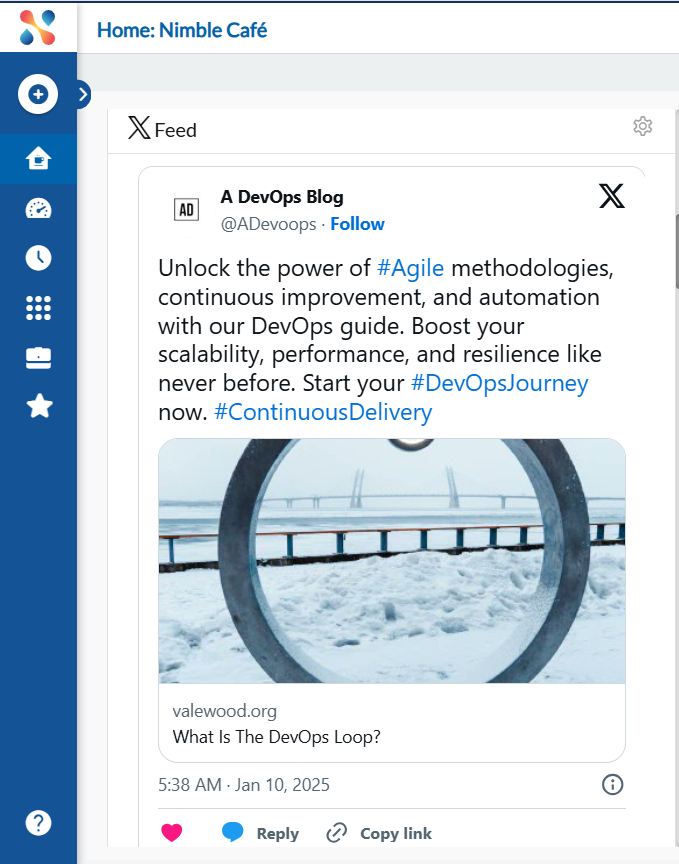
Note: To Like, Reply, or Share an X post, you must log in to X. You are then redirected to X’s page to take those actions.
