
In this article, we will help you understand how to define a rule on a field in a form using the Form 2.0 Configuration.
|
Skip Ahead to: |
Introduction
Rules let you set conditions on fields so their appearance changes based on the value entered.
For example: In a Marks field, if a student gets 36 or more, the field can appear in green, and if the marks are below 36, it can appear in red.
Similarly, if a user enters a title in the Name field, it can be highlighted in red to indicate it’s not allowed.
- This tab is available for Field blocks and List Item block fields.
There are three types of Rules –
Font Color Decorator Rule
Font color decorators let you set conditions on a field so that when the condition is met, the font color changes accordingly. You can define multiple rules on the same field.
For example, if you create three rules — Rule A, Rule B, and Rule C — with colors Green, Blue, and Grey:
-
If the condition for Rule A is met, the font becomes Green.
Note: Only one rule can be applied at a time, so the field will display only one font color based on the first matching rule.
To define a rule based on font color, perform the following steps –
- Click the Rule tab.
- Click the Add Rule button next to Font Color.
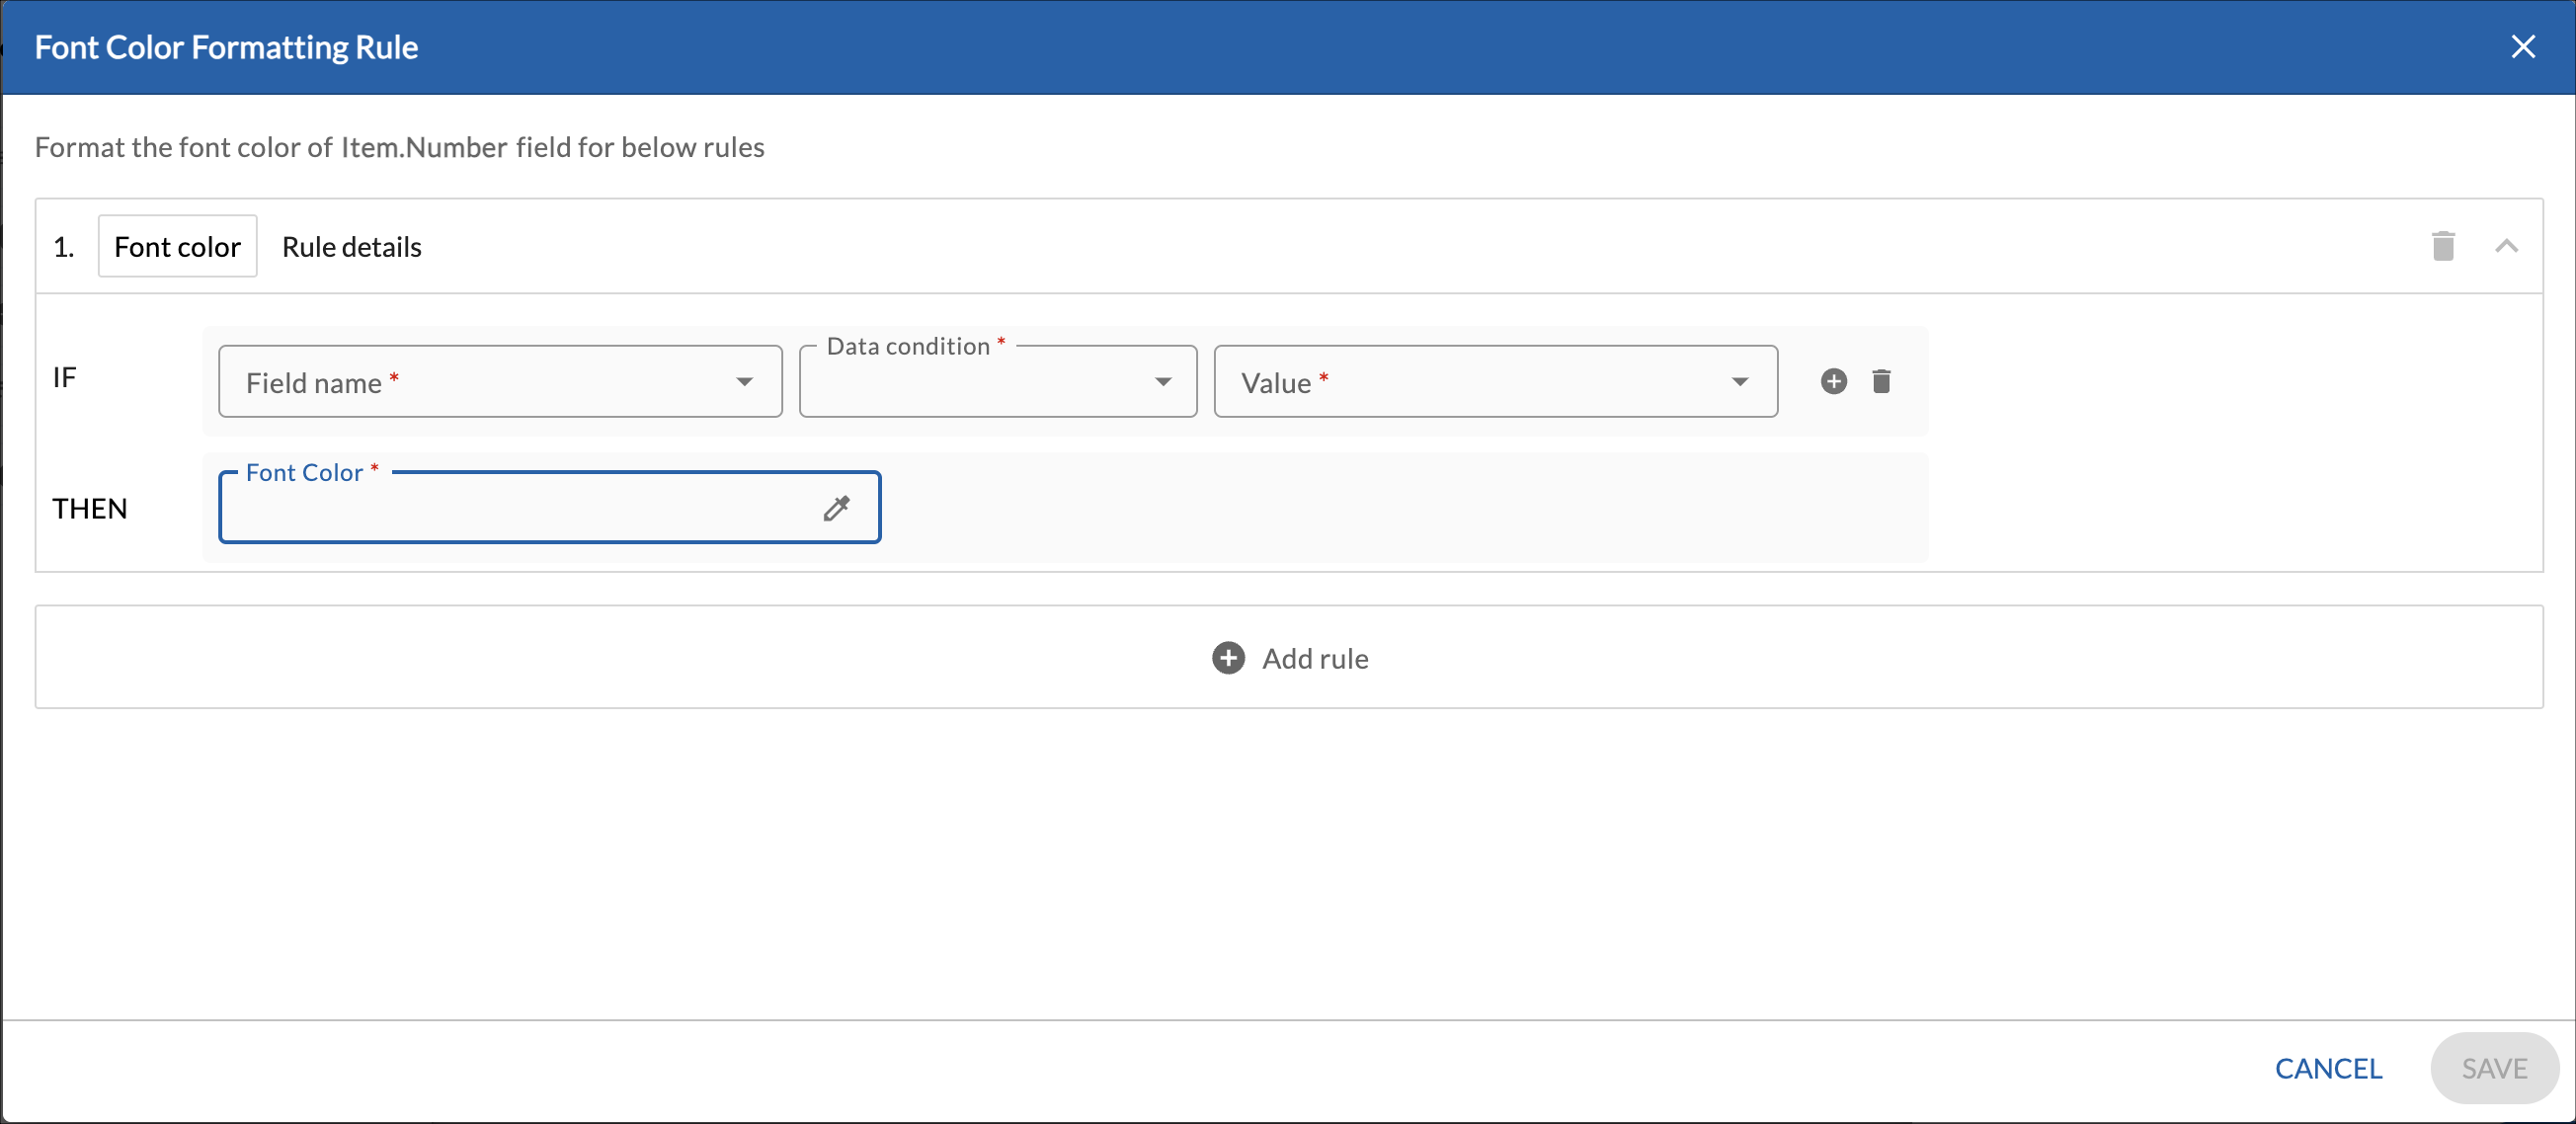
- Select the name of the field from the Field name list. It displays all the fields available in the form. You can define a rule on the value of any field available in the form.
- Select the condition from the Data Condition drop-down list such as if the specified value is equal to or contains the given characters etc. These conditions change as per the field selected in the previous field.
Field Type Conditions Number Field: is equal to, is not equal to, greater than, greater than or equal to, less than, less than or equal to Text Field: is equal to, is not equal to, contains, does not contain Multi-Line or RTF: contains, does not contain Master List Field: is, is not, is any of, is not any of, contains, does not contain URL Field: is equal to, is not equal to - Enter the value in the Value field.
- Specify the color name in the Font color field. If the given condition is met, then the font of the specified field will be set to this color.
- To specify more than one condition, click the Add rule icon.
- To add multiple conditions, click the Add Rule icon and define the next rule.
- Click Save to apply the rule.
- Font Color Decorator rules are available in single-line, multi-line, Numbers, and URL fields.
Icon Decorator Rule
An Icon Decorator lets you display an icon next to a field value when its condition is met.
For example, if marks are below 50, a minus icon can appear, and if marks are above 50, a plus icon can be shown. You can set additional conditions such as showing an upward arrow when a number is greater than 200, a downward arrow when it is less than 100, and a straight-line icon when the value falls between 100 and 200.

To define a rule based on the icon decorator, perform the following steps –
- Click the Rule tab > Icon Decorator next to Add Rule.
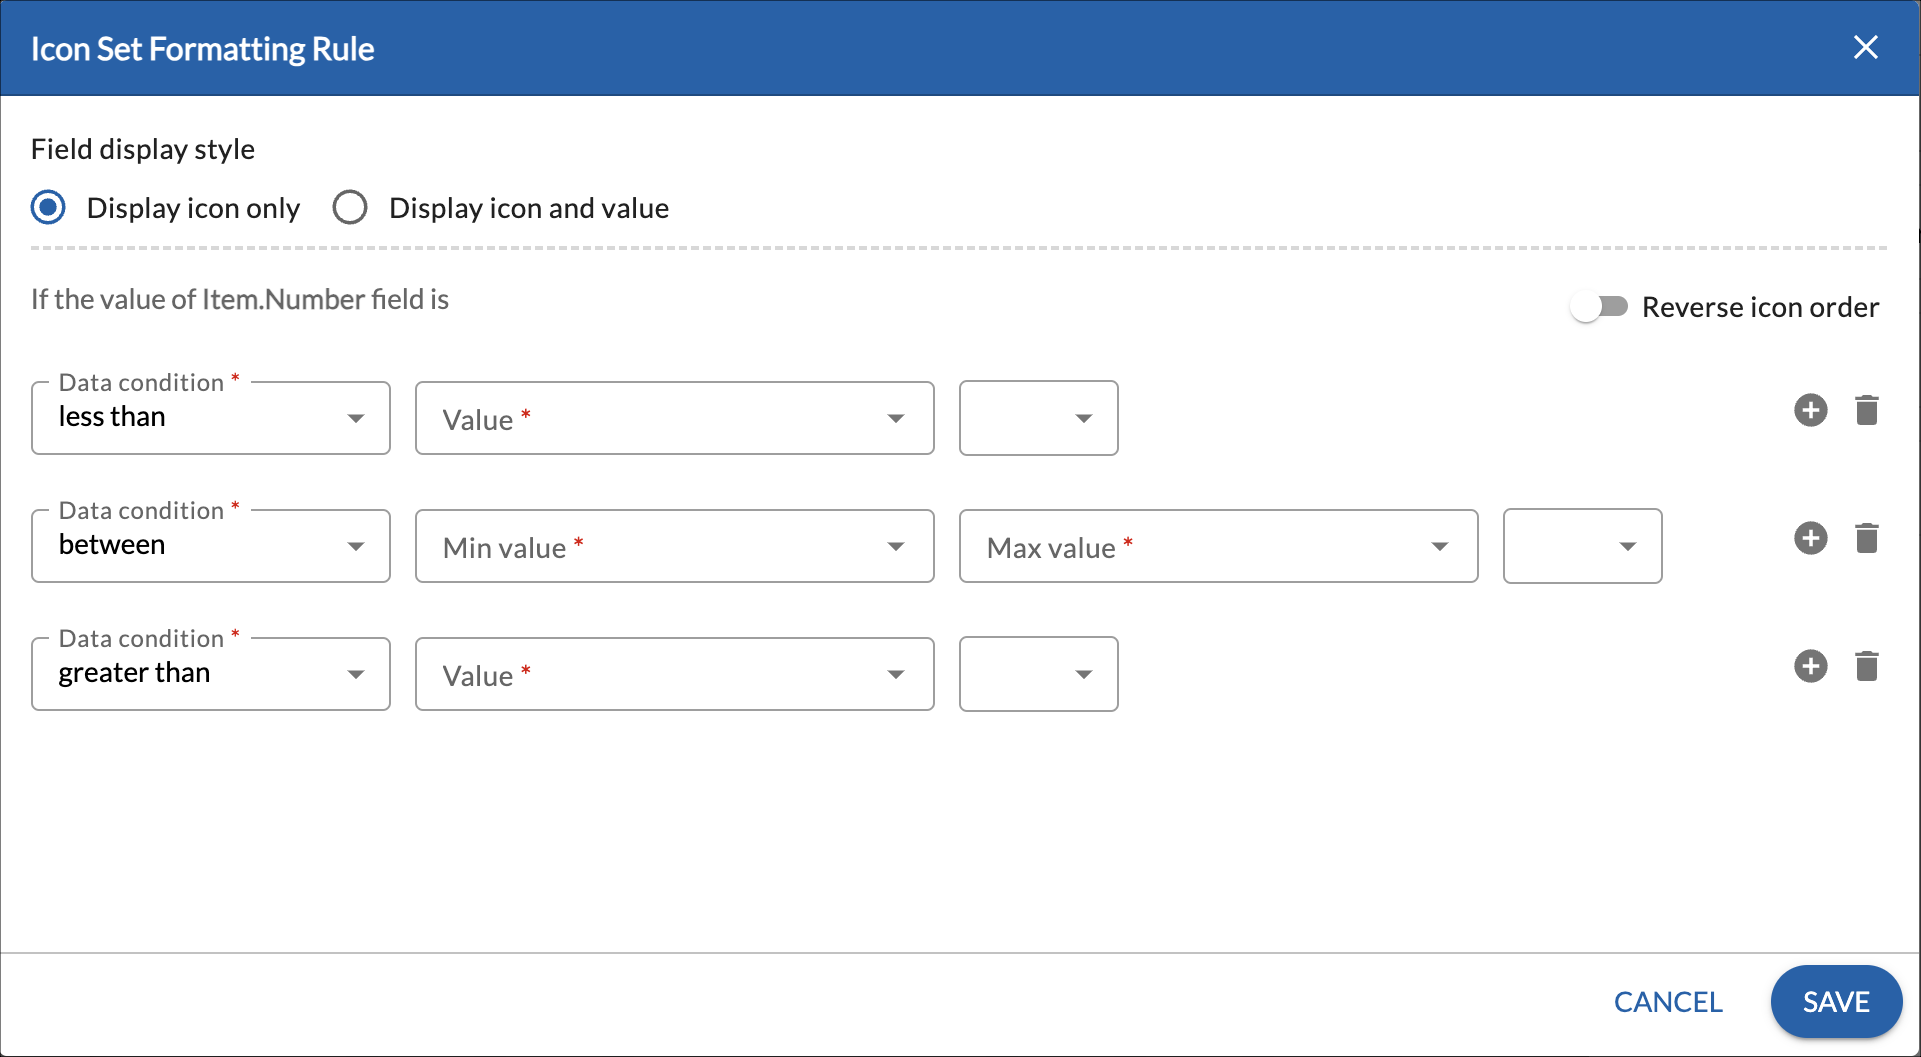
- Specify the condition such as less than, greater than, or between.
- Specify the value and the icon for the conditions.
- By default, three conditions are shown, however, you can add or remove them from the conditions.
- To add more conditions, click the Add icon.
- To remove a condition, click the Delete icon.
- To keep the condition same but reverse the order of the icons, turn on the Reverse icon order toggle.
- Click the Save button.
| Note: Icon Decorator rules are available in the Numbers field only. |
Validation Rule
A validation rule lets you display a message when certain conditions are not met. For example, if a required field like Price is left blank, you can set a rule that shows a message such as “Please enter the price of the item to proceed.”
Similarly, we can configure another validation where is the entered value is more than the set limit, then it shows a message.

To add a rule based on validations, perform the following steps –
- Click the Rule tab.
- Click the >Add Rule button next to the Validation rule.
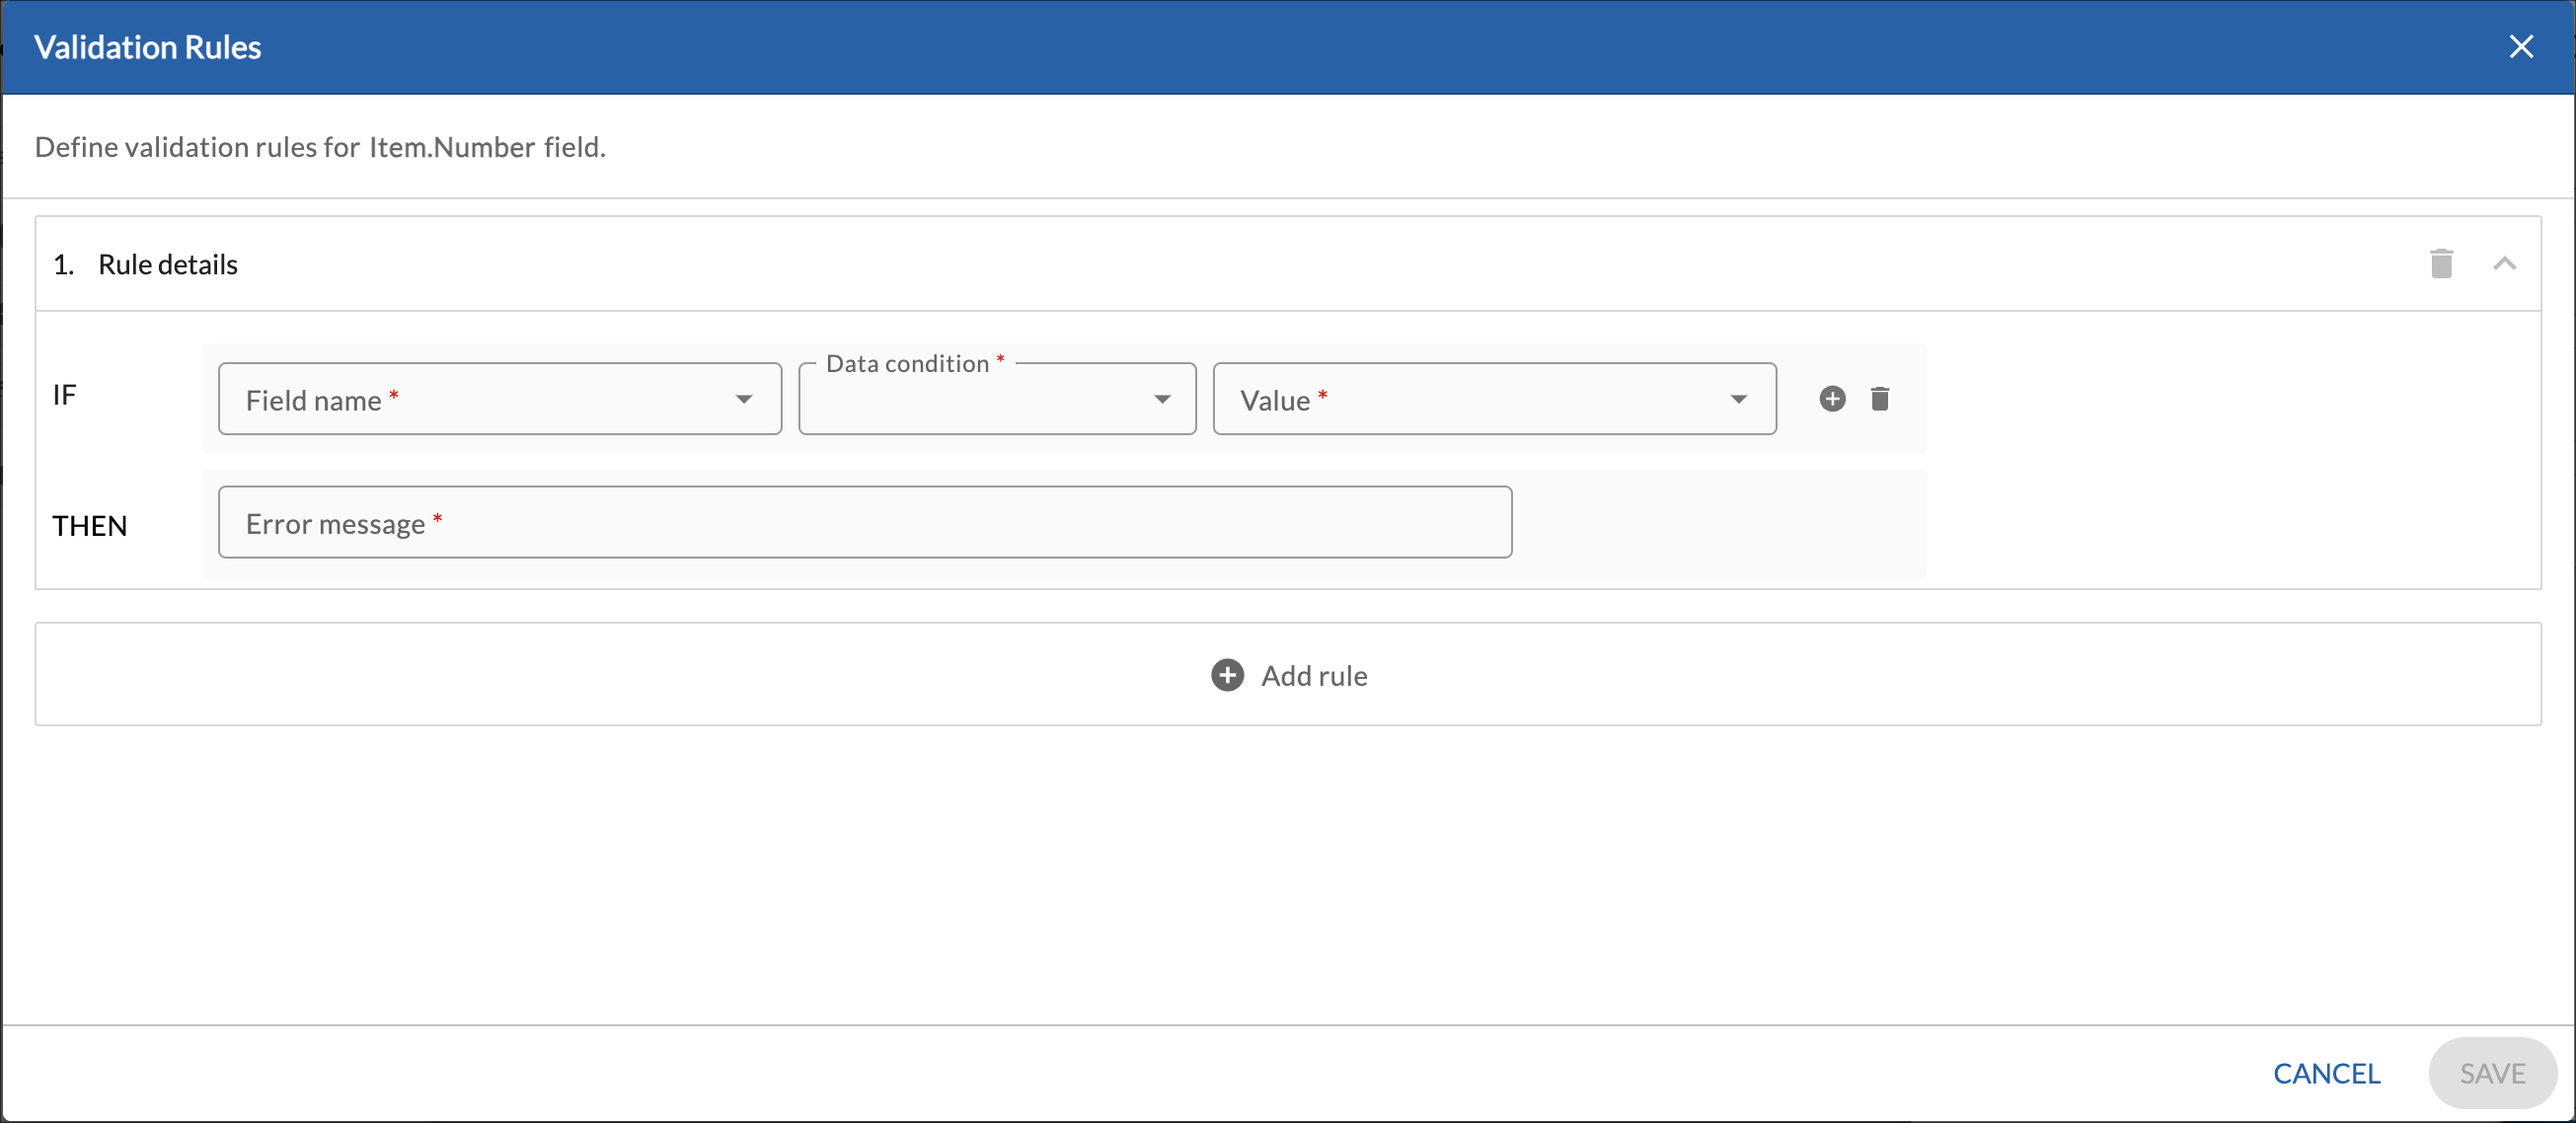
- For the IF condition, select the name of the field from the Field name list. It displays all the fields available in the form. You can define a rule on the value of any field available in the form.
- Select the condition from the Data Condition drop-down list such as if the specified value is equal to or contains the given characters etc. These conditions change as per the field selected in the previous field.
- Enter the value in the Value field.
- For the THEN condition, enter the message that you want to show on the screen if the given condition is met.
- Click the Save button.
| Note: Validation rules are available in single-line, multi-line, numbers, master List, and URL fields. |