
In this article, we will help you to understand the Advanced Field Types in Form 2.0.
|
Skip Ahead to: |
Introduction
As the names suggest the advanced field types have advanced capabilities to define a filed type in Form 2.0. There are three advanced field types in Form 2.0.
Master List
Forms 2.0 allows you to use the master list as the field value in a form. You can use the project master list as well as the organization master list in the form to use as the values of a drop-down list.
Details
| Fields | Description |
| Display Label | Enter the name that you want to give to the field. It will be visible to the users in the form, such as First Name, Last Name, etc. |
| Hide display label | Turn on this toggle to hide the label of the field so that the input field appears without any label on it. |
| Field Name | Enter a unique name that will be only used by the system to identify this field. It will not be visible to a user. |
| Helper text | Enter a helper text that will be visible to the user inside the field so that the user can enter the relevant information. For example, you can enter helper text for a name such as – Enter a name without a title. |
| Dropdown type | It has two options – Single-select and Multi-select. Select the appropriate option to specify whether you want the user to select one value at a time or multiple values at a time. |
| Enable search-select | Turn this toggle On to allow the user to search the values in the drop-down by entering the initials of the value. For example, in the list of Countries, entering the character “in” will list all the countries having the letters “in” in it such as India, Indonesia, etc. |
| Search Master List | Select a master list from the drop-down list that you want to use in your field. |
| Reposition field |
Use this option to move the field between different blocks within the same tab or to a different tab. |
Validations
Rules
The rule is useful if you want to set a condition for your field. For example, if the specific value is selected then the color of the field changes to a predefined color to highlight the field.
There are two types of Rules –
Lookups
Forms 2.0 allows you to use a field from an existing form to your form. For example, if you have a form named Order and a field named Name and want to use the same Name field in a new form called Purchase Order, then you can do that with the help of Lookups. A Lookup field has the following settings –
Details
| Fields | Description |
| Display Label | Enter the name that you want to give to the field. It will be visible to the users in the form, such as First Name, Last Name, etc. |
| Hide display label | Turn on this toggle to hide the label of the text field so that the input field appears without any label on it. |
| Field Name | Enter a unique name that the system will only use to identify this field. It will not be visible to a user. |
| Helper text | Enter a helper text that will be visible to the user inside the field so that the user can enter the relevant information. For example, you can enter helper text for a name such as – Enter a name without a title. |
| Dropdown type | It has two options – Single-select and Multi-select. Select the appropriate option to specify whether you want the user to select one value at a time or multiple values at a time. |
| Enable search select | Turn this toggle On to allow the user to search the values in the drop-down by entering the initials of the value. For example, in the list of Countries, entering the character “in” will list all the countries having the letters “in” in it such as India, Indonesia, etc. |
| Search Master List | Select a master list from the drop-down list that you want to use in your field. |
| Lookup form | Select the form field you want to use in your form. It also displays list instances from Lists 2.0. Learn more about it here. |
| Lookup field | When you select the form, all the fields of that form along with its block name appear in this list. Select the field that you want to select. If a segment of a form has two fields with the same name, then both fields will be listed in this list. The field names are followed by the segment name in the list so that it is easy to select the right field. |
| Add fields of Lookup Form | Based on the Lookup field chosen by the configurator list of fields would appear in this section. With the help of this property, the configurator would be able to set the associated field for the lookup. These fields are read-only fields whose values appear based on the value set on the main lookup field. For example, In the purchase order form, there is a lookup field Vendor name, and the associated field is Vendor Location which is referenced from the Vendor Form. End users when they create a purchase order form by selecting the value of the Vendor Name field, the Vendor Location field value would get the value.
You can also provide an alternate label name to these read-only fields to avoid conflicts in the current form. let’s say If the form already contains fields with similar or identical names, you can rename the read-only fields to something unique. This helps prevent overlap with other fields in the form. |
| Reposition field |
Use this option to move the field between different blocks within the same tab or to a different tab. |
Validations
| Mandatory | Set the toggle on if you want to make your field mandatory. |
| Hide Field | Set the toggle on if you want to hide this field. |
| Field Type | Set whether you want to set this field as read-only or editable. |
While selecting a lookup field from a form, you can also select the associated field of a lookup field by simply selecting the check boxes of the relevant fields. The associated fields are non-editable/read-only. In the given image, The Order Number is the Lookup field from the Item form while the Price, Amount, Discount, etc are the associated field.

Formula
Forms 2.0 allows you to add a formula in a field so that it automatically calculates the values depending upon the formula and shows the calculated value in the form. This is useful when you want to design a form that automatically calculates values and saves a lot of human effort and chances of mistakes in manual calculation.
Details
| Fields | Description |
| Display Label | Enter the name that you want to give to the field. It will be visible to the users in the form, such as First Name, Last Name, etc. |
| Hide display label | Turn on this toggle to hide the label of the formula field so that the input field appears without any label on it. |
| Field Name | Enter a unique name that the system will only use to identify this field. It will not be visible to a user. |
| Helper text | Enter a helper text that will be visible to the user inside the field so that the user can enter the relevant information. For example, you can enter helper text for a name such as – Enter a name without a title. |
| Field icon | Select an icon from the available list of icons to display with the filed name in the form. |
| Formula | Enter a unique name for the formula that you are configuring in the formula builder. |
| Reposition field |
Use this option to move the field between different blocks within the same tab or to a different tab. |
Validations
Rules
The rule is useful if you want to set a condition for your field. For example, if the specific value is selected then the color of the field changes to a predefined color to highlight the field.
There are two types of Rules –
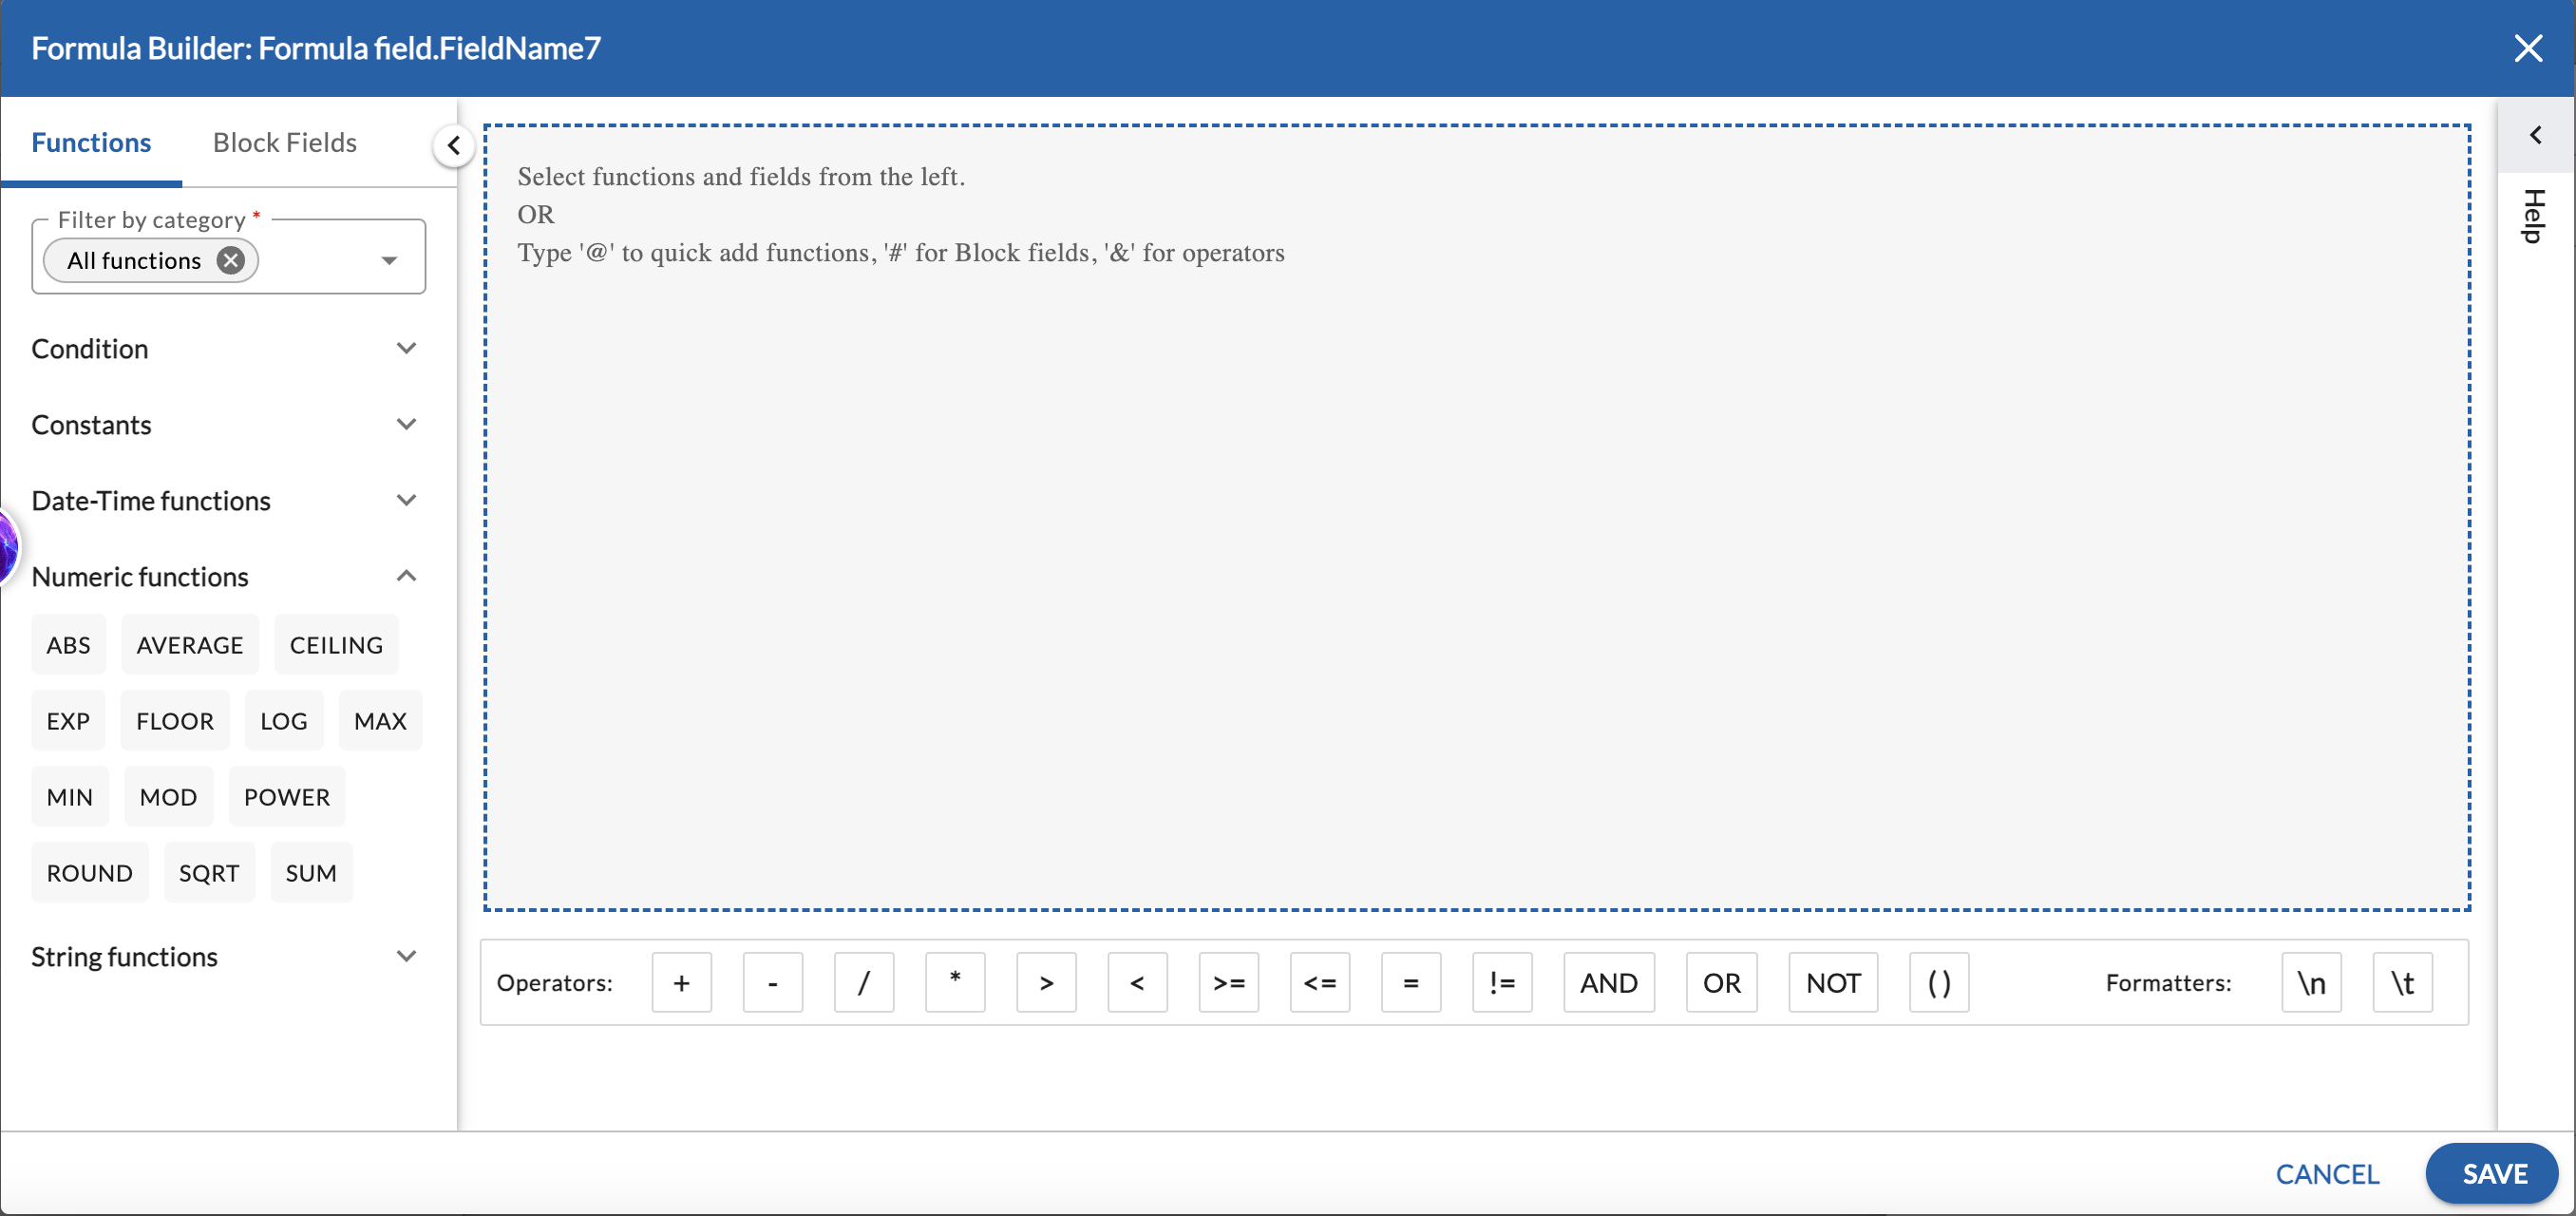
Configuring a Formula in the Formula Builder
The Formula Builder in Form 2.0 allows you to configure a formula and apply it to the formula field so that the field’s value is automatically calculated based on the given formula. It has predefined functions, conditions, and operators to help you configure a formula. The left panel in the formula builder contains all the conditions and functions while the bottom bar contains all the available operators.
To configure a formula, perform the following steps –
- Insert the formula field in the required field segment of the form.
- Clock the formula field. The Reposition, Settings, and Delete icons are enabled.
- Click the Settings icon.

- On the Details tab, click Configure Formula. The Formula Builder appears.
- On the left pane, click the Block Fields tab and expand the required field segment.
- Drag the required field name to the Configure area. You can also enter # and select the required field name from the list.
- Click the required operator at the bottom bar. You can also enter the required operator with the keyboard.
- To insert a function in the field or formula, click the Functions tab and drag the required function. You can also enter @ and select the required function.
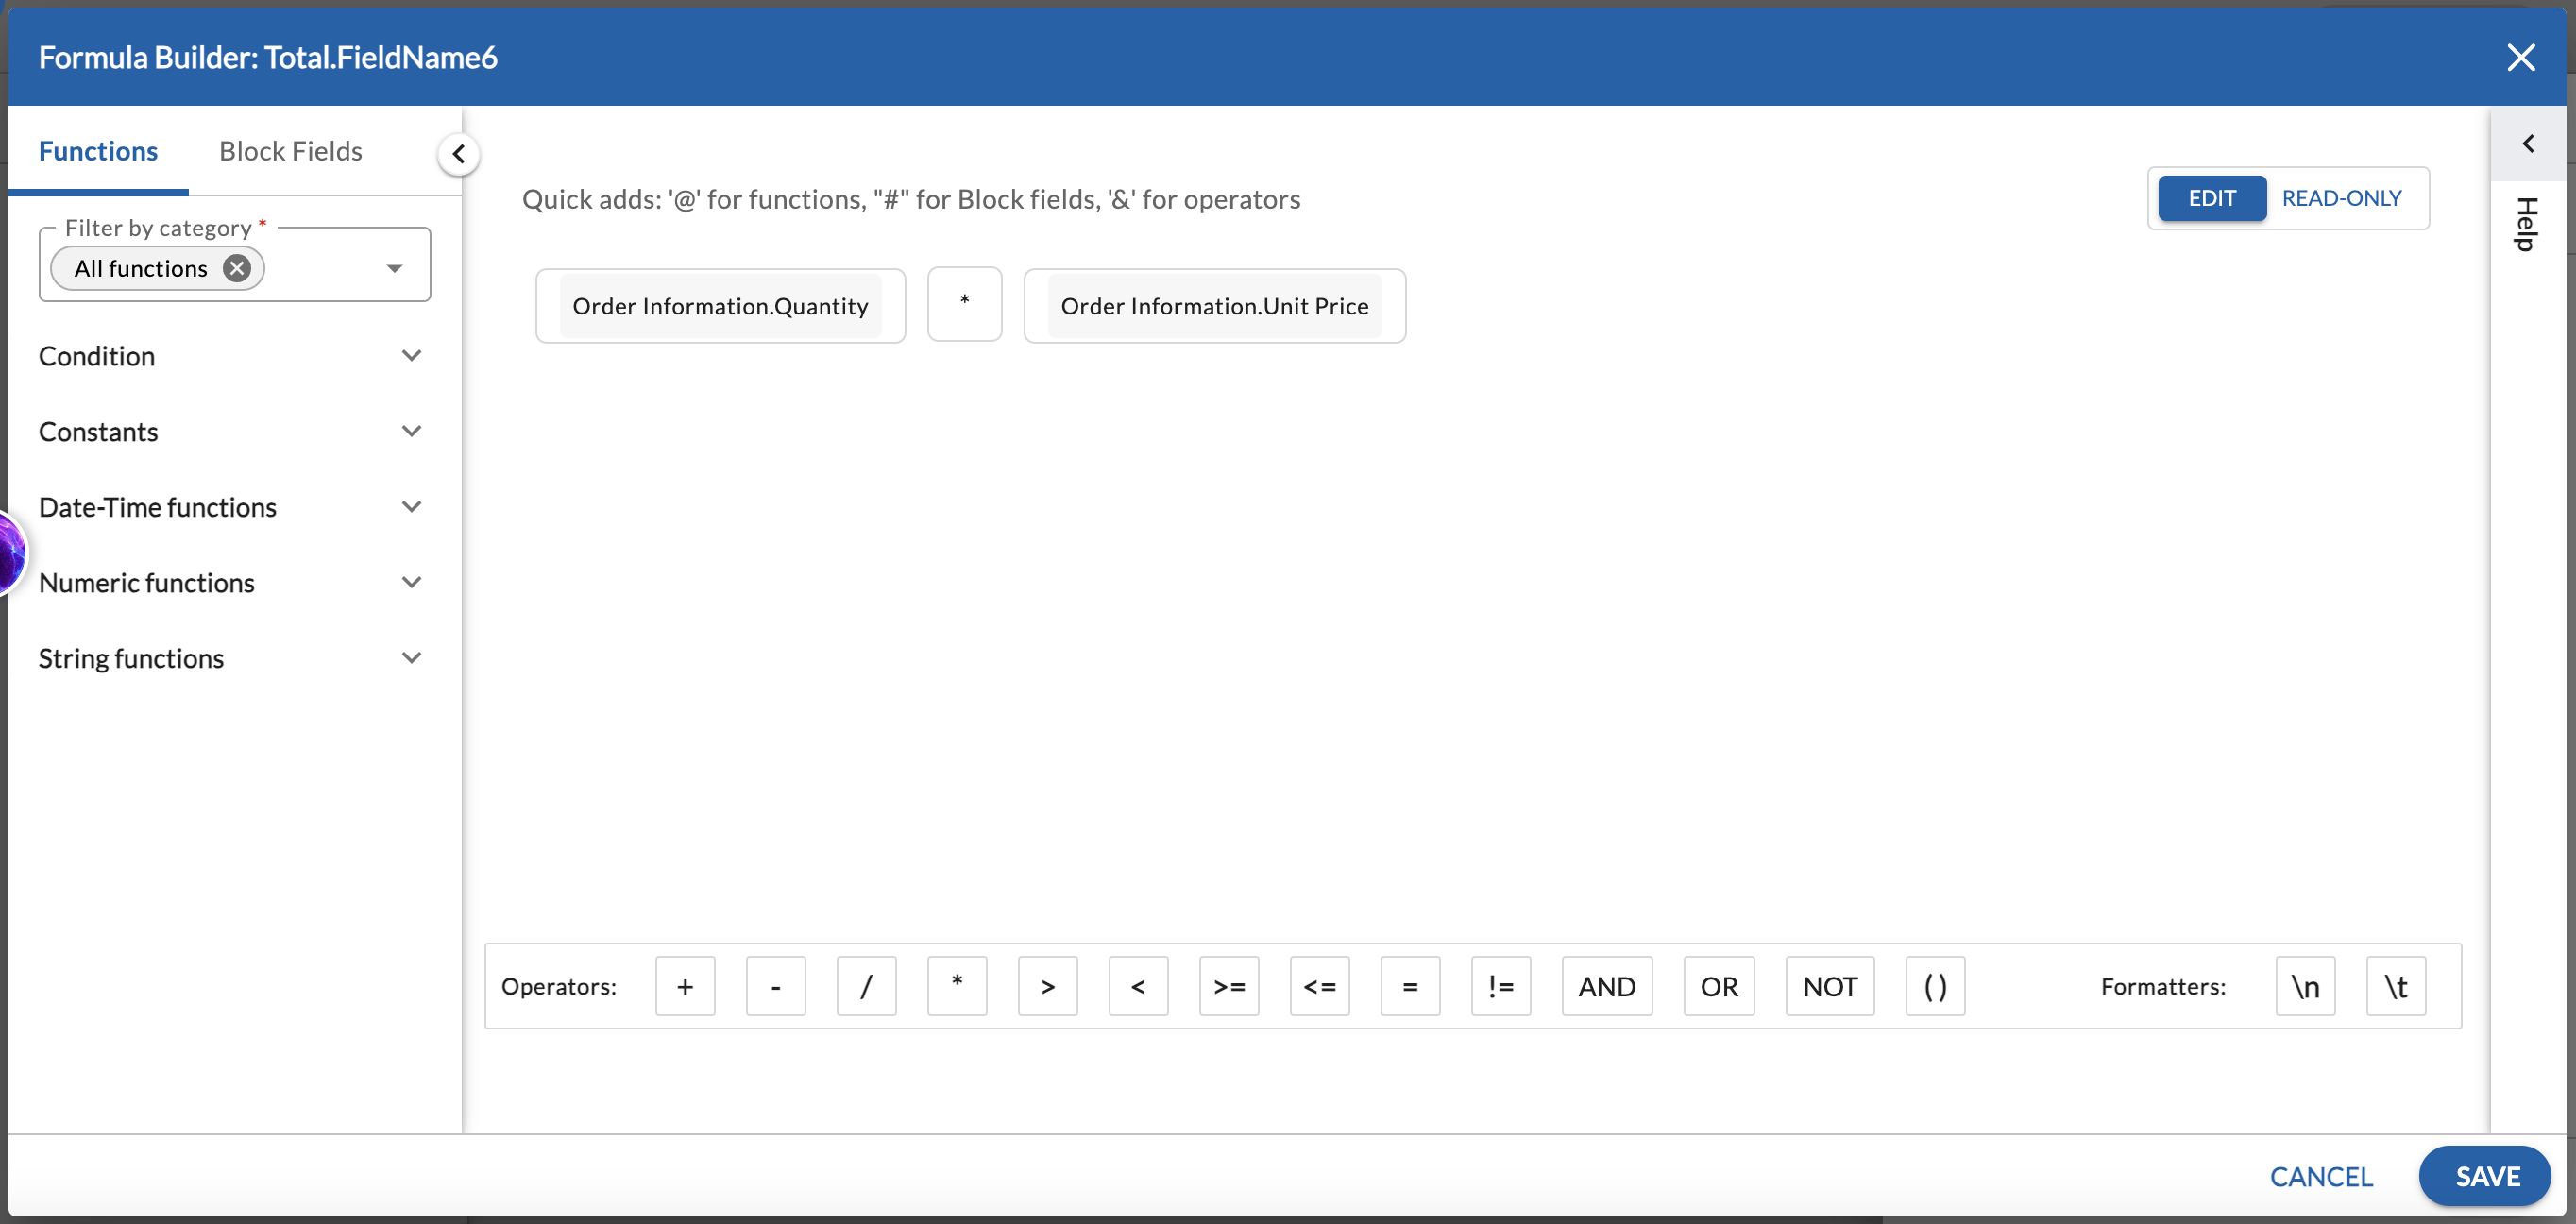
- Once the formula is configured, click the Save button.
The value of the field will be calculated automatically depending on the formula defined in the formula builder.
Note: Changing the formulas of a field will also impact any formula field that is depend on it.
Functions in Formula Builder
The Formula Builder supports the Date and Time, Numeric, and String functions as mentioned in the given table.
Please note, for all the users, the date is returned in the format selected by the user in the User Preferences.
Operators in Formula Builder
The following operators are available in the Formula Builder to configure a formula.
- Plus (+): Adds two numbers together.
- Minus (–): Subtracts the second value from the first value.
- Divide (/): Divides the first value by the second value.
- Multiply (*): Multiplies two values.
- Greater than (>): Compares if the first value is greater than the second value.
- Less than (<): Compares if the first value is less than the second value.
- Greater than or equals to (>=): Compares if the first value is greater than or equal to the second value.
- Less than or equals to (<=): Compares if the first value is less than or equal to the second value.
- Equals to (==): Checks if the first value is equal to the second value.
- Not equals to (!=): Checks if the first value is not equal to the second value.
- AND: it returns true if both conditions are true.
- OR: It returns true if at least one condition is true.
- NOT: It negates the result of a condition.
- Parenthesis (): Used for grouping expressions or operations to dictate the order of evaluation.
Formatters in Formula Builder
The following formats are available in the Formula Builder to format a formula.
- \n: It represents a newline character, used to format text or fields by indicating the start of a new line.
- \t: It represents a tab character, used to format text or fields by indicating horizontal spacing or indentation.
IF ELSE Conditions in Formula Builder
The IF-ELSE condition helps you set a field’s value based on a condition you define for the formula. Here’s how it works:
IF Section: Define a condition. If it’s true, the formula returns True and returns the value you specify here.
ELSE Section: If the condition is not true, the formula returns False and returns the value you specify in this section.
Multiple Conditions: You can have multiple IF-ELSE conditions or nest them within an IF condition for more complex formulas.
For example, a company is giving discounts on its electronic products in different ranges as shown in the below table. So we can define such kind of condition using the If Else condition of the formula builder for a formula field.
| Price | Discount |
| <=5000 | 5% |
| >= 5000 | 10% |
Here the value in the Discount field is calculated automatically as per the value in the Price field and the conditions defined in the Discount field.
To define the condition for a field, perform the following steps –
- Click on the field whose field type is defined as the Formula field.
- Click the Settings icon.
- Click Configure Formula.
- From the left panel, on the Functions tab, click Condition.
- Drag the IF THEN ELSE condition to the right pane.
- To enter a function in the IF box, from the left plane, click the Functions tab and drag the required function. You can also type @ and select the required function.
- To enter a field in the IF box, from the left plane, click the Block Fields tab, click the required Form and drag the required field. You can also type # and select the required field.
- To enter an operator in the IF box, click the operator at the bottom of the screen. You can also type & and select the required operator.
- To define a condition for the discount field according to the Price field, type # and select the Price field from the list.
- Define the conditions as shown in the table.
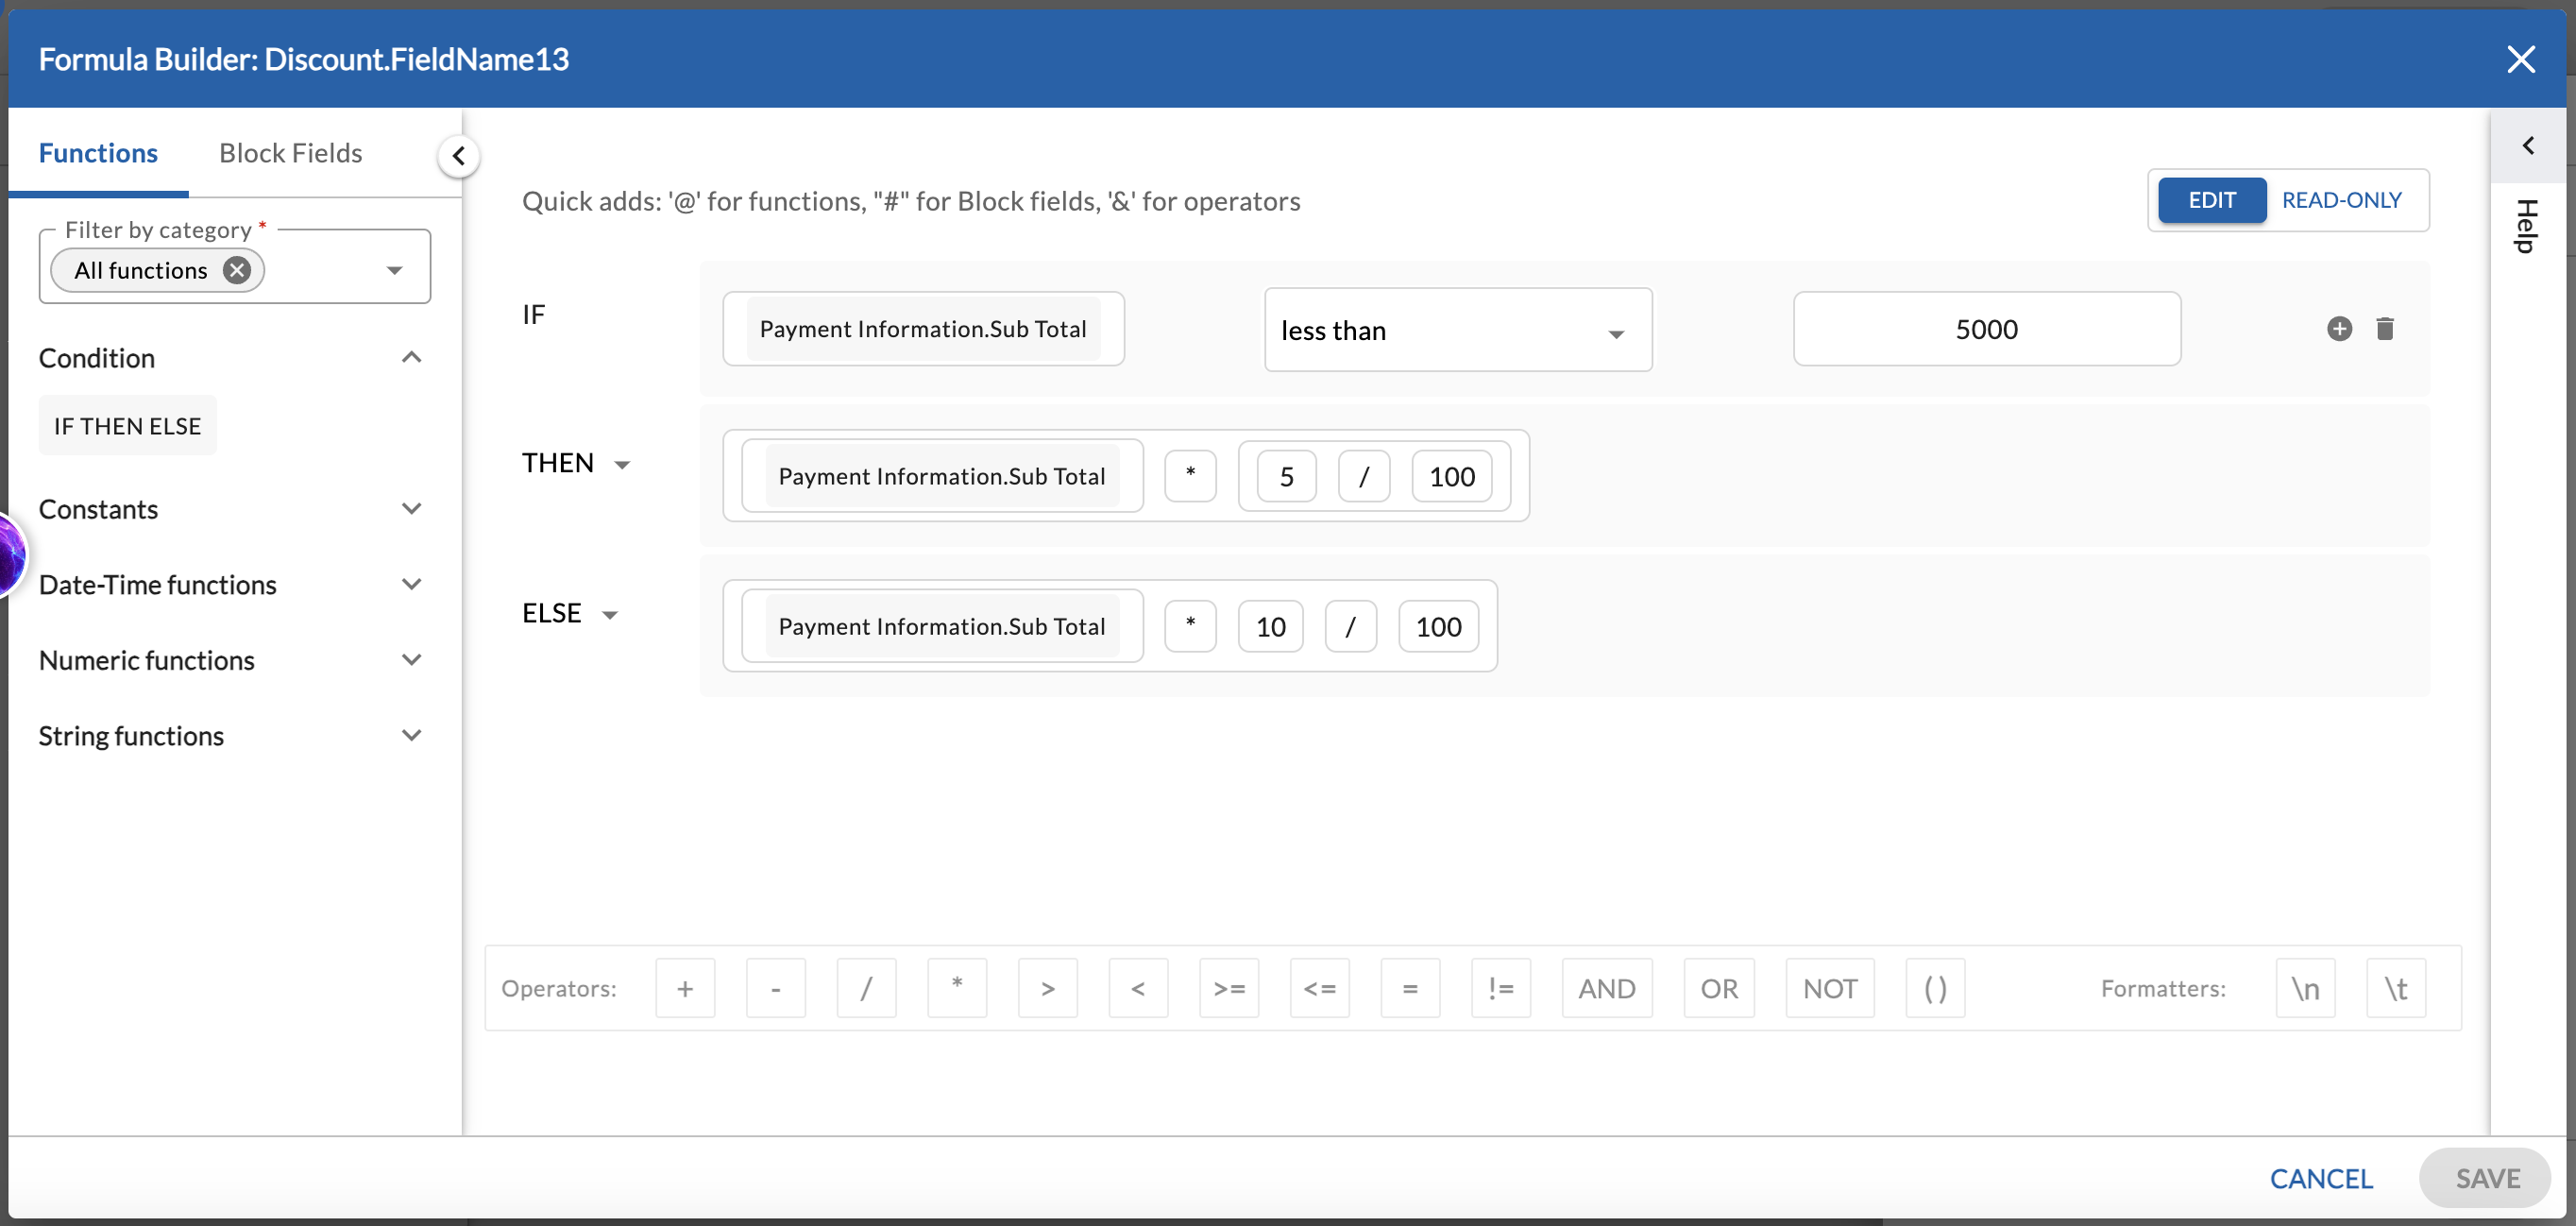
- Click the Save button.
Once you publish the form, the value of the Discount field is calculated automatically as per the value in the Price field. Similarly, you can define conditions including functions and operators in the IF box.
Defining a Formula Manually
You can manually define a formula using the shortcuts/ special characters to include the functions, form fields, and operators with the help of given symbols –
- Use the @ symbol to include a function in a formula. As soon as you type or click the @, a list of functions appears. You can select the required function and define its parameters.
- Use the # symbol to include a form field in a formula. As soon as you type #, a list of forms appears. Clicking a particular form shows the list of available fields in it. Click the field which you want to insert in your formula.
- Use the & symbol to insert an operator in your formula. As soon as you enter the & symbol, it shows the categories of the operators, clicking a particular category shows all the operators in it. Click the operator that you want to select.
Data Grid
Forms 2.0 allows you to add a Data Grid, which allows you to organize data in a structured table format, with customizable grid and cell-level settings. Whether you’re building a student scorecard, an inventory list, a purchase order, or any structured data form, the Data Grid helps you efficiently input, display, and manage information. Each cell within the grid can hold unique data, and you can add various field types like text, number, selection, advanced, and common fields.
You can further customize the grid by merging or splitting cells, applying colors, adjusting alignments, and more. By right-clicking on any cell, you can access options such as Cell Settings, Merge Cells, and Split Cells, as well as Row Settings and Grid Settings. Also, you can find Grid Settings by selecting the Data Grid and clicking the gear icon.

Grid Settings
| Details | |
| No. of Columns | Specify the number of columns for the grid, allowing you to control the table’s width. |
| No. of Rows | Set the number of rows for your grid to control the table’s length. |
| Horizontal align | Choose how the data in each cell is aligned horizontally. |
| Vertical align | Select how data is vertically positioned within cells. |
| Reposition field |
Use this option to move the field between different blocks within the same tab or to a different tab. |
| Style | |
| Border width | Define the thickness of the borders around cells, allowing for more visual clarity or subtlety. |
| Border style | To customize the grid’s look, you can choose from various border styles, such as solid, dotted, double, or outset. |
| Border color | Set the color of the cell borders to match the design of your form. |
| Background color | Customize the background color of individual cells to highlight specific data or simply enhance the table’s appearance. |

Once the table is added, drag and drop various field types into the cells based on your requirements, such as text, number, selection, advanced, lookup, and common fields. This allows you to design your grid/table exactly the way you need to manage and present data efficiently. Please note that once fields are added to the data grid cells, certain settings for those fields will be disabled.
Right-clicking on a cell provides various cell and row options:
- Cell Settings: Cell settings, merge cells, and split cells.
- Row Settings: Row settings, copy row after, and copy row before.
- Grid Settings.

