
Start with the video first to get a better grasp of the topic!
|
Skip Ahead to: |
Overview
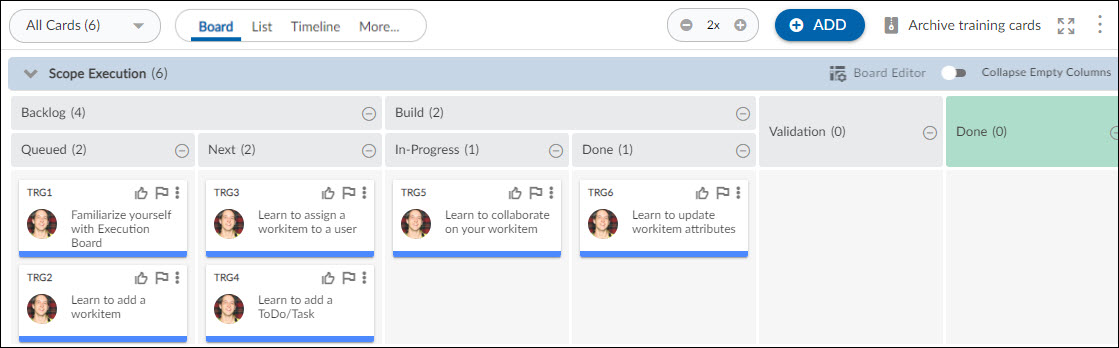
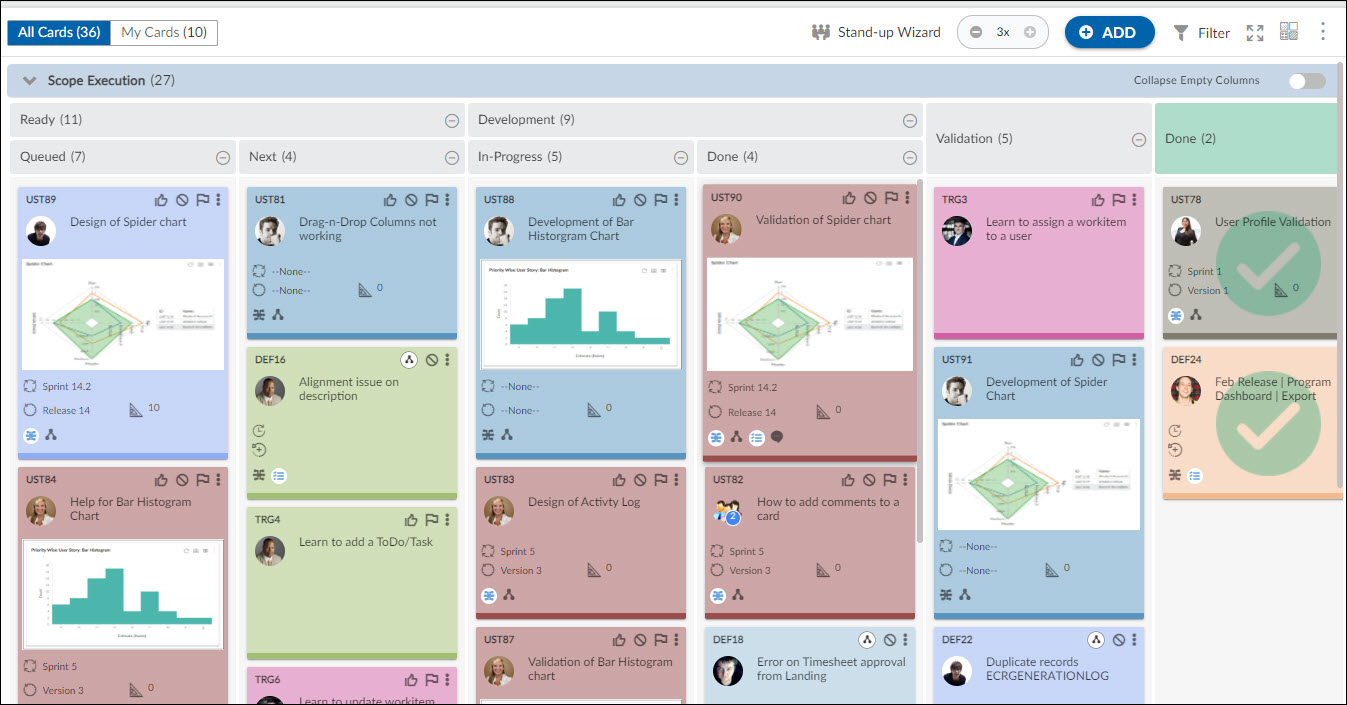
The toolbar contains features that let you initiate a Stand-up wizard, change workitem view, add cards, filter cards, change board zoom levels, Maximize screen and perform other board options such as Refresh, Board Editor, Card Designer, and Dependency View.
Navigation
Navigate to the breadcrumb at the top and hover over the Project name, expand the Execute module, and select Work Hub.
Operations to perform on the Toolbar
Using the toolbar, you can perform the following operations:

View Cards
To view cards using the drop-down:
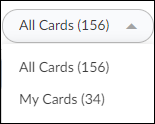
i) All Cards
In this view, you can see the cards assigned to all the team members. This helps you to know the current state of each card in the project. It also shows the total number of cards on the Work Hub.
ii) My Cards
In this view, you can see the cards that are assigned to you only. You can either be the card owner or assigned to a ToDo in a card. It also shows the total number of cards assigned to you on the Work Hub.
In this view, it will show the number of ToDos pending from your side (if any) on each card.
Add Card
Click the ADD icon and select the card type to add a new card to the board or you can right-click on the Board and select the Add option. Read more here.
Archive Training Cards
For the first time, when you onboard, the Archive Training Cards icon will be visible on the Toolbar of the Work Hub. Click the Archive Training Cards icon to archive all the training cards from the Work Hub. To know more click here.
Note: Once the archival of training cards takes place, the Archive Training Cards icon disappears from the toolbar.
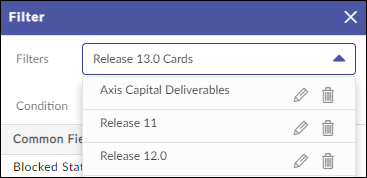
Steps to Apply a Filter on Cards
With too many cards on the board, it gets difficult to focus on priority work. You can use the Filter option on the toolbar to view only selected cards based on various filter criteria like Card Owner, Priority, Card Type, Release, and so on.
The visibility of common fields in the Filter panel will be based on:
-
-
- Projects template modules: The Release and Sprint modules do not apply to the Simple Work Management template, and these common fields will not be visible to the project with this template.
- Form Configuration: If the fields are hidden on the forms, then corresponding filters will not be visible in the common fields section, such as Blocked Status, Blocking Reason, Created By, Flag Status, etc.
- Template Configuration: The common fields will not be visible if the menus are hidden at the process template level, such as Release, Sprint, and Team.
-
To apply a filter, perform the following steps:
1. Click the Filter icon on the toolbar.
2. The left pane of the Filter will display the following attributes:
- Common Fields: Attributes that are common across all card types. By default, the Common Fields section is expanded. Clicking the section header will collapse it.
- Custom Fields: Attributes that are specific to a particular card type. Custom fields are grouped under the Card Type name. By default, the section will be collapsed, clicking the section header will expand it.
3. Click any of the attributes to view their corresponding values on the right pane of the filter, for example, Priority.
4. Select the check box for its values.
5. If the value list is long, then you can also search for the required attribute value using the Search field.
6. Click the APPLY button. The cards matching the selected attribute values are displayed on the board.
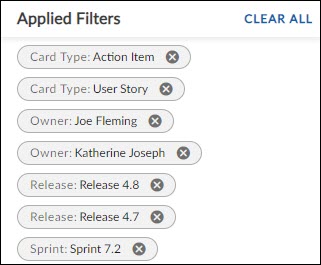
7. Once the filter is applied, it will show the Filter Criteria on the toolbar. You can remove the individual criteria by clicking the Cross icon next to each value, or remove the entire filter using the CLEAR ALL option. Else, click the CLEAR button in the Filter option.
Note: The filter will persist across sessions.
More Options
Click the More Options icon to view the following board options:

- Add from Backlog
- Stand-up Wizard
- Refresh
- Card Color Scheme
- Card Settings
- Show Zoom Level
- Show Collapse Empty Columns
- Show Expanded View
- Show Card Aging
- Show Media on Card
- Freeze Board Headers
Add from Backlog
The cards that are in the backlog can be easily added back to theWork Hub using the Add from Backlog option. This will help you to view and add cards back to the Work Hub based on card type, like User Story, Technical Story, etc.
To add an existing/backlog card on the Board:
- Click the Add from Backlog icon from the Toolbar.
- Select a card type from the drop-down.
- In the Search and Add to Board view pop-up, select the checkboxes of cards from the list of cards shown there.
Note: You can also apply filters to find a particular card using the Filter icon on the right side of the pop-up.
Working with Stand-up Wizard
Click the Stand-up Wizard icon to initiate the Stand-up mode screen. It facilitates each Card or ToDo owner in a Sprint to provide their update, as well as the team to look at the Sprint Burndown to know if they are on track or not. To know more, click here.
Show Zoom Levels
Zoom levels help you get better visibility of the cards and their current status on the board. So, choose the zoom level at your convenience. As you increase the zoom level detailing of the cards will also increase.
Note: At any zoom level, you can click the card to open its pop-up view.
Show Expanded View
The full-screen mode will hide the Top Panel and Menu bar of the application, allowing you to have a bigger view and more focus on the Work Hub.
Show Media on Card
On setting an attachment as a cover image the attachment will be visible on the Work Hub. From the toolbar, navigate to the More Options icon, set the Show Media on Card toggle and the attachment will be visible for that card.
Freeze Board Headers
With the Freeze Board Headers option, you can freeze both lanes and column headers on the Work Hub. By utilizing this feature, you can keep the lanes and column headers fixed in their positions even while scrolling through the cards until you move to the next board lane. This enhances visibility and allows you to concentrate on the cards without losing context.
However, if you find that the frozen headers are not necessary for your specific use case, you have the flexibility to easily toggle off this option.