
Overview
Form, when associated with a workflow, enables routing at the item level to indicate that work for that item is completed at that workflow stage and is in the next stage.
A workflow is available for a Form when you select the Linear Workflow option at the time of creating a Form (which is a one-time setting).
Navigation
In the left navigation panel, expand the Recent Projects menu and select any Project. Hover over the Project breadcrumb at the top, expand the Configure module, and select Forms.
Adding and Modifying Workflow Stages
The default stages in a workflow are—Initiator and Reviewer. You can add more stages to the workflow to cover ownership of items at each stage.
The new stage will appear for new projects and templates only.
- Click the required Form in the Form list and then the Workflow icon on the toolbar.
- Click the Add Stage icon from the toolbar. In the Add Stage window, enter the following:
- Stage Name: Type the name of the stage that would indicate at what level in the queue the project item is.
- Description: You can describe the activity for the stage here.
- Estimated Effort: Type the estimated hours for each step in the workflow. The total estimated hours are displayed automatically at the eForm instance level. Ideally, you can skip this and enter the efforts at the eForm instance level.
- Initial/Next Standard Code: Select the standard activity code from the available list. Once any activity code is selected for the stage, the effort logged for that workflow stage is accounted for the activity associated with the selected activity code. (It is primarily used in some of the Analytics components where effort needs to be calculated for different activities). The initial activity code indicates the effort logged for the stage for initial work and the Next standard code indicates the effort logged for the stage for rework. Standard Activity Code is maintained at the Process Governance level as codes for Activities. For more information on how to add a standard code, see Activities.
- Stage Position: Select the position where the stage should appear in the sequence. The list displays the existing stages in the workflow. You cannot change the position later.
- Project Level Stage Settings: Select the project-level settings for the selected stage to allow renaming, skipping, and deleting the stage at the project level.
3. Click the Save button to save, or the Return button to exit from the window. Click the Reset button to discard the entered values and select new values.
To modify,
- Go to the Form Workflow view, and select the workflow. You can change the name and description of the stage and the attributes such as Estimated Effort, Initial/Next Standard Code, and Project Level Stage Settings.
- Click the Save button.
Configuring Form Workflow Stages
The default stages in a workflow are— Initiator and Reviewer. The attributes in the project-level stage settings for these stages and the skip option are selected by default. You can modify these, by selecting other options for the default stages and also for the new stages that you add.
To configure the existing workflow stages for a Form, go to the Form workflow and define:
- Mandatory/Optional Workflow Stage
- Modifying Workflow Stage Settings for Projects
- Deleting a Workflow Stage
Set Mandatory/Optional Workflow Stage
To provide an option to the users at the item level to skip the stage, select the Skip check box. To make the stage appear mandatory in the queue, clear the Skip check box.
Modifying Workflow Stage Settings for Projects
The workflow settings for a stage are defined while adding a stage. However, you can also modify the settings later. These settings apply depending on the Forms at the project level.
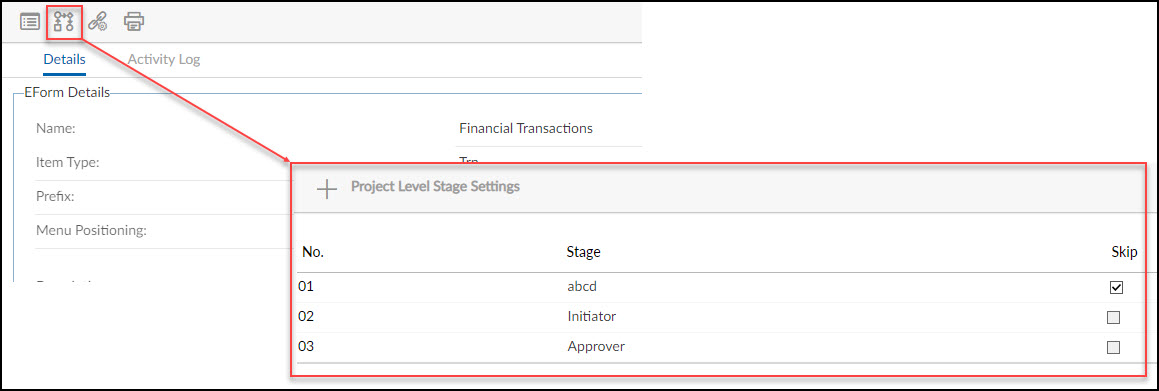
In the Forms Stages view, click Project Level Stage Settings. The Project Level Stage Settings window is displayed with the following attributes.
- Can add Stage at Project Level: If selected, new workflow stages can be added at the project level for the Form.
- Rename: If selected, the stage can be renamed at the project level.
- Skip: If selected, the stage can be skipped at the project level.
- Delete: If selected, the stage can be deleted at the project level.
Deleting a Workflow Stage
On deleting a stage, the time logs posted for this stage in any instance will be lost and all the items in this stage will be moved to the previous stage.
In the Form Stages view, select the stage you want to delete. In the Stage Details window, click the Delete button and then OK in the confirmation window.