
In this article, we will help you to understand how to add and manage user requirements.
|
Skip Ahead to: Steps to Add and Manage User Requirements |
Overview
Requirements management is a continuous, systematic process, which helps identify, organize, communicate, and manage the changing necessities of any project. User Requirements specify the requirements the user expects from the software and is useful while planning costs, timetables, milestones, testing, managing releases, etc.
Navigation
Navigate to the breadcrumb at the top and hover over the Project name, expand the Execute module, and select User Requirements.
Steps to Add and Manage User Requirements
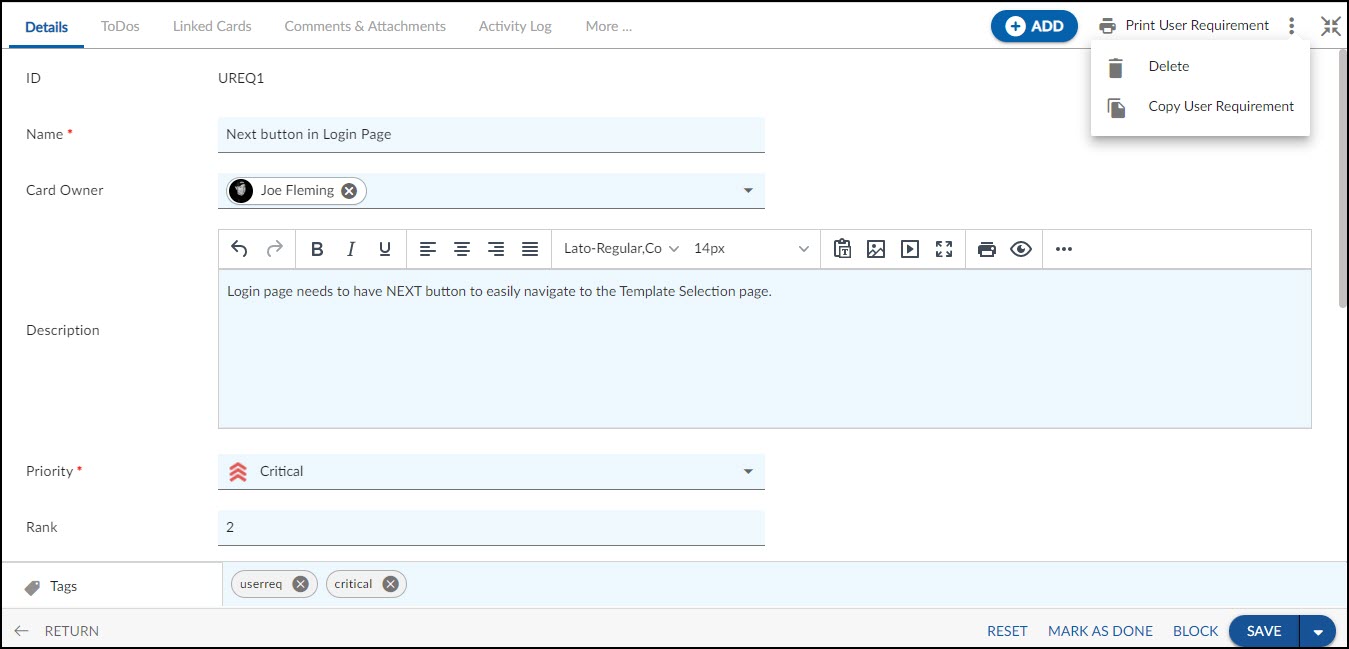
To capture specific information in User requirements, managers can customize the User Requirement Form by modifying the Details. You can add new sections, or link existing sections specific to the User Requirement or Associated Tasks to link and track Tasks associated with the requirement.
To add User Requirements:
- Click the ADD button.
- Enter details such as Name, Description, Priority, Card Owner, Release, Sprint, Estimate points, etc.
- Click the Save button.
When adding the User Requirements, select the Feature Importance to rank the importance and the Releases to tag it as a release. You can specify additional details in the Advanced tab along with Triggers and Assumptions such as:
- Basic Course of Events– Detailed description pertaining to the requirement
- Alternative Paths– Alternative courses of action when other conditions are present.
- Exception Paths– Course of action to be pursued if the use case fails
- Extension Points– A distinct use case representing an alternative, conditional, or exceptional course of interaction that can alter or extend the main flow of events in the base use case.
- Pre-Conditions– Conditions to be satisfied before the use case executes.
- Post-Conditions– Actions that will occur to the use case after it is executed.
Other tabs that are visible:
The Linked Cards section available after adding the User Requirements helps to trace if the requirement originated from another requirement or a defect.
Common Operations to Manage User Requirements
- Edit
- Multiline Add Item
- Delete
- Export
- Import
- Copy
- Multi Sort
- Log Effort for the User Requirements (available only for projects which have the ‘Include in Timesheet’ option selected for the User Requirements Form).
Organizing Requirements into a Hierarchy
Importantly, you can create a hierarchy within the requirements you create. This helps to break down a huge requirement into smaller, manageable requirements.
You can create a hierarchy by creating requirements and then organizing them into a hierarchy. You can promote or demote requirements as required.
Select a User Requirement, click the More options icon, and select the View hierarchical List icon, which will display the list in the hierarchical form after you promote or demote the requirements one below the other using the additional icons Promote and Move & Demote Below.
- To promote, select the particular requirement and click the Promote icon.
- To demote, select one or more requirements from the list and click the Move and Demote Below icon. This opens a window listing all the requirements except those selected.
You can also reorder the Requirements using the Reorder Workitems at Same Level icon under the More options icon. This helps you reorder the same level workitems under a particular hierarchy. You can also reorder the same-level parent workitems.