In this article, we will help you to understand how to print workitems.
|
Skip Ahead to: |
Overview
The application provides the Print capability to print the details and even mail them to project members and external users.
Steps to Print Workitems
To print workitems,
- Go to the Detail view of the workitem.
- Click the Print icon.
When printing you can select the following options:
- Output Format: Select Save to File or Output on Screen.
- Output Option: To print specific workitems, select the workitems in the List view to be printed and in the Print window, select the PRINT button. To print all workitems, click Select All from the drop-down.
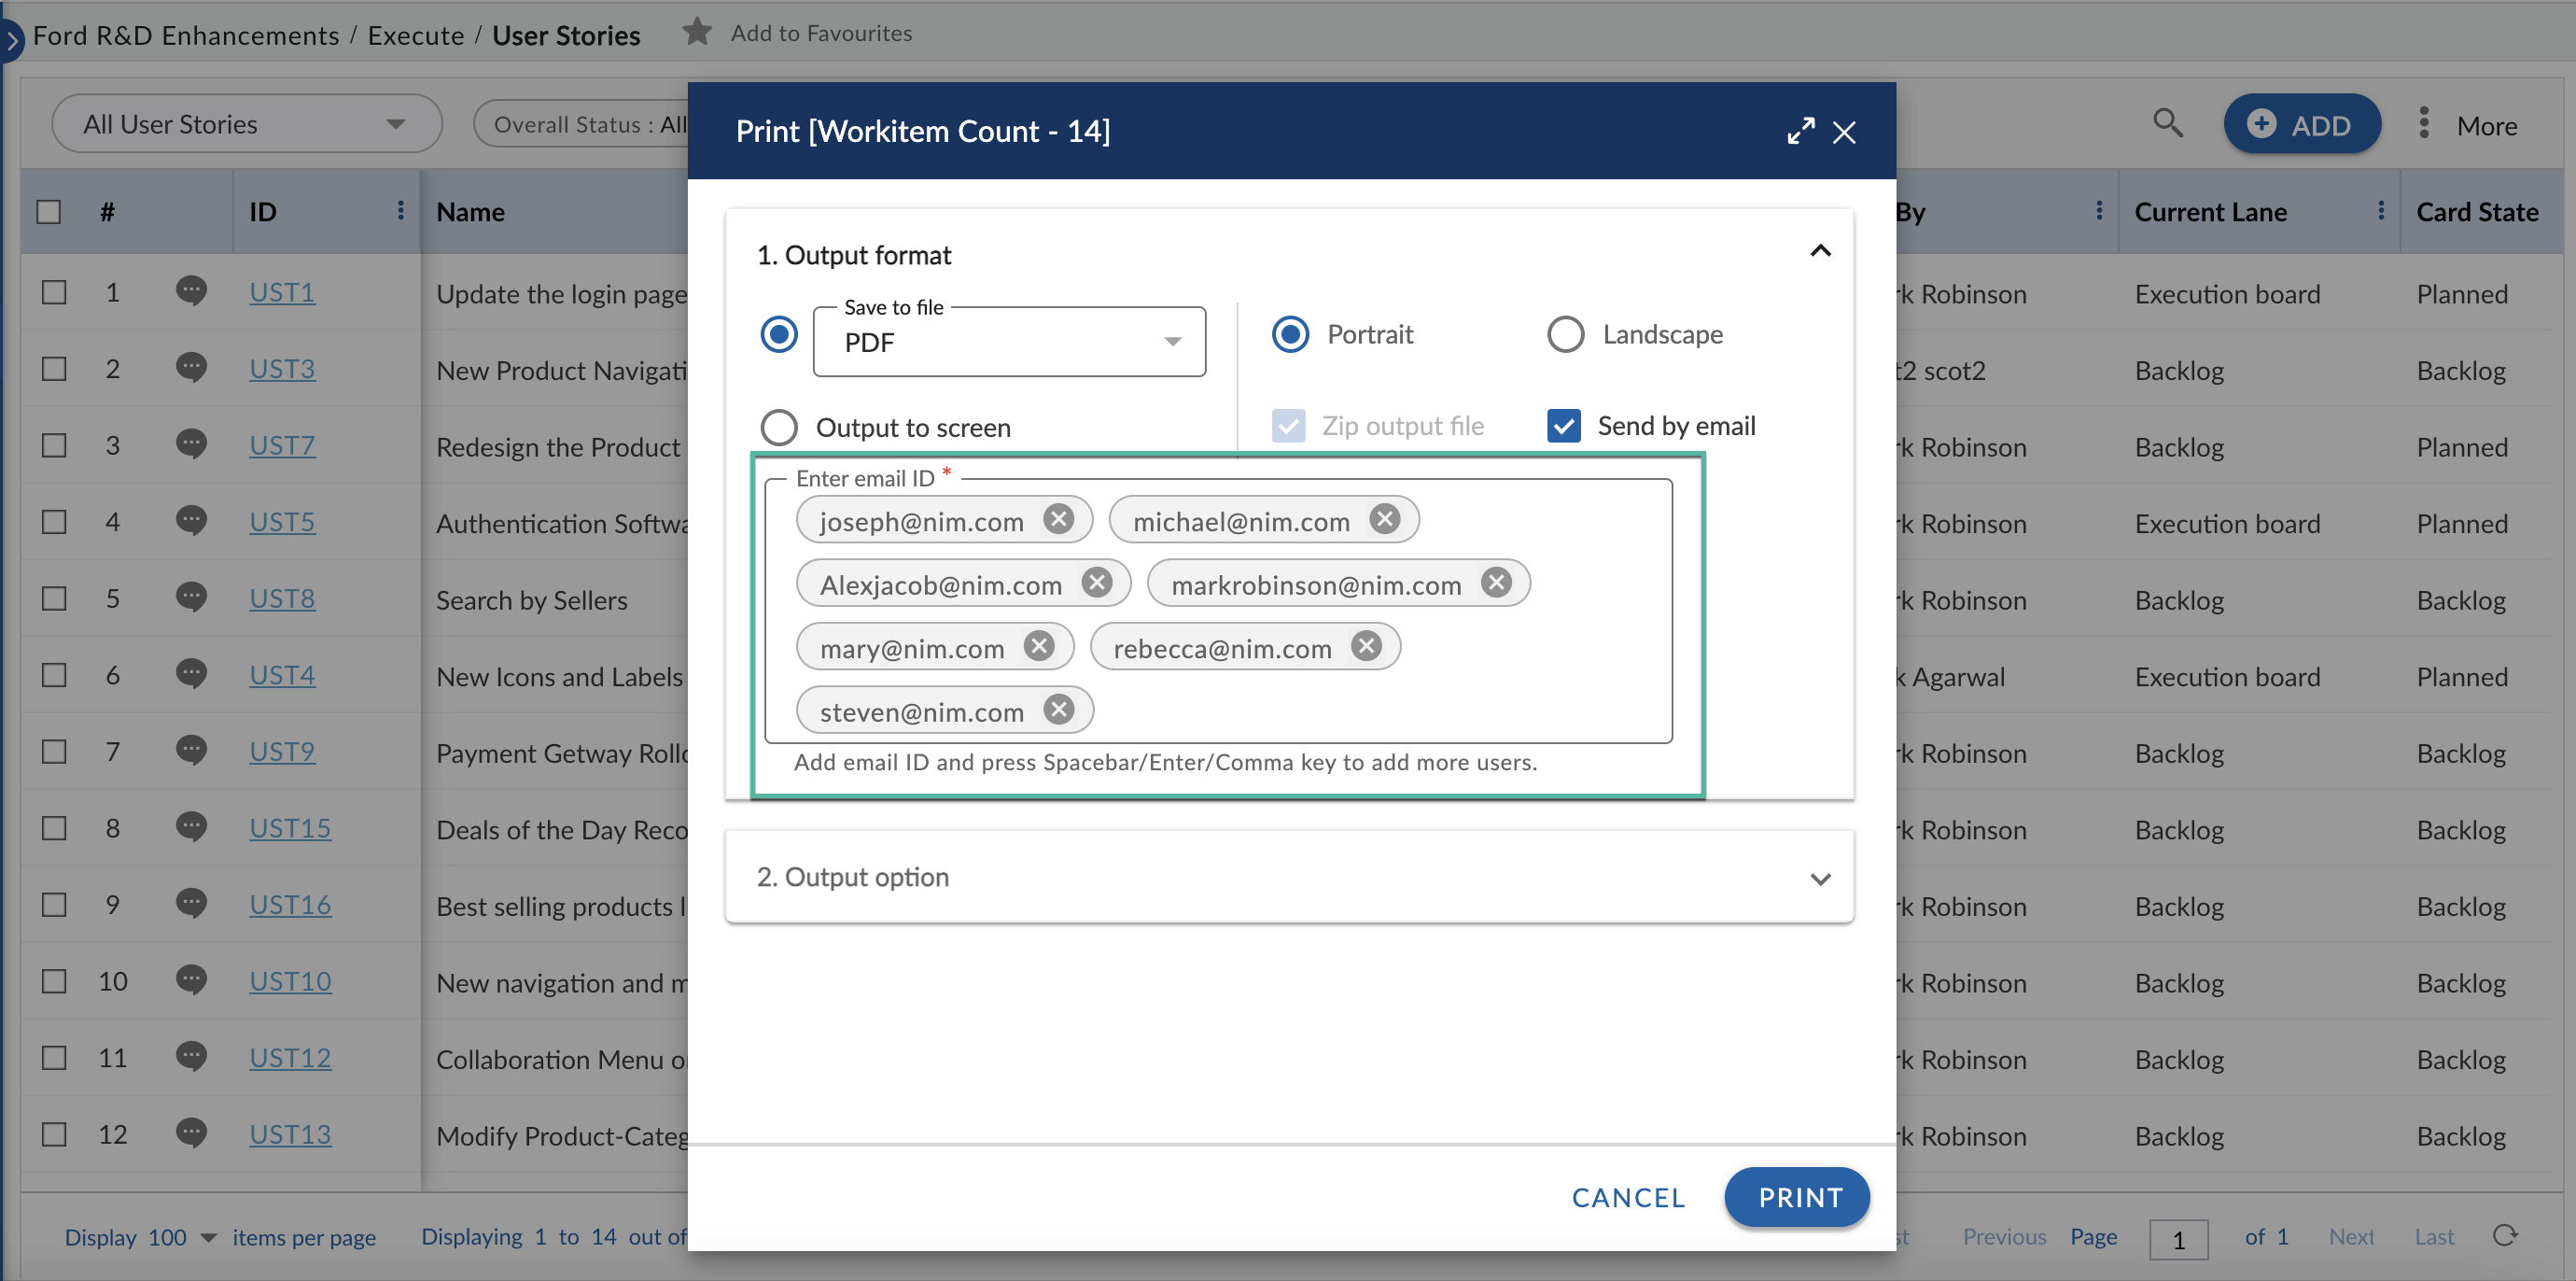
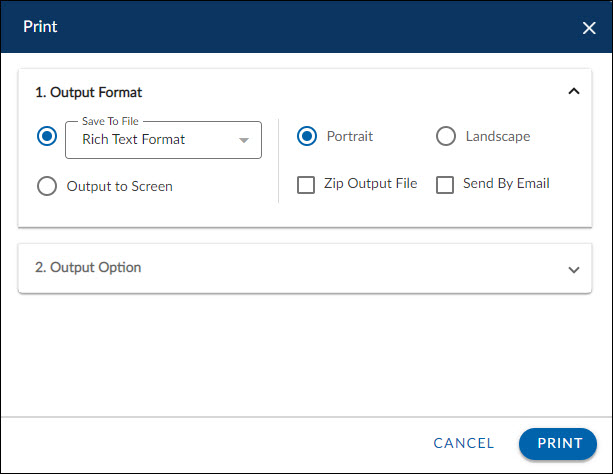
On selecting Save to File, you can:
- Save the file in Rich Text Format or a PDF format and set the page orientation to Portrait or Landscape. You can choose to save the file in a zip (compressed format) file by selecting the Zip Output File option. You can choose to mail the file to yourself and your team members by selecting the Send By Email option. See Mailing the Workitem List/Details for more help.
Note that the CSV option in Save to File is available only for List View printing.
- On selecting Output on Screen, you can view the workitem list/details (based on your selection) on your screen, which opens in your browser window but cannot be saved on your system. The Send By Email, Orientation, and Zip Output File options are not applicable.
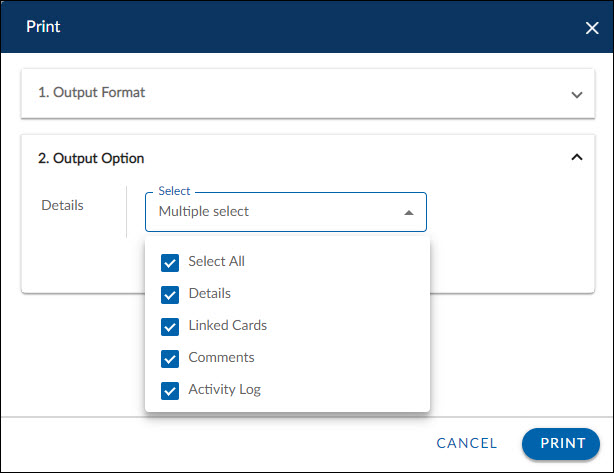
- You can choose to print only the work-item List or workitem details in the Output Option:
- Printing the Workitem list: Select List View in the ‘Output Option’. A list of items will be displayed/printed in a columnar format with data as per the columns selected in the selected Table view. To print/view data for all columns including those not selected in the Table View, select the Print All Columns option.
- Printing the Workitem Details: Select the Details option in the ‘Output Option’. From the Details section, select the sections that you want to print. To print all sections, select the Include All Details option. Subsequently, checkboxes for all sections are selected. The output is displayed/saved to a file, workitem wise, and based on the sections selected in the Print window. The fields and sections will be arranged as configured in the Form of the workitem.
Note: When you select the option, the Zip Output File option is selected automatically as the file will be mailed in compressed format by default.
When you select Send By Email, then the report will be sent to you via email. You can provide multiple email IDs to send the report to multiple team members at the same time.