In this article, we will help you to understand how to manage your profile from the user profile panel.
|
Skip Ahead to: |
Overview
The My Profile page contains basic information about you. You can update your personal information for organization and project requirements. However, you may not be able to edit some information such as the Personal Information and Projects sections as these sections are read-only.
You can access the My Profile page by hovering over the User Profile in the top right corner and clicking on the My Profile.
Navigation
Hover over the User Profile in the top right corner, and select My Profile.
Personal Information
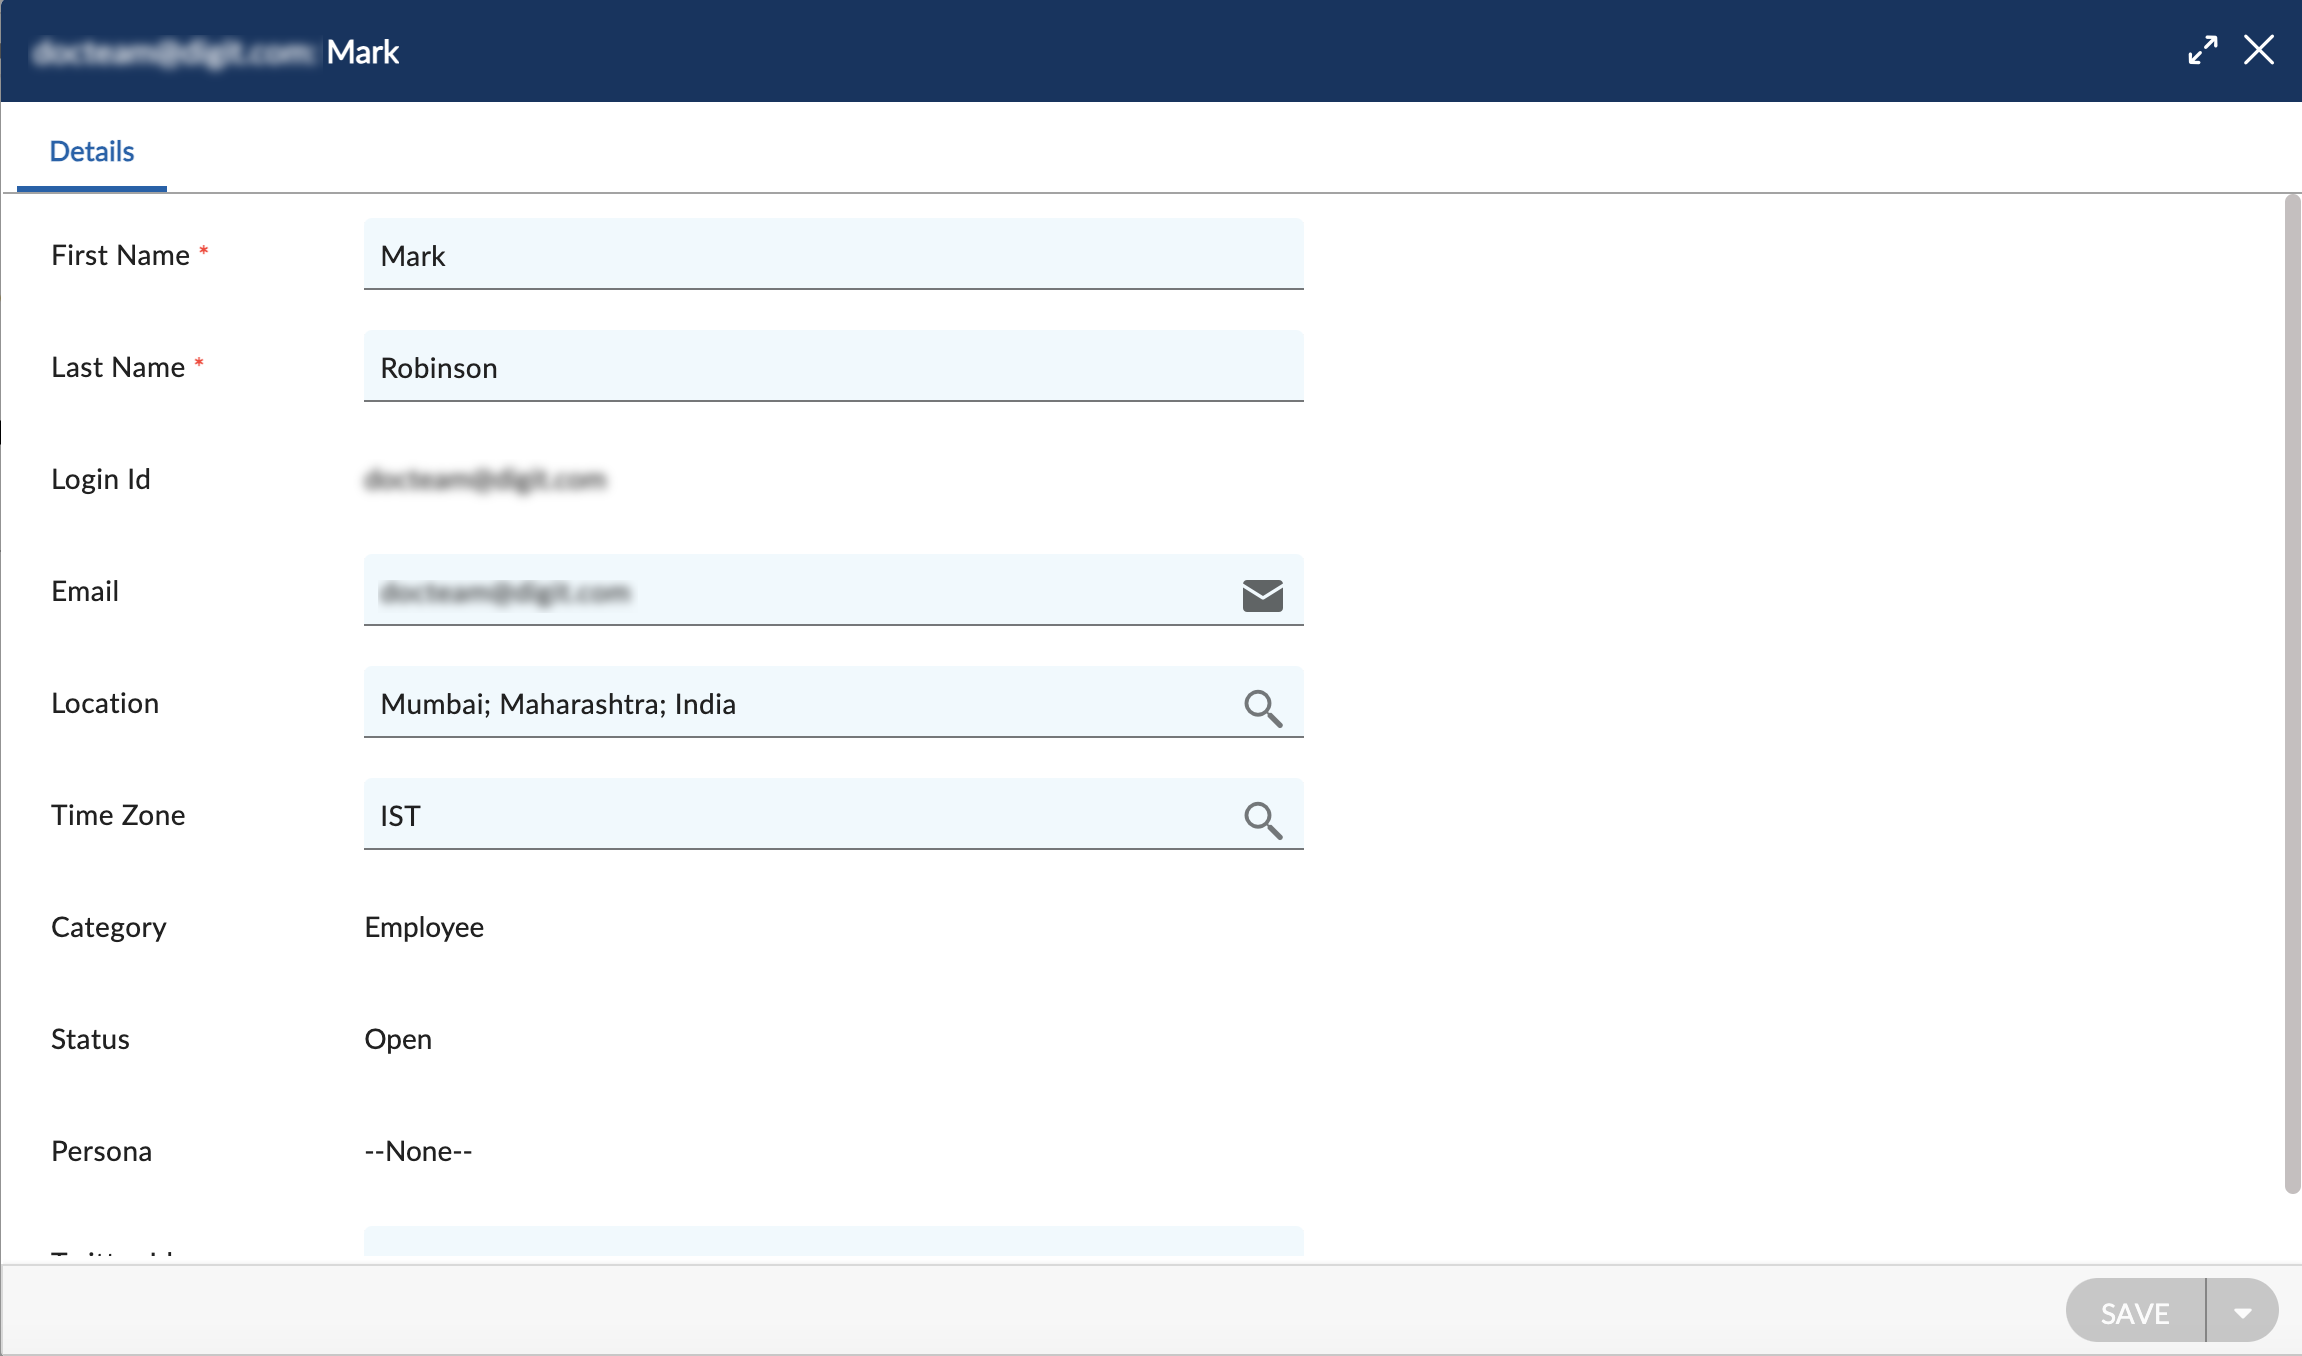
The Personal Information section displays information such as the Profile Picture, Name, LoginId, Email ID, Persona, Location, etc., which is provided when you join the company. The necessary information will be reflected in many places across the application.
Note: Any admin-level changes made to any user will be reflected in the User Information section.

To make changes to the profile information, click the Edit icon next to the profile picture. You can update your Name, Email ID, Time zone, Twitter ID, and Location. Please note, that you cannot update the Persona and Category from the Profile view. These can be updated from the Organisation settings only.
Skills & Proficiency
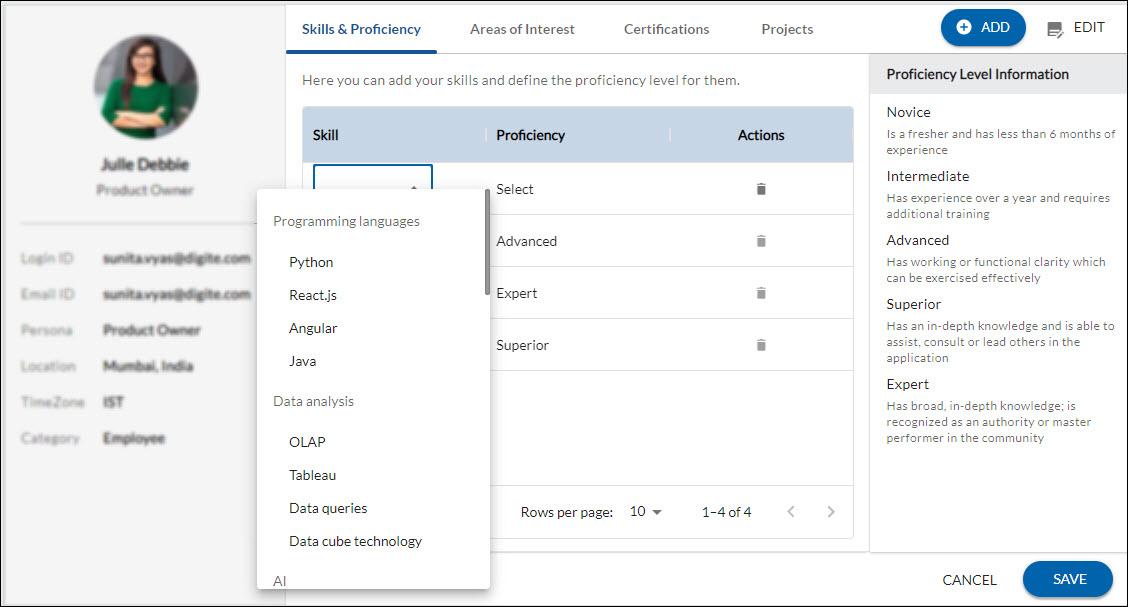
Showcase your skills by adding them, which gives the project manager or resource manager an edge to choose you for further projects/tasks.
Steps to define skills & proficiency:
Prerequisite: Ensure that the required skills and proficiencies are defined in the Master List.
- Click the ADD button.
- Enter the details as explained below:
-
- Skill: Select the skills using the drop-down. To learn more about how skills and grouping are defined, click here.
- Proficiency: Select the proficiency level of skill using the drop-down. To learn more about how proficiency levels are defined, click here.
-
- Click the SAVE button.
To edit or delete the Skills and Proficiency:
- Edit: Click the EDIT button, make changes, and click the SAVE button.
- Delete: Click the delete icon to delete the required row.
Area of Interest
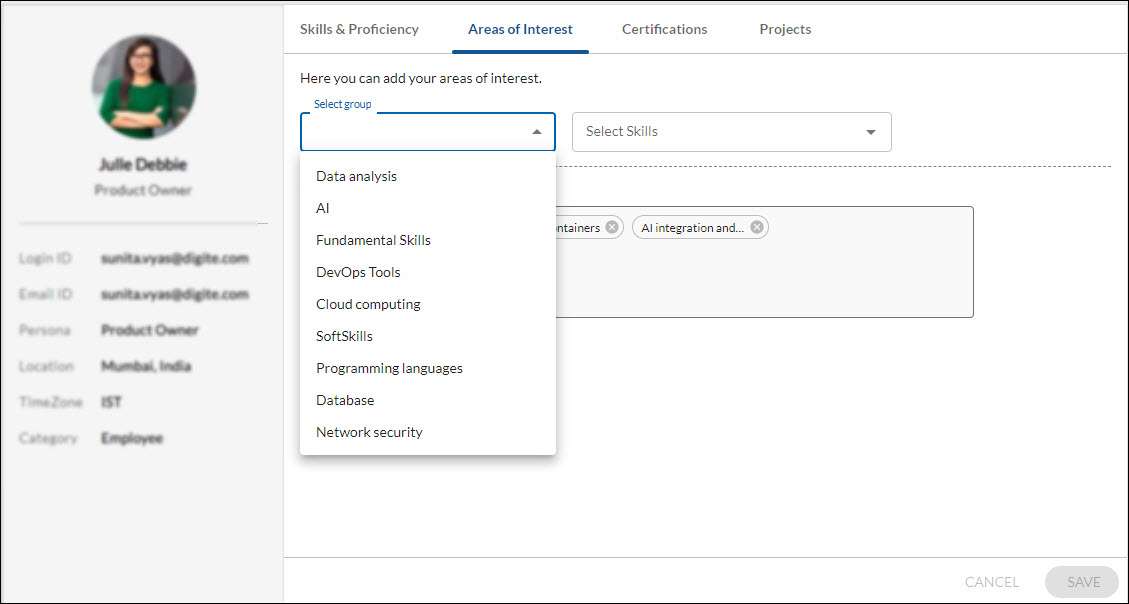
An Area of Interest is a section in which you can identify your interests and consider what activities, skills, or topics you want to have and learn about. Add skills that will help you to advance in your career. To add, choose a group and a list of skills. The selected skills from all groups are displayed as chips in the Your Interests box. To delete any area of interest, click on the cross icon on the skill.
Prerequisite: Ensure that the required skills groupings are defined in the Master List. To learn more about how the skills grouping is defined, click here.
Certifications
Certifications are a great way to showcase your knowledge and professional achievements. List all of the certifications you have earned. This benefits you and helps the resource manager allocate new projects or tasks to you per the certification.
Steps to Add Certification
- Click the ADD button.
- Add a license or certification page that requires details about your certificate. Add:
-
- Click on the UPLOAD IMAGE button and select the certification image.
Note: Upload an image with a length and width of at least 256 pixels with a png or jpg file. - Add the name of the course you attended
- Issuing organization- Name of the organization
- Select the month and year of issuing your certificate (optional)
- Select month and year of expiry (if appliable for your certificate)
- Credential ID (optional)- Certification ID
- Credential URL (optional)- Enter the URL of the course which you can get from the course’s (for example: Google, Microsoft, Udemy, Coursera, etc.) website.
- Click on the UPLOAD IMAGE button and select the certification image.
-
- Click on the SAVE button.
To edit or delete the Certification:
- Edit: Click the EDIT icon, make changes, and click the SAVE button.
- Delete: Click the delete icon to delete the required certification.
Congratulations Post
Upon certification completion, you receive a congratulatory post from the Nimble Team on your Nimble Cafe.
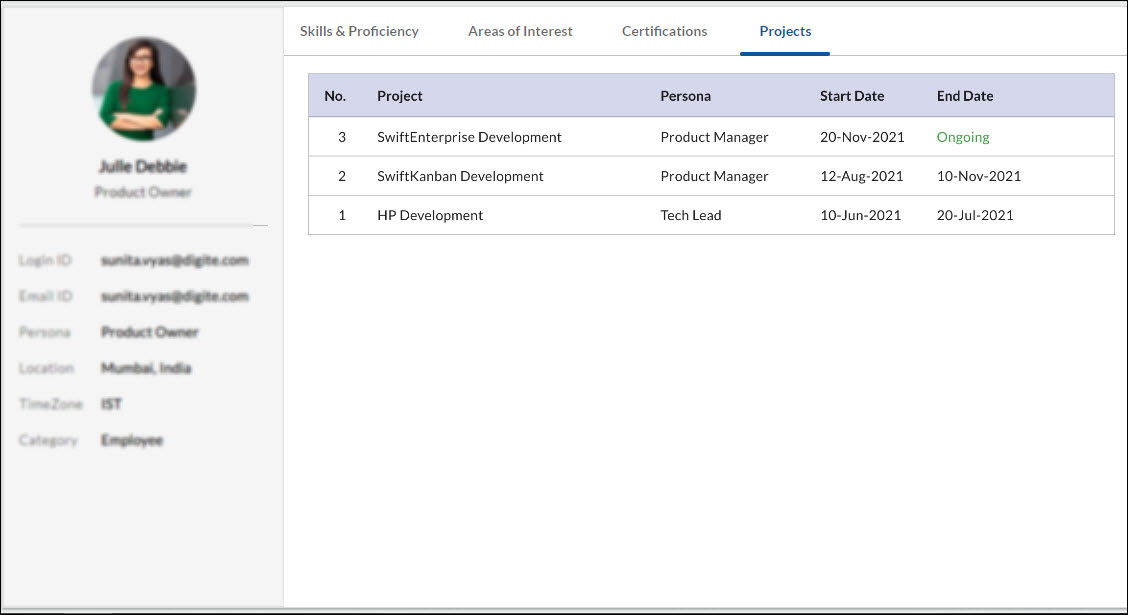
Projects
The project section displays a list of projects (read-only mode) so that you have a clear understanding of how many projects you are involved in. It also shows your Persona in each project against the project name and the Start Date and End Date of the project. The Persona field displays the persona (role) you played for that specific project and If the project is still in progress, the End Date field will show as Ongoing.