Introduction
A workflow is a model to represent real work for further assessment, e.g., for describing a reliably repeatable sequence of operations. In Nimble, you can manage the workflow as an automated process to produce an outcome. The Workflow management system allows you to define different workflows for different types of jobs or processes. The workflow is always linear i.e. the work will flow in one way indicating progress as the workitem moves ahead.
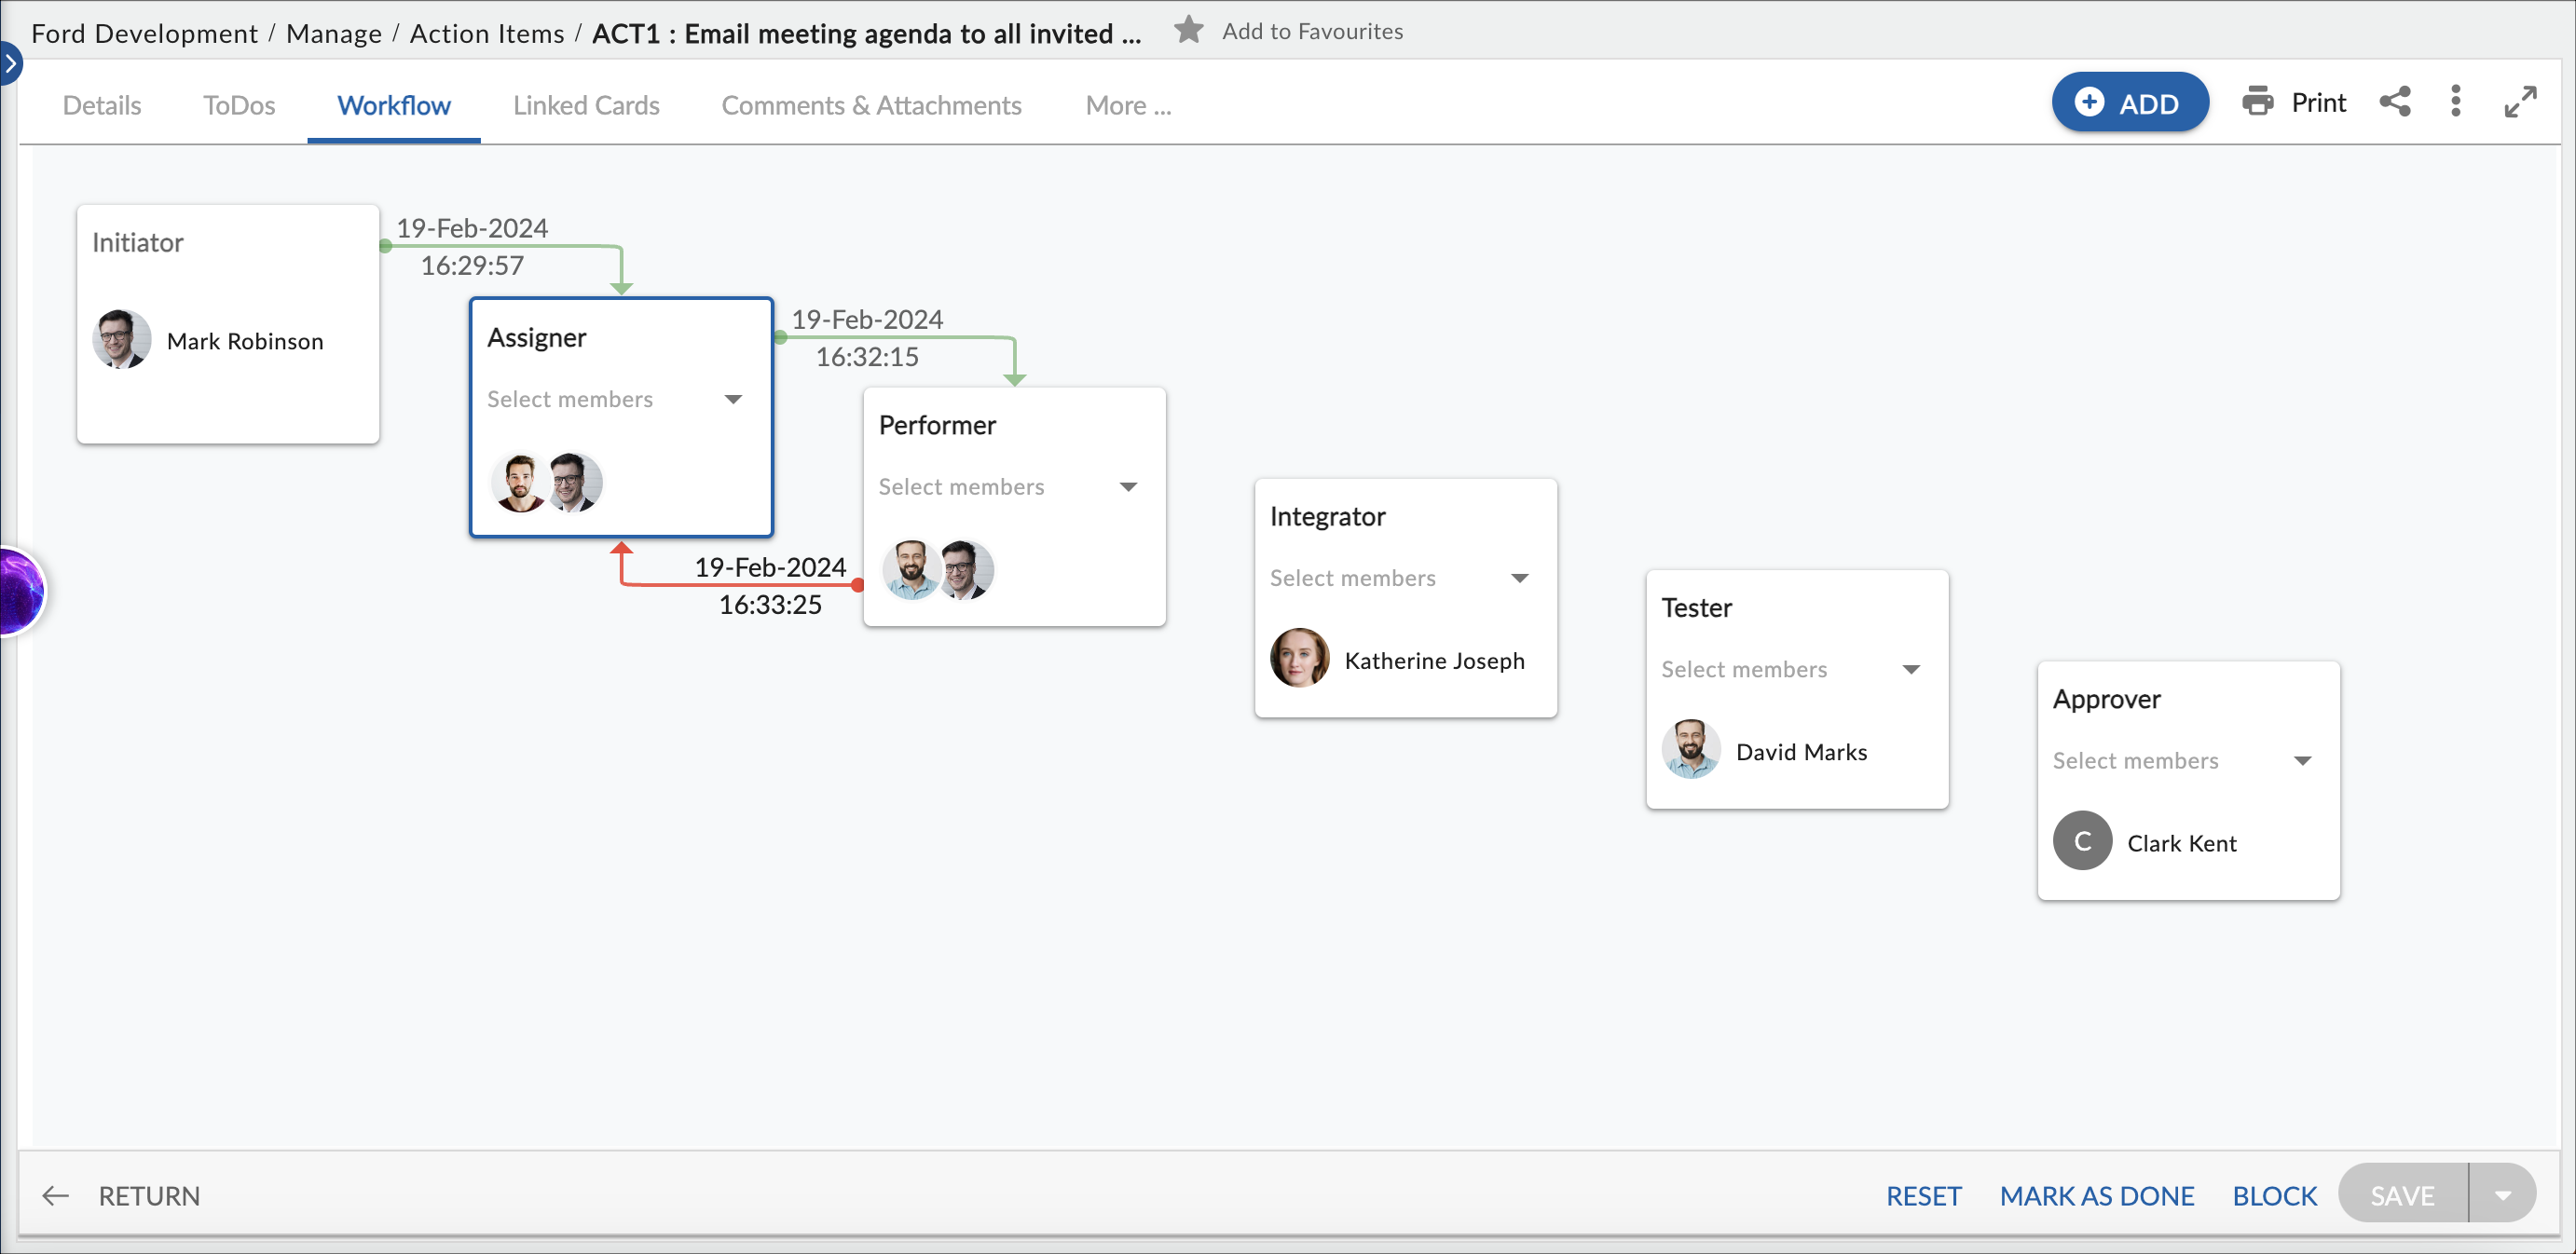
- In the workflow, each step is a workflow queue, which represents which stage the work is. For example, Impact Analysis, Coding, Testing, and so on.
- At each stage in the workflow, one team member assigned to the workitem is responsible for the workitem.
- When the team member completes an assignment for that workitem, he/she can route it to the next member in the workflow queue interpreted as work has progressed to the next stage. In the workflow, the green arrow indicates that the item is routed and the workflow queue after the green arrow is the current stage.
- Team members can also reject the item when the information is incomplete or if the previous steps are incomplete. On rejection, the previous team member will have to rework on the item. In the workflow, the orange arrow indicates that the item is rejected and the workflow queue before the orange arrow is the current stage.
Prerequisites
- The workflow tab in a workitem has to be enabled from the Forms.
- Ensure that appropriate workflow stages are configured for the workitem so that the queues are displayed in the workflow of all workitems.
Understanding the Workflow Layout
The workflow tab of an open workitem shows all the stages of the workitems. Every workflow stage i.e. queue defined is indicated by a box in the Workflow pane. It will be updated as you assign a workflow member, or the item passes through different stages sequentially on routing/rejecting.

To define the workflow for a workitem:
- Select a member in the corresponding Members list to assign him/her to the queue. If you have created the workitem, you will be selected in the first queue by default. By default, ‘Unassigned’ is selected in the Members list for all other queues. Note that unless a member is selected in the next stage, the Route button will be disabled.
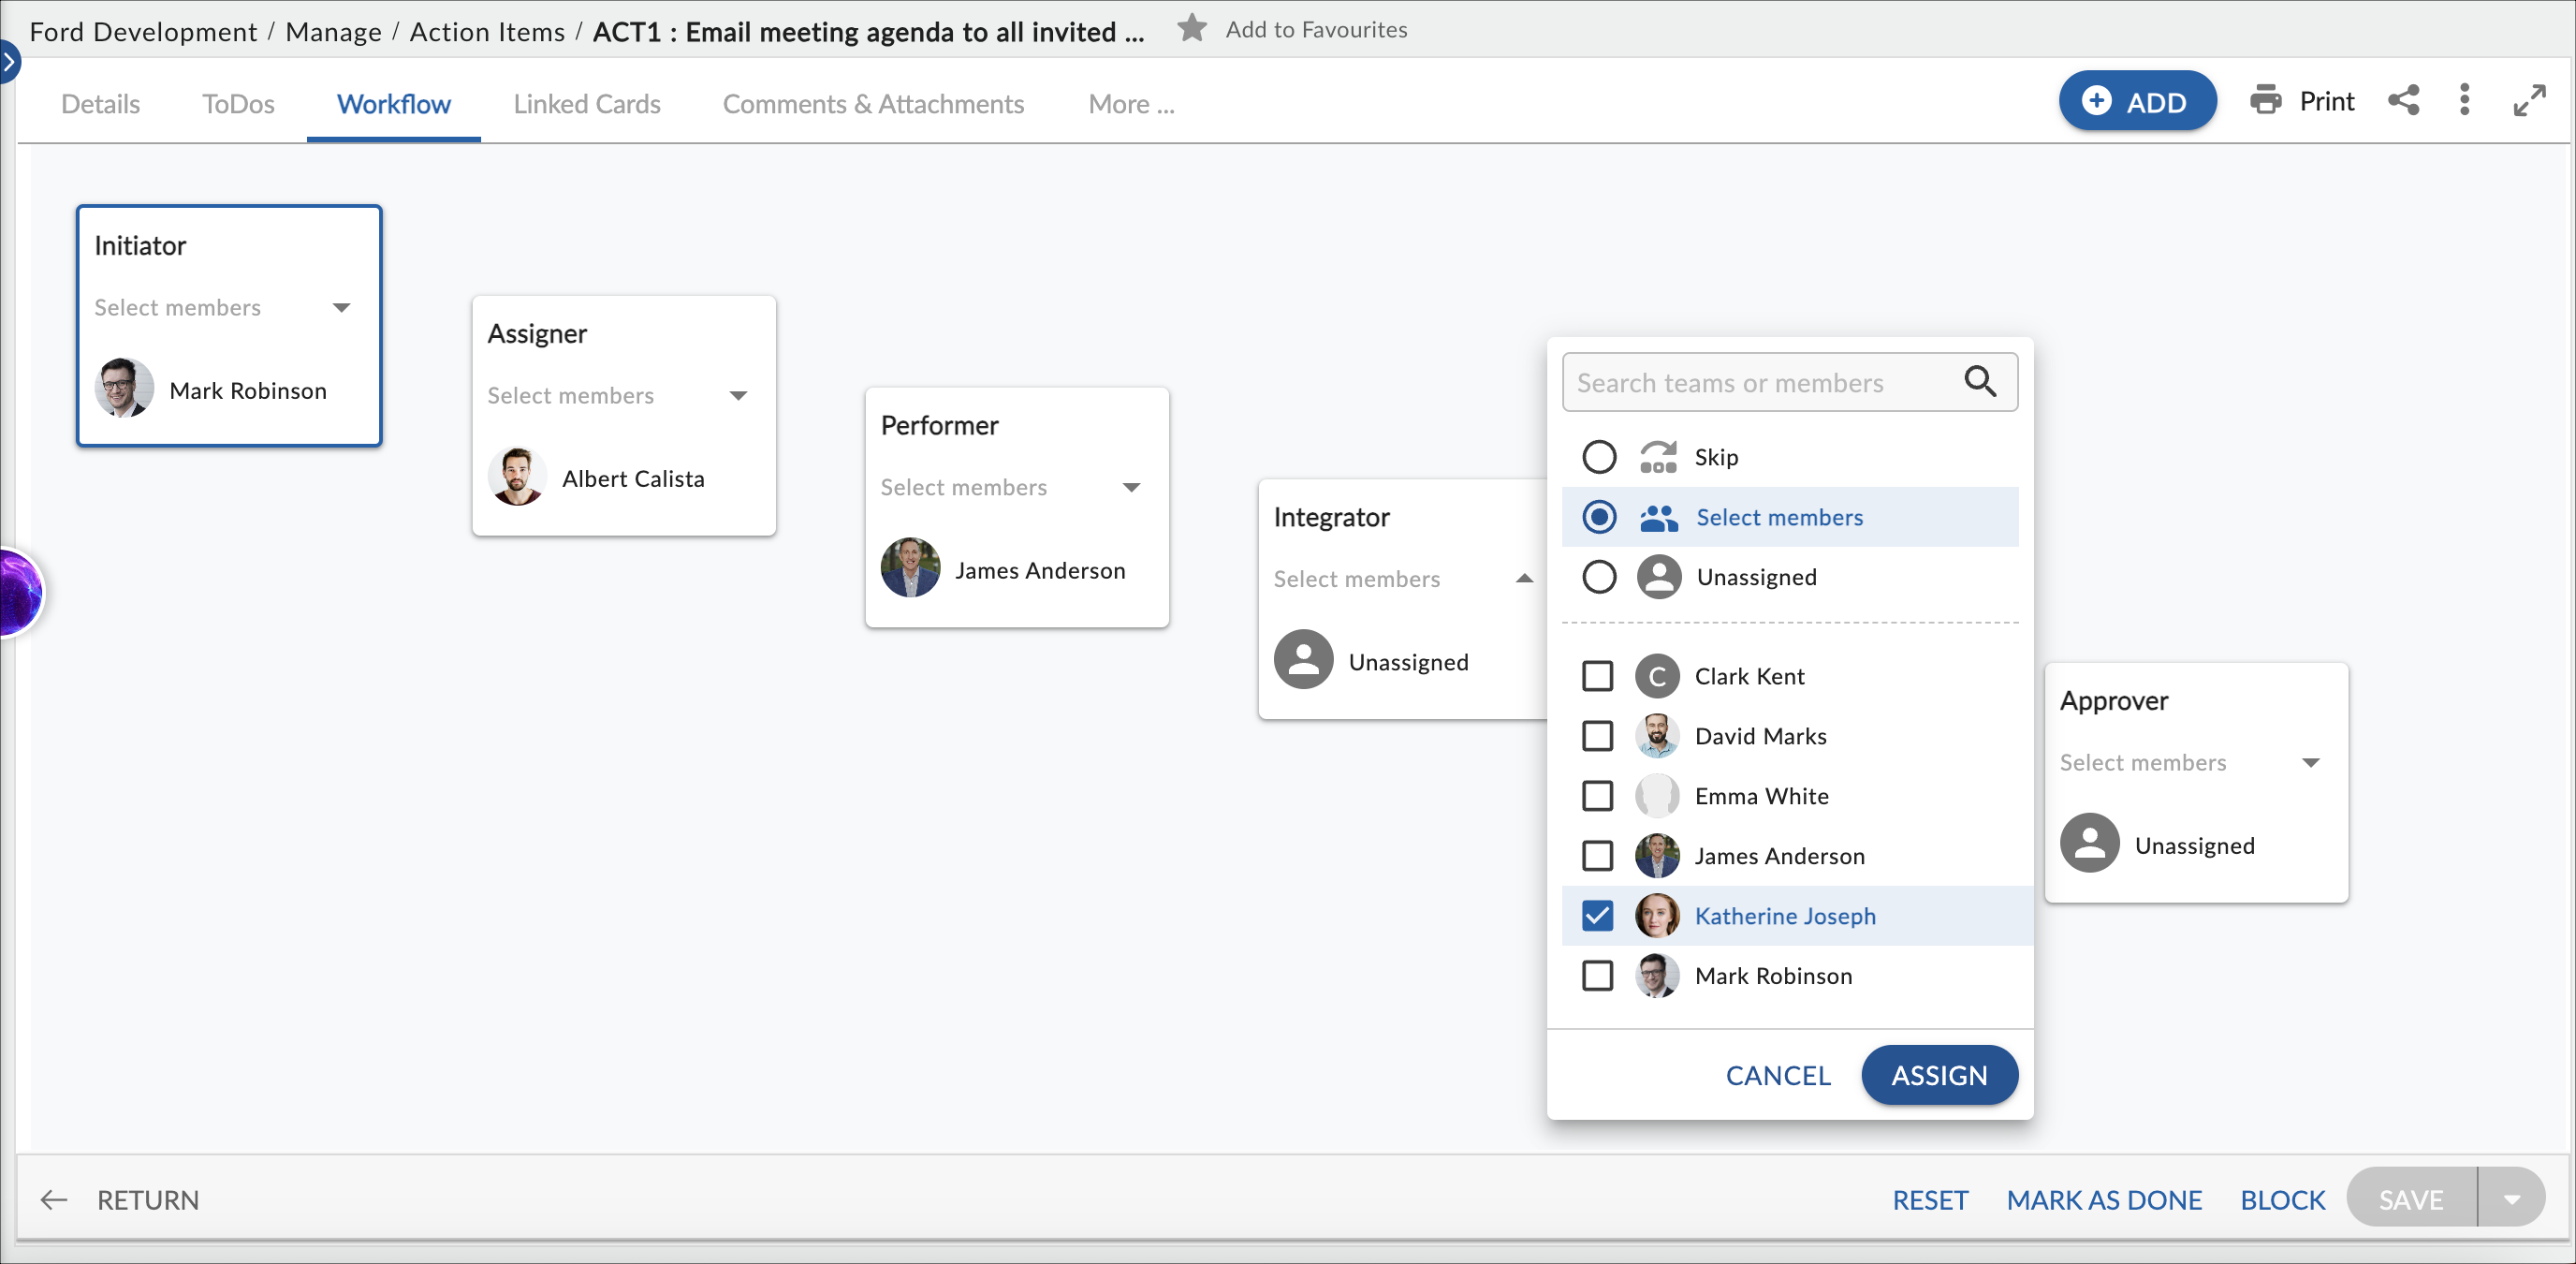
- To assign multiple users to a queue, select the required check boxes of the users and click the ASSIGN button.
- The workitem will not move to the next queue unless the member assigned at the previous stage routes the workitem.
- To remove a member from the workflow queue, clear the check boxes of the required users and click the ASSIGN button.
- You cannot remove a member from a workflow stage in a workitem if the member has logged any effort against the item. This will avoid any possible timesheet data loss.
- If you do not want to assign a member to work on the item in a stage, select Skip in the Members list.
Routing a Workitem
When defining the workflow for a workitem, at each stage in the workflow, one team member assigned to the workitem is responsible for the workitem. When the team member completes work for that workitem, he/she can route it to the next member in the workflow queue interpreted as work has progressed to the next stage. If Timesheet is enabled for that workitem, the team member has to enter time and route the Timesheet, additionally.
To route a workitem:
- Open the workitem. In the Workflow tab, click the More Options icon and click Route. The workitem is routed to the next person in the workflow.
- On routing the workitem, the green arrow indicates that the item is routed from the previous stage to the next stage. The visual workflow displays grey arrows indicating the stages the items have passed through.
- After the item has been routed from the last queue, the item closes. The Complete button is replaced by the Reopen button. All sections change to non-editable. However, you can add comments, create a link to new items, and check the versions. If the item hasn’t passed through all stages and is closed, it means it was closed mid-way by clicking the Complete button. The stage after the green/orange arrow indicates at which stage the item was closed.
Rejecting a Workitem
You can reject an item based on incomplete work or not meeting the requirement. On rejection, the item is moved to the previous stage in the workflow i.e. to the member assigned to the previous queue.
To reject a workitem:
- Open the workitem. In the Workflow tab, click the More Options icon and click Reject.
- On rejecting the workitem, the item is moved back to the previous stage with the orange arrow enabled and pointing backward.