
Start with the video first to get a better grasp of the topic!
|
Skip Ahead to: |
Overview
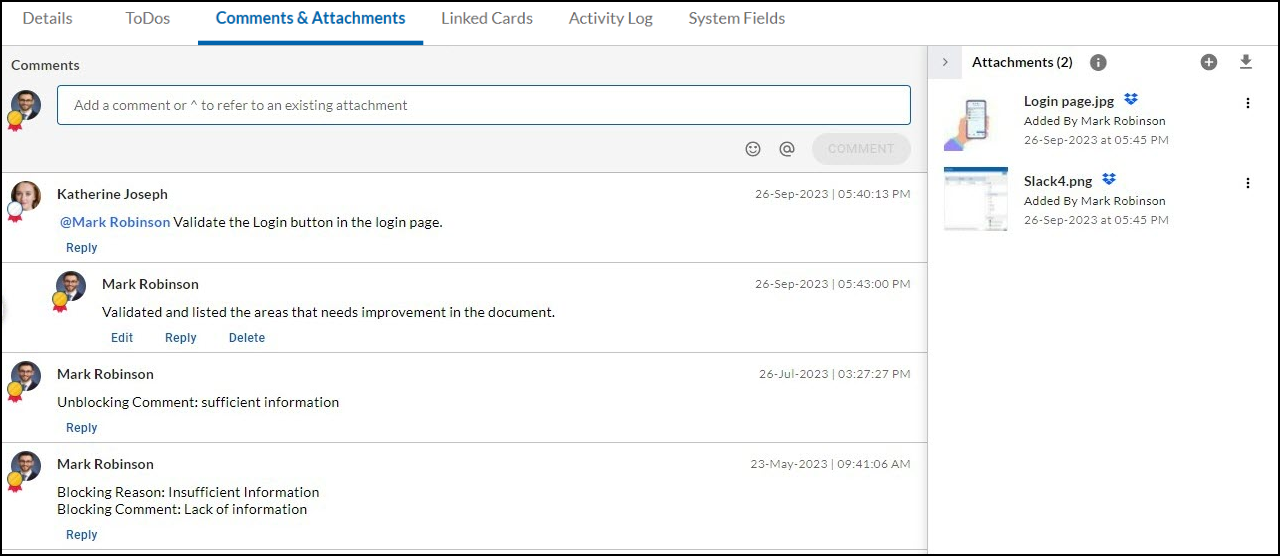
For every card, the Comments & Attachments segment displays two different sections.
- Left Section (Comments): Add and manage comments. In the Comments section, you can add, edit, reply to, and delete comments, enabling seamless collaboration with team members.
- Right Section (Attachment): Add, view, and download attachments. The Attachments section allows you to share files with your team and access them for download whenever needed.
Navigation
Once you add and save any card then beside the Details, Linked Cards, Activity Log, etc., there is a Comments & Attachments segment.
Steps to Add Comments
In the Comments & Attachments segment, you can add comments in the Comments section for every card.
Note:If you don’t see the comments section for a card, it may have been hidden for the module. You can unhide it if you have appropriate rights.
In this section, you can view all comments entered by various team members for an item. Every comment has a user’s name, profile picture, time, and date stamp for it.
To add a comment to a card:
- Open the card > go to Comments & Attachments.
- Enter your comment, use ‘@’ to mention teammates, and add emojis if needed.
- Click on the Comment button and save the comments.
- You can add replies to the comments made by other team members or by yourself too. The replies are displayed below the parent comment box.
- To edit a comment on a card, click on Edit below the comment. Edit your comment in the Comment box and click SAVE. The comments can be tracked based on the details displayed for each, such as the date and time, comment type, and team member who commented, also identified by the profile image displayed.
Note: You can edit the comments made by you, but not made by others.
With that, you can view your comments and the comments in which your team members tag you with the ‘@‘ symbol.
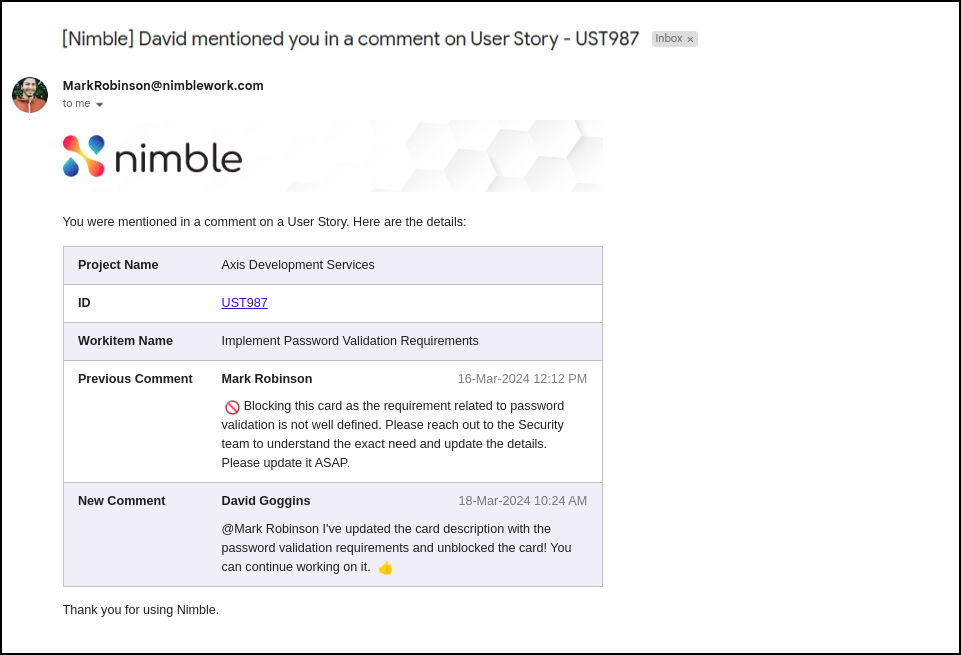
Receive Email if Mentioned in Comments
Here’s how it works:
- A teammate mentions you using “@” in a workitem’s comment section. Example: @MarkRobison
- You’ll receive an email notification containing the following details:
- Project name
- Workitem ID (clickable link to the workitem)
- Workitem name with contextual information:
- Previous comment
- New comment
- Blocking comment (if the new comment unblocks the workitem)
The full comment with your mention is highlighted. Clicking the workitem link opens
it is in a new browser tab with the comments section already displayed.
Notes:
- You’ll only receive one notification per comment, even if you’re mentioned multiple
times. - Notifications are sent regardless of whether the comment is added via web or mobile
app. - Modifying a comment with an “@” mention will resend the notification to all mentioned
users.
Share Comments to Slack
Sharing comments from Nimble cards to Slack allows you to keep your team up-to-date on important updates and discussions. To share comments to Slack, follow these steps:
- Navigate to the card and go to the Comments & Attachments section.
- Click the Share icon in the top right corner.
- If you haven’t integrated the Slack plugin, learn more about it here.
- Click the Slack button and select the desired Slack channel or users.
- Click the Share button to send the comments from the Nimble to the selected Slack channels or users.
Steps to Add Attachments
In the Comments & Attachments segment, you can share attachments with your team members. In case you don’t see the attachments section for a card, it may have been hidden for the module. You can unhide it if you have appropriate rights. To upload an attachment in a card, there are two options: From Computer and From Dropbox.
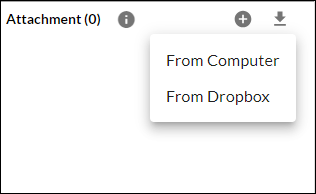
From Computer:
To add attachments to a card from the Computer:
- Open the card > go to Comments & Attachments.
- On the right, click the Add icon > select From Computer > select any jpeg, mp3, mp4, gif, etc. file to upload from computer.
- Your file will be successfully added to the card’s Attachment section.
The attachments can be downloaded by the other members as well by clicking on the Download option. Once the attachment is uploaded, click on More Options. Now, you can View, Download, Set as a Cover page, or Delete the respective attachment.

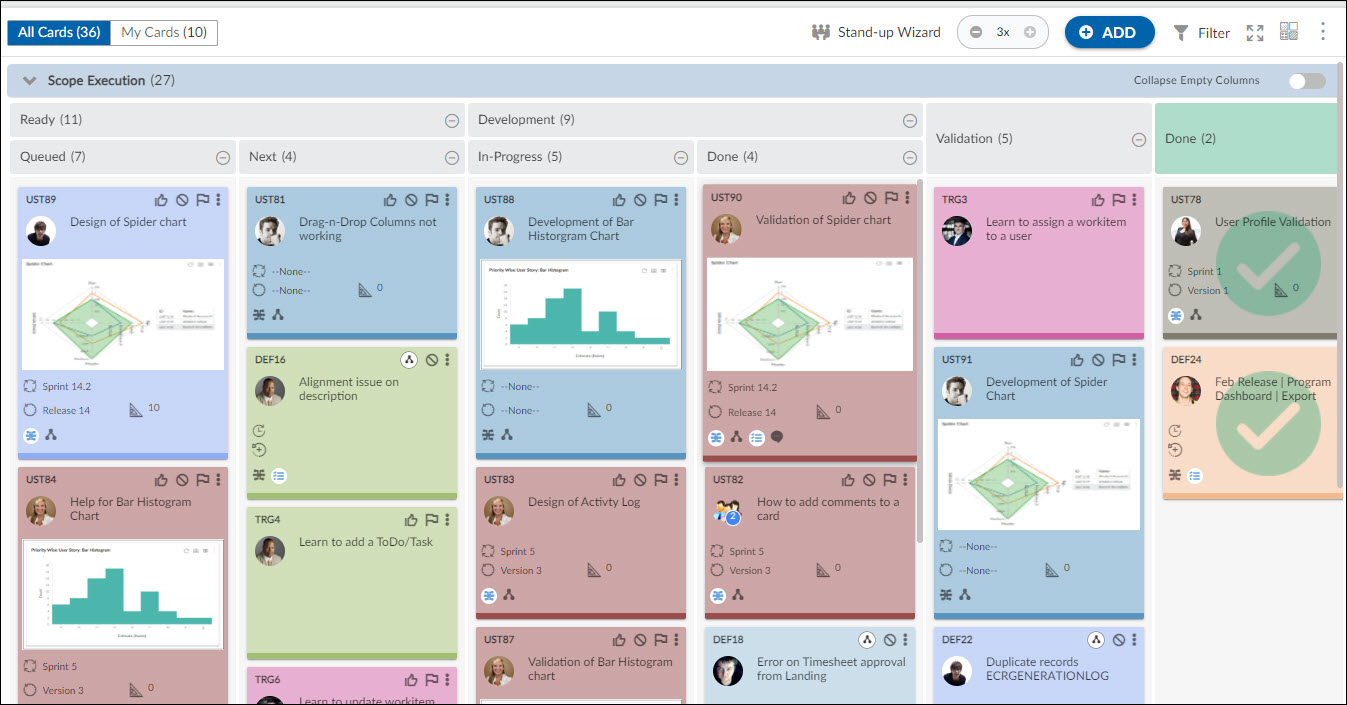
Display Media on Card
Setting an attachment as a cover image makes it visible on the Work Hub. Open the toolbar, click the More Options icon, enable the Display Media on Card toggle, and the attachment will appear as the card’s visible media.
Adding Attachments to Your Own Storage Account
You can save your attachments on the cards in your cloud storage account. Nimble Allows you to link your cloud storage such as Google Cloud Storage, Amazon S3, and Microsoft Azure to your Nimble account to save your enterprise data within your secured environment. Once linked, all your enterprise data (attachments on the cards) will be stored in the linked storage account afterward.
To link your storage account to Nimble, perform the following steps –
- From the left menu, click the organization name.
- Under the Administration menu, select the Link Your Own Storage option.
- Select the storage account that you want to link with Nimble.
- Click Connect.
- Enter the required credentials and access keys.
- Once your storage account is connected, a confirmation message is shown on the screen.
