
Start with the video first to get a better grasp of the topic!
|
Skip Ahead to: |
Overview
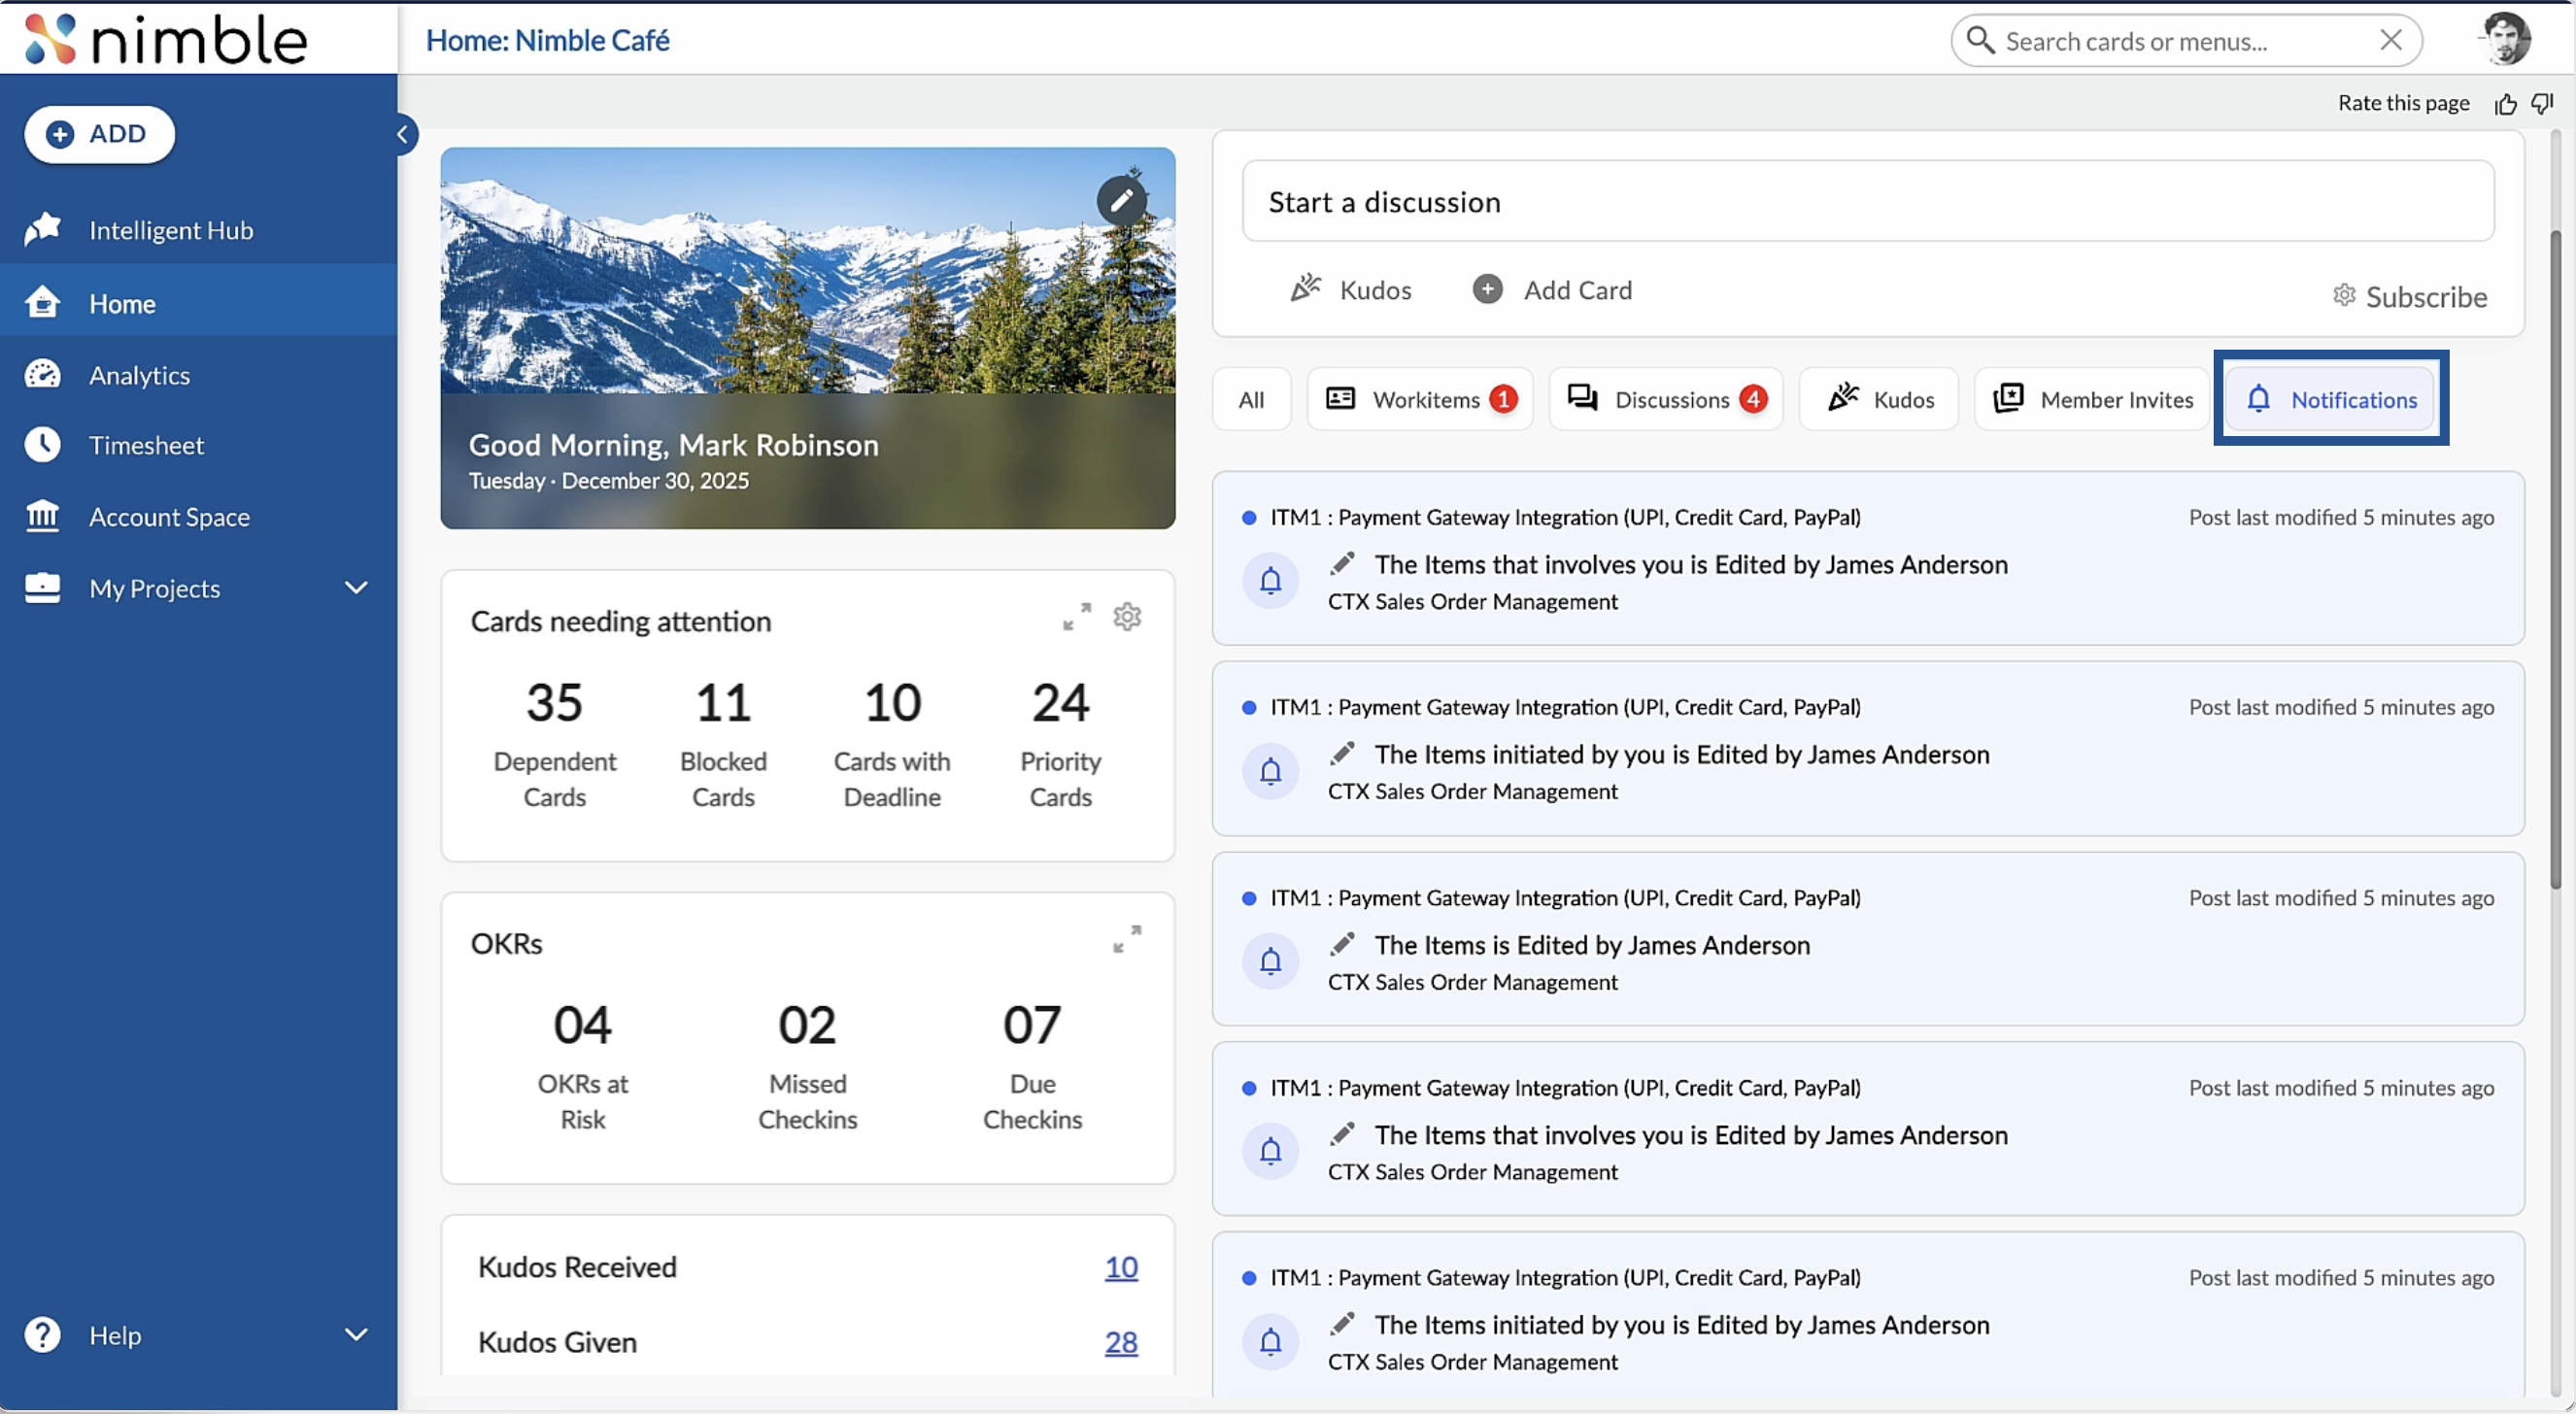
The Notifications tab is a place to quickly view or manage notifications for the projects in which you are a team member. All your notifications are available in one place in Nimble Café, along with updates from discussions, kudos, and member invites.
If you have new notifications, the notification count is displayed in the left panel on the Home icon. This count represents the combined total of updates from workitems, discussions, kudos, member invites, and notifications. Click the Notifications tab to view all notifications. Notifications from the last three months are displayed in chronological order.
You can set notifications to be received for various important events in a project. For example, you can set a notification email to be sent whenever a new workitem is assigned to you. The email is sent to your registered email ID based on the frequency configured in Notification Settings, when an event occurs in the selected project.
Setting up Notifications
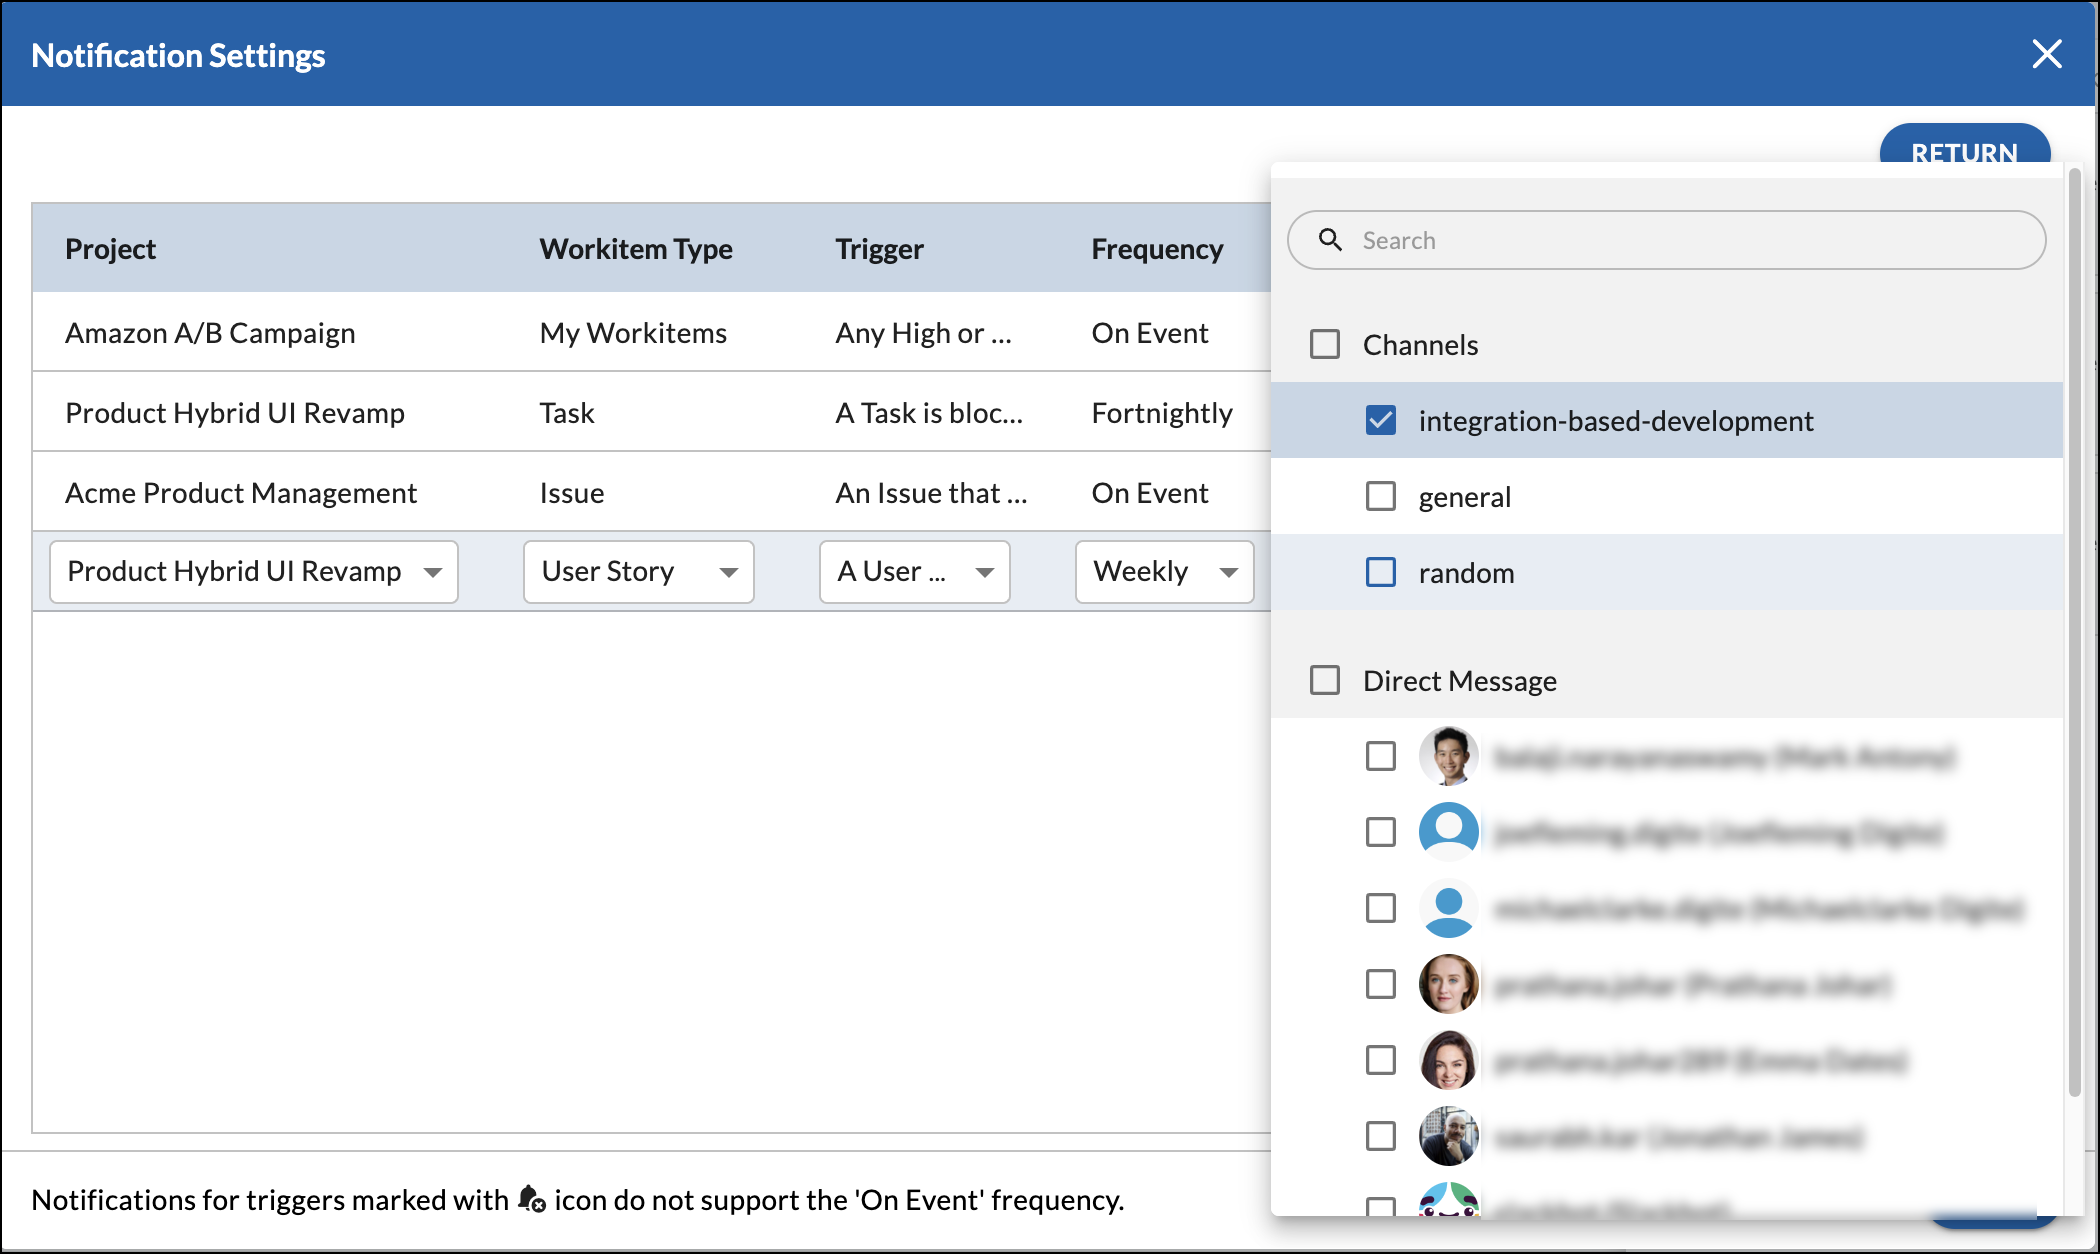
To set up a plan to receive notifications:
-
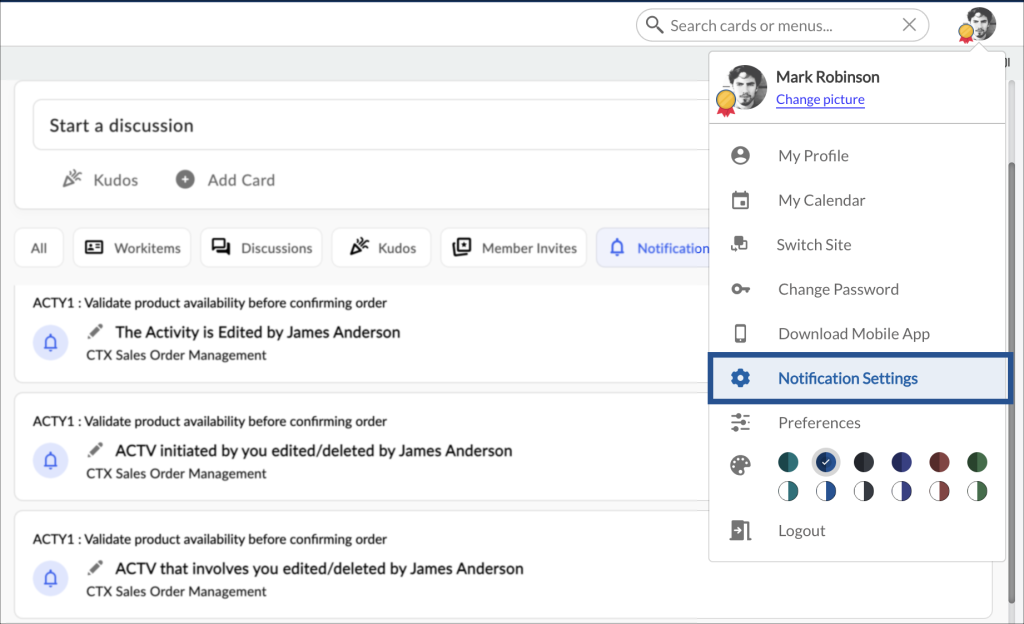
Hover over Profile picture in the top-right corner.
-
Click Notification Settings.
-
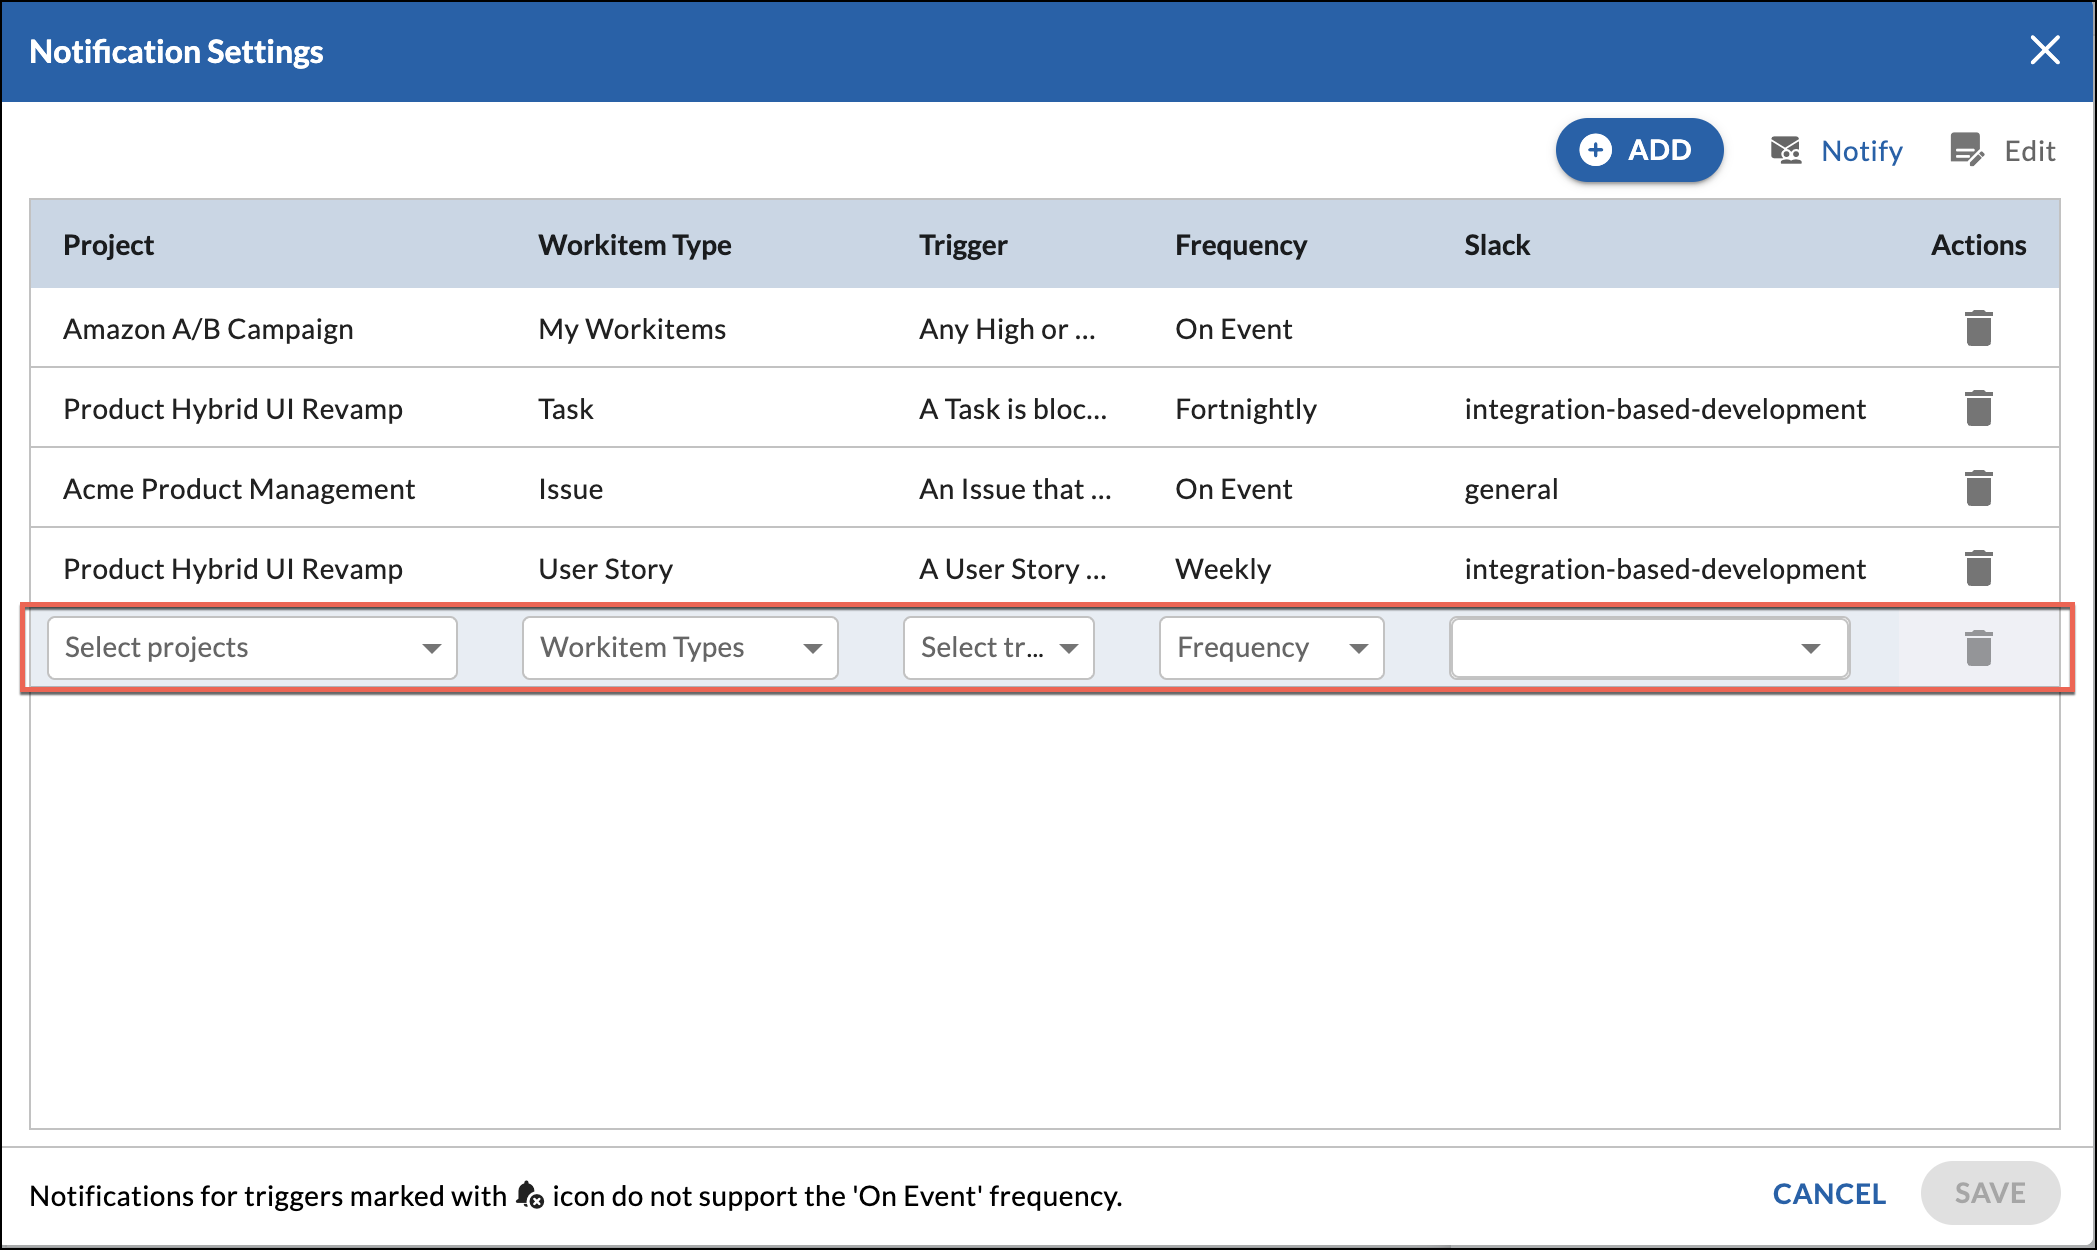
Click the ADD button and select the following fields:
-
Project: Select the required Project(s) from the drop-down list. Events occurring only in these project(s) will be notified to you.
-
Workitem Type: Select the required Workitem Type(s).
-
Trigger: Select the required Trigger(s) and set values if needed.
(To view the list of triggers, click here.) -
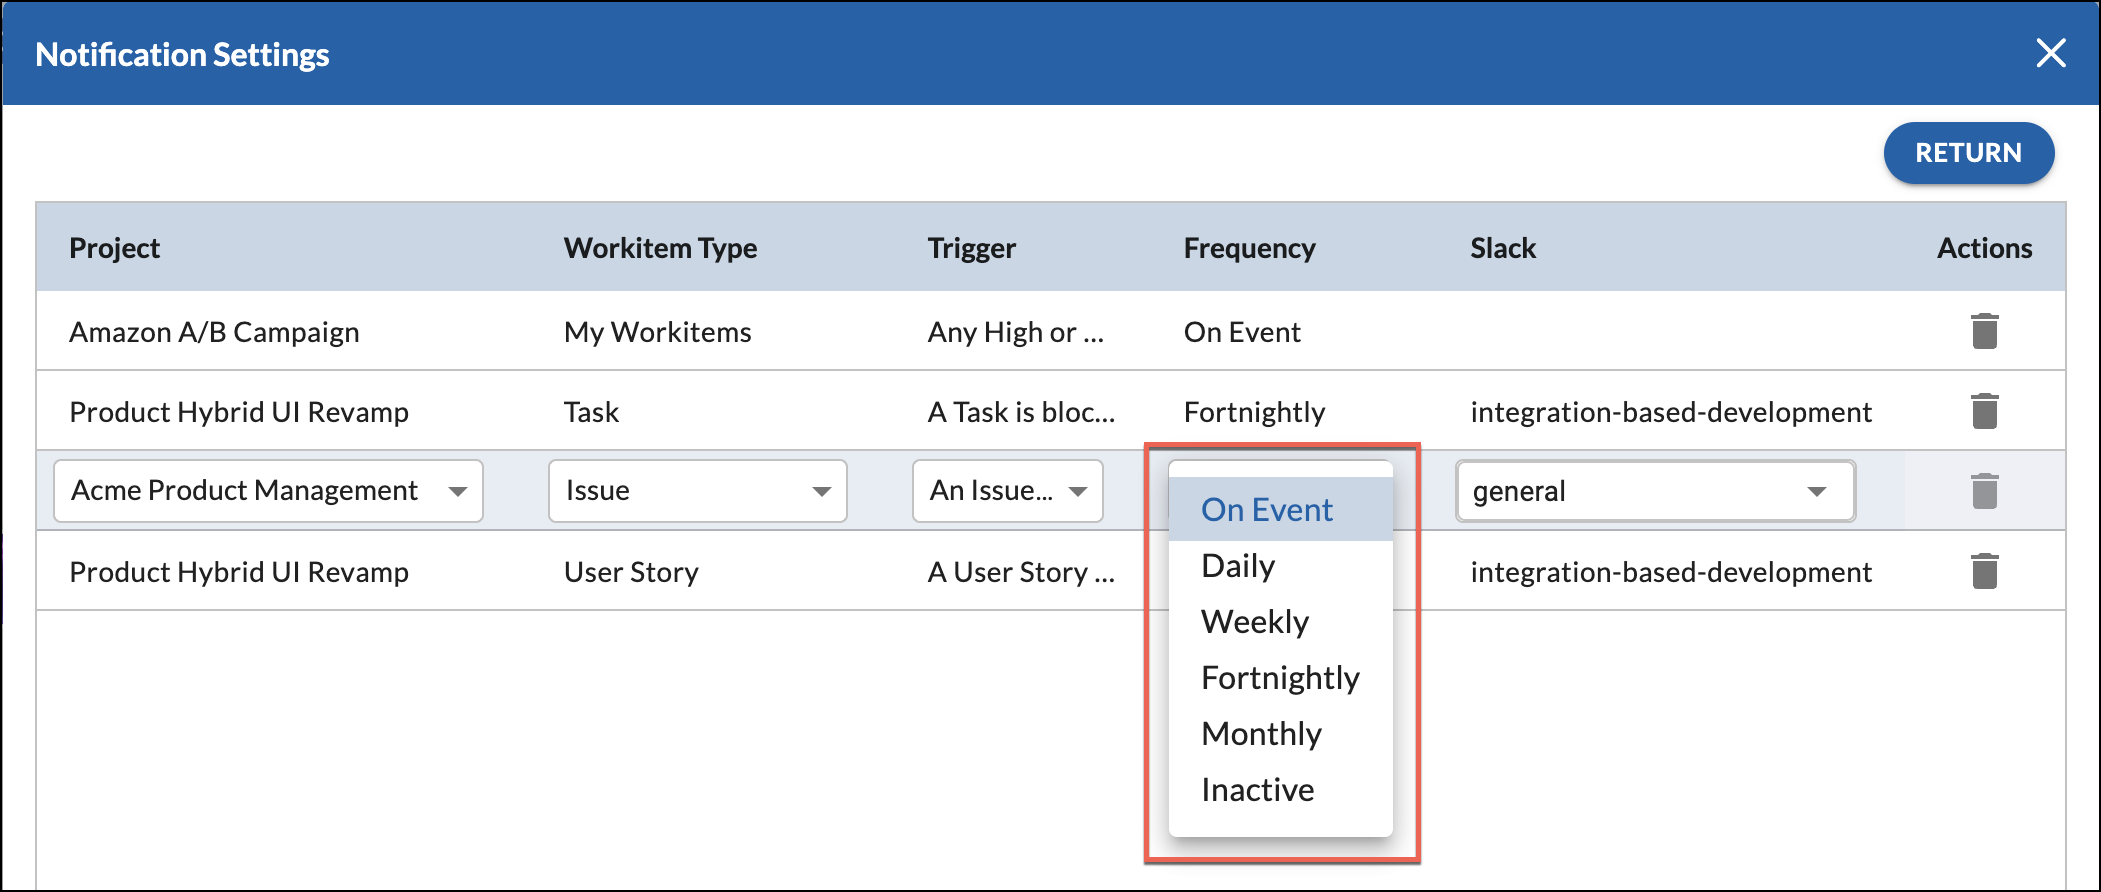
Frequency: Select the required notification frequency.
- Click the SAVE button.
-
-
Click the SAVE button.
To edit or delete the Notification Settings:
- Edit: Click the Edit icon, make changes, and click the SAVE button.
- Delete: Click the DELETE icon to delete the required row.
Note: You can also configure the notification trigger for custom forms.
Activating/Inactivating Notifications
You can temporarily inactivate the notifications by selecting ‘Inactive’ in the Frequency list. To activate it, select any other available options such as On Event, Daily, Weekly, Monthly, and Fortnightly.
Nimble Notifications in Slack
You can get Nimble notifications in Slack by selecting the required channels or users directly. To do so, enable the Slack toggle (if it is not done already) and perform the following steps:
- Click the Notify button.
- To send notifications to channels, select the required channel from the Slack drop-down list.
- To send notifications to users, select the required users from the Slack drop-down list that you want to notify, and then click the SAVE button.
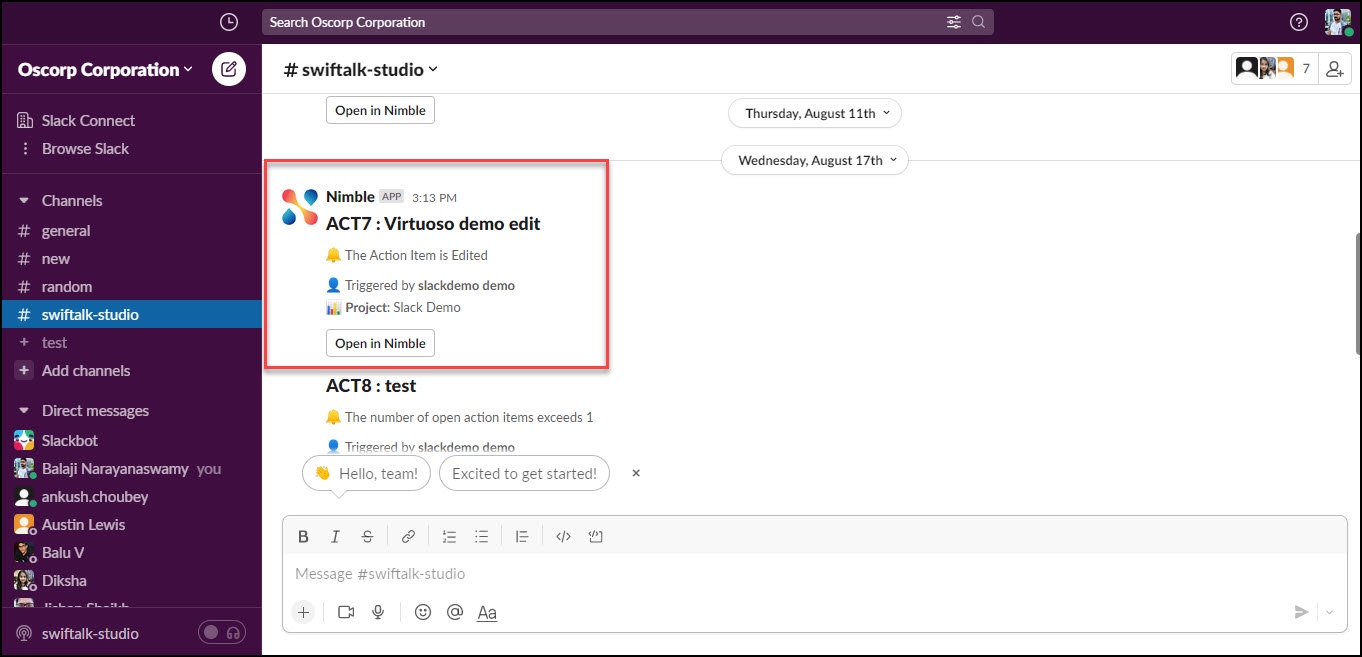
- When an event occurs, the configured notifications are sent directly to the selected Slack users/channels.
- The triggered notifications can now be seen in the selected Slack users/channels.
Triggers that lead to notifications are listed below.
| 1 | The number of open <Workitem> exceeds |
| 2 | A <Workitem> is added, edited, or deleted. |
| 3 | A <Workitem> that I initiated is edited, routed or deleted. |
| 4 | A <Workitem> that involves me is edited, routed or deleted. |
| 5 | A high or critical priority <Workitem> is added, edited, routed, or deleted. |
| 6 | The number of High or Critical priority <Workitem> exceeds |
| 7 | The <Workitem> remains in a workflow stage for more than (days) * |
| 8 | A <Workitem> is delayed over (days) * |
| 9 | A <Workitem> is blocked or unblocked |
| 10 | An item gets assigned to me |
| 11 | Any high or critical priority item gets assigned to me |
| 12 | The milestone is delayed over (days) * |
| 13 | The milestone is due in (days) * |
| 14 | The number of overdue tasks exceeds * |
| 15 | A task is delayed with respect to task planned duration over (%) * |
| 16 | A task has exceeded its planned effort by more than (%) * |
| 17 | A team member is added |
| 18 | My timesheet is approved or rejected |
| 19 | Reminder to route timesheets for the past week(s) * |
| * Set the value for the mandatory triggers. |
NOTE: When you perform an action, only the following notifications will be sent to you
- The number of open <Workitem> exceeds
- The number of High or Critical priority <Workitem> exceeds
- My Timesheet is approved or rejected
To learn more about Notifications operations, refer to Getting to Know the Notifications Features.