Start with the video first to get a better grasp of the topic!
|
Skip Ahead to: Adding a Workitem from the Left Panel |
Overview
A workitem can be added multiple times—provided the form is configured to allow multiple instances. Some forms may permit only a single entry. Using AI-powered recommendations, you can also view similar workitems at any point, even after creating or updating an item.
Adding a Workitem
All workitems related to a feature display an ADD button on the toolbar in the List view. If the AI-Powered features are configured for your workitem type, then while creating a workitem, AI helps to perform the following operations:
- AI-Suggest: This feature recommends similar workitems from the same as well as other projects alongside so that you can easily refer to its details. To use the AI similar workitem functionality, you must configure settings in the Set Up AI-Suggest page. To know about similar workitems functionality in detail, read here.
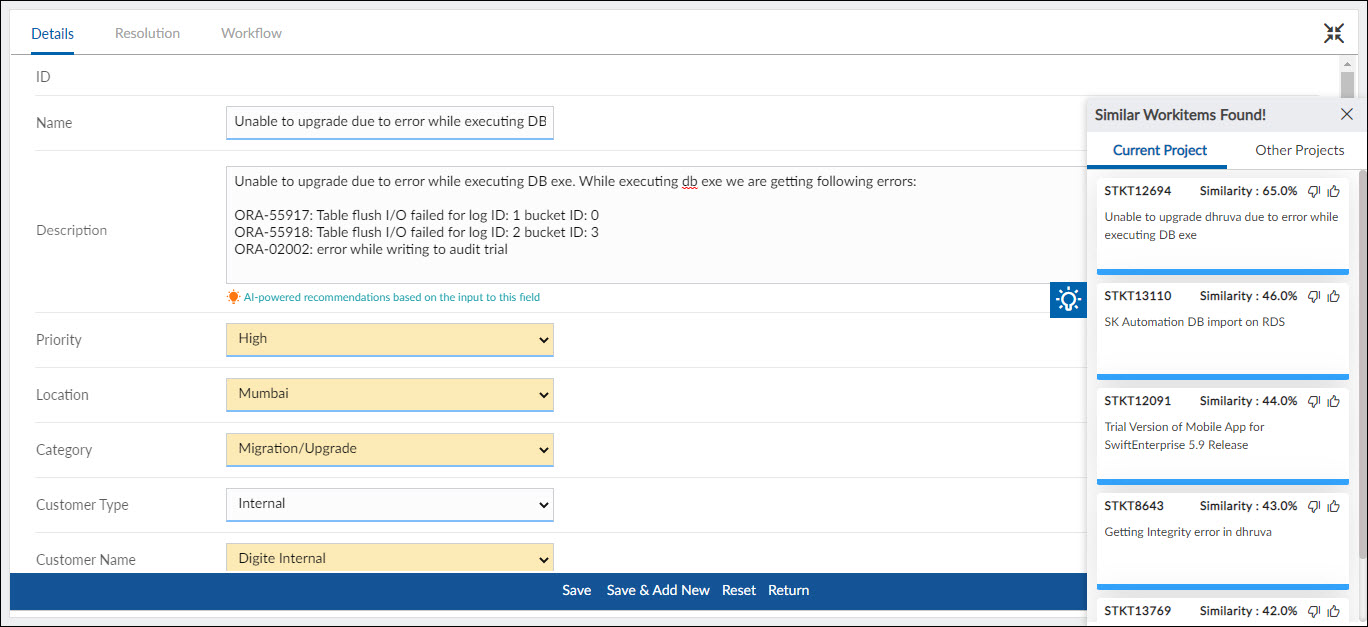
- Smart-Fill: Based on the recommendation settings, AI helps to auto-populate the workitem fields, which are editable. To know more about setting up Smart-Fill, read here.
Enter sufficient information in the Name and Description-type fields. For example, if your workitem type is Defect and you want AI recommendations based on the Steps to Reproduce field, set the recommendation on that field.
Fields enabled for AI suggestions are highlighted and display a note at the bottom-left corner, reminding users to provide adequate input for accurate auto-population and better similar-workitem results.
Common Tabs of a Workitem
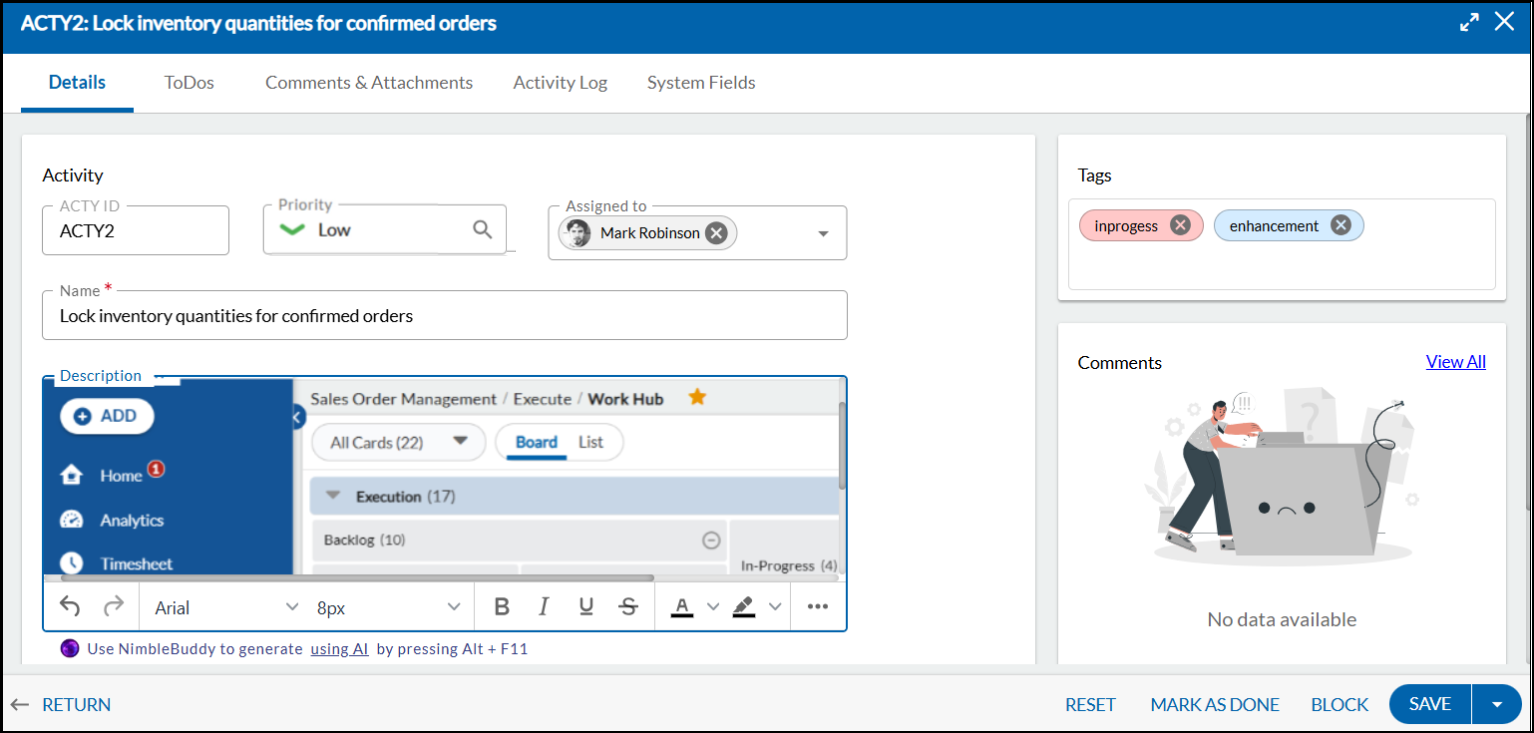
Details Section: Details is a standard section. Enter information in text boxes or select values in lists.
On saving the workitem, other common tabs will appear, based on the form configuration such as:
- Comments & Attachments: Add and view timestamped comments. Attach files up to 25 MB, which can be edited, deleted, or downloaded. Learn more here.
- Activity Log: The Activity Log shows a read-only list of actions in the format Activity by User on DD-Mon-YYYY HH:MM:SS. It also lets you view previous versions of the item and compare the changes. Learn more here.
- Linked Cards: Create and track relationships between workitems like Defects, Risks, or Change Requests. Learn morehere.
- ToDos: Break tasks into smaller, manageable elements for prioritization, collaboration, and timely completion of parent tasks. Learn more here.
- System Fields: They are auto-generated, read-only fields like Date Created, Date Closed, and Created By. They appear on most forms and are updated by the system for your reference.
- Custom Section: For items displaying any custom sections, enter and select values.
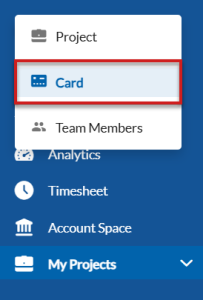
Adding a Workitem from the Left Panel
Perform the following steps to add a workitem from the left navigation panel –
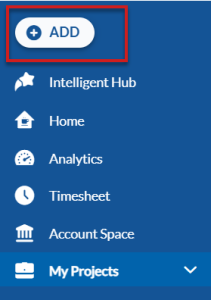
- Click the ADD button and click the Card option.
- Specify the project name, card type, lane and column on the Work Hub, card title and the card owner.
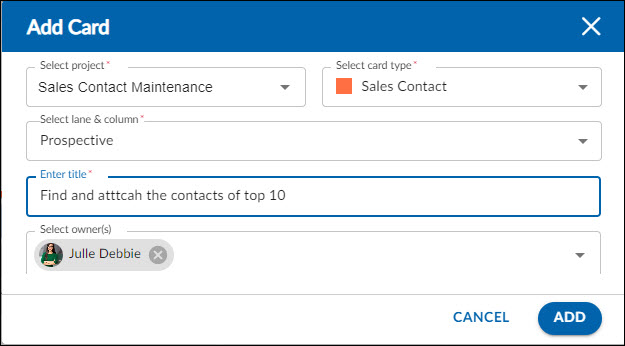
- Click the ADD button. The card is created. You can also open the detail view of the card and make further changes to it.
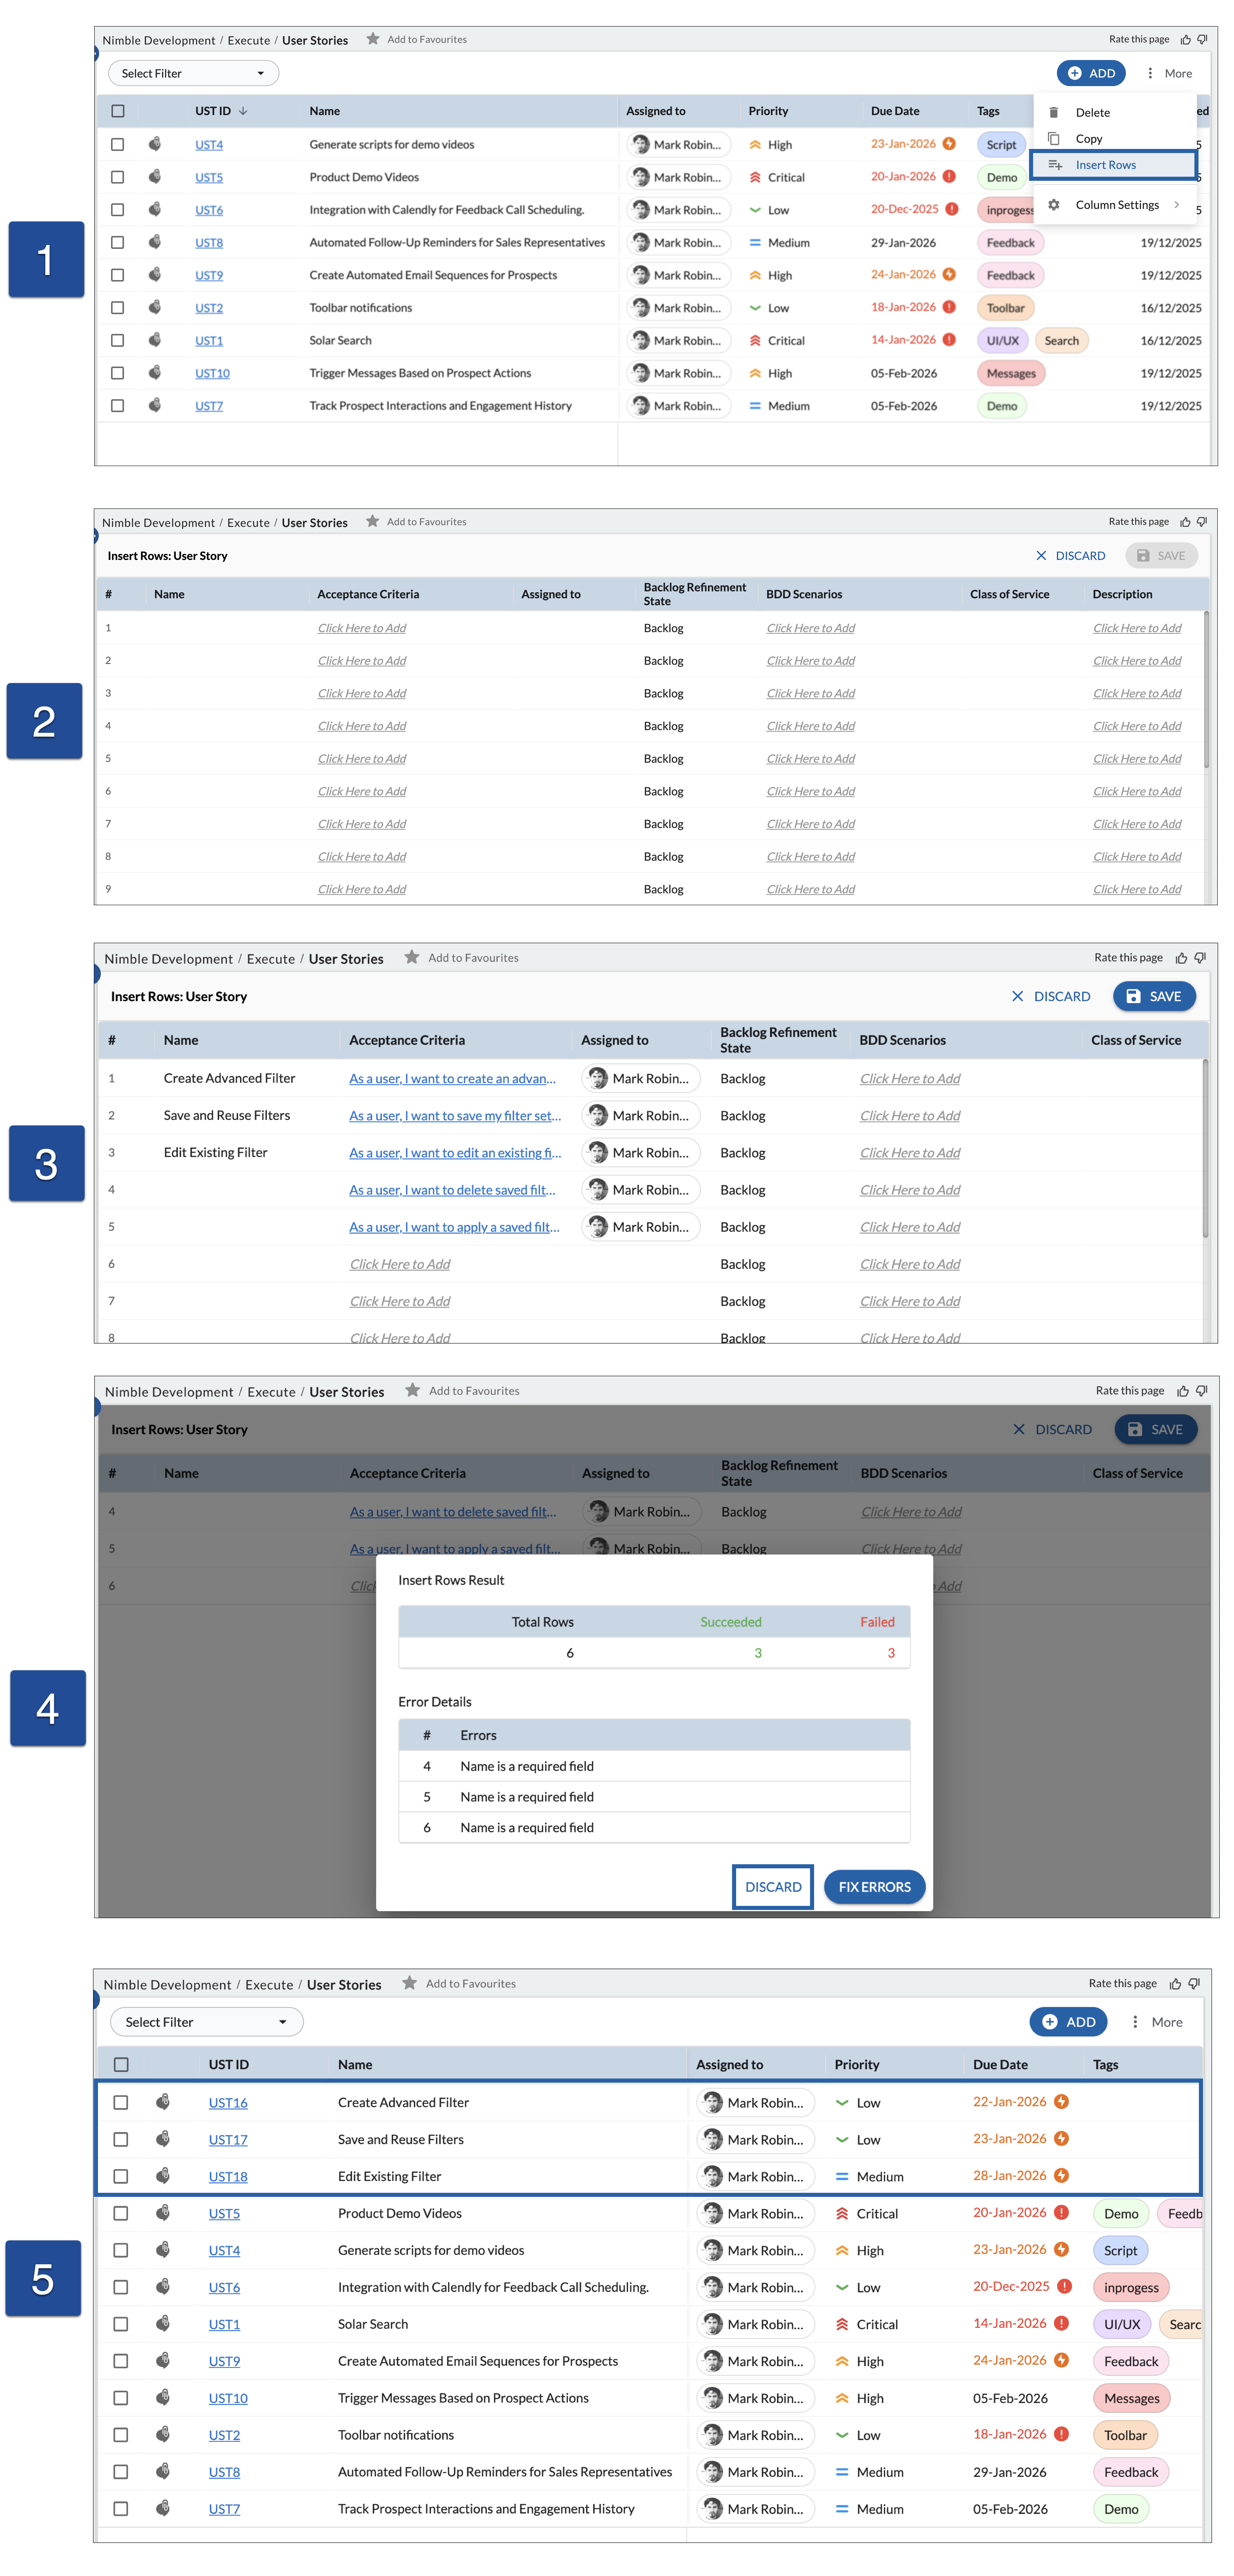
Insert Rows to Add Multiple Workitems at Once
The Insert Rows option allows you to add multiple Workitems (cards) directly from a grid in a single action, without creating them one by one. This is useful when you want to quickly capture multiple cards during planning, refinement, or review sessions while staying within the grid.
How to Insert Multiple Rows
- Open the required Workitems listing. Click More in the top-right corner of the grid, and select Insert Rows.
- In the Insert Rows window:
- Each row represents a new Workitem.
- You can enter values directly into the grid based on the field type.
- Enter data in the Insert Rows grid.
In the Insert Rows window, enter values directly in the grid. Each row represents a new Workitem, and fields support different input behaviors based on their type:- Rich text fields such as Description, Acceptance Criteria, or BDD Scenarios display Click Here to Add. Clicking this opens a rich text editor where you can enter and format content.
- Inline-editable fields such as dropdowns, tags, dates, numbers, or short text can be edited directly within the cell. Click inside the cell and select or type values, similar to working in a spreadsheet.
- Click SAVE to create the Workitems, or DISCARD to exit without saving.
If errors occur while adding multiple Workitems,- Click DISCARD to proceed with the successfully added Workitems, or FIX ERRORS to correct the Workitems with errors.
- After saving, Workitems are successfully created and added to the Workitem listing grid.
Note: The Name field is mandatory. You must provide a value for the Name field to save a row.
Handling Errors During Save
If one or more rows contain errors:
- An Insert Rows Result window is displayed, showing: Total rows processed Rows that succeeded Rows that failed
- Error details list the row numbers and the reason for failure (for example, Name is a required field).
- You can then:
- Click Fix Errors to return to the Insert Rows grid and correct the invalid rows, or
- Click Discard to discard the failed rows while keeping the successfully saved Workitems.
- This row-level validation ensures that valid Workitems are saved without being blocked by errors in other rows.
Modifying a Workitem
Modifying a Workitem To modify a workitem, follow these steps:
- Select the workitem from the list to open it in Edit mode.
- Update any field you want, you can make the necessary changes in the desired field, just like you would in a spreadsheet.
- After editing, press Enter or click outside the cell to save the update.
- A checkmark next to the workitem ID confirms the modification is saved.
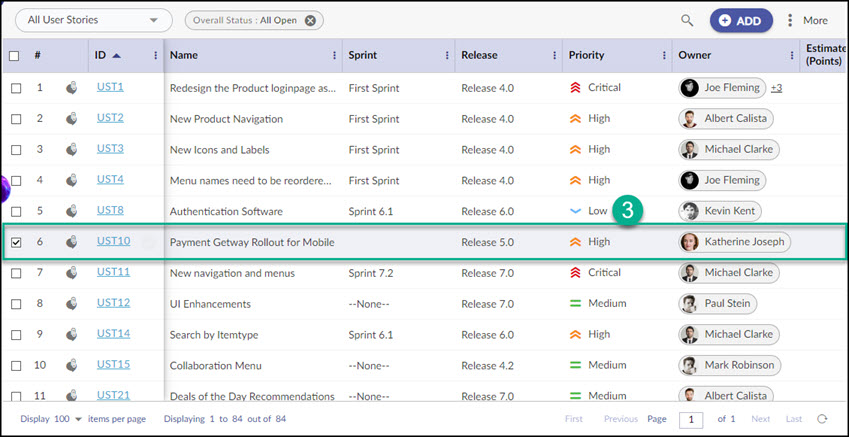
For example, let’s say you want to change the Priority of workitem UST10 to Medium. Here’s how you can do it:
- Simply click directly on the Priority field of the UST10 workitem.
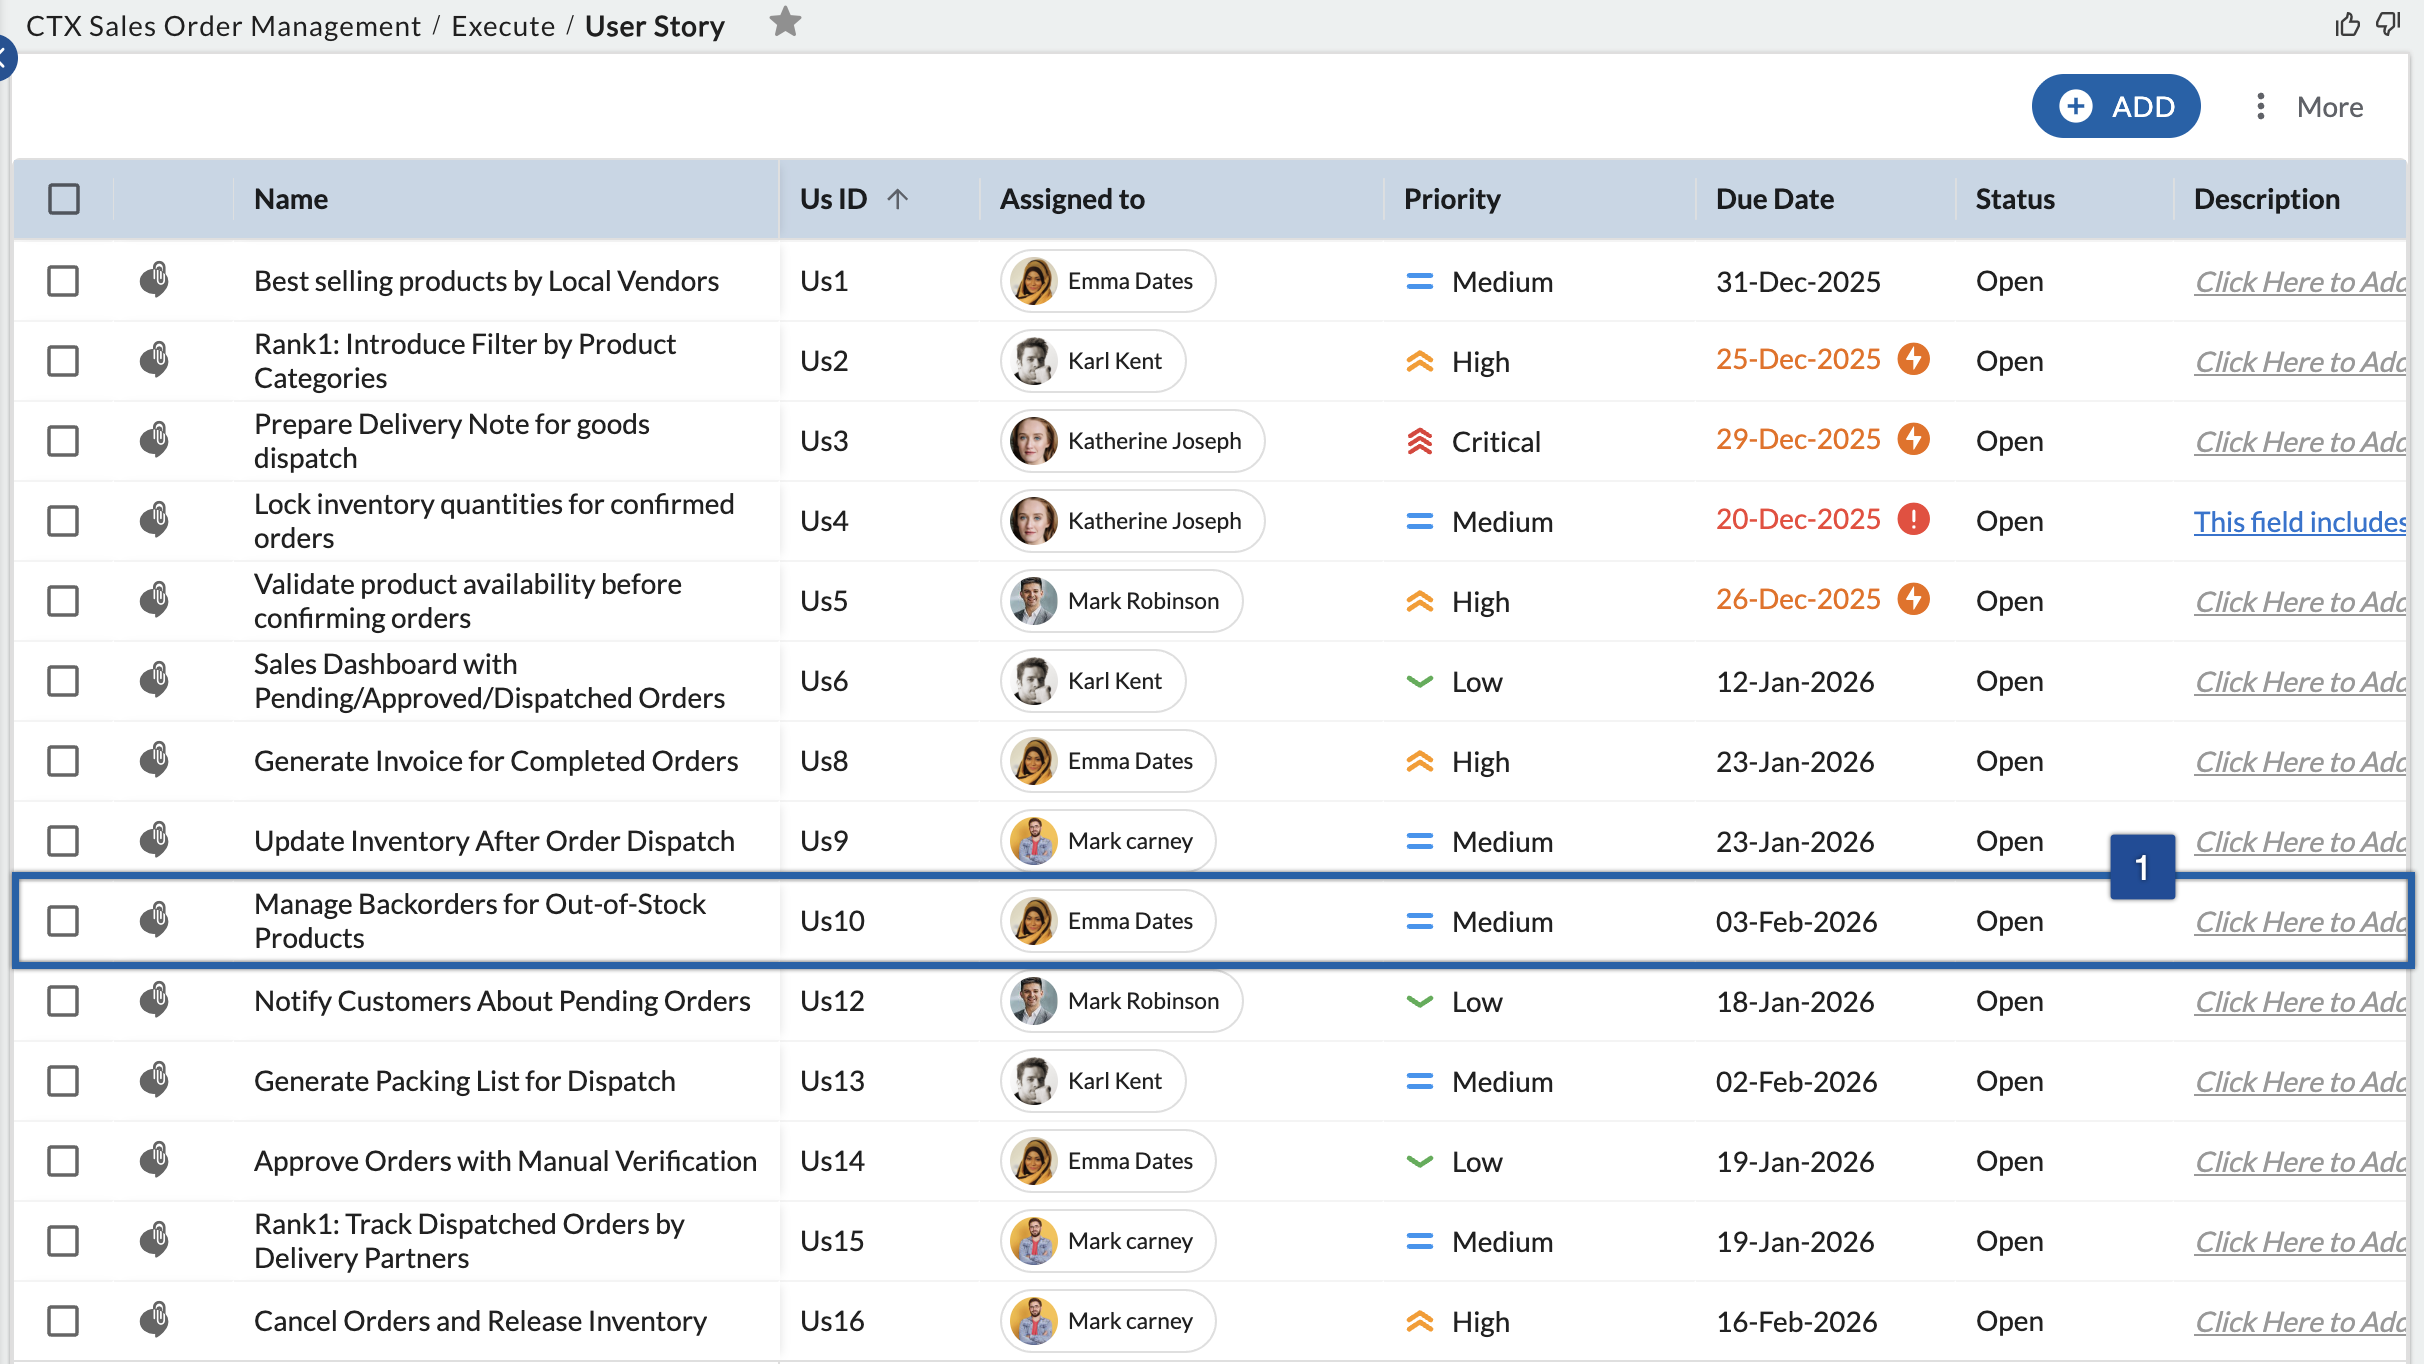
- A drop-down menu will appear, showing the available priority options. Select High as the new priority value.
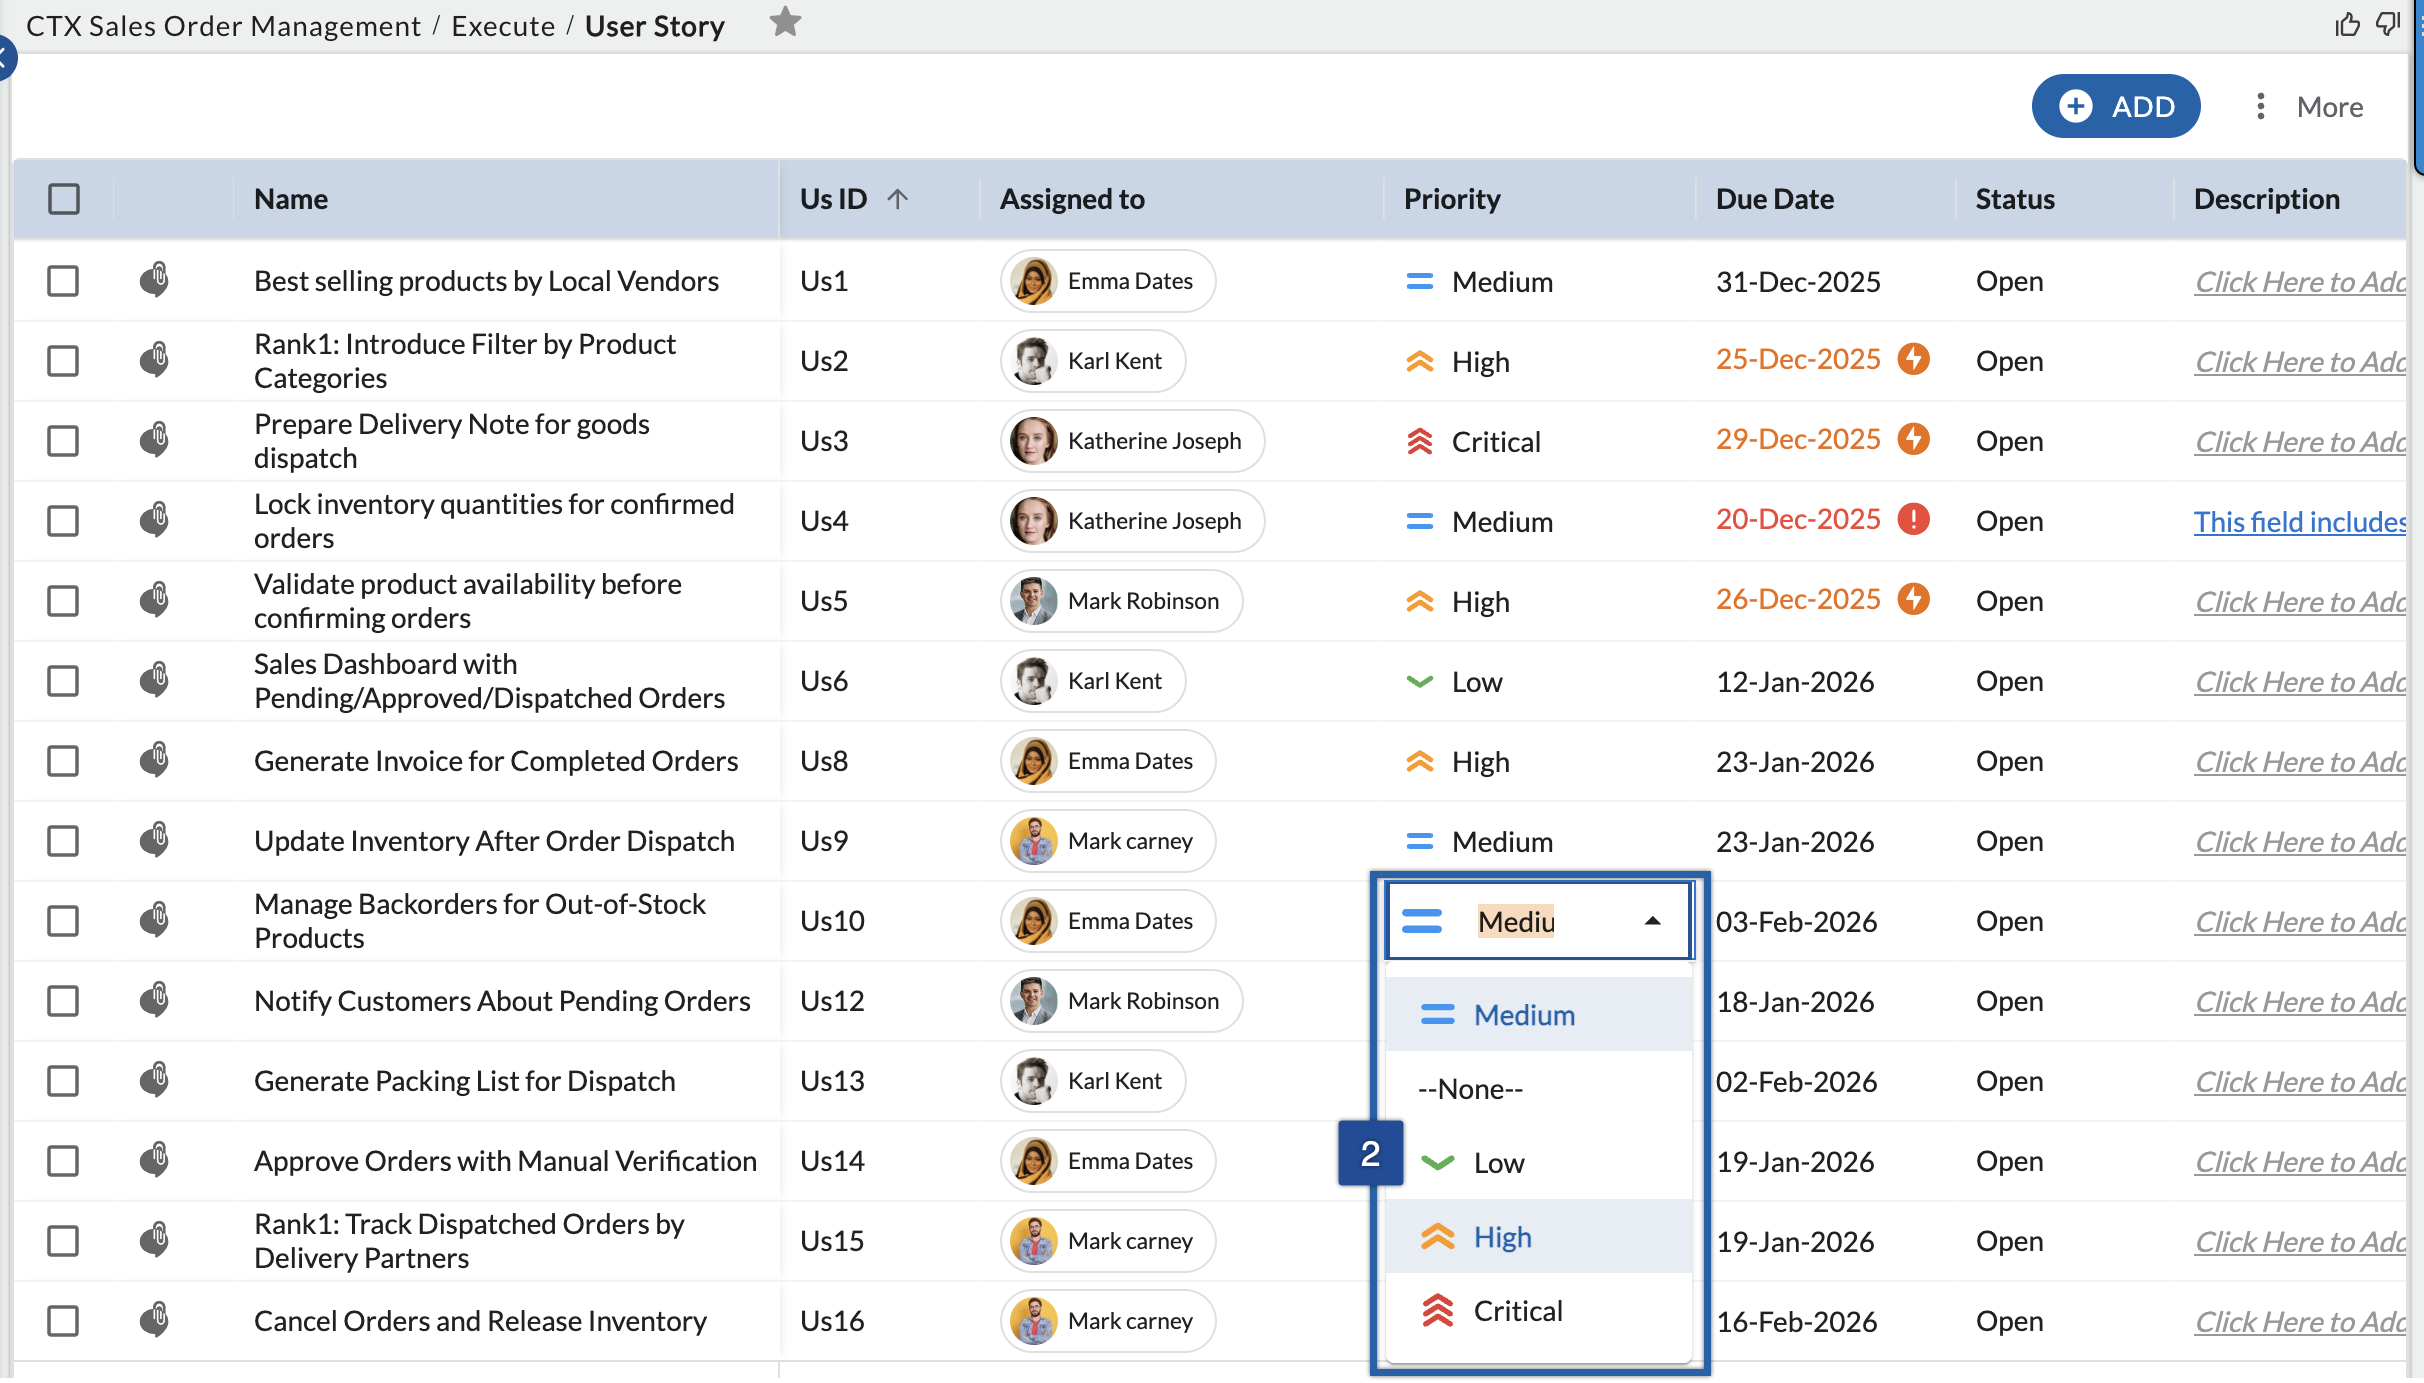
- Finally, press the Enter key or click elsewhere to save the changes.

Note: Clicking the card’s ID opens the card detail section, while clicking elsewhere on the card row activates instant edit mode
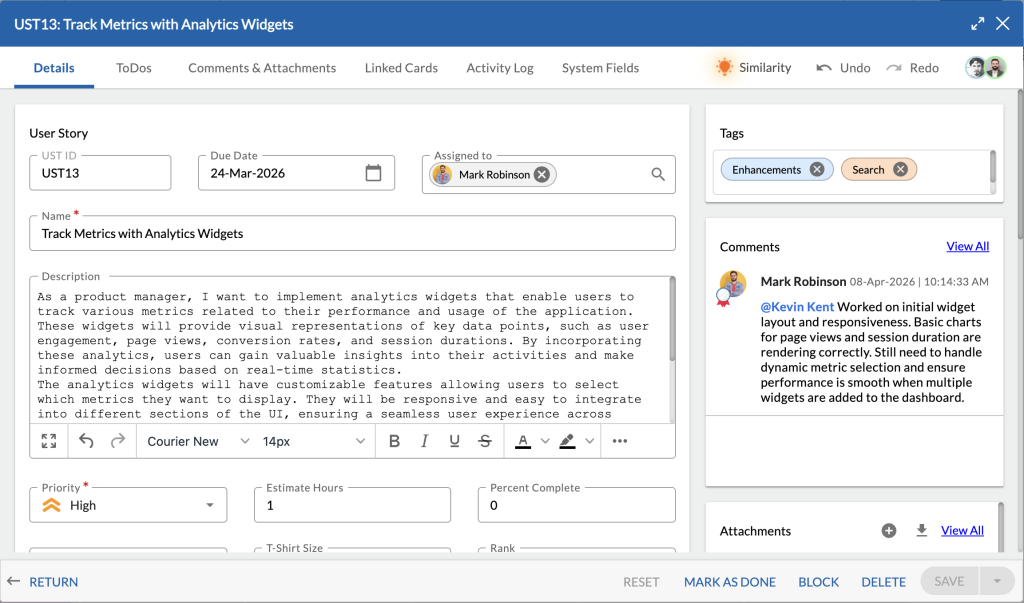
You can make updates in the Details View, Linked Cards, To-Dos, Comments & Attachments, and any custom sections available for the workitem.
Use the bulb icon on the right to view similar workitems and compare their details. Add comments if needed. To edit a comment you added earlier, go to Comments & Attachments, click the Edit icon, make your changes, and save.
After finishing your updates in the Details View, click SAVE to apply the changes to the workitem.