An organization hierarchy is the structure and arrangement of the entities of a business. The hierarchy can be of any type – location-wise, business units, or others. Nimble allows you to create an organization hierarchy so that you can track data of your projects in a hierarchy and get useful insights.
Note: You can create the organization hierarchy in your enterprise only if your enterprise is an Implementation-led enterprise and you are given the Nimble Consultant persona.
Creating Organization Relationships
In order to create an organization hierarchy, you need to first define the relationship for it. For example, if you want to create a location-wise hierarchy then the relationship would be Location. Similarly, if you want to create a business unit-wise hierarchy then the relationship would be Business Unit. These relationships would be useful in forming the hierarchies of the business entities or sub-organizations.
To create a relationship, perform the following steps –
- Click the left panel. Under the Apps section, click the organization name.
- Click the More menu and select the Organization Hierarchy option.
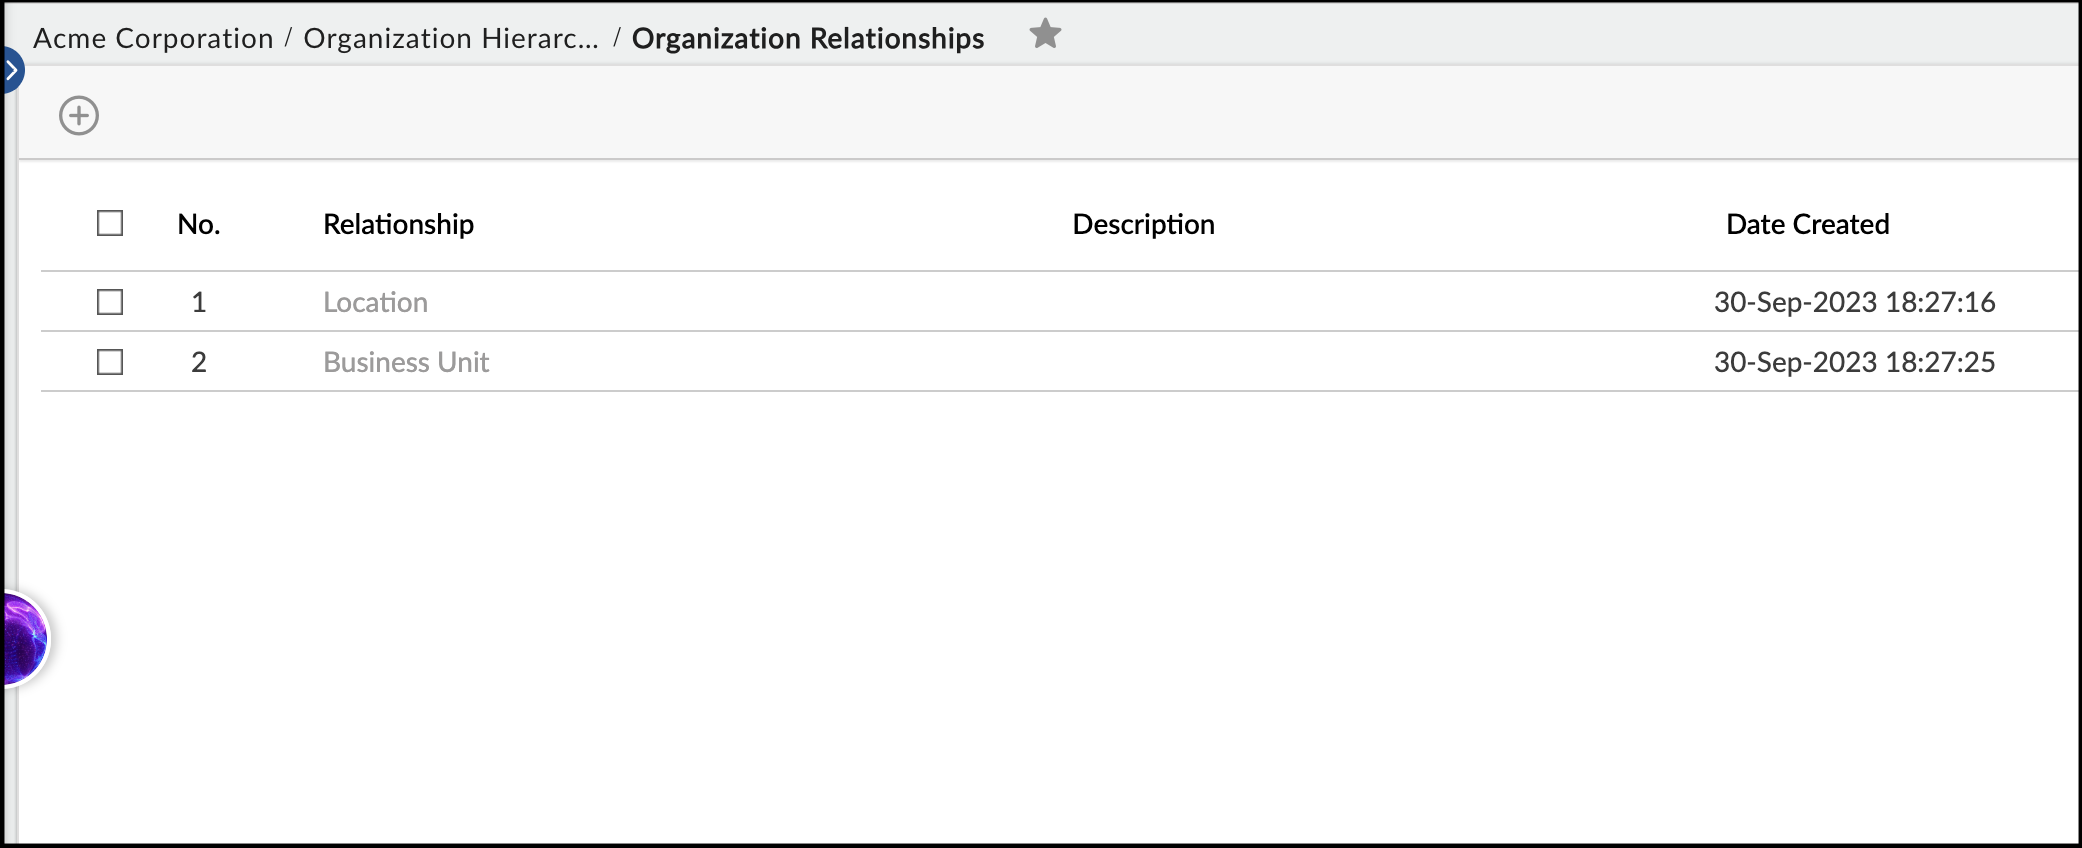
- Click Organization Relationships.
- Click the Add icon on the top-left corner of the page.
- Specify the name and the description of the relationship.
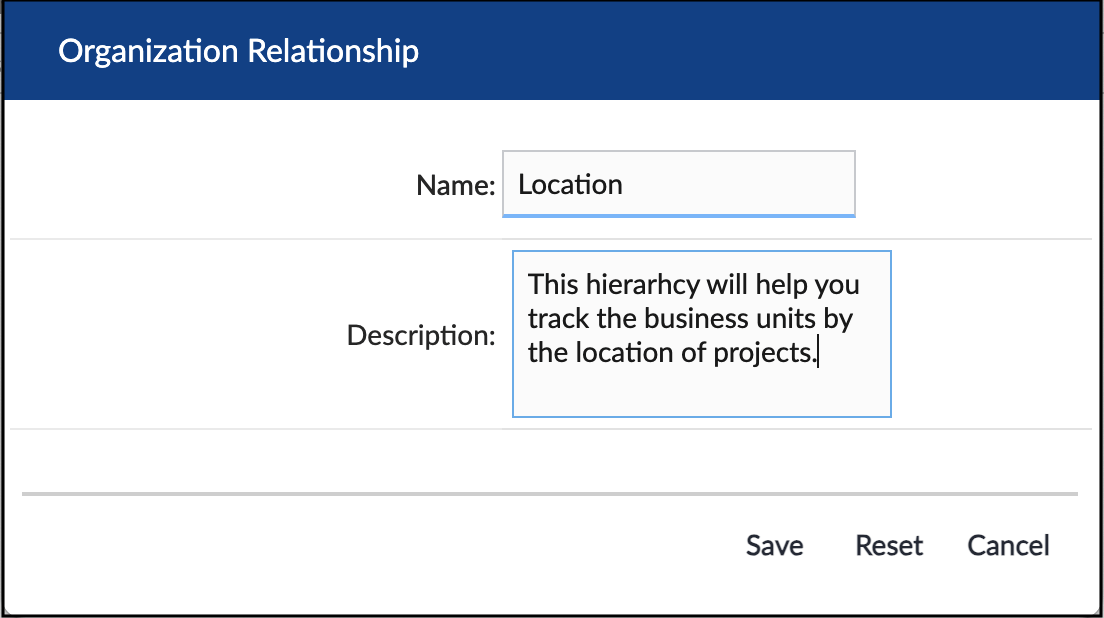
- Click the Save button.
- Similarly, you can create more relationships.
Once you define the relationship type, the next step is to create the child or sub-organizations and tag them to their parent organization to form a hierarchy.
Creating Sub Organisations
To create sub-organizations and arrange them in a hierarchy, perform the following steps –
- Click the left panel. Under the Apps section, click the organization name.
- Click the More menu and select the Organization Hierarchy option.
Note: If you have recently opened the Organization Hierarchy menu, then it will appear on the menu bar itself. - Click the Sub organizations option.
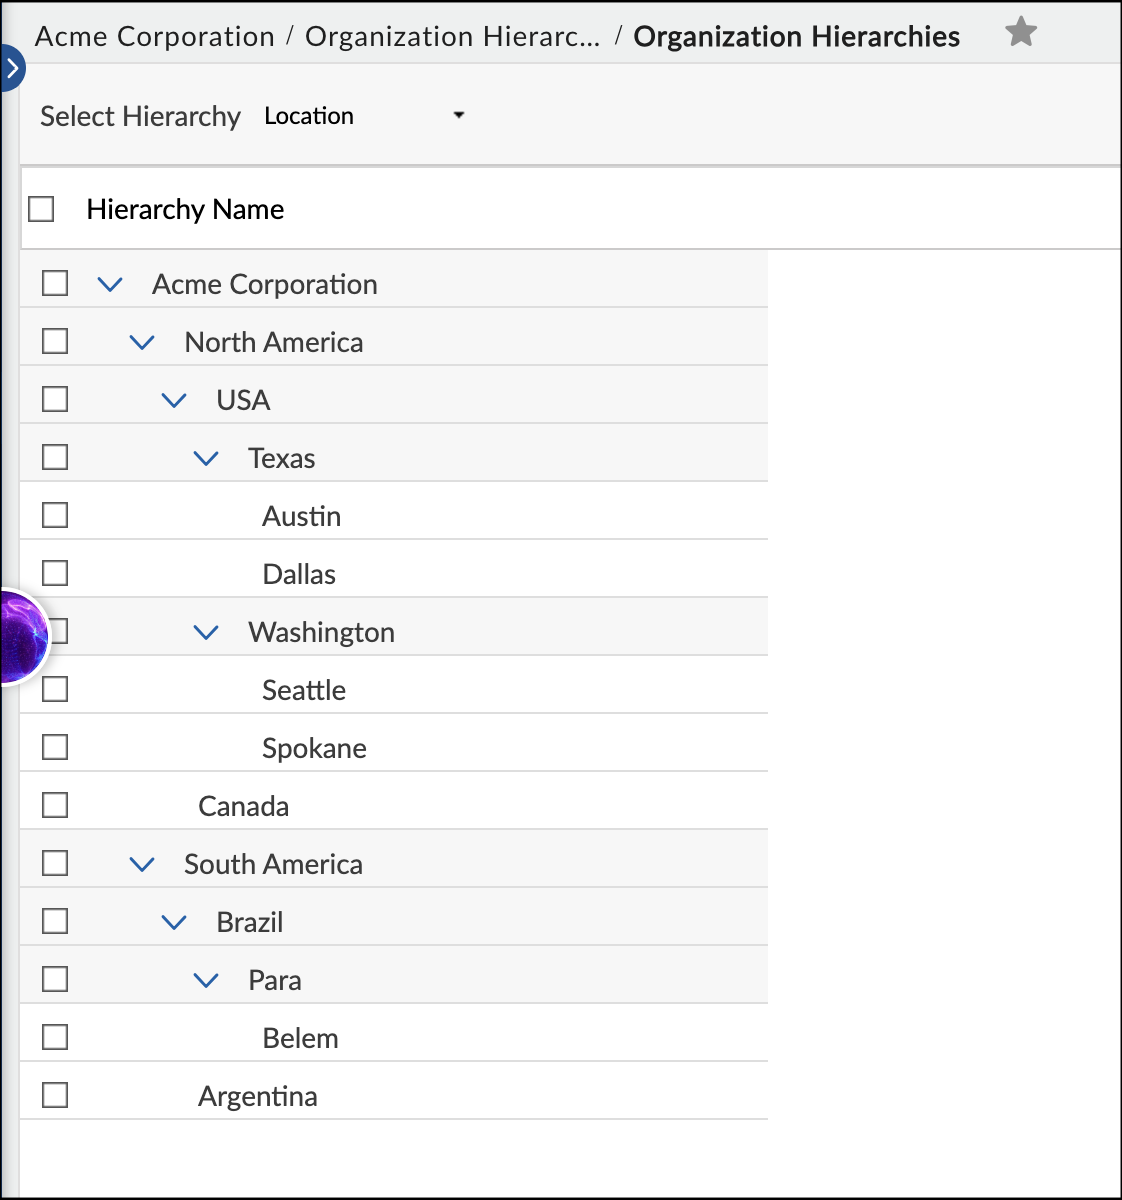
On the Sub organizations page, we need to define all the entities of your business. For example, if your business is divided into location-wise entities as shown in the below example, then you need to create all the locations here one by one. If your business has multiple hierarchies like location-wise, business unit etc. then all those units will be created here as a sub-organization. Later we will do the correct tagging to create the hierarchy of a particular business level.
- Click the ADD button.
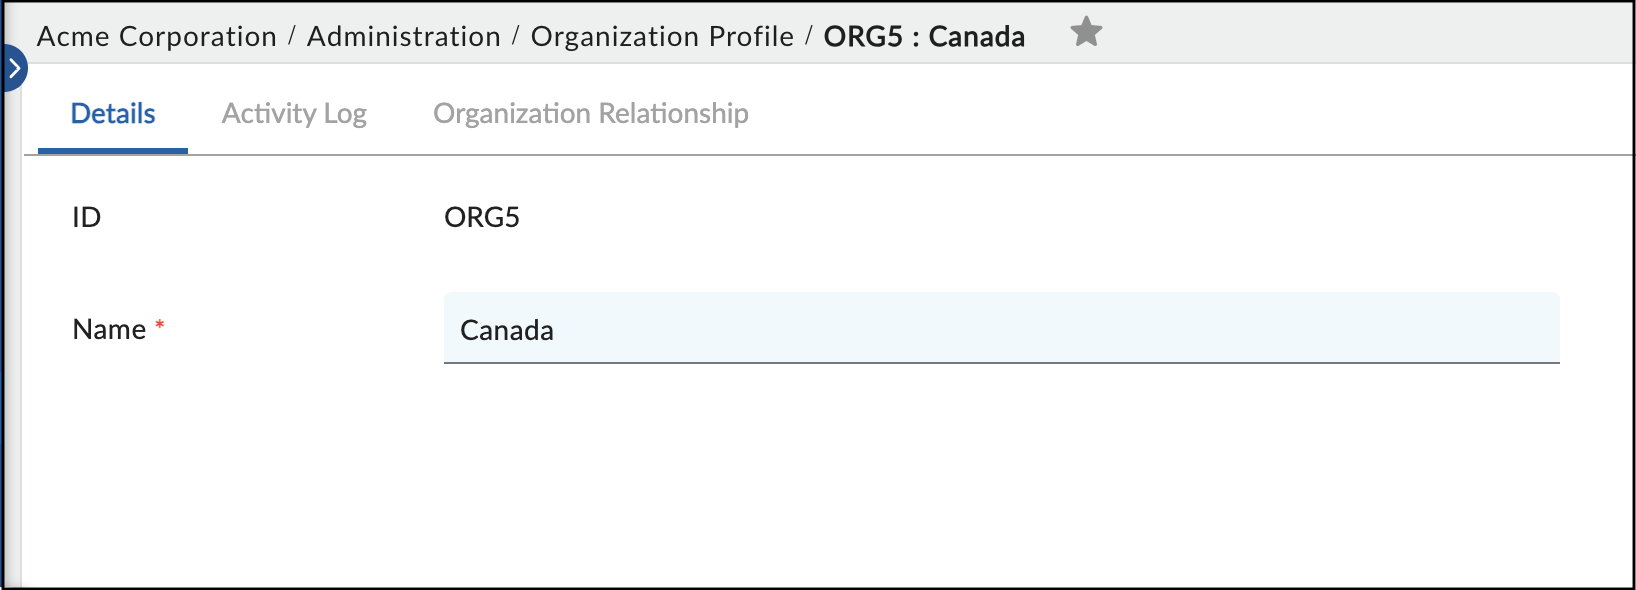
- Define the name of the unit. Considering the example of location hierarchy, we need to create separate sub-organizations for North America, South America, and all its sub-entities as shown above.
- Click the Save button. Once the sub-organization is saved, the Activity Log and Organization Relationship tab appears.
- To define the hierarchy, click the Organization Relationship tab. It shows all the business hierarchies that your organization has.
- From the desired business hierarchy drop-down list, select the desired sub-organization. That you want to set the parent of this organization. For example, if you want to set North America as parent of Canada then you need to set its parent as North America. This way, you will define the parent node for each sub-organization and the hierarchy will be created automatically.
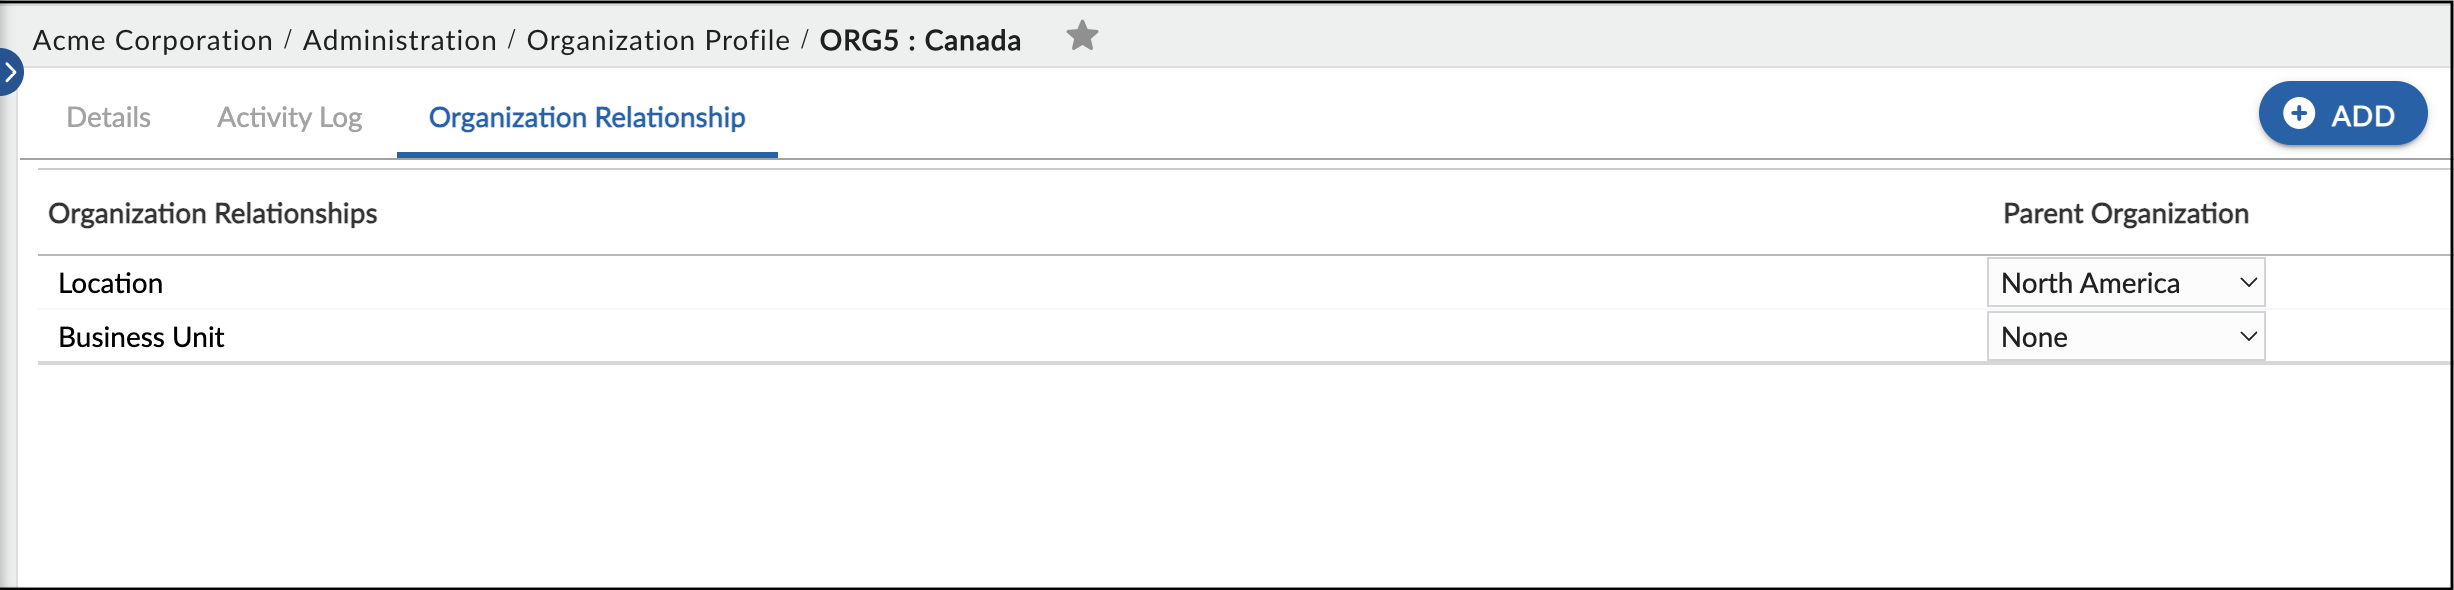
Note: One sub-organization can be tagged to one parent only under one relationship. For example, if Canada is tagged to North America in the Location relationship, then it can’t be tagged to any option in the Business Unit relationship. Also if you wish to change the relationship, then you need to first select the None option in the current relationship and only then you can select the new relationship. Once you tag all the sub-organizations to their parent organization, you can see the hierarchy under the Organization Hierarchies menu as shown below.
Tagging a Project to a Sub organization
Once the sub-organizations are created, you can tag your projects to these sub-organizations. To associate a project with a sub-organization, perform the following steps –
- Open the required project.
- Navigate to the Project Details under the Plan menu.
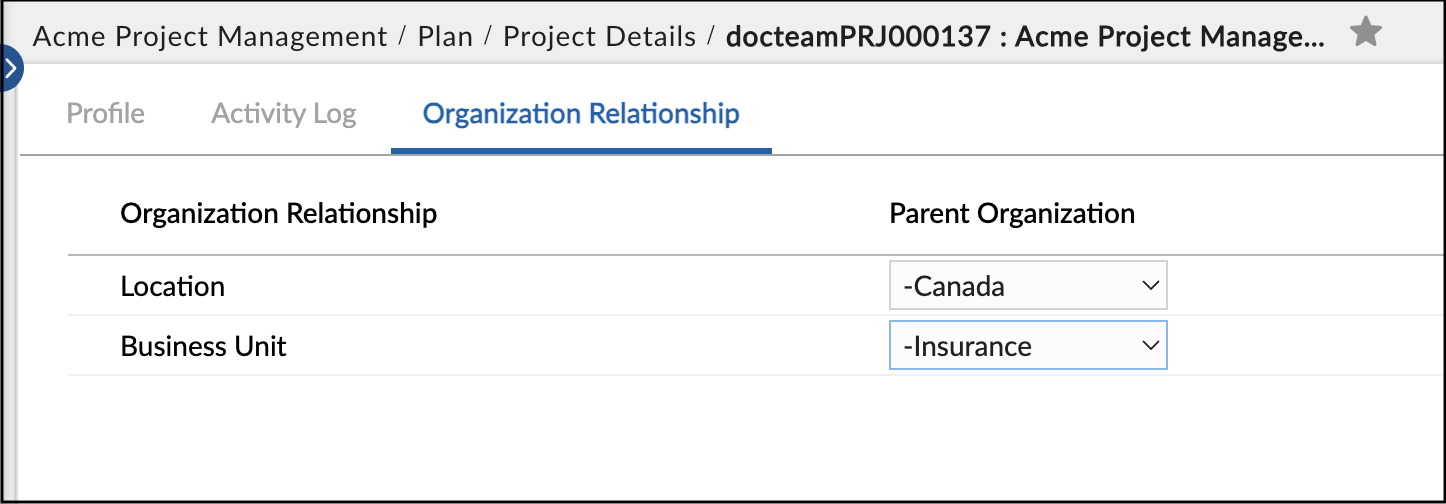
- Click the Organization Relationship tab.
- Select the required organization relationship and select the sub-organization from the drop-down list. For example, if you want to tag your project to the Canada sub-organization in the Location relationship then from the Location drop-down list, select the Canada option.
- Similarly, you can tag it to other relationships. For example, the same project can be tagged to the Insurance sub-organization in the Business Unit relationship. Click the Save button to save the changes.
Now that you have created the hierarchy and tagged the projects to their sub-organizations, you can plot a pivot widget to get useful insights from your data.
Plotting the Pivot Analytics
You can plot a Pivot widget to see the projects to which you have access and analyse data in them. When plotting a pivot widget, it asks whether you want to plot your projects or projects in your line of sight. The My Projects will help you see the proejcts in which you are a team member or assigned work. The Projects in My Line of Sight will help you see the projects to which you have access in your organization hierarchy. For example, if your organization hierarchy is created on location basis as shown in above example, and you have access to USA only then you can plot all the projects which are tagged to USA or its sub-organisations. You can’t plot the projects that are tagged out of the USA location or any of its sub-organizations.
To plot a pivot widget of your organization hierarchy, perform the following steps –
- From the left panel, click the Analytics icon.
- Click the Org Hierarchy Analytics page.
- To add a pivot widget, click the ADD button. The analytics Builder appears.
- Click Add Pivot Table. The Pivot Table Selection box opens.
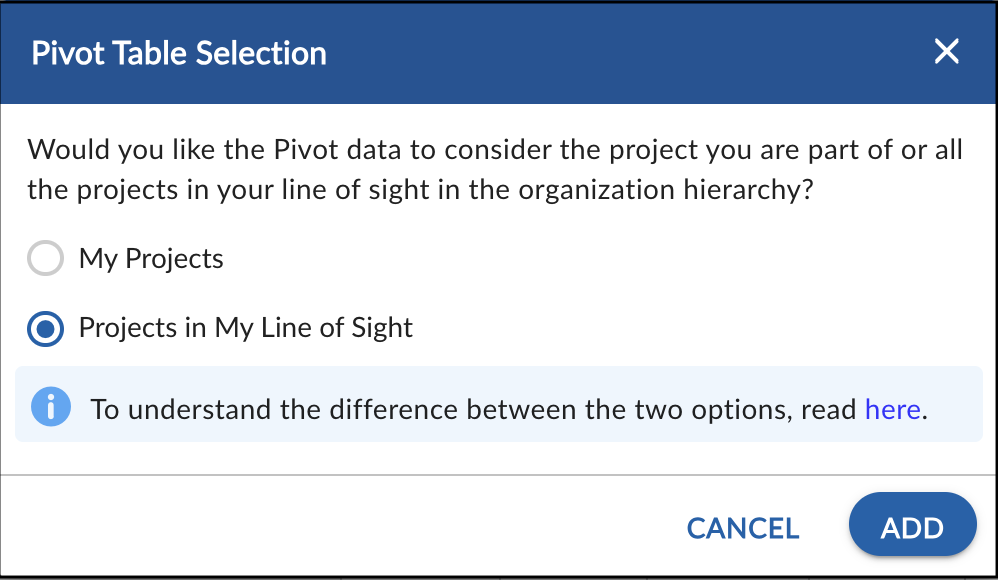
- To create a pivot of all the projects in your organization hierarchy, select the Projects in My Line of Sight option. This will allow you to plot the projects to which you have access in the organization hierarchy.
- Select the project which data you want to plot or you can select the My Projects option to select all the projects in your line of sight.
- Select the required criteria such as workitem type, workitem status, filter, and date range.
- Select the chart settings such as aggregation, and chart type from the drop-down list and select whether to show or not the total of the rows and columns. The fields applicable to the selected project and workitem type appear.
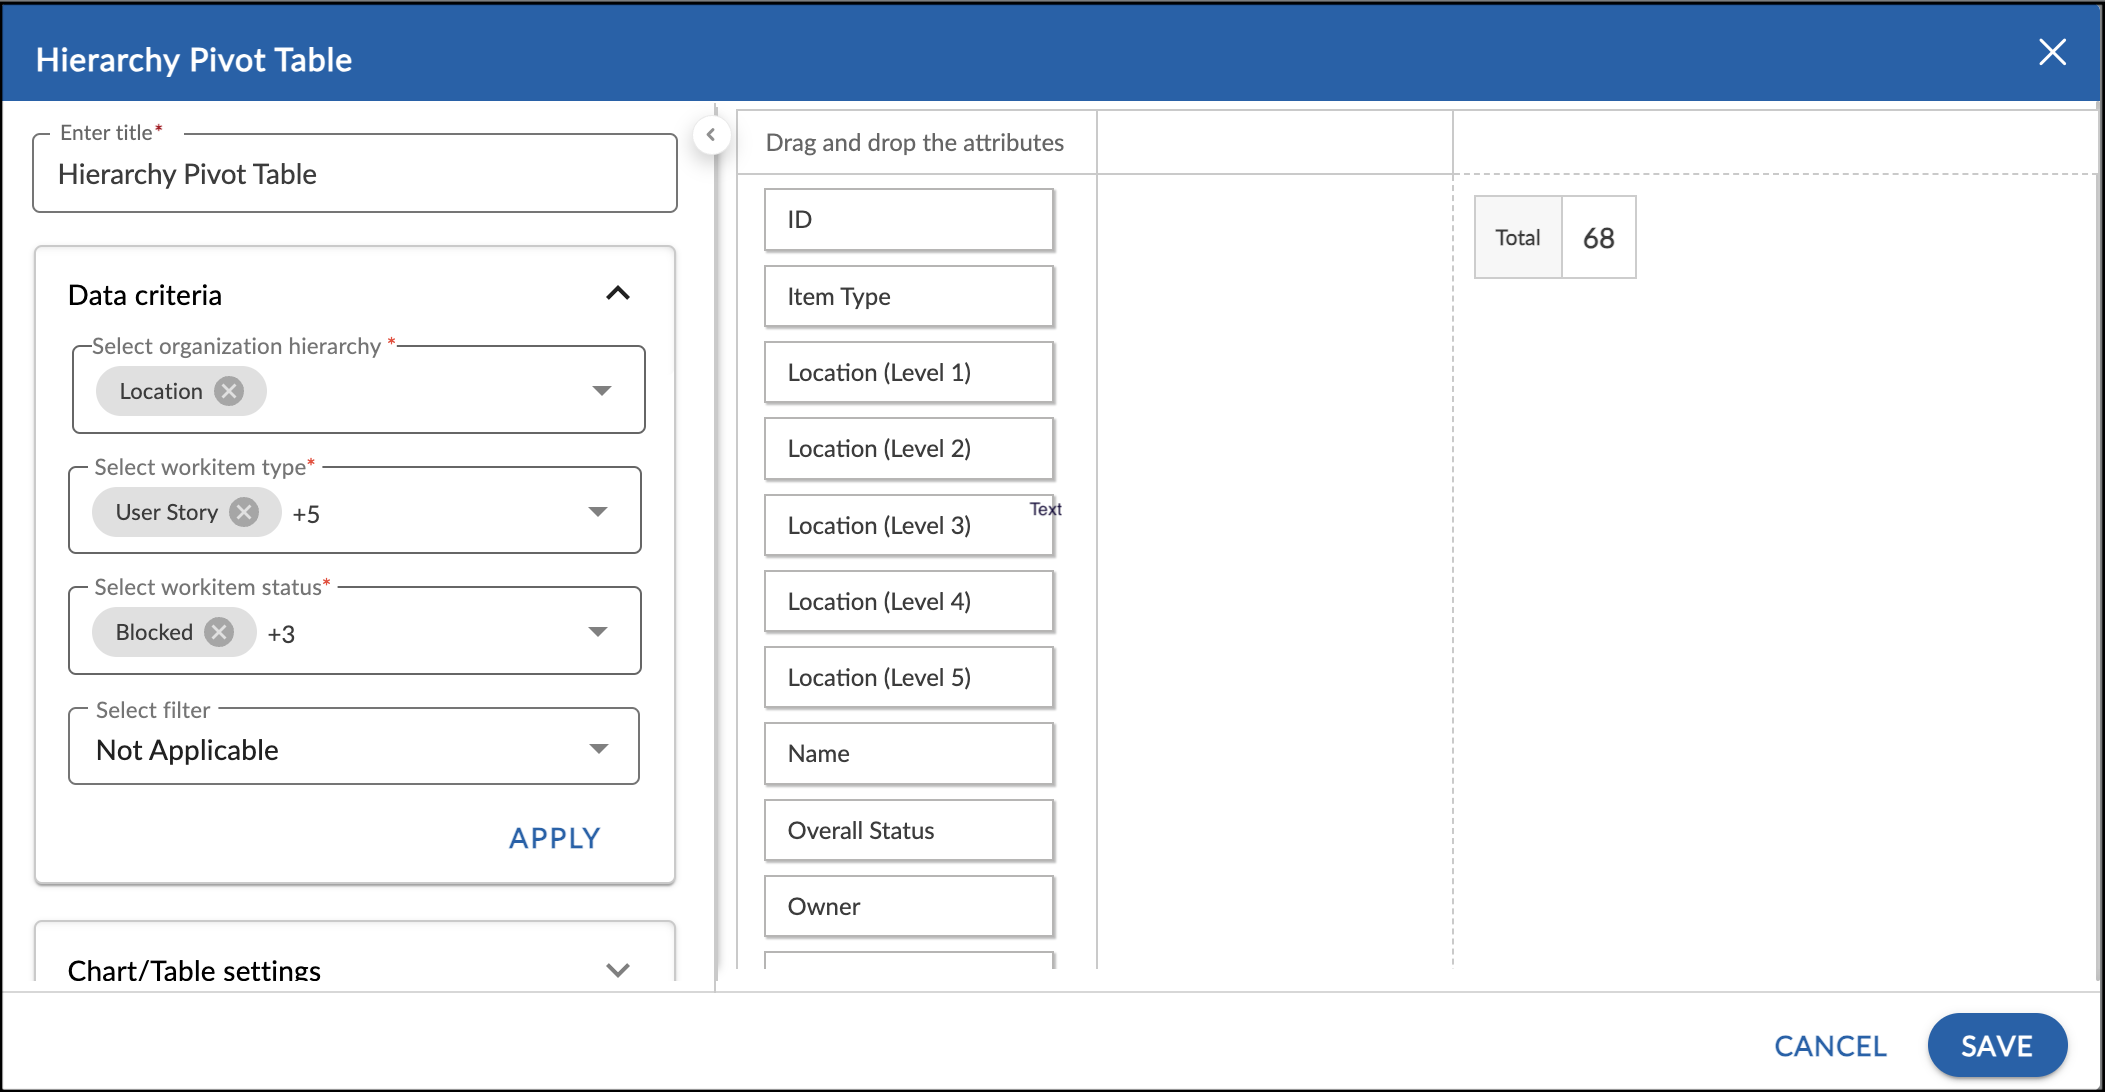
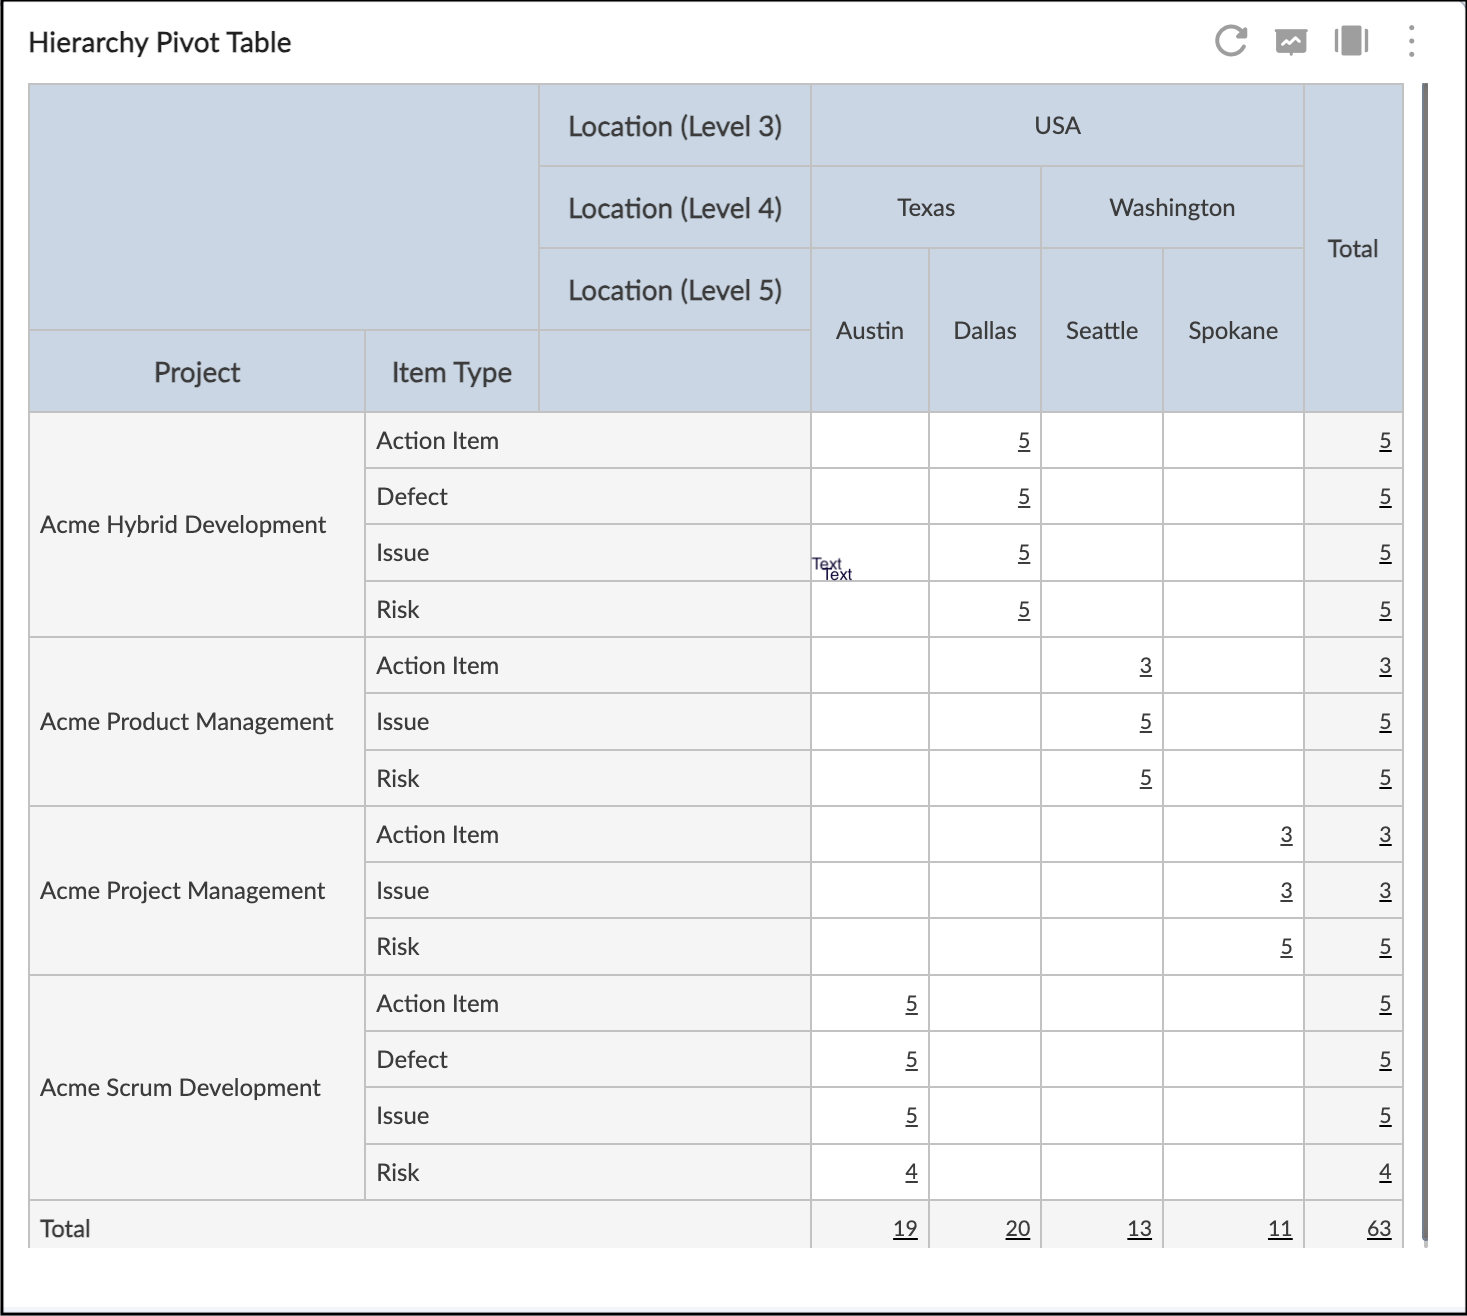
- Drag and drop the required levels of the organization hierarchies to plot the pivot. For example, if you want to plot all the levels of the location relationship then drag and drop the Location (Level 1) to Location (Level 5) to form a pivot.
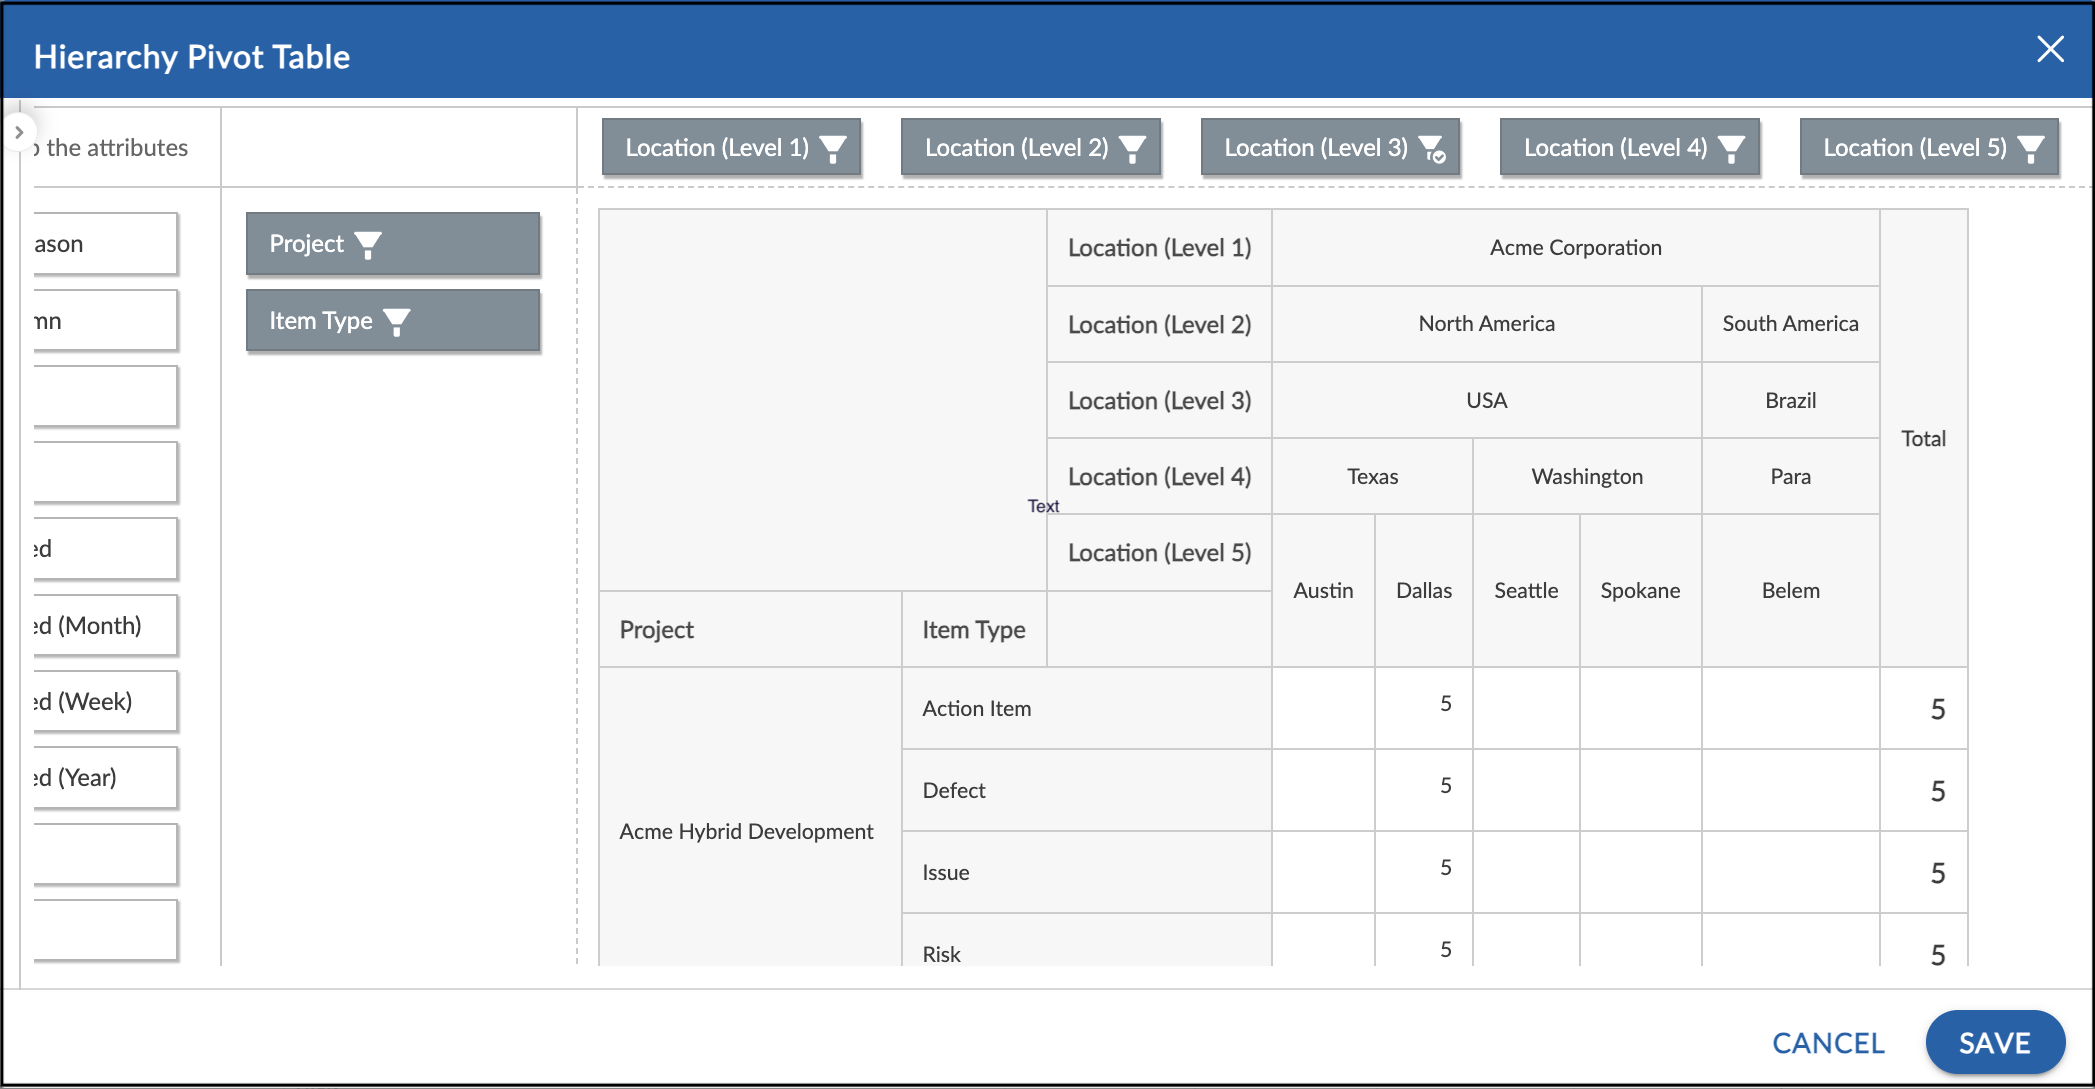
- Drag and drop the other required fields such as Projects, item type, Priority etc. as shown below.
- Click the Save button. The Pivot table is plotted with hierarchies of the organization. You can also plot the projects of more than one hierarchy in the same pivot.
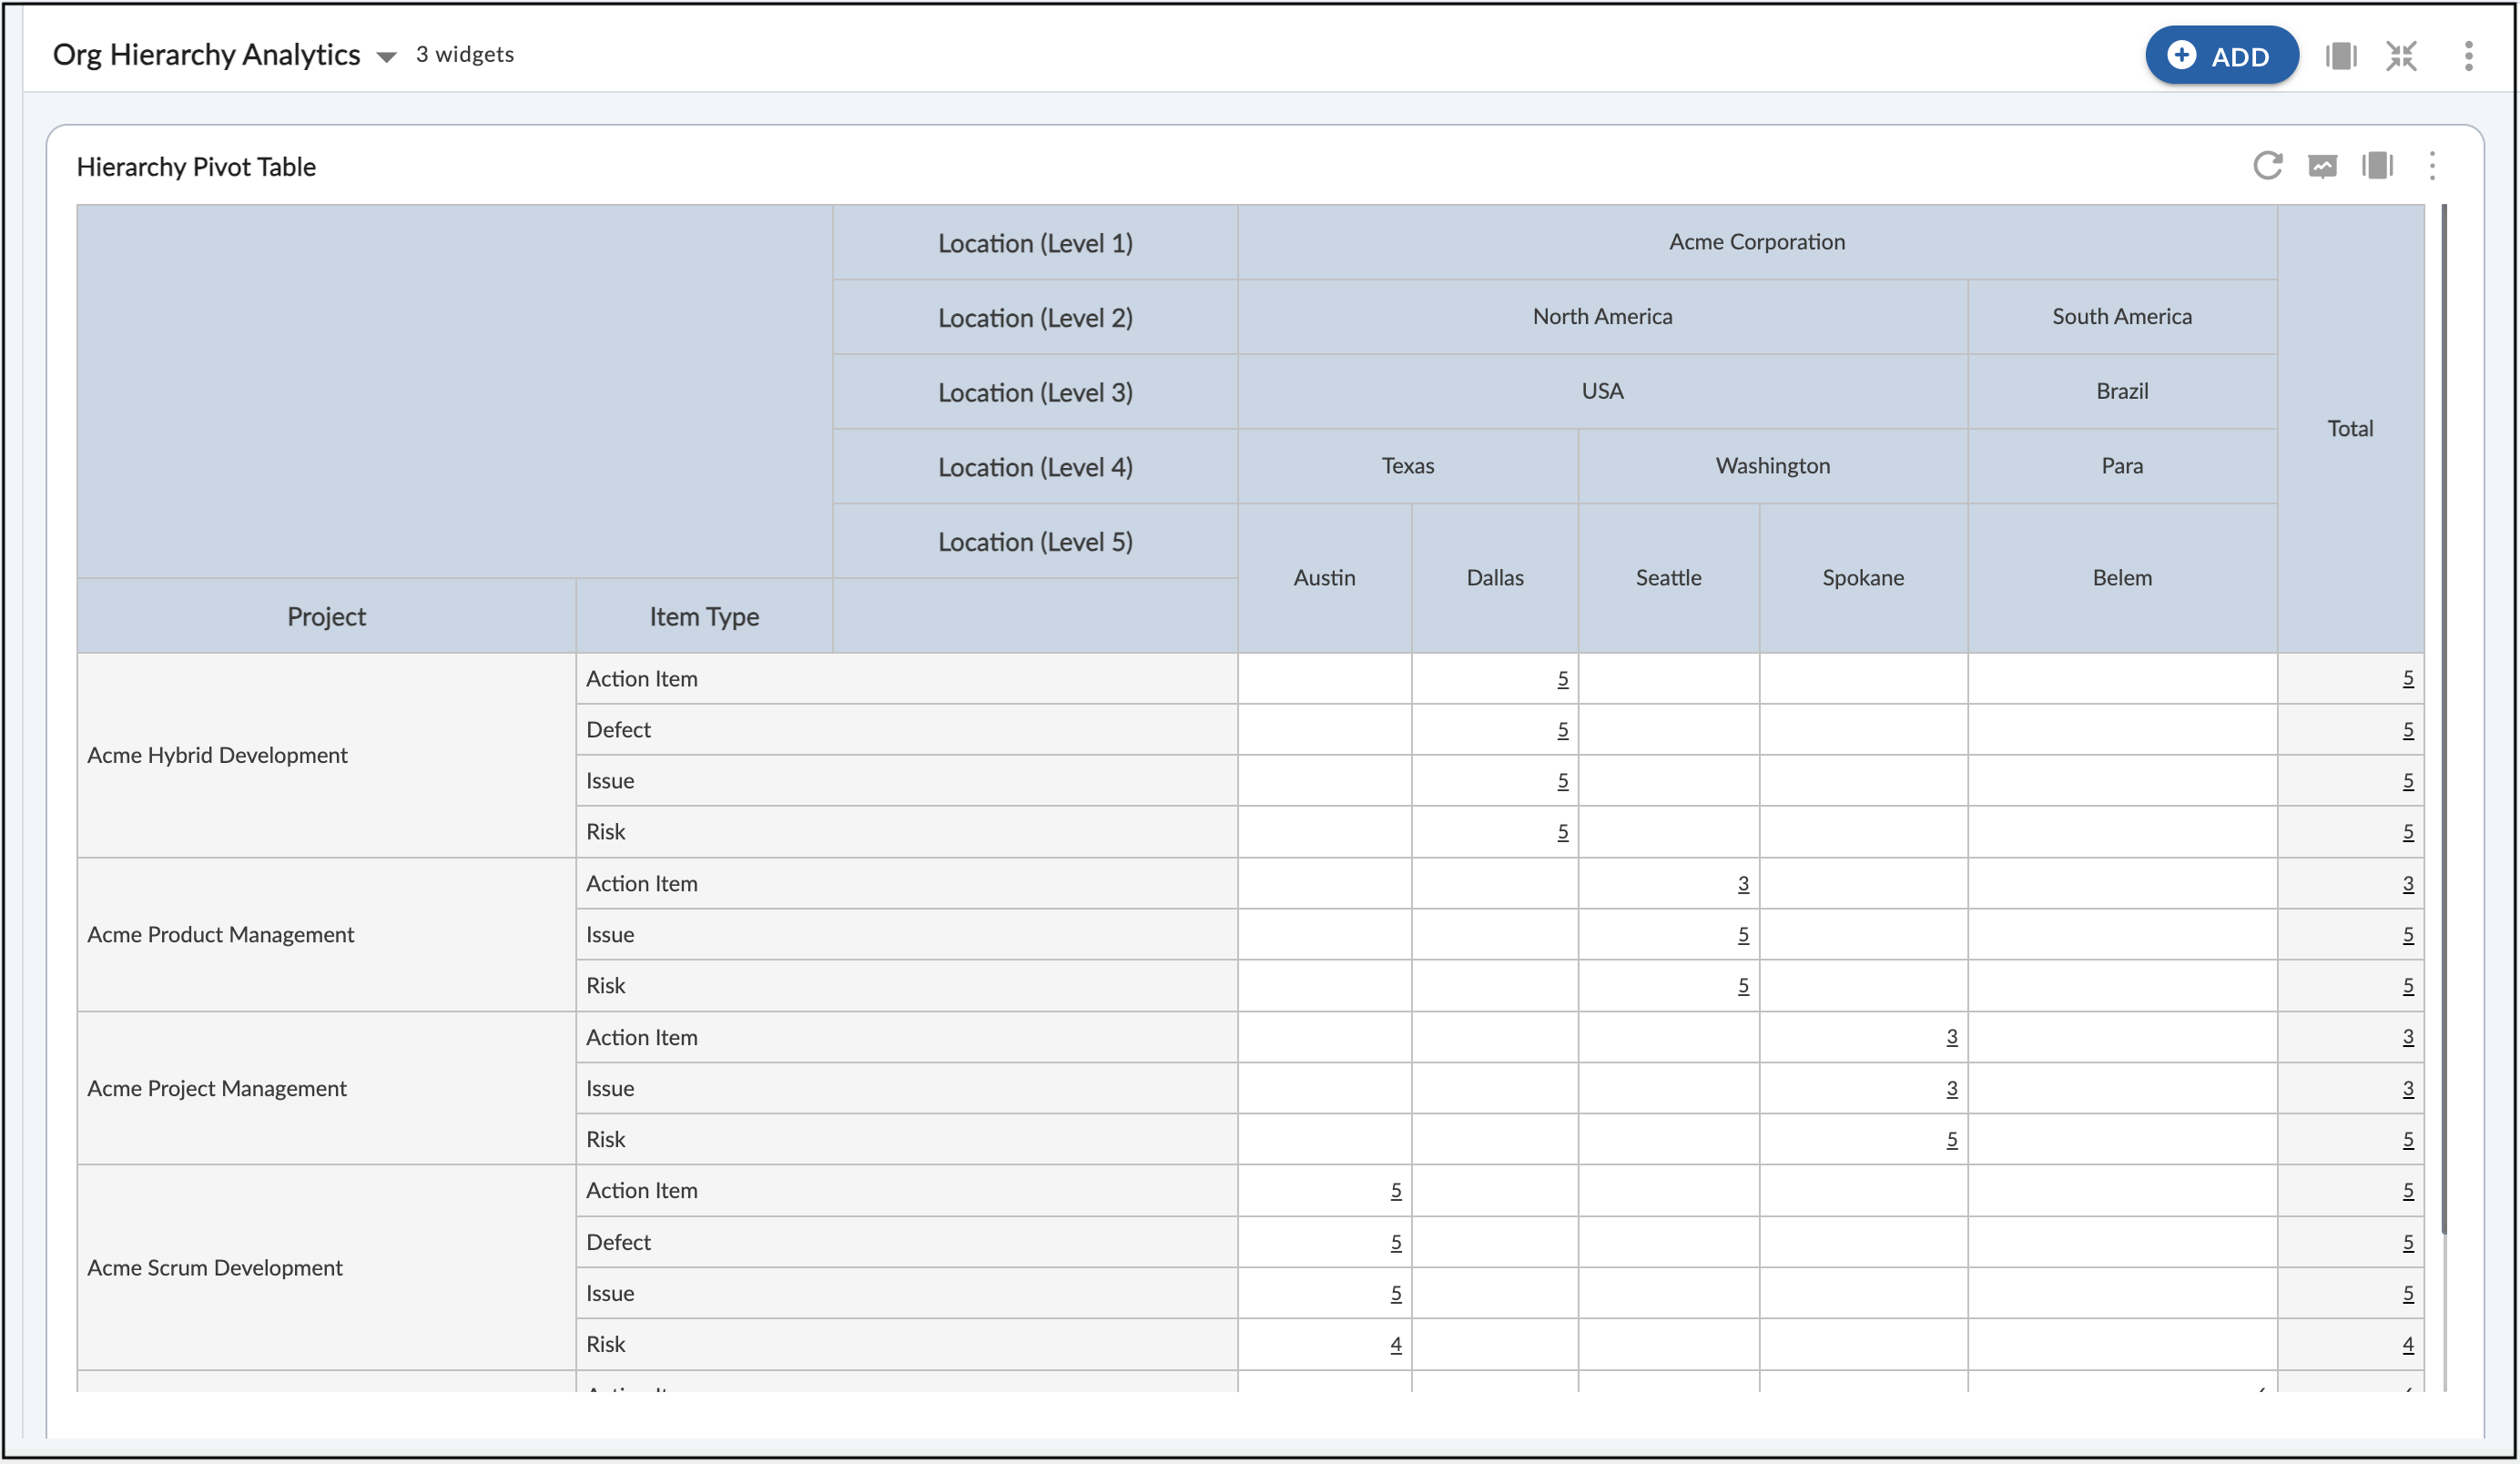
- Please note, you can plot the projects based on your access rights only which are defined in User Management. For example, if you have access to USA node, then you can see projects which are tagged to USA only.