
Start with the video first to get a better grasp of the topic!
|
Skip Ahead to: |
Each OKR is made of its objective and the key results and sub-key results. To create a new OKR, you have to define an objective and create the KRs and sub-KRs for it to track its progress.
Navigation
-
Navigate to the project created using the OKR template. Or, to create a new project using the OKR template, click here.
-
In the project, expand the Plan menu to view objective workitem types such as:
-
- Company Objective
- Department Objective
- Team Objective
- Individual Objective
-
Objectives List View
Users can view Objectives in a listed format according to their access level.
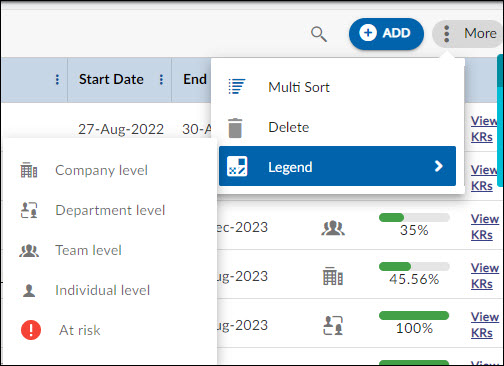
- Company Level Objectives– These objectives are accessible to the Executive and Project Manager persona only. They can view the entire hierarchy of OKRs
- Department Level Objectives– These objectives are accessible to the Product Manager persona only. They can view Department Level Objectives, Team level objectives, and Personal objectives.
- Team-Level Objectives—These are accessible to the Product Owner, Reviewer, Scrum Master, and Team Lead Persona. They can view the Team-Level Objectives and personal objectives.
- Individual Level Objective – These are accessible to Team Members, Testers, and Consultant personas.
Creating a New Objective
Perform the following steps to create a new objective –
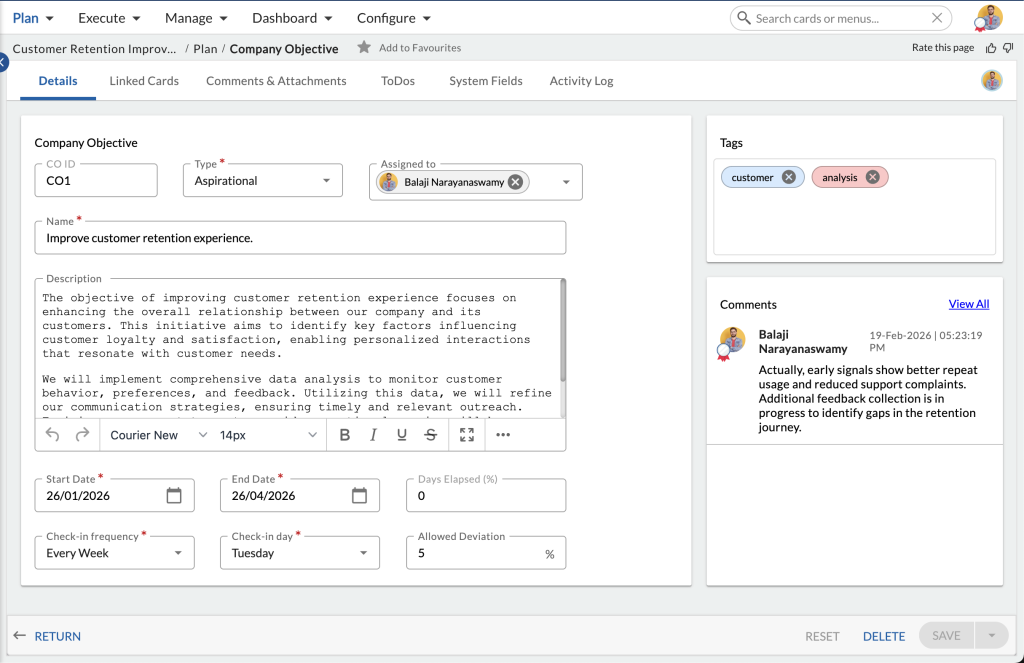
- Click the ADD button. The Details view of the objective appears.
- Specify the required details such as –
-
- Type – Defines the nature of the objective.
- Assigned to – Owner responsible for tracking and updating progress. Multiple owners can be assigned.
- Name – Specify a title that best defines your objective.
- Description – Additional context, intent, or approach for achieving the objective.
- Define the Start Date and End Date for your objective. Please note, that the End date of the objective cannot be extended and is closed automatically after the End date.
- Days Elapsed (%) – System-calculated value showing timeline progress based on start and end dates.
- Specify the Check-in frequency for the objective when you will be checking the progress of your objective like every week, once in 2 weeks, or monthly.
- Select a day from the Check-in day drop-down when you will be checking the progress of the objective.
- Deviation – Enter a deviation range from 5% to 100% for the objective.
Please note you will get an email when the check-in date of the objective approaches. For example, if the check-in day is Monday and the frequency is once in 2 weeks, then you will receive a reminder email before every alternate Monday.
3. Click the SAVE button.
As soon as an objective is saved, the following sections appear –
Details – This section has all the basic details of the objective as mentioned above.
Linked Cards – This section shows the Key Results and Sub-key Results of an objective on the Parent-child Links page. You can create KRs of an objective with the help of this section. You can trace other objectives with this objective by defining a link in the Mind-map section. Read more about creating key results and defining Mind-maps.
Comments and Attachment – The Comments and Attachment section helps you add comments and attachments to the objective for your team. You can also mention the team members in this objective.
Activity Log – The Activity log shows all the updates made to this objective by the owner and the time of the update.
System Fields – The system fields section of an objective shows all the system-driven fields such as Progress, Created by, and Date Created. You cannot change the value in the system fields of an objective.
You can perform the following operations in the details view of an Objective are –
- Add – Click the Add button to create a new objective.
- Print – Click the Print button to print the details of the objective.
- Delete – Click the Delete option under the More icon to delete the objective.
- Copy – Click the Copy option under the More icon to create a copy of this objective.
- Maximize the screen – Click this icon to see the objective in full screen.
Common Operations
You can perform the following operations in the list view of an objective –
- All Objectives/My Objectives—Select the All Objectives option from the drop-down list to see all the objectives. Select the My Objectives option to see the objective for which you are set as the owner.
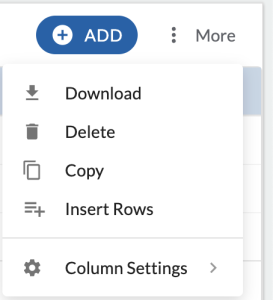
- ADD
- Insert Rows
- Delete
- Column Settings
Editing an Objective
You may want to modify the description, frequency, or other information of an objective. To update an objective, open it, make the required changes, and save the objective. You cannot modify the objective level and the objective to which it is aligned.
Completing an Objective
Once the objective reaches its End Date, it is closed. However, you can complete an objective before the Planned Date also. You can complete an objective even if it is not 100% completed. To complete/close an objective, you need to first close all its child items – key results and sub-key results. You can see all its child items in the Linked Cards section of the objective. To complete an objective perform the following steps –
- Open the objective.
- Click the COMPLETE button at the bottom of the Details View of the objective.
- Click OK in the confirmation box.
When you close/complete an objective a lock icon appears next to its title in the list view to indicate that the objective is closed. However, you can reopen it.
Deleting an Objective
When you delete an objective, all its child items – key results and sub-key results are also deleted. Once you delete an objective, you cannot retrieve the objective or its items back.
To delete an objective –
- Select the Objectives in the list view and click the More icon.
- Click the Delete icon. The selected objective is deleted and cannot be retrieved.
You can also open the details view of the objective by clicking the More option and selecting the Delete icon.
Copying an Objective
You can copy an existing objective and save it with a new name by clicking the More icon on the details page of an objective and selecting the Copy Objective option. When you copy an objective, all its information gets copied and can be saved with a different name.
Note: while copying an objective, its key results and sub-key results never get copied.
Calculating the Progress of an Objective
The progress of an objective is calculated based on its key results. It is the average of all its key results’ progress. For example, if an objective has 4 KRs with the progress of 20%, 60%, 40%, and 80% then the progress of the objective would be 50%.
The status of the objective is calculated based on the average progress of its key results and its end date. If the Objective is not progressing at the expected speed, it is considered at risk. An objective is considered to be at risk if there is a 10% threshold i.e., the objective’s status is 10% less than the expected progress.
For example, if an objective is defined for one month having the Start Date and End Date as Jan 1, 2022, and Jan 30, 2022. If the objective has 4 key results then by Jan 15, 2022, 50% of the key results should be completed which means either 2 key results should be completed or the average of all the 4 key results should be 50%. But if on Jan 15, 2022, only 40% (or less) of key results are done then there is a 10% threshold due to which the objective is considered at risk.
The progress of a key result is calculated as per the values entered in its Start value, Current value, and Target value. The Start Value and the Target value are defined while creating a key result while the current value is updated as per the progress of the Key result. So the progress of the key result is measured based on the current value concerning the Start and Target value.
For example, if the Start value and the Target value of a KR are 1 and 10 respectively, and if the current value is 4 then the progress of the key result would be 40 %. Similarly, if the Start Value is 300 and the Target value is 700, and if the current value is 500 then the progress of the KR would be 50%.
The Time Elapsed field helps to know the total time elapsed till the current date in percentage. For example, if the Start Date and End Date of an objective are Jan 1, 2022, and Jan 30, 2022. Then on Jan 15, 2022, the Time Elapsed field will show 50% indicating that 50 % of the defined time has been passed. This helps in knowing the progress of the objective against the defined time.