
This article will help you understand the Timesheet approval tab, its visibility and how to use the Timesheet Approval feature to approve or reject time logged by team members.
|
Skip Ahead to: Who Can See the Timesheet Approval Tab |
Overview
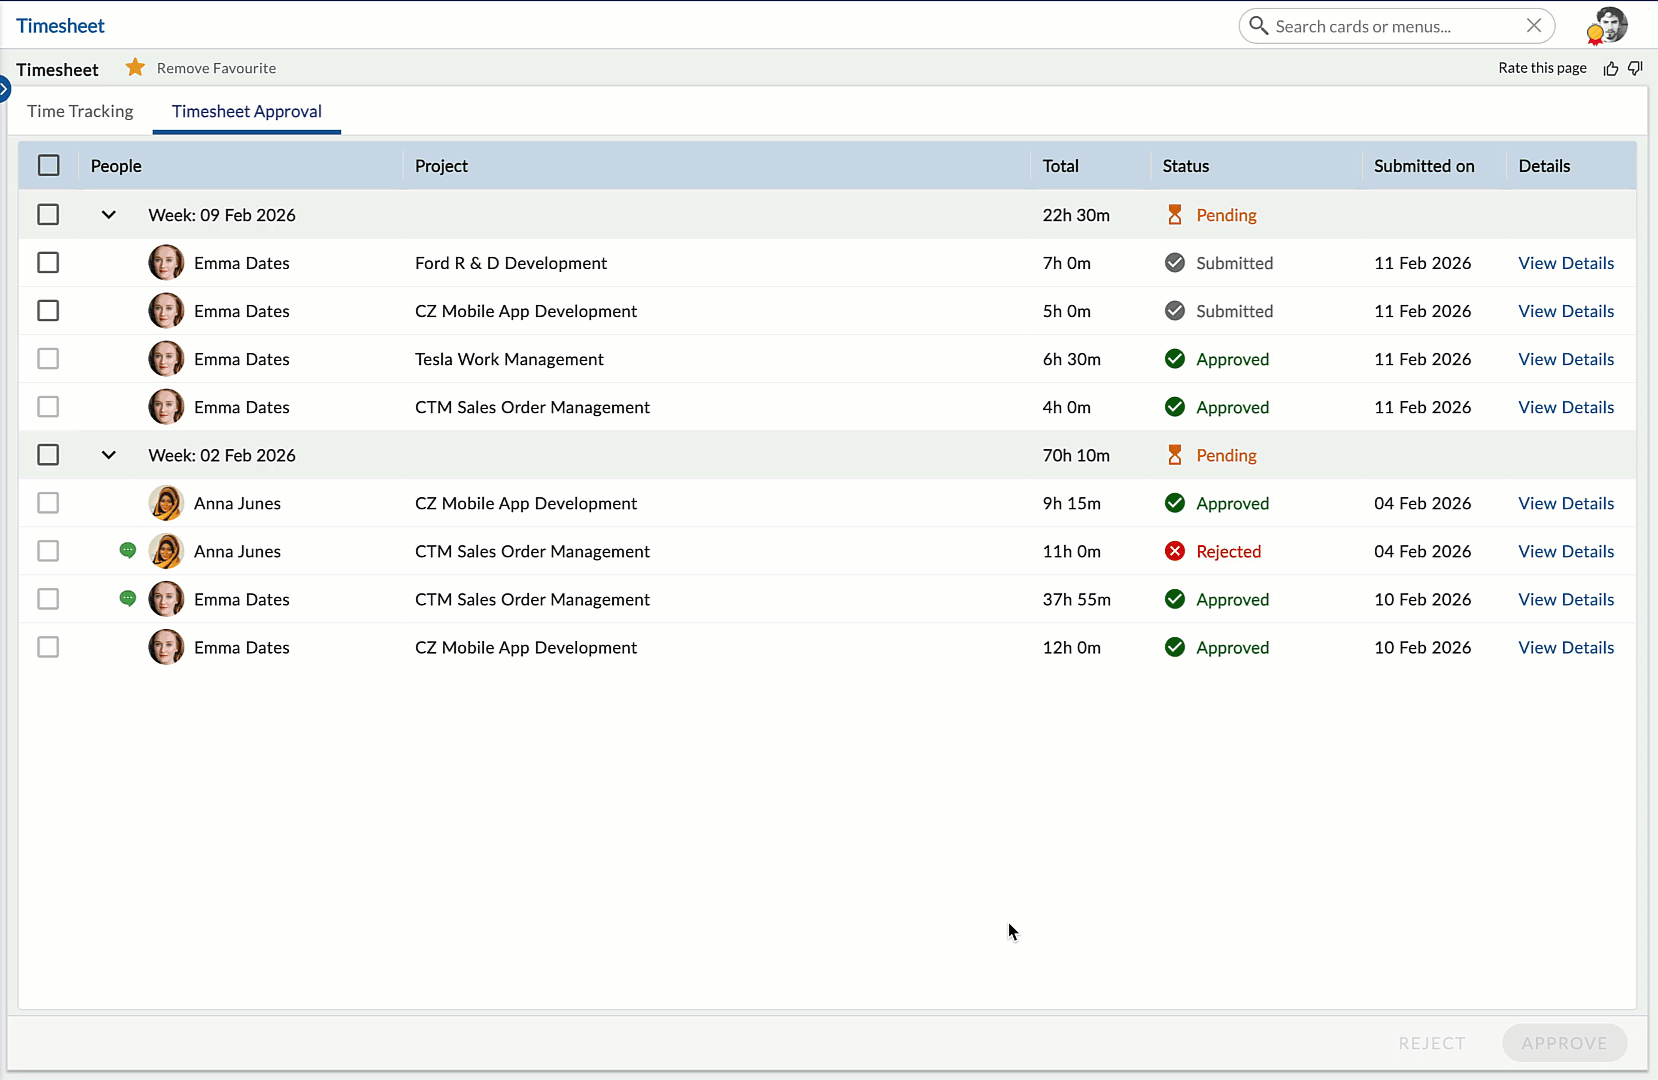
The Timesheet Approval tab in the Timesheet module enables designated approvers to review, approve, or reject time submitted by team members. This tab is part of an approval workflow and is visible only to users who are assigned as Timesheet Approvers.
This article explains: – Who can access the Timesheet Approval tab – How submitted time is presented to approvers – How to review detailed time entries – How approval and rejection impact team members
Who Can See the Timesheet Approval Tab
The Timesheet Approval tab is visible only to users who are configured as approvers in a project.
You will see this tab if: – You are assigned as a Timesheet Approver for one or more team members in a project.
You will not see this tab if: – You are not assigned as an approver for any team member.
Note: Approver visibility is controlled at the project level using the Configuring Timesheet Approvers settings.

Understanding the Timesheet Approval Screen
The Timesheet Approval screen displays submitted time entries awaiting review. The view is organized to help approvers quickly assess and act on time submissions.
Key aspects of the screen:
- Time entries are grouped by team member and by project.
- Each row represents a submitted timesheet for a specific week.
- The status indicates whether the submission is awaiting action.
Reviewing Submitted Time
For each submitted timesheet, the approver can:
- Review the total hours logged for the week.
- Click View Details in the Details column to inspect the time logged at a granular level.
Viewing Detailed Time Entries
When you click View Details:
- A detailed view opens showing:
- Cards or ToDos
- Day-wise time logged
- Logged effort breakdown
- This allows you to validate the accuracy of the submitted time before taking action.
Approving Submitted Time
If the submitted time is accurate:
- Click Approve.
- The status of the timesheet changes to Approved.
What happens next: – The approved time becomes final. – The team member can no longer edit the approved entries. – The approved status is reflected in the team member’s Time Tracking tab.

Confirmation While Bulk Approving Timesheets
When approving multiple timesheets, Nimble displays a confirmation message to prevent accidental approvals. After selecting one or more timesheet submissions and clicking Approve, a confirmation dialog appears asking:
“Do you want to bulk approve the selected timesheets?”
The approver can choose one of the following options:
- Approve – Confirms the action and approves the selected timesheets.
- Cancel – Cancels the operation and returns to the Timesheet Approval screen.
This confirmation step helps ensure that timesheets are not approved unintentionally without review.
Rejecting Submitted Time
If corrections are required:
- Click Reject.
- Enter a comment explaining the reason for rejection.
- Confirm the rejection.
What happens next: – The status changes to Rejected. – The rejection comment is sent to the team member. – The team member can view the comment from the Time Tracking tab.
What Happens After Rejection
When time is rejected:
- The team member’s time remains editable.
- A comment icon appears in the Time Tracking grid for the affected project.
- The team member can:
- Correct the logged time
- Add a response comment
- Resubmit the time for approval
Once resubmitted, the approver receives a new request to review the updated time.
Reviewing Pending Timesheets from Previous Weeks
Timesheet approvals are processed weekly.
If a team member submits time for a week and it is not reviewed immediately, the submission remains in Submitted status until action is taken.
Approvers can:
- Navigate to the required week using the week selection.
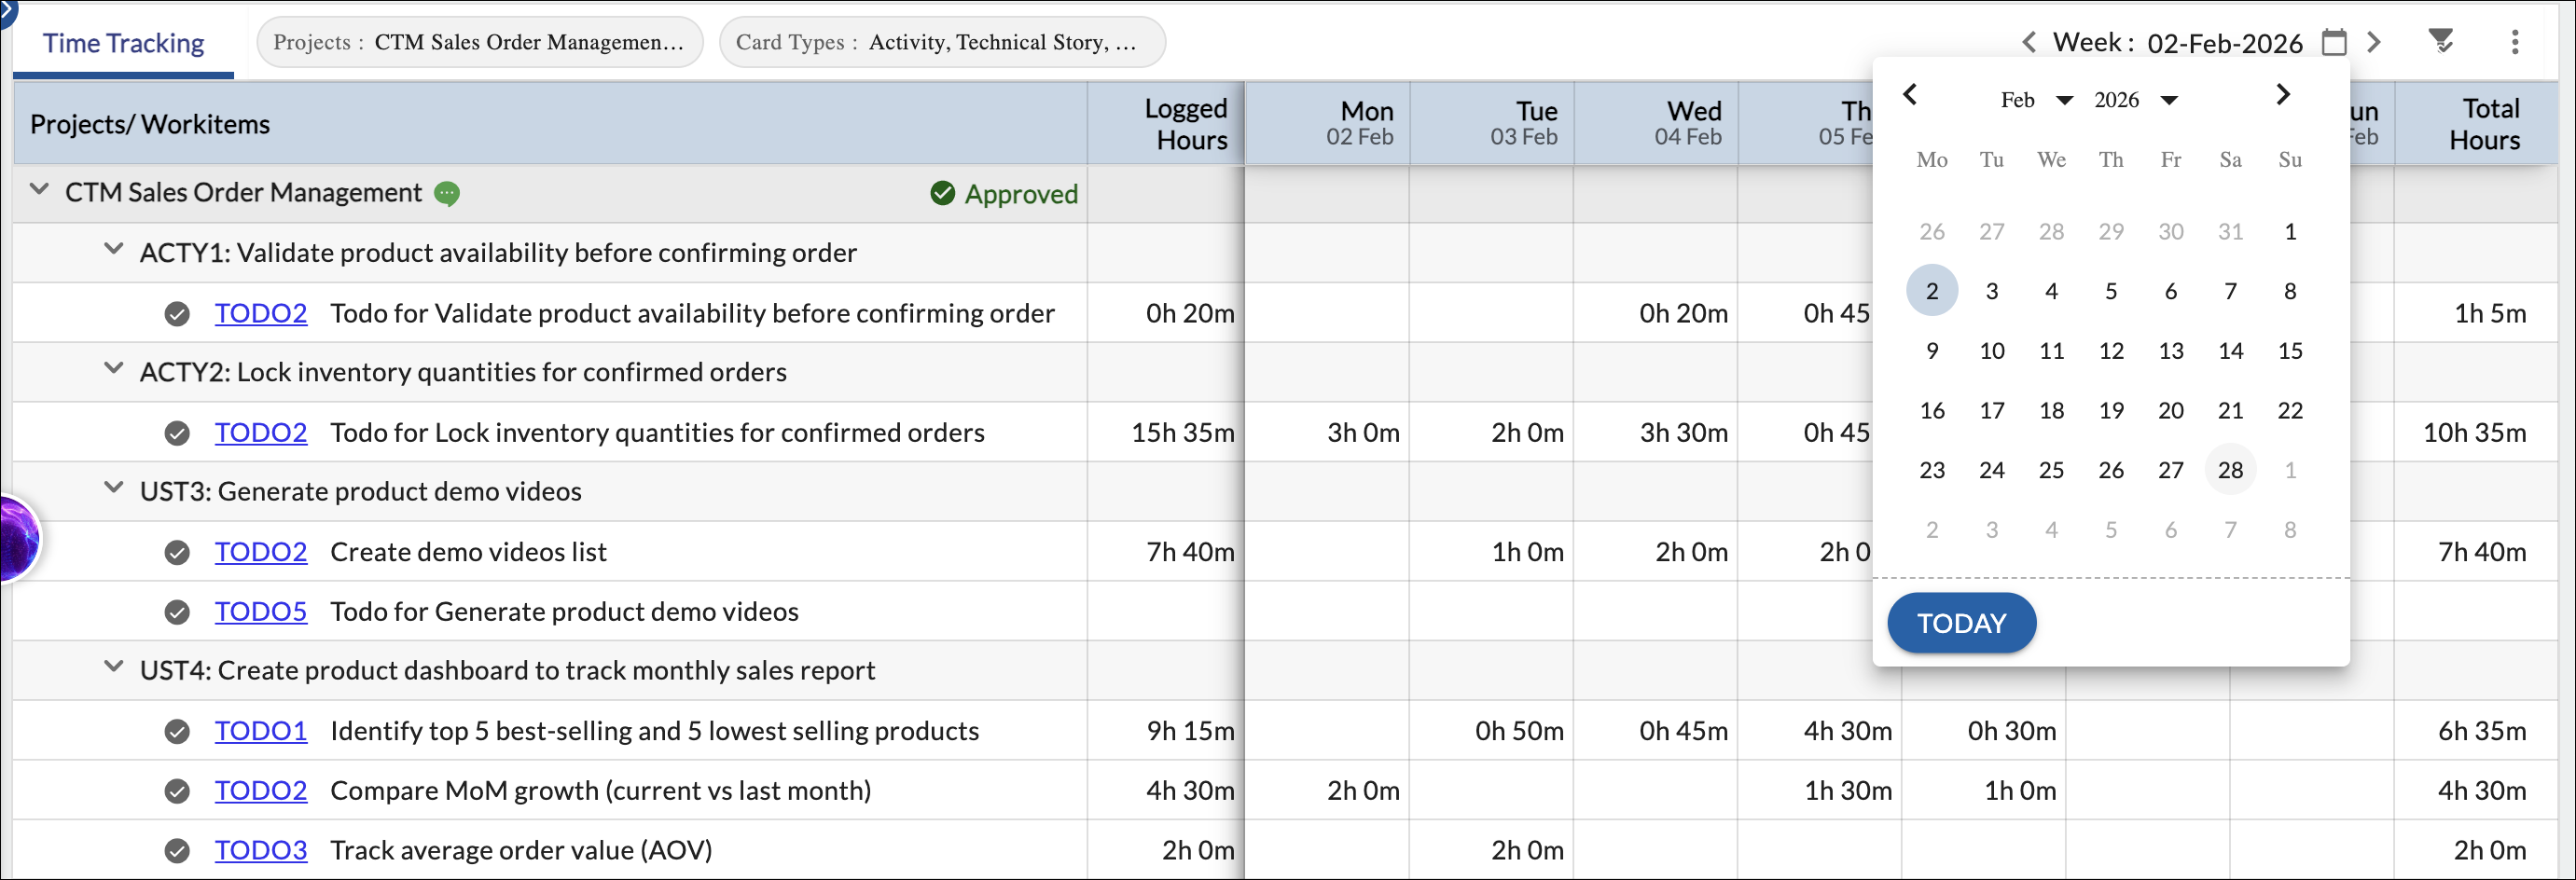
- Review the submitted entries.
- Approve or reject the timesheet.
Pending submissions from previous weeks should be reviewed to maintain accurate tracking and reporting.
Filtering Timesheet Submissions
Approvers can use the Filter option to locate specific timesheet submissions that require review quickly. Click the Filter button in the top-right corner of the Timesheet Approval tab to open the filter panel. The filter allows approvers to refine the listing using the following criteria:
People
Filter timesheets submitted by specific team members. Select one or more users to display only their submissions.
Project
Filter timesheets based on the project for which time was logged. This helps when reviewing submissions across multiple projects.
Status
Filter timesheets based on their approval status.
Available status options include:
- Submitted
- Resubmitted
- Rejected
- Approved
By default, the Approved status is not selected because the Timesheet Approval tab is primarily used to review timesheets awaiting approval.
Approvers can select Approved if they need to review previously approved timesheets.
Click Apply to update the listing based on the selected filters.
Approval Lifecycle Summary
The Timesheet approval workflow follows this lifecycle:
- Team member logs time.
- Team member submits time (if an approver is assigned).
- Approver reviews the submission.
- Approver:
- Approves → Time is finalized
- Rejects → Time is returned for correction
5. Corrected time is resubmitted and reviewed again.
Important Notes
- Approval is performed per team member and per week.
- Approvers can review time only for team members assigned to them.
- Approved time cannot be modified unless reopened by an approver.
- Rejection must include a comment to guide the team member.
Related Articles
- Working with Timesheet in Nimble – Overview of the Timesheet module and its tabs.
- Configuring Timesheet Approvers – Learn how approvers are assigned at the project level.
- Time Tracking in Nimble – Learn how team members log, submit, and track time.
This article explains the approver’s responsibilities in the Timesheet module. For time entry workflows, refer to the related articles above.