
This article provides a brief overview of several features available in the Tasks section of the Task Plan.
|
Skip Ahead to: |
Overview
The Tasks section of the Task Plan offers a wide range of options to help you manage your tasks effectively. In this article, we will go over some of the basic features and options available in the Tasks section of a Task Plan.
Tasks Section Features
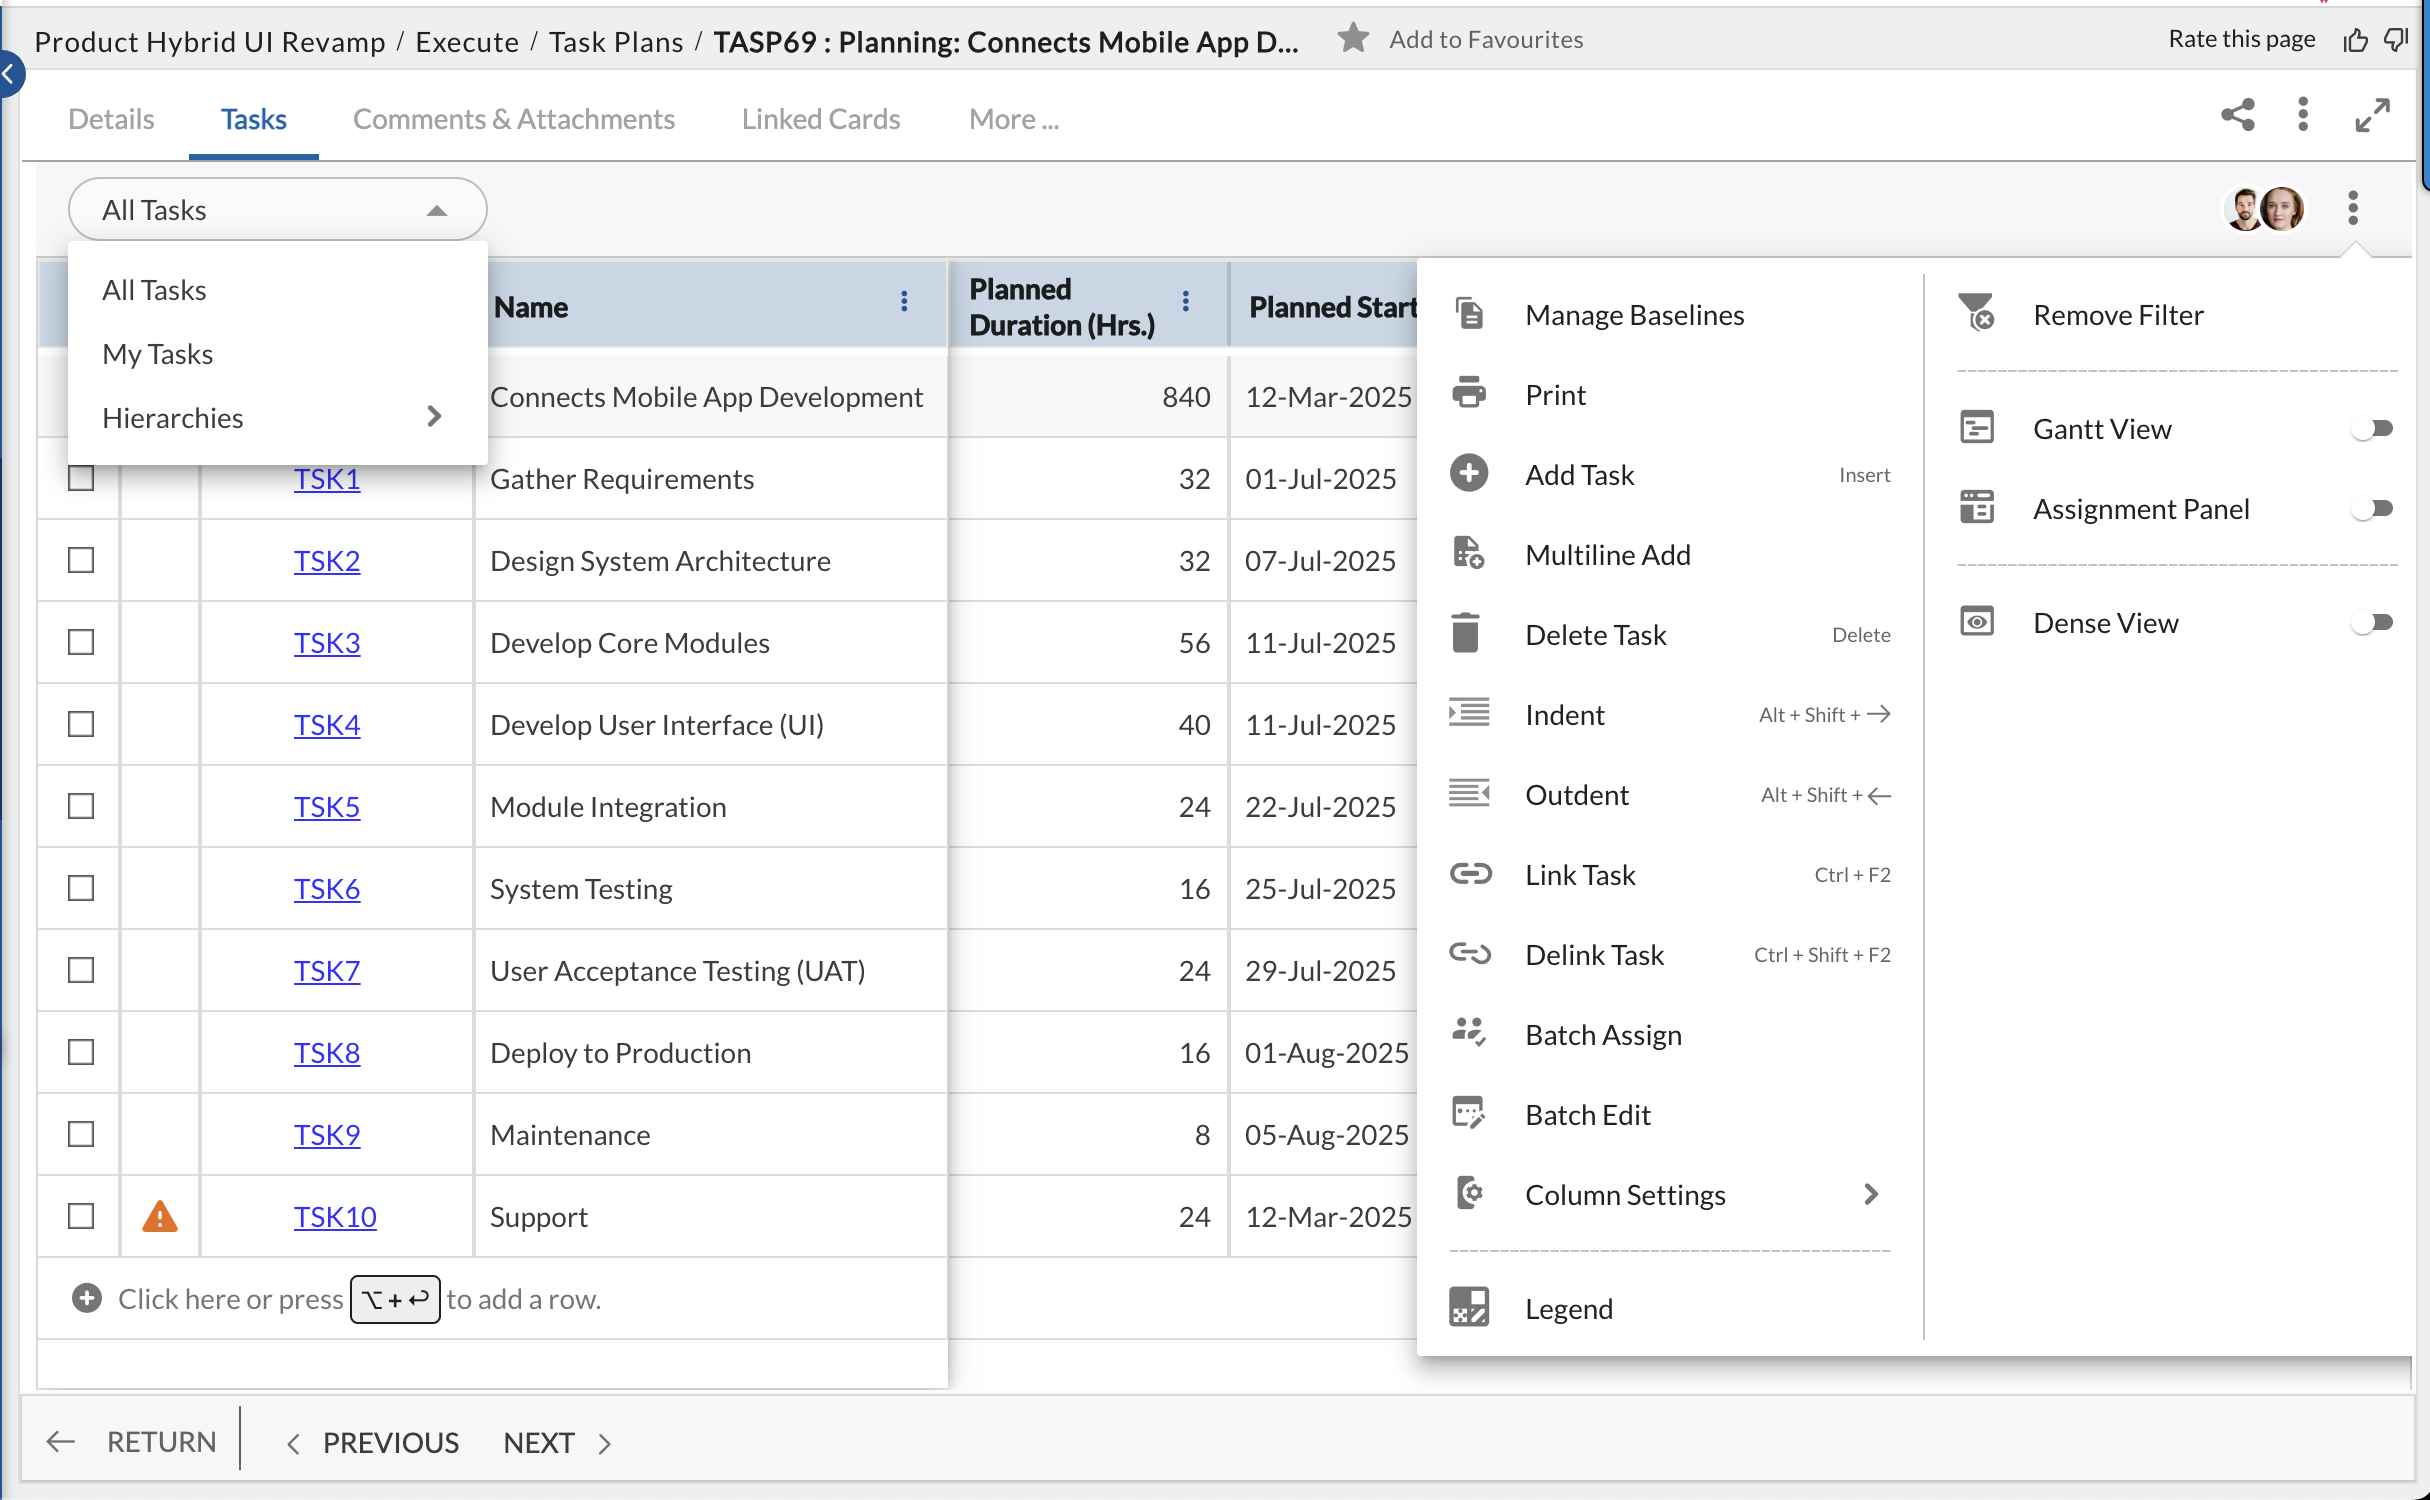
Add Tasks
To add a new task:
-
In the Task Plan grid view, select the hierarchy level to view all sub-tasks or collapse to a higher level as needed.
-
Click the task below which you want to add a new task.
-
Hover over the task, click the More Options icon, and select Add Task.
Alternatively, use the Add Task option directly from the toolbar or More Options menu. -
A new task appears with the same Planned Start and Finish dates as the task above it.
You can enter a name for the task and adjust the dates as needed. -
Fields such as Planned, Actuals, and Baselined will automatically update as the task is assigned and progresses.
Once added, the task is instantly saved and appears in the task hierarchy in real time.
Learn more on how to add tasks automatically in the Task Plan using the Activity Matrix from here.

The Add Task, Delete Task, Copy Task, Paste Task, Indent Task, and Outdent Task options are available by simply hovering over the task and clicking on the More Options icon, which displays a menu.
When you add Tasks from the Task List view, you need to note these important rules:
- Task Dates will never be computed or changed by the system except when the dates get rescheduled to accommodate the date changes of other dependent tasks. So the efforts and or the allocation is recalculated to accommodate changes if any to the task dates, efforts, or allocation, but the dates are never altered by the system.
- If no resources are assigned to the task, then moving the planned Start and End dates for a task will move the task allocation also accordingly. If a resource is assigned and has not logged in efforts against the task too, the same is applicable. For example, if the initial planned Start Date was 01-Sept, the planned End Date was 05-Sept and allocation is available for the same duration. Pushing the Plan Start Date by 2 days to 03-Sept will push the planned End date and allocation days also by 2 days.
- For efforts logged in the timesheet for dates falling within the range of the Planned Start and End dates of a task, trying to move the planned Start Date will throw an alert. This informs the user that efforts are logged in the timesheet, so the planned Start Date cannot be altered. This is applicable for partial efforts or efforts for the entire duration falling under the planned Start and End dates of tasks. For example, if efforts are logged against 02-Sept against the task for which the Planned Start Date is 01-Sept, trying to move the Planned Start Date to 03-Sept will throw an alert informing the user of the efforts logged already.
- Selection of ‘Planned Start Date’ and ‘Planned Finish Date’ is mandatory while creating a new Task.
- The efforts get calculated from %allocation. When the Allocation level effort is changed, the % allocation gets re-calculated. If %allocation is changed then effort gets recalculated. For example, if a resource’s allocation is changed from 100% to 50%, then the effort for the 50% allocation gets recalculated and displayed.
- Selection of ‘Summary Task’ is mandatory. The selection of the summary task decides the WBS code of the new task is added. The new task appears last within the hierarchy of selected ‘Summary Task’.
- The list of ‘Summary Tasks’ displays only tasks that do not have any resources assigned to them. For existing summary tasks, you can assign resources. However, once resources are assigned to an existing summary task, no more child tasks can be added to it.
- ‘Planned Finish Date’ must be equal to or greater than ‘Planned Start Date’. The Planned Start date cannot be later than the Actual Start date at resource allocation as well as task levels.
Notes:
- Allocation start date having actuals posted against it is editable only in case the assignment is an open assignment.
- Standard Code is code maintained for standard activities/tasks by the Process Team in the organization, which helps to aggregate data in reports such as Timesheet Reports and computing metrics such as Rework Effort on the Analytics.
- The highest level summary task is created by default in your project to which you can add subtasks. It is named on the basis of the project ID entered when creating the project and can be edited.
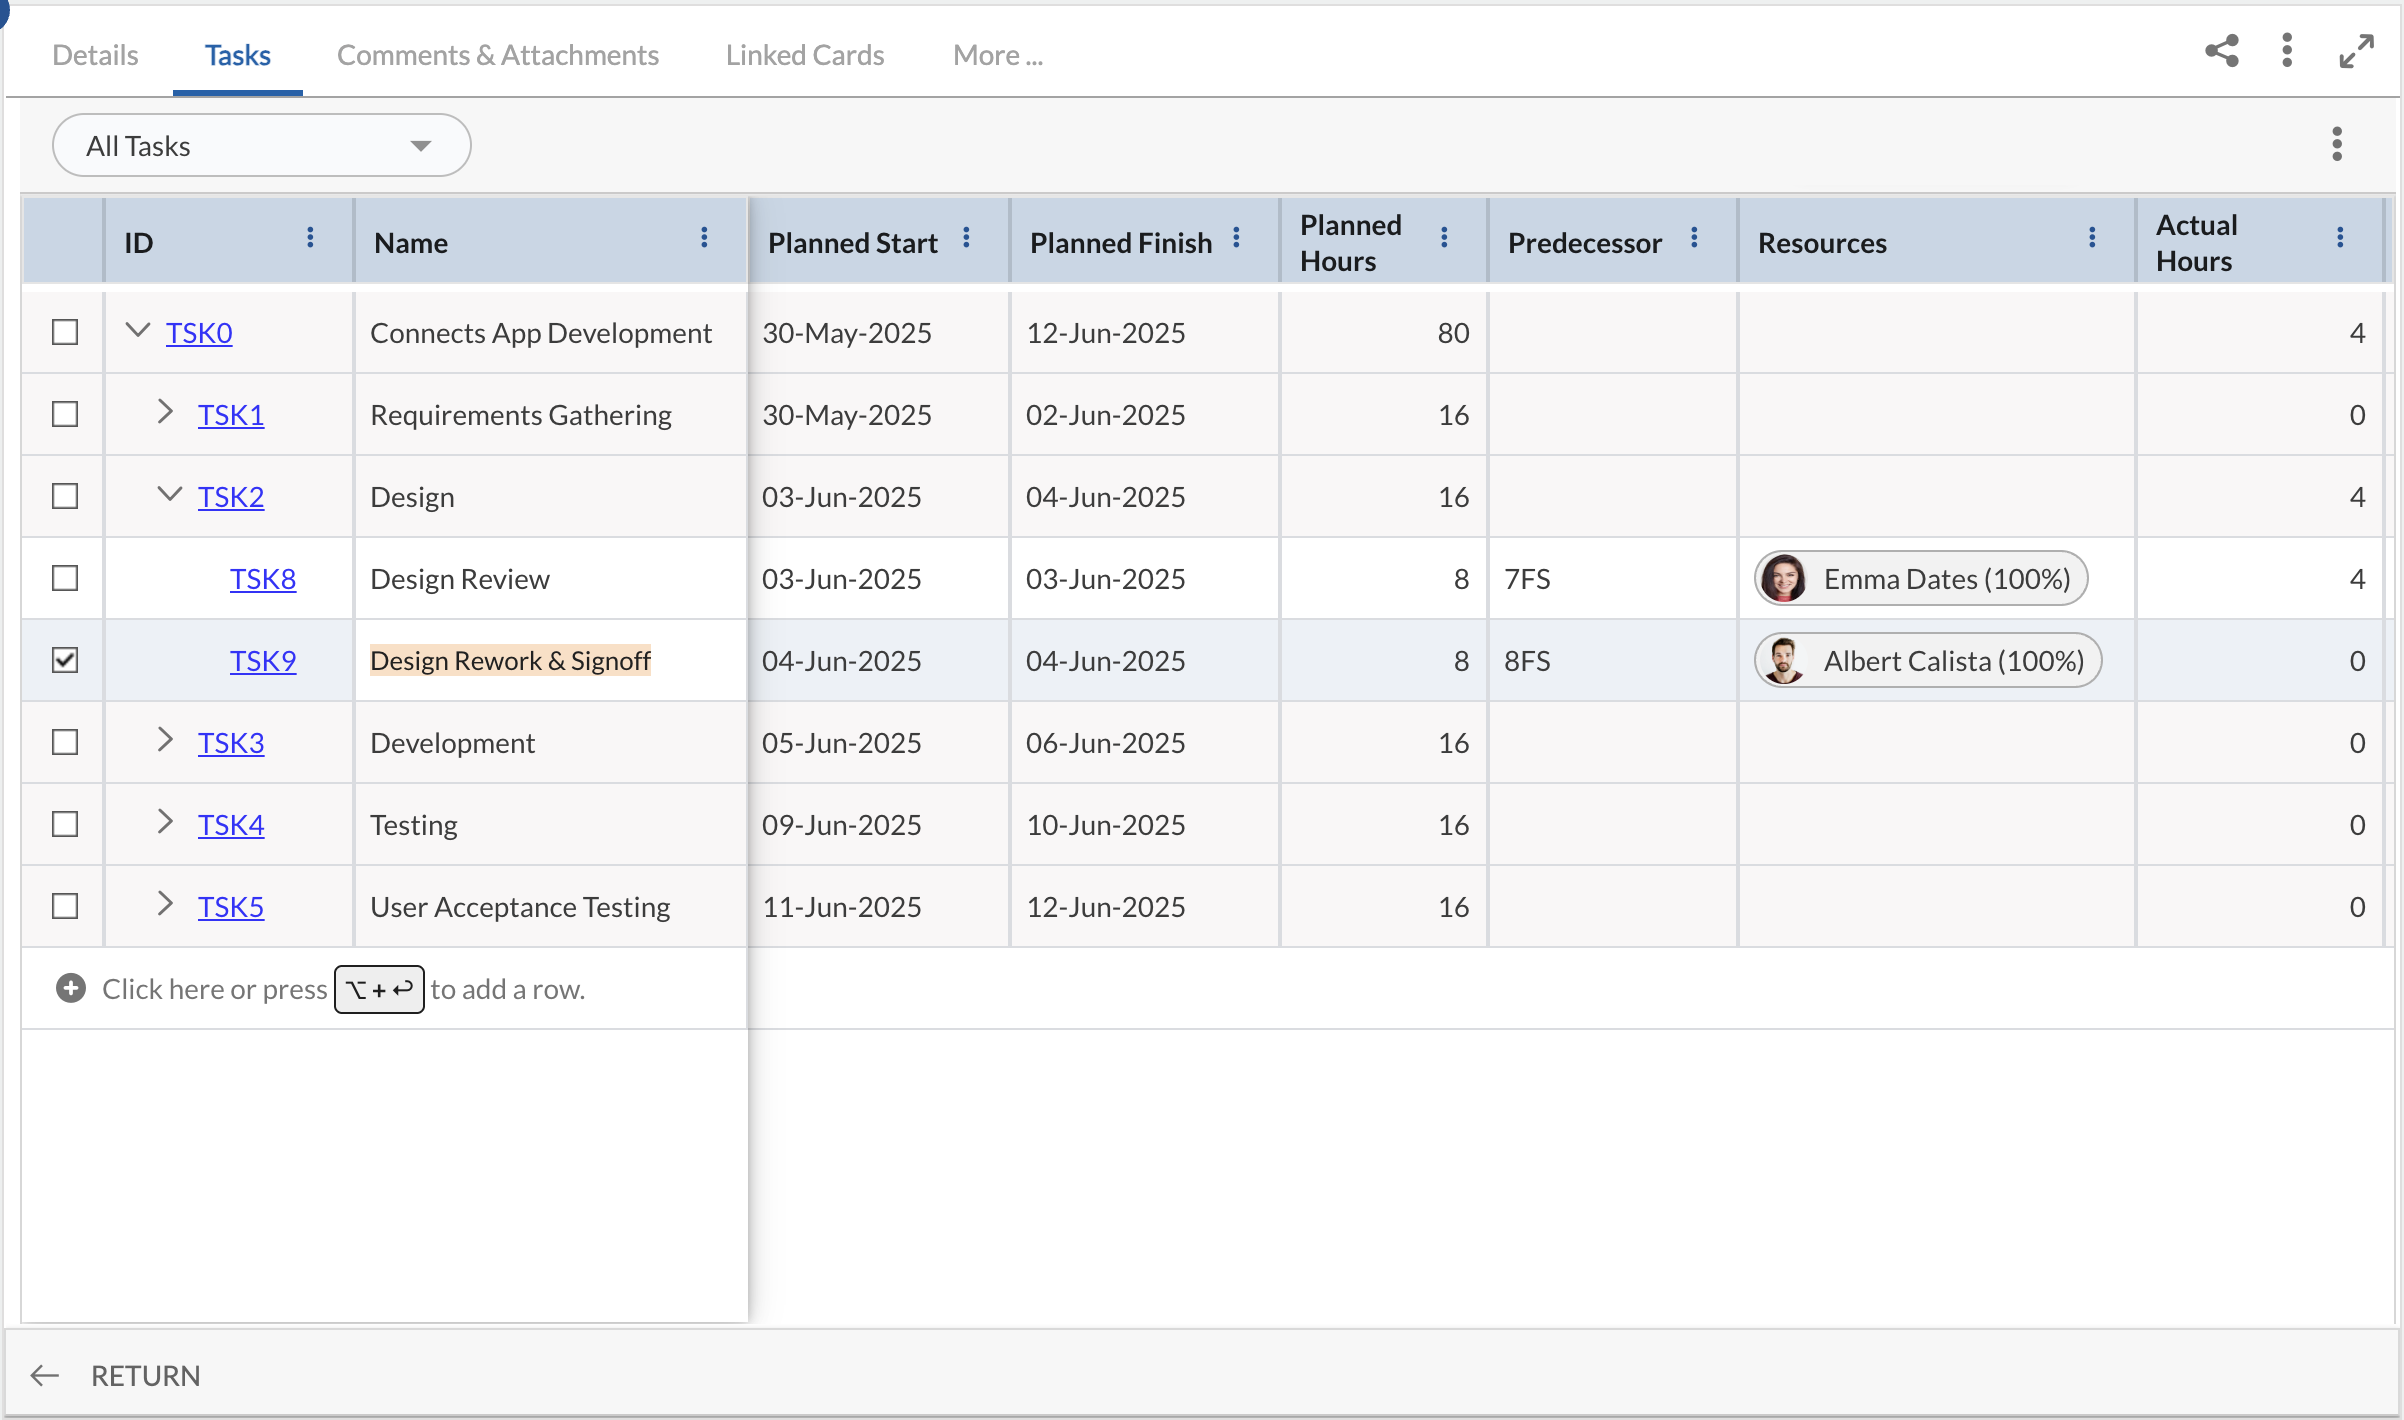
Common operations available for a Task are – ‘Enter Time’ for the Task (available only for projects which have Time Tracking enabled i.e.‘Include in Timesheet’ option selected for the Task Form), Close and open Time-Entry, Comments & Attachments, Linked Cards, and View the Activity Log.
Modify Tasks
After adding tasks, you can organize and structure your Task Plan by outlining the tasks. You can only edit tasks that are not marked as closed.
- To modify the content of a task cell, click once to edit inline. Double-click to select the full content in the cell.
- To change task duration, click the date field and select new dates using the calendar picker.
- To indent a task, hover over it, click the More Options icon, and select Indent Task. This turns it into a subtask of the nearest preceding task at a higher outline level.
- To outdent a task, select Outdent Task to make it a summary task for the task that follows.
- To assign or unassign resources—or update assignment dates—see the Assigning Resources section for help.
All changes are saved automatically in real time. If there are any issues, a validation message will appear with details for correction.
o modify a task, single-click the task or select the task in the Grid listing, make changes, and save. Certain aspects of the Simple Scheduling task modifications are explained with help of the following scenarios:
Scenario 1: Modification to Planned Dates of Tasks without Actuals
Consider modification to plan dates for a task, to which resources are assigned but have not logged actuals.
- Modifying the Task Start/End Date with dates within planned and assignment date ranges will modify the assignment dates. You can observe this in the following illustration:
|
Task Details |
Planned Task Dates |
Assignment Dates |
|
Original Task Dates |
01-Sept to 05-Sept | 01-Sept to 05-Sept |
|
Modified Task Dates |
03-Sept to 05-Sept | 03-Sept to 05-Sept |
- Modifying the Task’s Planned Start Date/End Date with a date outside planned date ranges will modify the assignment date. You can observe this in the following illustration, where the Planned Start Date is modified:
|
Task Details |
Planned Task Dates |
Assignment Dates |
|
Original Task Dates |
02-Sept to 05-Sept | 02-Sept to 04-Sept |
|
Modified Task Dates |
01-Sept to 05-Sept | 01-Sept to 04-Sept |
- Modifying the Task Start Date and End Date with dates outside the planned and assignment date ranges, will not modify the assignment dates. You can observe this in the following illustration:
|
Task Details |
Planned Task Dates |
Assignment Dates |
|
Original Task Dates |
02-Sept to 05-Sept | 03-Sept to 04-Sept |
|
Modified Task Dates |
01-Sept to 05-Sept | 03-Sept to 04-Sept |
Scenario 2: Modification to Planned Start Date of Task with Actuals
Consider modification to the Planned Start date for a task, to which resources are assigned and actual efforts have been tracked.
- Modifying the Task’s Planned Start Date with a new date within the planned and assignment date ranges will throw an alert that the Planned Start cannot be after the first time log date. So, the Planned tasks and allocation remain unchanged. You can observe this in the following illustration where time has been logged for 01-Sept and the Planned Start is modified to 02-Sept:
|
Task Details |
Planned Task Dates |
Assignment Dates |
|
Original Task Dates |
01-Sept to 05-Sept | 01-Sept to 05-Sept |
|
Modified Task Dates |
02-Sept to 05-Sept | 01-Sept to 05-Sept |
|
Task Details |
Planned Task Dates |
Assignment Dates |
|
Original Task Dates |
01-Sept to 05-Sept | 02-Sept to 05-Sept |
|
Modified Task Dates |
02-Sept to 05-Sept | 02-Sept to 05-Sept |
Scenario 3: Modification to Planned End Date of Task with Actuals
Consider modification to the Planned End Date for a task, to which resources are assigned and actual efforts have been tracked against.
- Modifying the Task’s Planned Dates with a new date within the planned and assignment date ranges will change the Assignment Dates. You can observe this in the following illustration where time has been logged against 01-Sept and the Planned Dates are modified:
|
Task Details |
Planned Task Dates |
Assignment Dates |
|
Original Task Dates |
01-Sept to 05-Sept | 01-Sept to 05-Sept |
|
Modified Task Dates |
01-Sept to 04-Sept | 01-Sept to 04-Sept |
- Modifying the Task’s Planned End Date with a new date outside the planned and assignment date ranges, where the Planned Start Date remains the same will not change the Allocation Dates. You can observe this in the following illustration where time has been logged against 01-Sept and the Planned End Date is modified to 06-Sept:
|
Task Details |
Planned Task Dates |
Assignment Dates |
|
Original Task Dates |
01-Sept to 05-Sept | 01-Sept to 04-Sept |
|
Modified Task Dates |
01-Sept to 06-Sept | 01-Sept to 04-Sept |
- Modifying the Task’s Planned End Date with a new date outside the assignment date ranges will change the Assignment Date. You can observe this in the following illustration where time has been tracked against 01-Sept:
|
Task Details |
Planned Task Dates |
Assignment Dates |
|
Original Task Dates |
01-Sept to 05-Sept | 02-Sept to 05-Sept |
|
Modified Task Dates |
01-Sept to 04-Sept | 02-Sept to 04-Sept |
Scenario 4: Modification to Planned Dates of Closed Task and for Closed Allocation
Consider modification to Planned Dates for a closed task, and for a task where the allocation is closed.
- Modifying the Task’s Planned Dates with a new date within the planned and assignment date ranges for a closed task. This will throw an alert that the task is already closed, so further modifications cannot be done. This applies to the Planned Start Date or Planned End Date of a closed task. You can observe this in the following illustration, where efforts were logged for 02-Sept and 03-Sept and the task was completed on 03-Sept:
|
Task Details |
Planned Task Dates |
Assignment Dates |
|
Original Task Dates |
01-Sept to 05-Sept | 01-Sept to 05-Sept |
|
Modified Task Dates |
02-Sept to 04-Sept |
01-Sept to 05-Sept |
- Similarly, modify the Task’s Planned Dates with a new date within the planned and assignment date ranges for a task with closed allocation. This will throw an alert that the date change will affect the closed allocation, which is not allowed. This applies to the Planned Start Date or Planned End Date of a task with closed allocations. You can observe this in the following illustration, where efforts were logged for 02-Sept and 03-Sept and the allocation was closed on 03-Sept:
|
Task Details |
Planned Task Dates |
Assignment Dates |
Assignment Dates |
|
Original Task Dates |
01-Sept to 05-Sept | 01-Sept to 03-Sept |
01-Sept to 05-Sept |
|
Modified Task Dates |
02-Sept to 04-Sept |
01-Sept to 03-Sept |
01-Sept to 05-Sept |
Scenario 5: Modification to Planned Dates beyond Allocation dates
Consider modification to Planned Dates for a task, beyond allocation dates.
- Modify the Task’s Planned Start Date with a new date that is beyond the Assignment date. This will display an alert and the previously planned task and allocation dates are unchanged. You can observe this in the following illustration, where the Planned Start Date is 01-Sept and Planned End Date is 05-Sept and allocation is from 01-Sept to 05-Sept.
Trying to modify the Planned Start Date from 01-Sept to 07-Sept will display an alert – Planned Start Date cannot be later than Planned End Date.
|
Task Details |
Planned Task Dates |
Assignment Dates |
|
Original Task Dates |
01-Sept to 05-Sept | 01-Sept to 05-Sept |
|
Modified Task Dates |
07-Sept to 05-Sept | 01-Sept to 05-Sept |
Scenario 6: Modification to Planned Dates for Tasks without Actuals and overlapping Allocations
Consider modification to Planned Dates for a task without Actuals and overlapping allocation dates.
- Modify the Task’s Planned Dates with dates that overlap the Assignment date. This will change the Allocation dates and consider the nearest inter-lapping dates. You can observe this in the following illustration, where the Planned Start Date is 02-Sept and Planned End Date is 10-Sept and allocation is from 05-Sept to 07-Sept.
|
Task Details |
Planned Task Dates |
Assignment Dates |
|
Original Task Dates |
02-Sept to 10-Sept | 05-Sept to 07-Sept |
|
Modified Task Dates |
08-Sept to 10-Sept |
08-Sept to 08-Sept |
Similarly in the following example, you can see similar results.
|
Task Details |
Planned Task Dates |
Assignment Dates |
|
Original Task Dates |
02-Sept to 10-Sept | 05-Sept to 07-Sept |
|
Modified Task Dates |
02-Sept to 04-Sept |
04-Sept to 04-Sept |
To delete one or more Tasks, select the task (s), click the More Options icon, and select the Delete option.
Note: You can delete normal tasks only and not summary tasks, which have child tasks associated with them
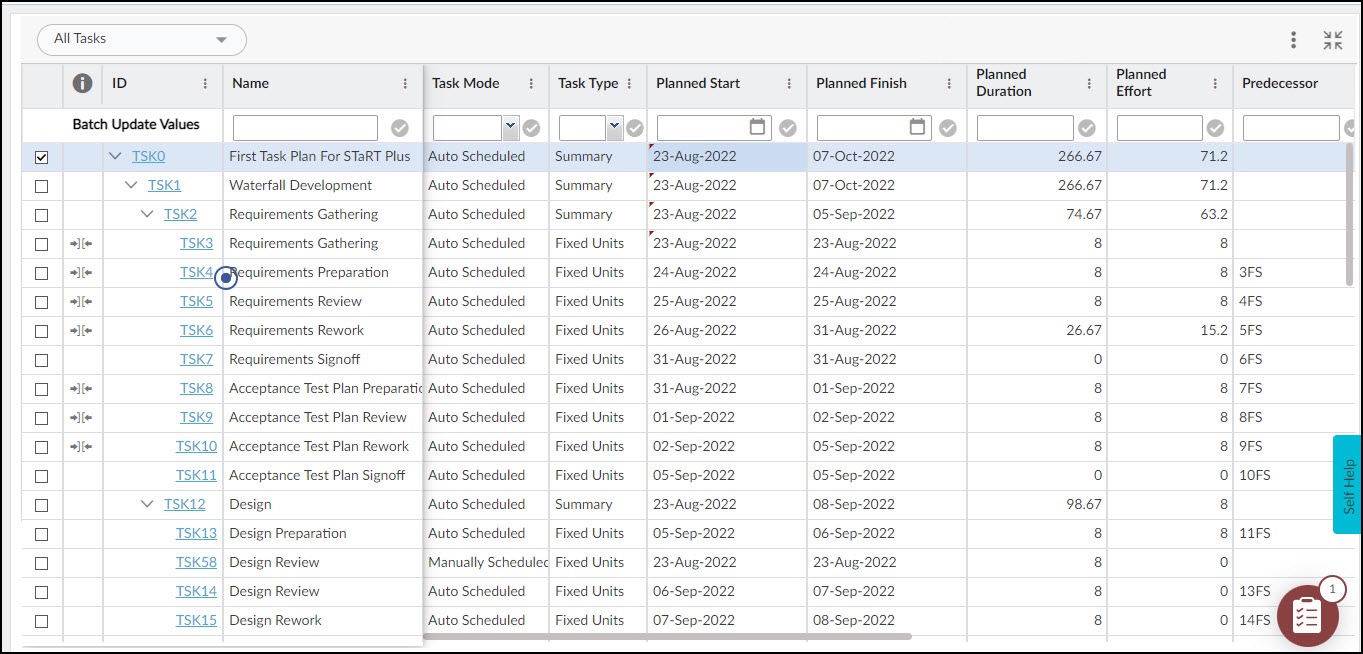
Indent and Outdent Tasks
Your task plan will likely consist of a list of tasks organized in a hierarchy. This means some tasks are summary-level tasks, while others are child/leaf-level tasks under those summary tasks. Summary tasks may represent different phases of a project or larger portions of work, whereas child tasks are the more detailed activities under these summary tasks. Summary tasks are typically displayed in greyed-out.
You can create subtasks or adjust summary tasks using Indent or Outdent functionality. To indent or outdent a task, simply right-click the desired task and select Indent or Outdent Task from the context menu or use the options under More Options.
To learn more about indent and outdent failure details, click here.
Indented Task
When you indent a task, it becomes a subtask of its immediate sibling task. For example, let’s consider the following hierarchy of tasks:

Now let’s indent Task TSK44. The new hierarchy will look as follows:

Outdented Task
When you outdent a task, it becomes a summary task of all the subsequent sibling tasks. For example, let’s consider a hierarchy of tasks:

Now let’s outdent the Task TSK8. The new hierarchy will look as follows

Some facts are listed below to note when you indent or outdent a task:
-
Indenting a Task: Indenting moves a task to a lower hierarchy level (to the right), making it a subtask of the nearest preceding task at a higher hierarchy level. You can indent tasks across multiple levels to reflect your project’s structure.
-
Summary Tasks: When you indent a task, the preceding task becomes a summary task. A summary task, which consists of subtasks, is displayed in greyed-out and outdented. It summarizes the information of its subtasks.
-
Outdenting a Task: Outdenting moves a task to a higher level in the hierarchy. When you outdent, the task can either become a normal task or a summary task, which can represent different phases or major sections of the project. Summary tasks automatically update their information based on the subtasks underneath them.
The Following explains in detail how the sub-task data is rolled up to the summary task.
-
Roll-up of Task Planned data to Summary Tasks
-
‘Planned Start Date’ of the summary task is the MINIMUM of the ‘Planned Start Date’ of all child tasks
-
‘Planned Finish Date’ of the summary task is the MAXIMUM of the ‘Planned Finish Date’ of all child tasks
-
‘Planned Start Date’ and ‘Planned Finish Date’ of the summary task can’t be modified (it is not editable field)
-
The ‘Planned Start Date’ of the summary task is automatically set to MINIMUM (‘Planned Start Date’ of all child tasks if it is greater than MINIMUM (‘Planned Start Date’ of all child tasks).
-
You can manually set the ‘Planned Start Date’ of the summary task to earlier than the MINIMUM (‘Planned Start Date’ of all child tasks)
-
The ‘Planned End Date’ of the summary task is automatically set to MAXIMUM [‘Planned Finish Date’ of all child tasks] if it is less than MAXIMUM [‘Planned Finish Date’ of all child tasks].
-
Roll-up of Task Actual dates to Summary Tasks
-
‘Actual Start’ of the summary task is the MINIMUM of ‘Actual Start’ of all child tasks
-
‘Actual Finish’ of the summary task is the MAXIMUM of ‘Actual Finish’ of all child tasks
-
‘Actual Start’ and ‘Actual Finish’ of the summary task cant be modified (it is a label)
-
Roll-up of Task ‘Estimated Effort’ and ‘Remaining Effort’ to Summary Task
-
‘Estimated Effort’ of a summary task is the SUM of ‘Assigned Effort’ of all child tasks
-
‘Remaining Effort’ of a summary task is the SUM of ‘Assigned Effort’ of all child tasks
-
Indent or outdent a task such that sub-tasks created share characteristics or that are planned to be completed in the same time frame under a summary task.
-
If you need to change a summary task’s values, such as duration, update the individual sub-tasks accordingly. Summary task values are then recalculated.
Notes:
-
Placing tasks in a hierarchical order does not automatically create task dependencies (Task Dependency: When you link a task with another, you create a dependency of one task on another by setting a relationship between their start and finish dates. There are four kinds of task dependencies: Finish-to-start [FS], Start-to-start [SS], Finish-to-finish [FF], and Start-to-finish [SF].) Simple Scheduling supports only F-S dependencies between Tasks. For more details on task dependencies, click here.
-
After rearranging linked tasks in your outlined schedule, the task dependencies you set previously may no longer be relevant and you need to update them.
Batch Assign
Assign Resources to Multiple Tasks using Batch Assign. Select the tasks by pressing CTRL (Windows) or CMD (iOS) then click the Batch Assign icon in the toolbar. The resource that is already assigned is listed with the corresponding check box selected.
Select the check boxes for the required team members and click the Apply button.
Delete Tasks
You can delete a selected task by clicking the More Options icon and selecting Delete Task. The Delete button is also available in the task’s Detail view. However, if time has already been entered and approved for that task assignment, the Delete option will be disabled.
If the task has dependencies (e.g., it is a predecessor to another task), deleting it will also remove those dependency links.
For Task Plans using the MS Project Task Module, the Delete button is not available. To delete a task, refer to the MS Project Help documentation.
Although MS Project allows deletion of tasks with approved time entries, when the Task Plan is synced back into Nimble, an alert will prompt you to re-include the task—since its effort cannot be excluded from the plan.
Batch Edit
Batch editing enables you to quickly apply the same changes to many tasks in a task at the same time without having to edit each one individually.
Steps for Batch Edit Operation:
- In the List view, select the items to be edited by clicking on the corresponding checkboxes. alternatively, select multiple tasks by pressing <Shift + Click> in Microsoft® Windows or <Command-Click> on the Mac OS.
- Click the More Options icon and select the Batch Edit option. Each column will now have an input field.
- Enter the value in the input field of each column for the fields that need to be updated.
- A green tick icon is shown against that column, click it to apply the changes to the selected task(s).
Filtering Tasks
Column Filter helps to filter the list quickly based on the existing columns.
The filtered task will always be shown with all its parent tasks. Mouse-hover on the column to be filtered and click the arrow to specify the conditions for filtering. In the Filter option menu, select one or more values. Click Apply. The list view now displays tasks with the filtered criteria.
To remove all the applied filters and view all workitems, click the More Options icon and select the Remove Filter option.
Note:
- The applied filter will persist within a session.
- Gantt Chart is disabled for filtered task plan.
Complete Tasks
You can close tasks by disabling the Time-Entry for the tasks.
To disable resources to enter time for tasks, click the Close Task Assignment icon on the toolbar of the Task Assignment window, this closes the Time-Entry for that task. However, the task will continue to appear in the resource’s timesheet and the timesheet cells will be grayed out.
You can also disable Time-Entry for tasks by clicking the Close button at the bottom of the Detail view of the task.
You can reopen the task i.e. timesheet entry for a closed task by clicking the ‘Reopen Task’ button available for closed tasks.
Copy-Paste Tasks
To create tasks with the same planned dates, select the checkbox next to the task(s), then right-click and choose Copy. When you paste the task using the right-click option, it is added at the same hierarchy level as the original task.
Alternatively, you can copy and paste multiple tasks using keyboard shortcuts:
- Windows:
Ctrl + Cto copy andCtrl + Vto paste - Mac (iOS):
Cmd + Cto copy andCmd + Vto paste
Assign/Unassign Resources to Tasks
To assign resources for a task, click the Resource cell for the respective task. Click the drop-down icon to open the Resources list.
If the resources are already assigned, the team member is listed with the corresponding check box selected.
To search team members, enter a search string such as part of the last name or first name, in the Search box. From the results displayed, select the checkboxes for the required team members and click the Apply button.

The Task planned start and finish dates are copied to allocation dates when the allocation for a team member is added for the first time.
When you assign a team member, he/she will be assigned 100% by default for the Task duration.
To unassign a team member from a task, simply clear their selection. If the team member has already logged time against the task, a warning will appear indicating that time has been posted.
Set the Hierarchy Level in the Task
As your Task Plan grows with multiple tasks and subtasks, expanding and collapsing summary tasks individually can become time-consuming. The Hierarchy Level option in the Task Plan view helps you control how deeply nested tasks are displayed. This makes it easier to scan the plan and understand the relationships between summary tasks and their subtasks.
To view tasks up to a specific hierarchy level:
- From the top bar in the Task Plan, open the All Tasks drop-down.
- Select the desired Hierarchy Level.
Tasks beyond the selected level appear collapsed. You can expand a specific task to view its subtasks, and collapse it again to hide them.
The Hierarchy Level list displays levels one less than the maximum hierarchy in the plan. For example, if your plan has tasks nested up to Level 6, the list shows options up to Level 5. To view all tasks regardless of depth, select All Tasks from the drop-down.
Note:
-
Indenting or outdenting tasks changes the task hierarchy, but does not dynamically update the values in the Hierarchy Level list.
For example, if you reduce your plan from Level 6 to Level 3, the list may still show levels up to 6.