
This article will help you to familiarize yourself with the steps to integrate Gmail with Nimble.
|
Skip Ahead to: |
Steps to Integrate Gmail with Nimble
Follow these steps to integrate Gmail with Nimble:
- Log in to your Gmail Account.
- Click the Get Add-ons button (marked with a ‘+’).
- In the Google Workspace Marketplace window, search for the Nimble app.
- Select the Nimble app thumbnail and click Install.
- Grant the necessary access permissions when prompted.
- Nimble will now be available as an add-on for your Gmail account.
- Next, log in to your Nimble account using your credentials, and you’re all set!”
Learn more about the various actions that you can perform using the Nimble app from your Gmail account here.
Nimble-Gmail Integration Steps
a) Installing Nimble App on Gmail:
- Open Gmail from the integrations list and click on ‘Redirect’, which will take you to Gmail Workspace Marketplace.
- Nimble installation page will open up on the Google Workspace marketplace on Gmail.
- Install the Nimble App from the Google Workspace Marketplace.
- Access the Nimble App in the Gmail add-ons bar post-installation.
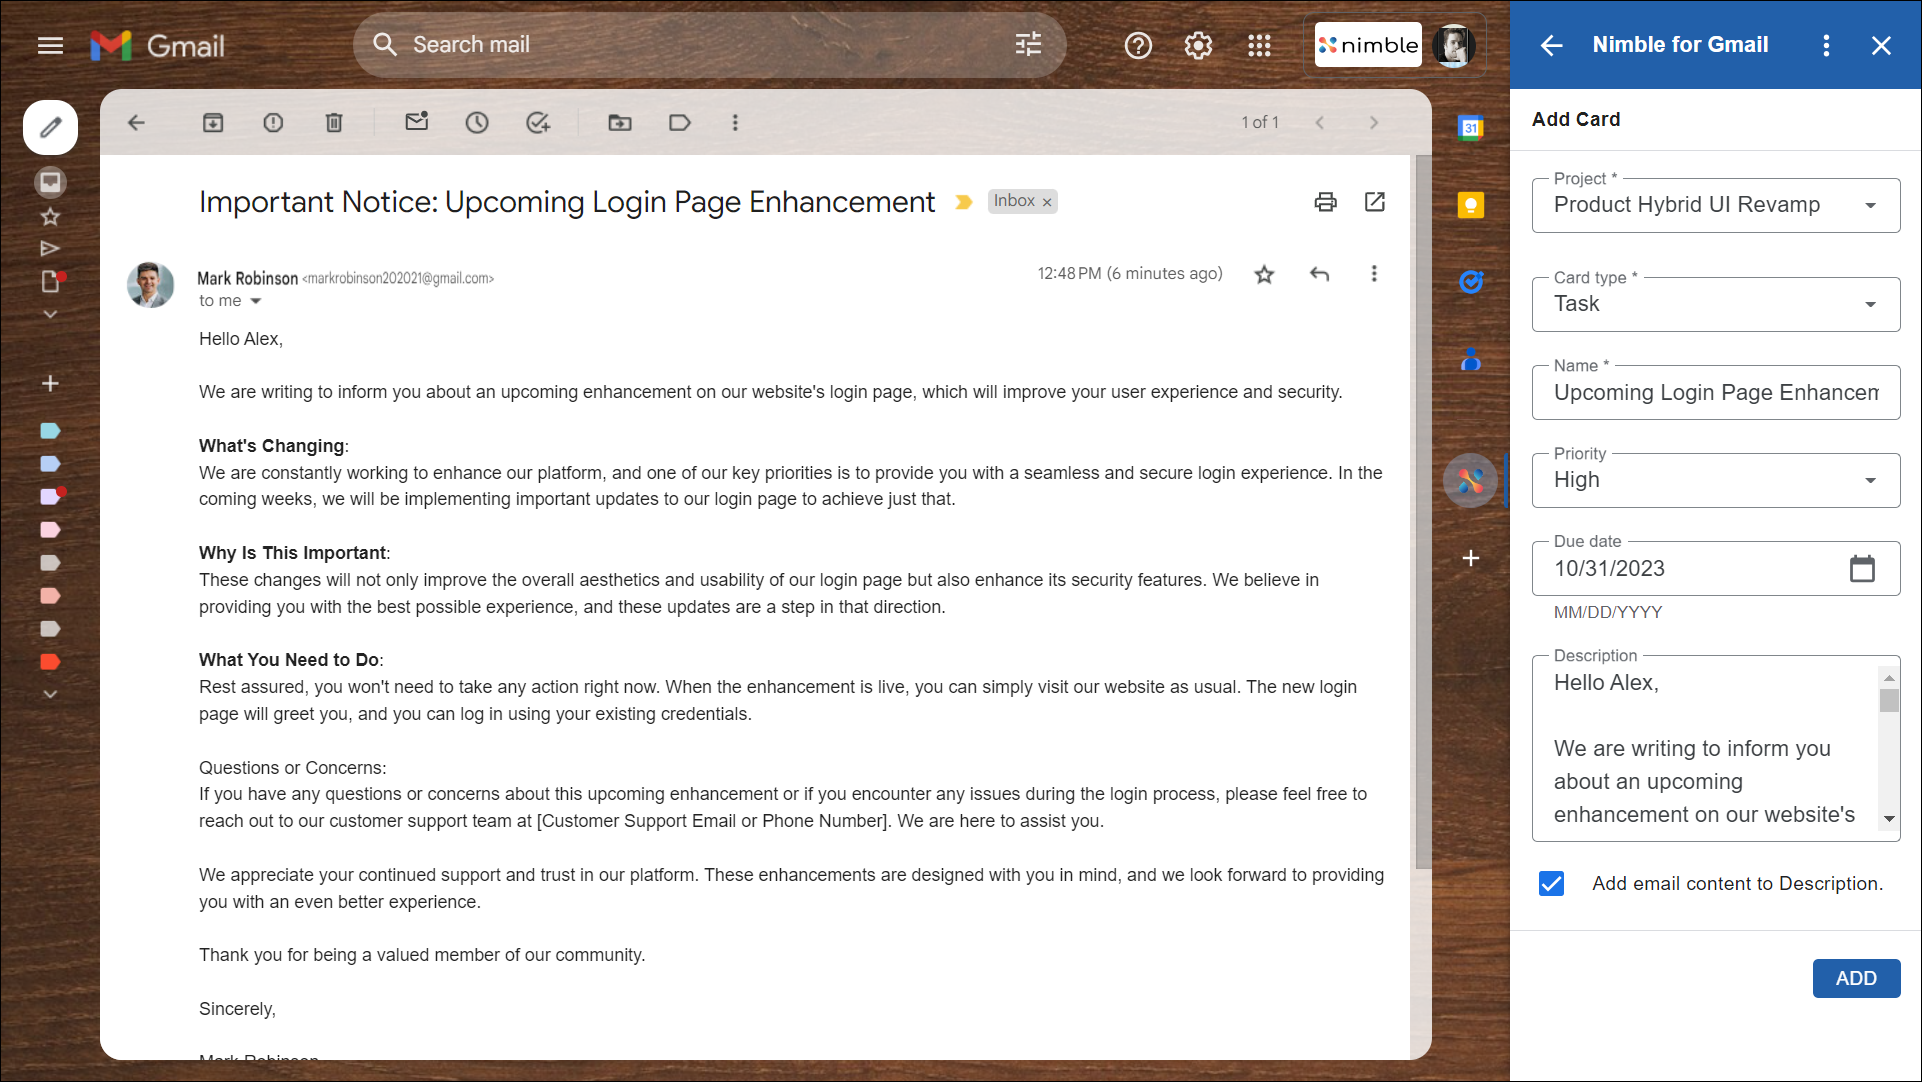
b) Adding a Card via Nimble App:
- Open the Nimble App from the add-ons bar.
- Open the required email and click on ‘Add Card’ on the Nimble side panel.
- Choose a project, card name (default is the email subject), type, priority, and due date.
- Any missing fields will be added as comments to the card
- Select the option ‘Add email content to the card’. This will add the entire email conversation along with attachments in the card description.
- Upon clicking on ‘Add’, the card will be created.
c) Updating a Card via Nimble App:
- Open the Nimble App from the add-ons bar.
- Open the email you wish to update a card for.
- In the Nimble side panel, search for the card using the Card ID or Card name and select a card from the search results.
- Select the option ‘Add email content to the card’. This will add the entire email conversation along with attachments as a comment to the card.
- Additionally, you can close the card by clicking on ‘Mark as Done’.