Start with the video first to get a better grasp of the topic!
Column Settings for In-progress column:
Default Column Settings:
|
Skip Ahead to: |
Overview
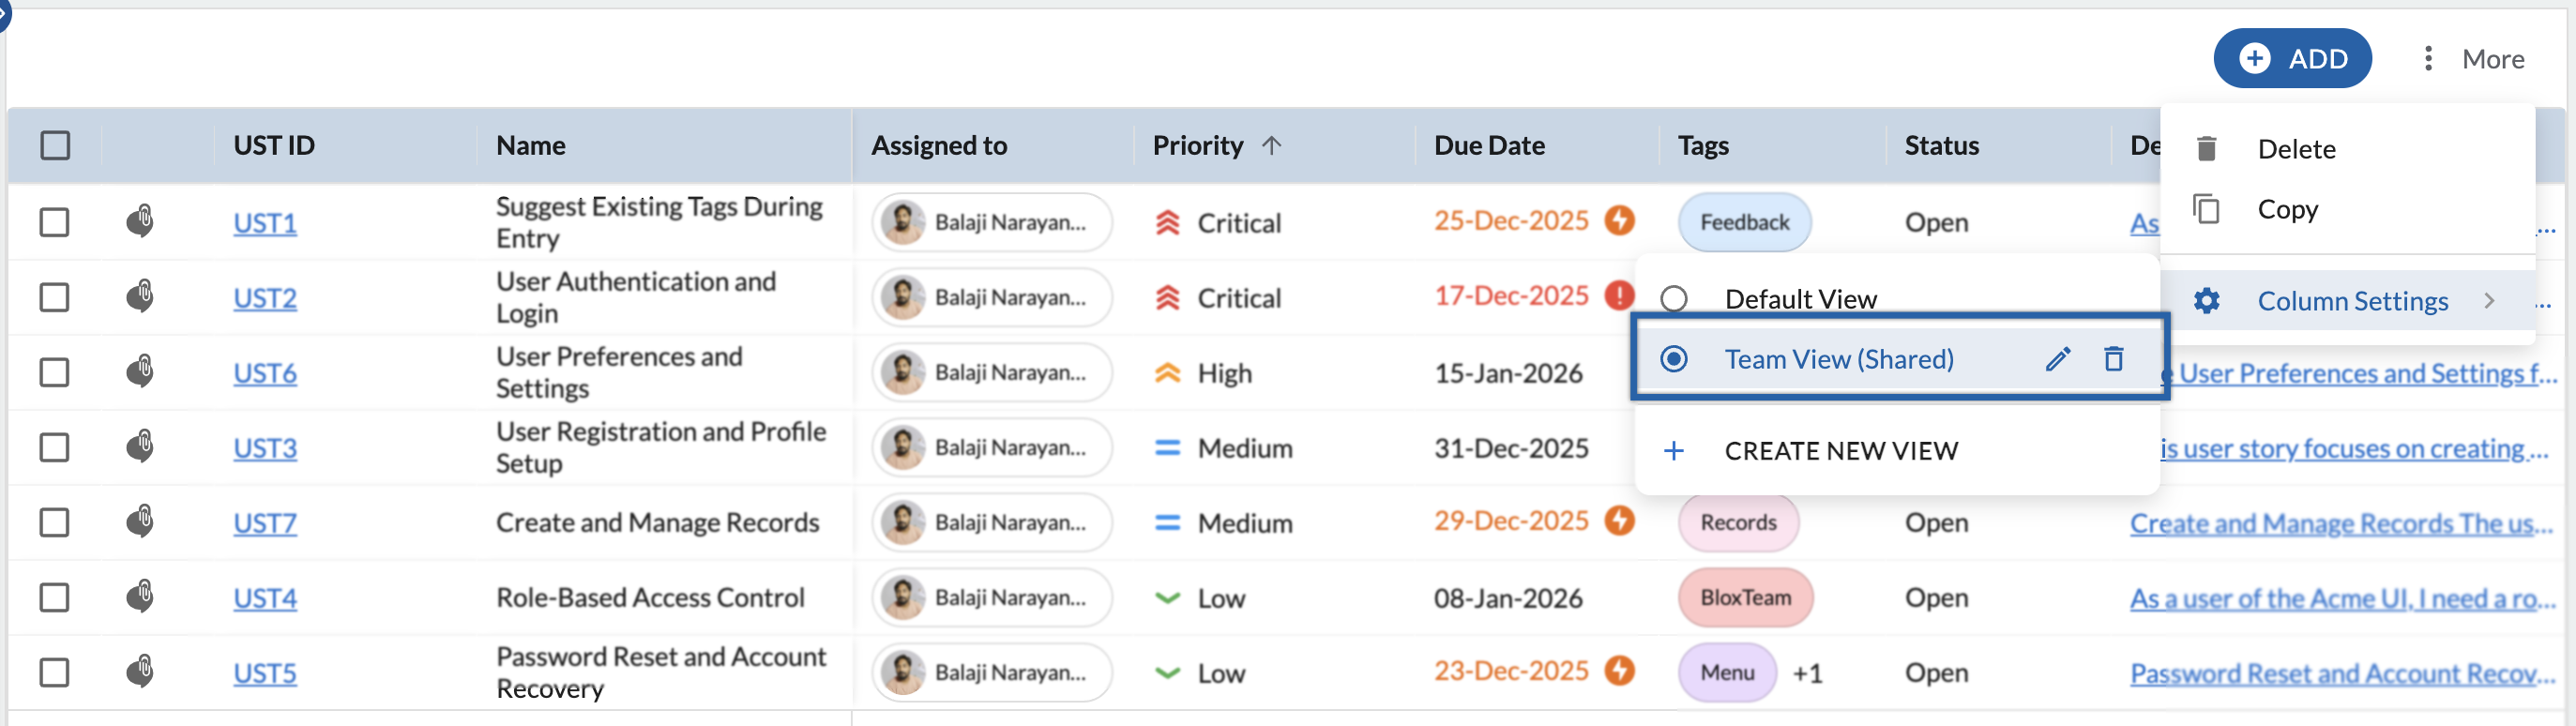
The default List view displays pre-selected columns. You may want to set your view displaying attributes you want to track for work items in columns. Depending on the List view of the Module, different fields will be available for selection. Once you create a Column Settings, it will persist the next time you log on. The applied column settings are shown with a check against it to distinguish it from other views.
Steps to Define Column Settings
1. Go to the List View for any workitem.
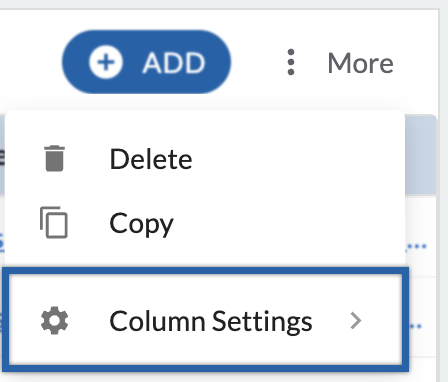
2. Navigate to the More Options icon, and select Column Settings.
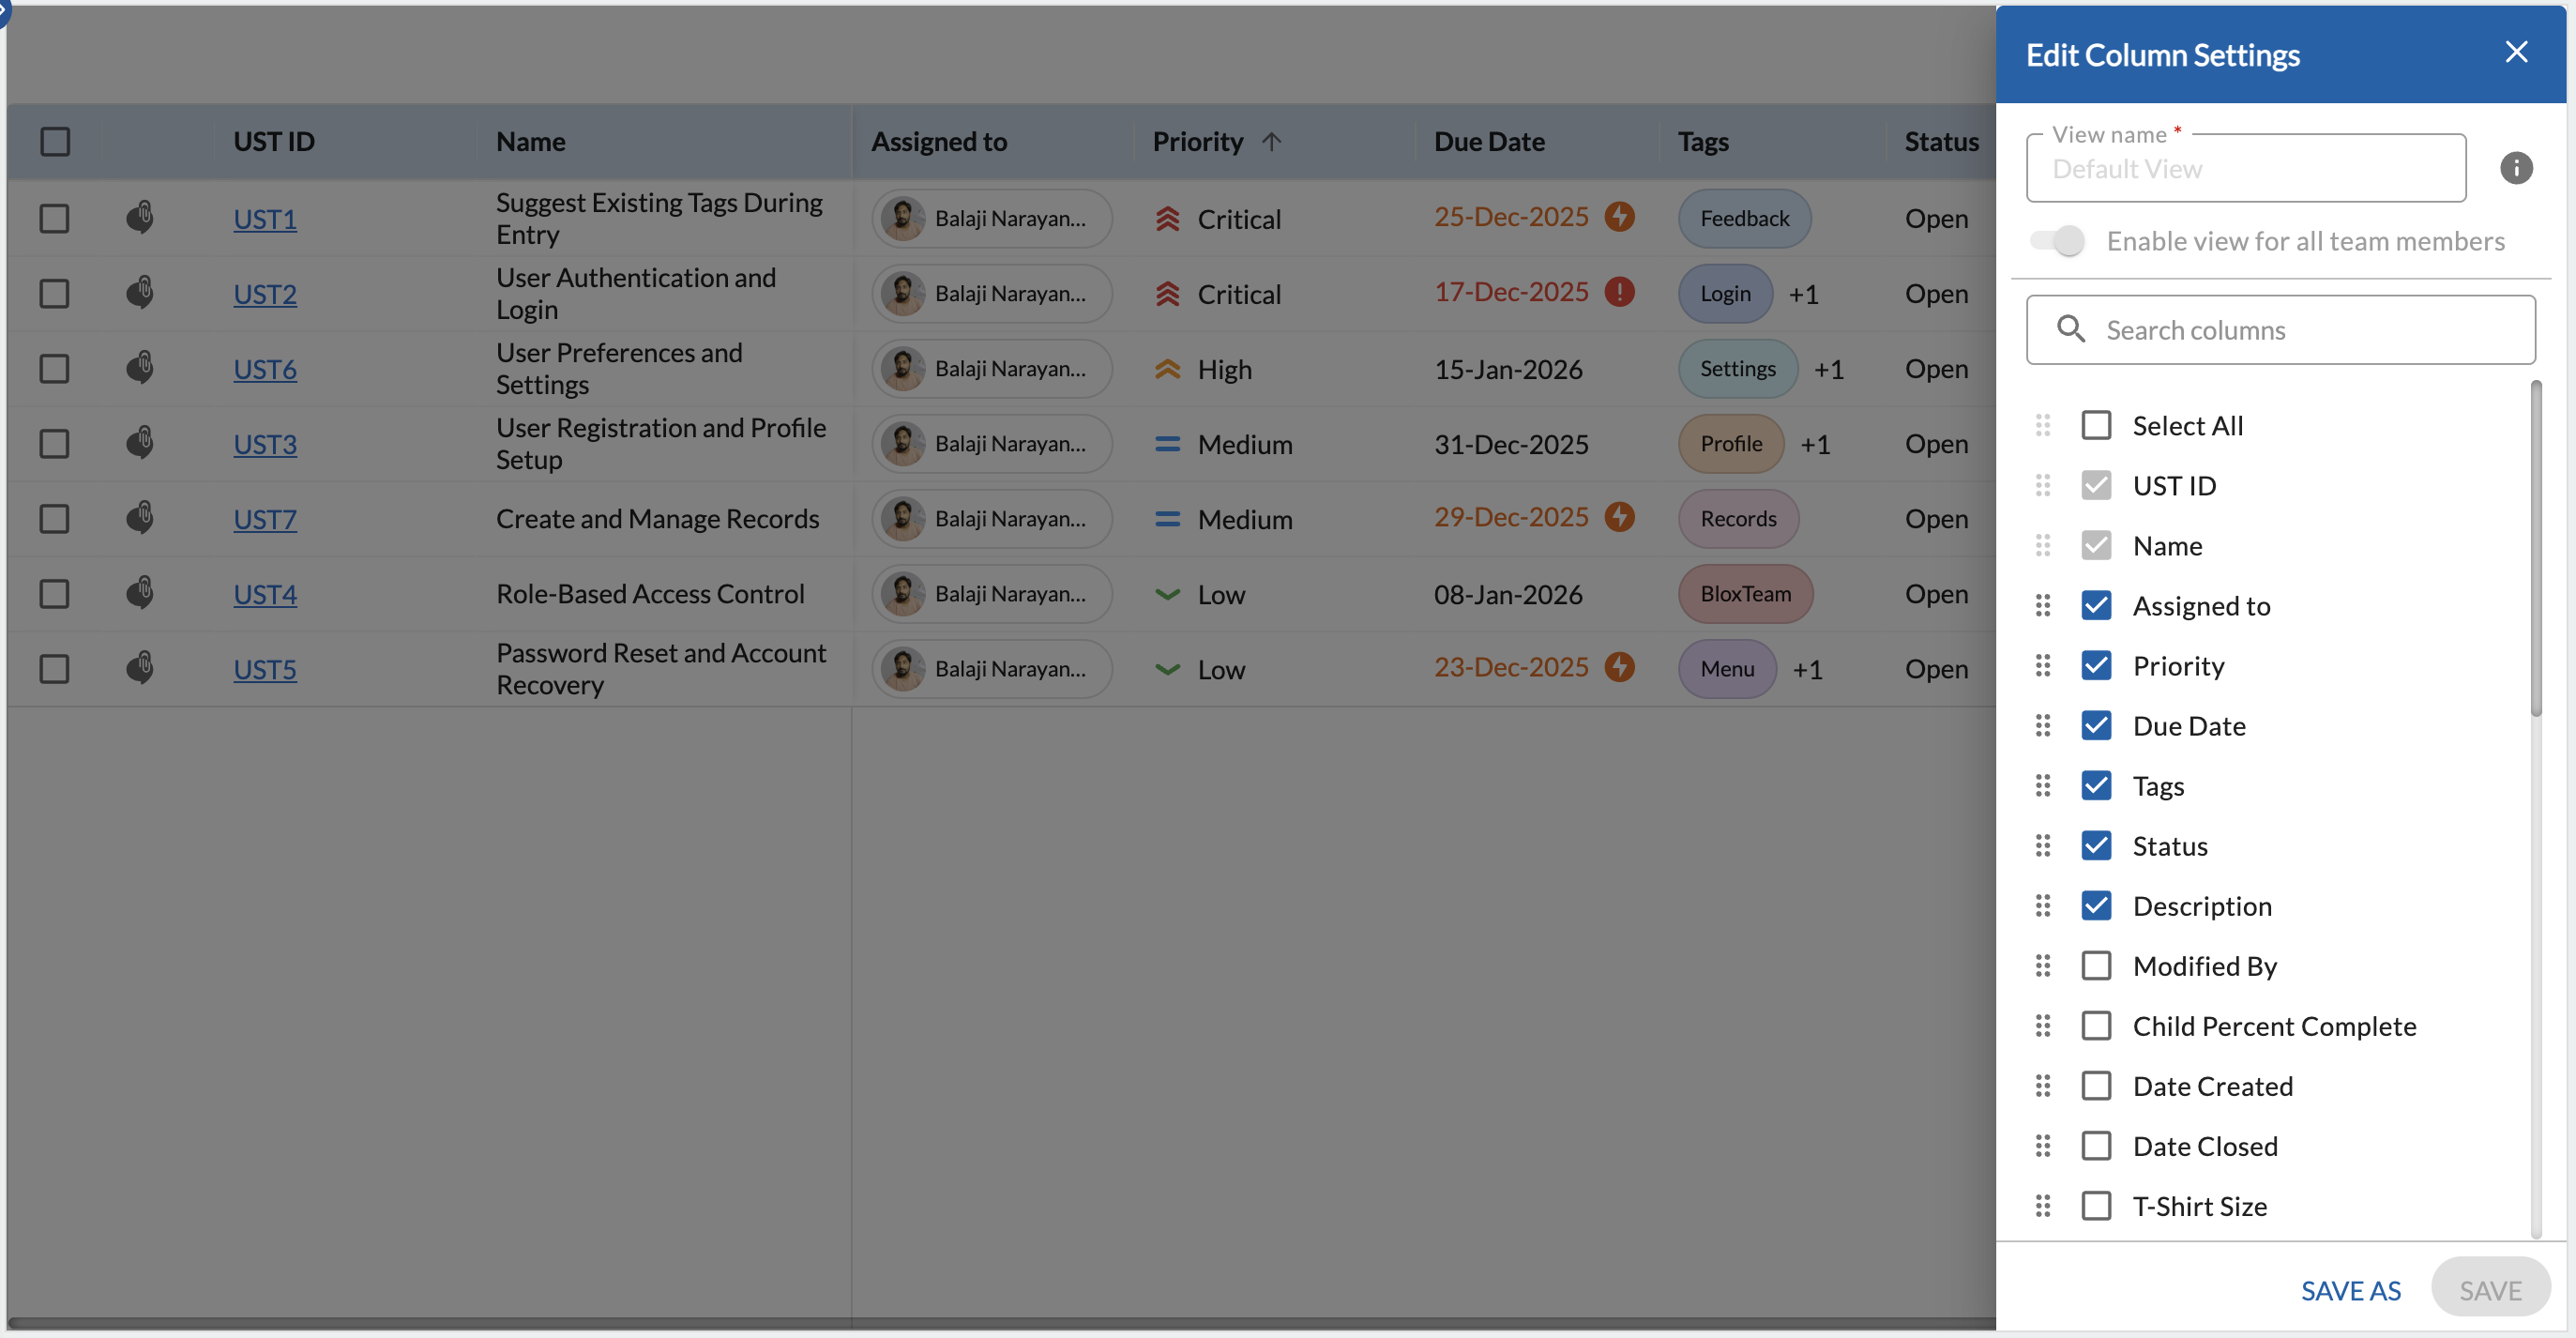
3. Click on the CREATE NEW VIEW button.

4. In the Column Settings panel, enter the name of the view and select the required fields.
5. Reorder the fields as per your preference by dragging and dropping them using the drag indicator.
6. Click the SAVE button to save the changes.
Share the Column Settings with Team Members
You can share the Column Settings you’ve created with your team members. Click the “Enable view for all team members” option in the Column Settings window to make it a global column setting.
Note: Only users with either Create or Delete access rights to the eForm will be able to create a global column setting.
Steps to Edit the Column View
To edit an existing Column Settings, Click the Column Settings under More Options, then hover over an existing view click on the pencil icon, and reorder it. Make the necessary changes and save.
If the view is shared with all team members, you will see “(shared)” next to the view name. For example- New View (Shared).