
Skip Ahead to:
| 1Overview |
| 2Navigation |
| 3How to Plan a Sprint Across the Program? |
| 4Layout of the Program Sprint Planning Board |
| 5Rules You Should Know |
Overview
Sprint Planning brings the team together to decide what work a sprint will deliver. On a single project you plan one backlog into a row of sprint columns, as How to Plan Your Sprints Using Sprint Planning describes. On a Program project you plan the same way, but across every project in the program at once.
The board becomes a grid. Each row is a project. Each column is a sprint. So a cell holds the cards that project has planned into that sprint.
So you can see what every team has committed to in the same sprint, side by side. You can also move a card from one project to another without leaving the board.
iWhere This Board Appears
Sprint Planning is available on every project. What changes is what it shows you.
Open it on an ordinary project and you get that one project’s board. Open it on a project whose Project Category is Program, and you get the across-projects view described here. That view gives one row to the program, and one row to each linked child project.
If the rows are missing, the category is not set to Program, or no child projects are linked yet. See How to Set Up a Program Project.
Navigation
Navigate to the breadcrumb at the top, hover over the program name, expand the Agile Planning module, then select Sprint Planning.
How to Plan a Sprint Across the Program?
To plan a sprint across the program, perform the following steps –
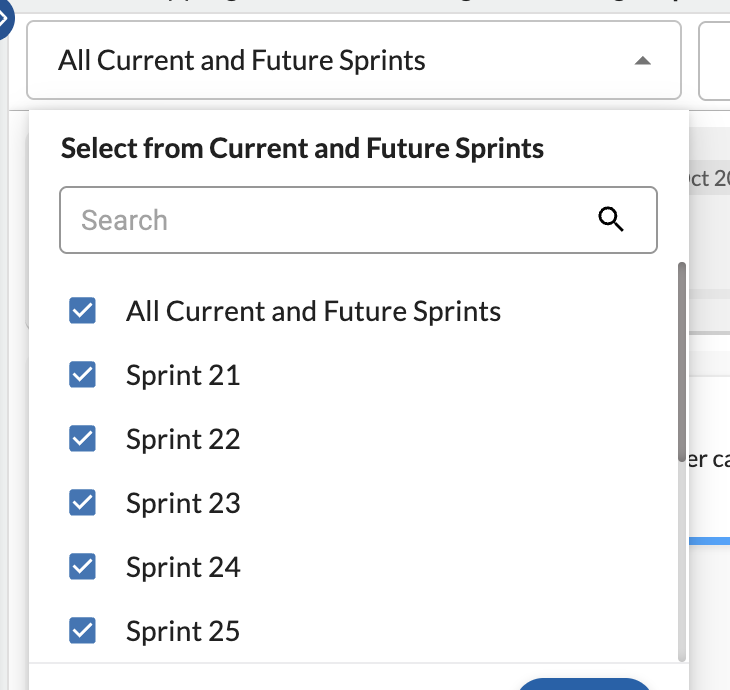
1Select the sprint you want to plan from the All Current and Future Sprints list. Leave it on All Current and Future Sprints to see every sprint at once.
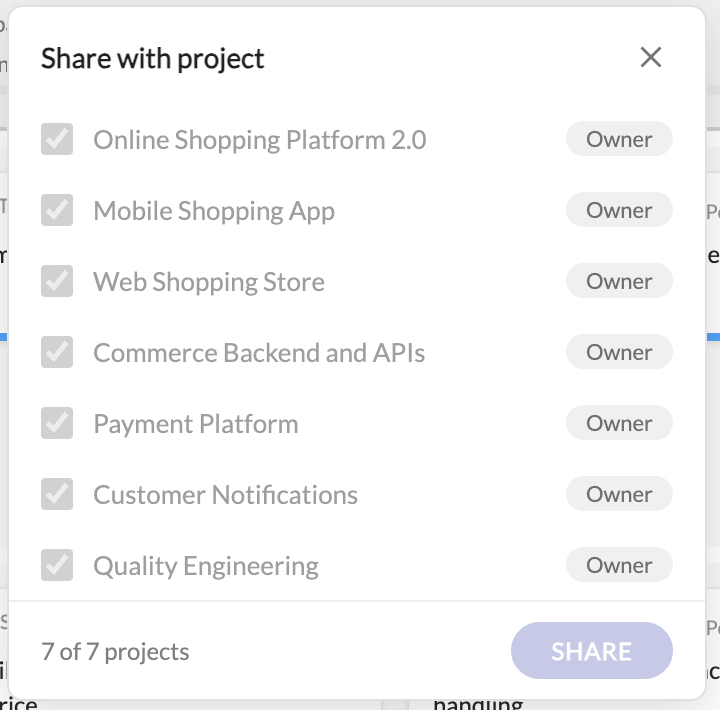
2Share the sprint with the child projects that will contribute to it. Hover over the sprint column header and select the share icon. Tick the projects, then select SHARE.
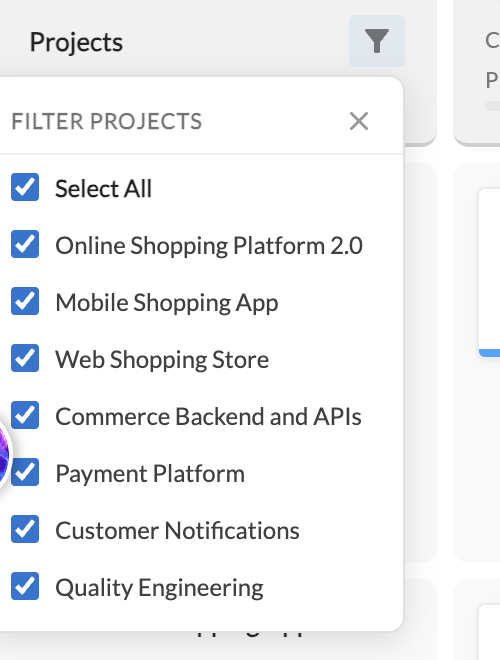
3Narrow the board to the projects you are planning with. Hover over the Projects column header and select the filter icon, then tick the projects you want to see.
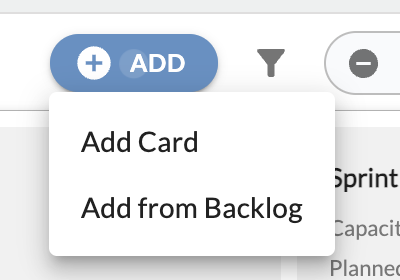
4To add a card, select ADD → Add Card. To bring in a card that already exists, select ADD → Add from Backlog.
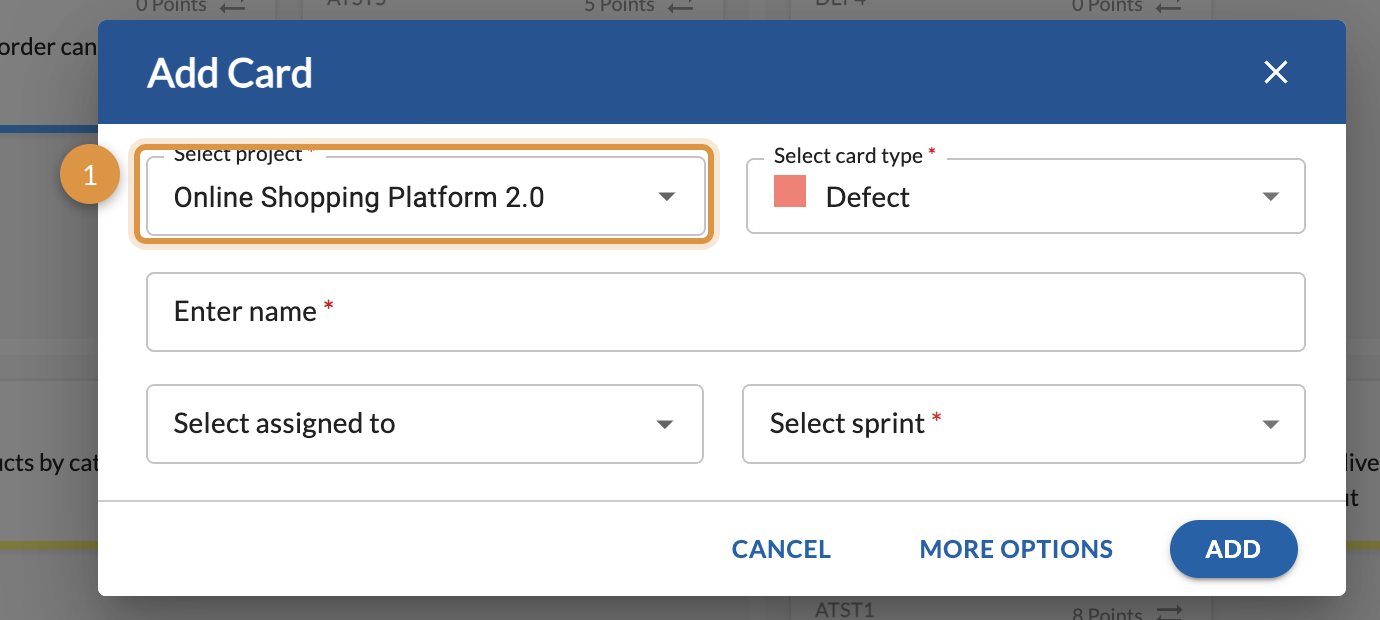
5Fill in the card. Choose the project it belongs to, its card type, a name and the sprint. Then select ADD. Select MORE OPTIONS instead if you want the full card form.
6Drag and drop the cards between sprint columns to move them to a different sprint.
7Drag and drop a card into another project’s row to move it to that project’s sprint.
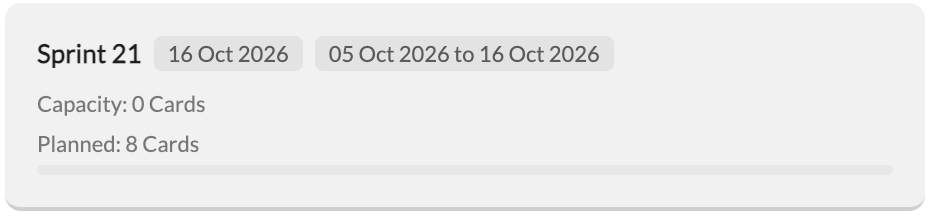
8Compare Planned against Capacity on each sprint header to see how loaded the sprint is.
Sharing a Sprint With Child Projects
You create sprints at the program level. A child project does not get one automatically, so you share it first.
Hover over the sprint column header and select the share icon. The Share with project panel lists the program and all its child projects. Tick the ones you want, then select SHARE.
Nimble then creates the same sprint, with the same dates, inside each project you ticked. Their cards can now be planned into it, and those cards appear on this board.
Adding Cards
Add Card opens a short form. Pick the project the card belongs to, its card type, a name and the sprint.
The project list covers the program and every child project. So you decide which row the new card lands in. The program itself is a valid choice, because a program can hold its own cards.
Add from Backlog pulls in cards that already exist instead of creating one.
Moving Cards Between Sprints
Drag and drop a card from one sprint column to another, within the same project row. This simply re-plans the card, exactly as it does on a single-project board.
Moving Cards Between Projects
Dropping a card into a different project’s row does more. The two projects are separate workspaces, so the card cannot simply move across.
Instead, Nimble closes the card in the source project. It then creates a new card of the same card type in the destination project. This is the Transfer Card behaviour, and it runs on its own when you drop the card. Both the closure and the new card appear in the card’s Activity Log.
!This Cannot Be Reversed
Check the destination row before you drop. Once the card transfers, the original is closed and you cannot reopen it.
What happens to attributes, effort and links
- The transfer copies all attributes to the new card.
- Where applicable, it also replicates to-do items and linked cards.
- The new card traces back to the old one.
- Logged effort stays on the closed card.
- However, Actual Effort on the new card starts at zero.
- Remaining Effort transfers across, so log all further effort on the new card.
You can also run the same operation deliberately. Select the card on the workitem listing page, then choose More → Transfer Card Type and pick the destination project and card type. See Common Operations on the Workitem Listing Page.
Layout of the Program Sprint Planning Board
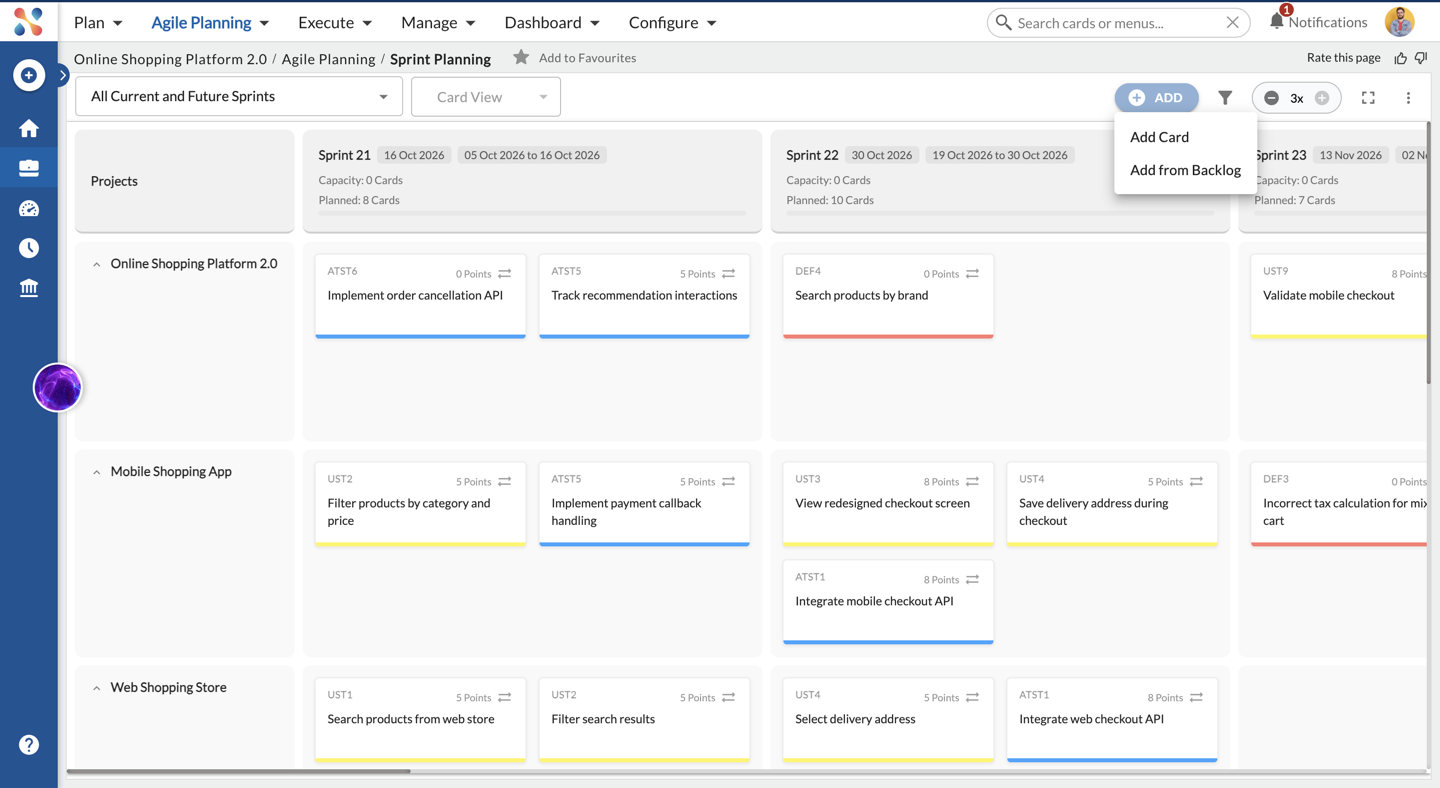
Tool Bar
- Current and Future Sprints lists present and future sprints in ascending order. Select one, or all of them.
- Card View shows each card with its ID, story points and title. The bottom border carries the colour set for that card type.
- ADD offers Add Card and Add from Backlog.
- Filter shows only selected cards, by criteria such as Card Owner, Priority or Card Type. Learn more about it here.
- Zoom enlarges the cards as you raise the level.
- Full-screen mode hides the top panel and menu bar for a bigger view.
- More offers Release Capacity and View Dependency.
Projects Column
The left-most column lists the program first, then each child project, one row each. Hover over the column header to reveal the project filter. Each row also carries Collapse project, so you can fold a project away while you work on the others.
Sprint Columns
Each sprint column shows the cards tagged to that sprint, per project. Its header carries the following.
Rules You Should Know
1Sprints Are Managed From the Program
You create sprints at the program level and share them downwards. Once a sprint is shared into a child project, manage it from the program. Re-sharing a sprint a project already has changes nothing, and reports no error.
2A Transfer Cannot Be Undone
Moving a card into another project’s row closes it in the source project and recreates it in the destination. There is no undo, and the original card stays closed.
3Use the Same Template Across the ProgramRecommended
A transfer recreates the card as the same card type in the destination project. Where projects run on different templates, their card types do not line up. That makes both the transfer and the board harder to read.