
This article provides an overview of the Nimble Mobile app and its features. It covers Login Options, Profile Details, Café, My Workitems, as well as its sections and notifications.
|
Skip Ahead to: |
Overview
Take control of your work with the Nimble App, available on the go anywhere, anytime. With just a tap of your finger, you can view and manage the workitems assigned to you, including updating their status, tracking the time you spend on them, adding comments and attachments, and more.
In addition to these tasks, you can also access the Profile section to view your personal information, check your notifications, and explore the Café, My Workitems, and Time Tracking sections for even more productivity and convenience. Whether you’re at the office, on the go, or working remotely, the Nimble App puts all the tools you need at your fingertips
Note: Nimble mobile app is fundamentally an extension of the Web Application.
Download the App
If you are a free or paid subscriber of Nimble, you can download and install the App from:


Specifications
The Nimble mobile app is designed to work with the following specifications:
| Andriod | iOS | |
| Operating System | 9 or higher | 11 or higher |
Signing Up
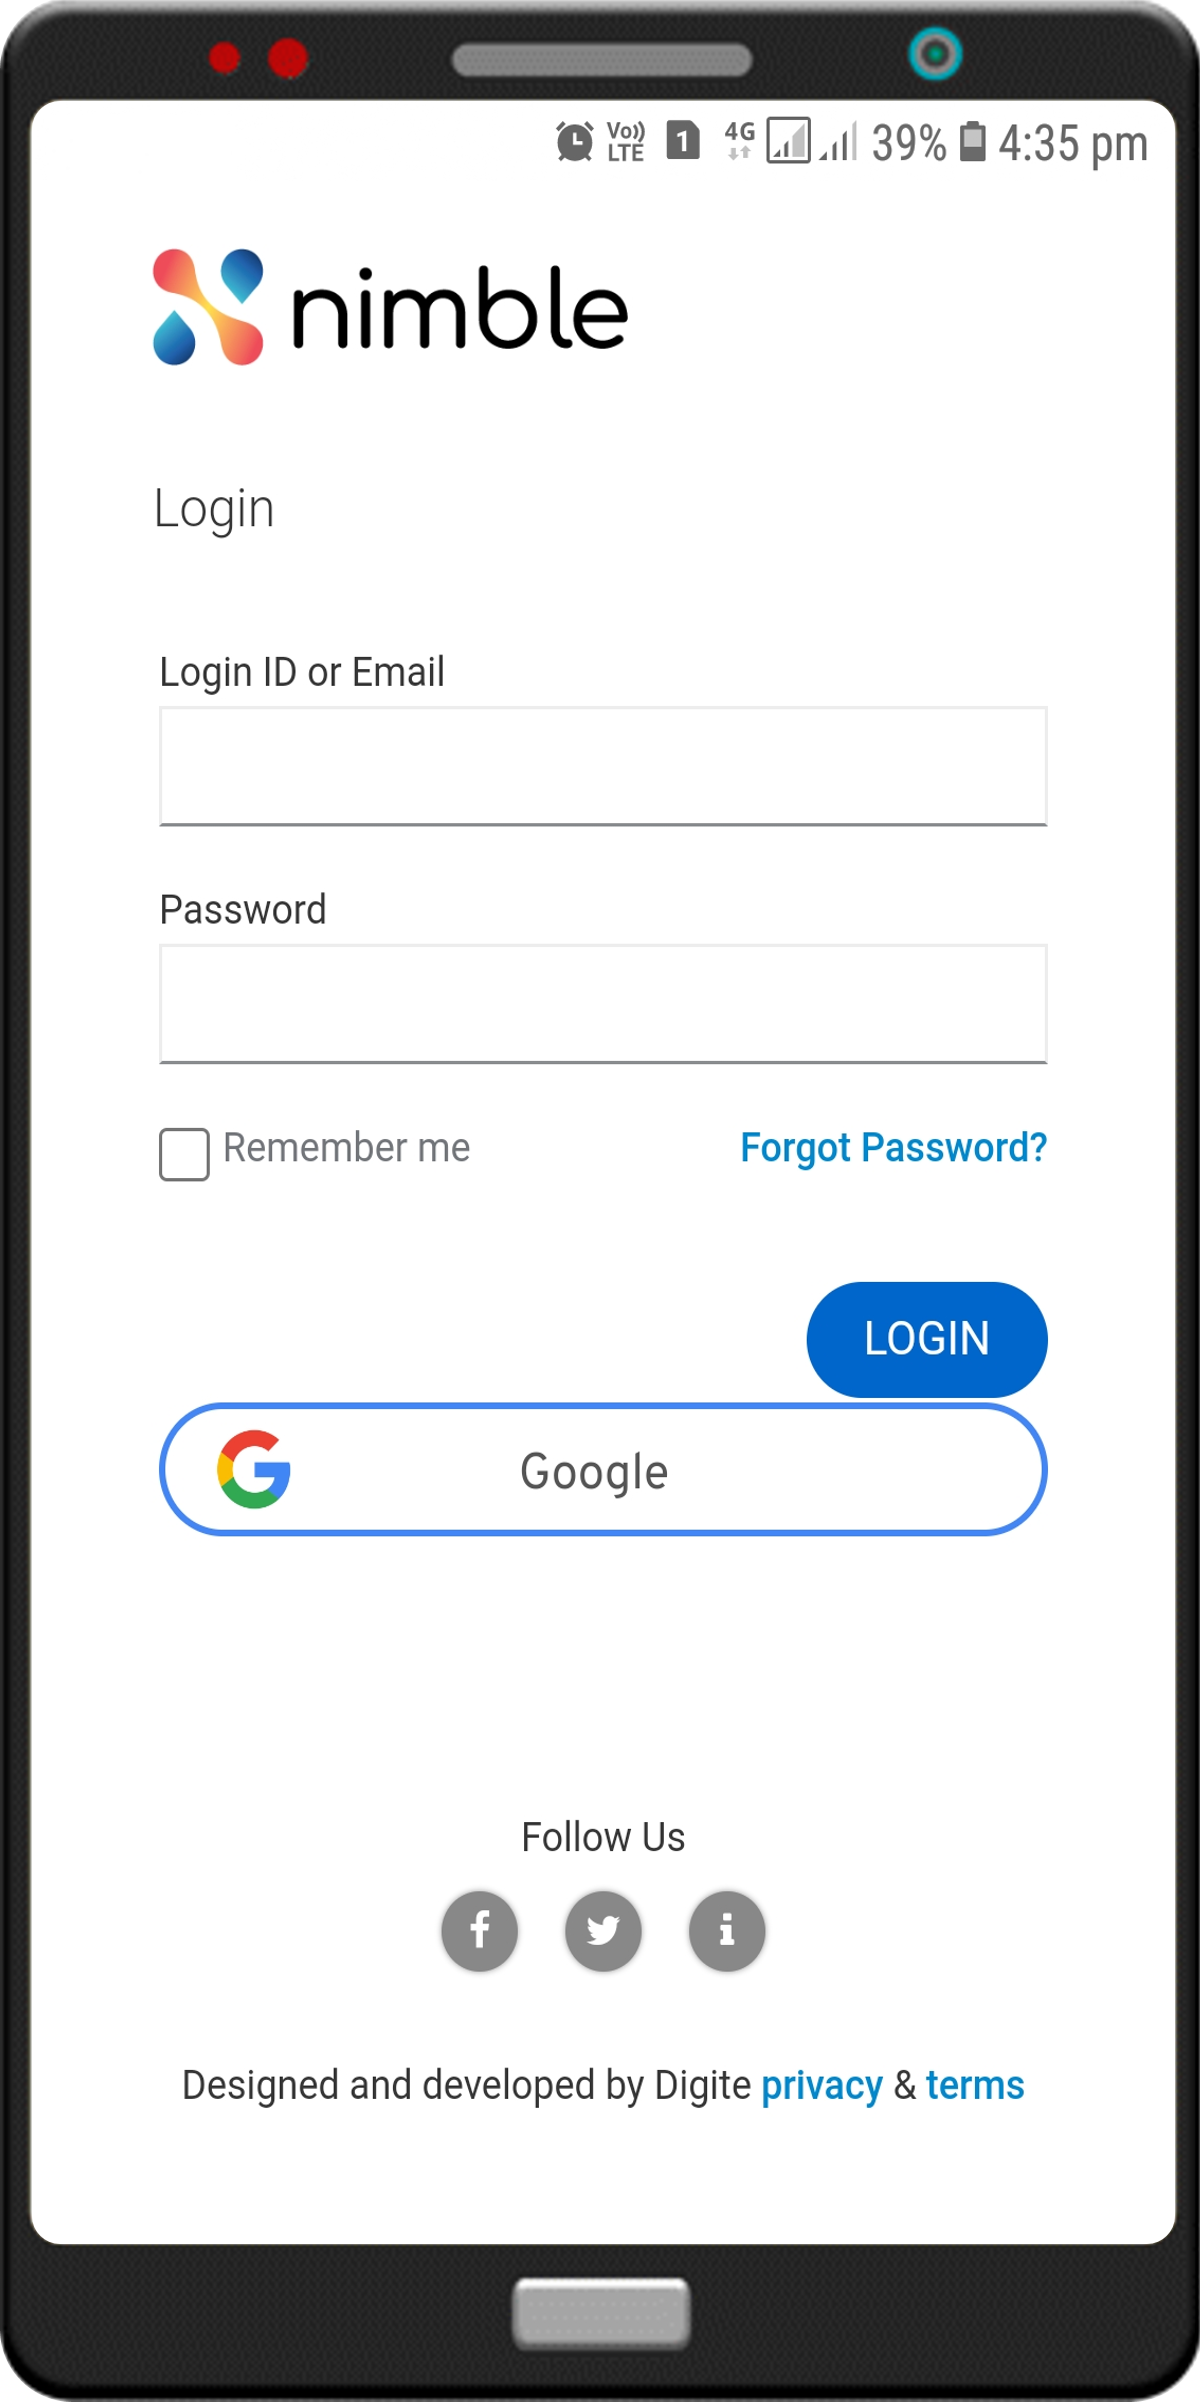 |
When you first open the Nimble mobile app, you can:
Sign up for a new account
Log in to your existing account |
Profile Details
 |
When you log into the Nimble mobile app, you will see your profile image and name displayed at the top right corner of the screen. You can update your profile picture by choosing an image from your photo library or taking a new picture with your device’s camera. In addition, you will find several other options available, including Help, Logout, and Account Settings. You can also view Gold, Silver, and Bronze badges with the profile picture of the users. To know more about it, click here. |
Café
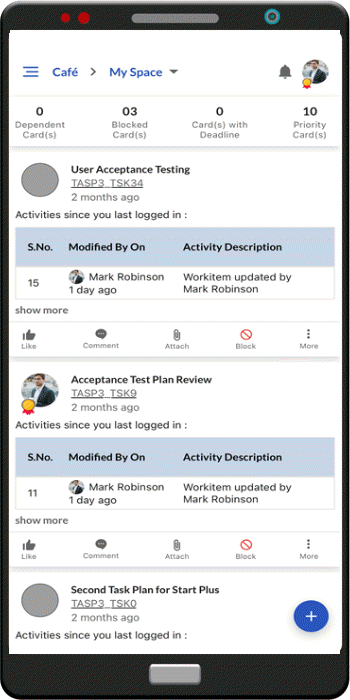 |
Get in touch with your colleagues and collaborators on a project seamlessly with Nimble Café. You can even send virtual pats on the back in the form of Kudos, or show your appreciation for a post by Liking it or leaving a Comment. All this is within the comfort of the mobile application.
The Nimble Café is divided into two sections: The Add icon allows you to send kudos to your colleagues, create a workitem, or start a discussion about a workitem. Note: With every Kudo, you send or receive you earn points. For every Kudo, you send you get 2 points and on receiving Kudo you get 10 points. Based on these kudos, you earn Gold, Silver, or Bronze badges. To know more about badges click here. |
My Workitems
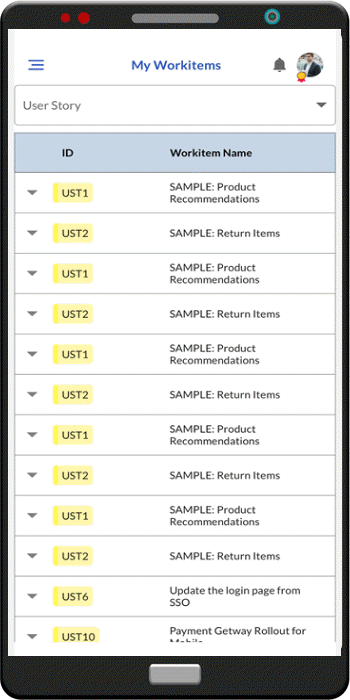 |
The My Workitems page in the Nimble mobile app displays a comprehensive list of all the tasks that have been assigned to you from various projects. To easily view the details and information of a particular workitem, simply tap on it.
On the My Workitems screen, select the desired workitem to view its card details. To access more information update the card details, or navigate to the various sections of the workitem, click the See More link. Workitem Sections |
| Workitem Sections | About |
| Details | Edit as required by the requirements. Additionally, you may delete, block or unblock, and close or reopen the workitem. Learn how to add and modify a workitem Details here. |
| ToDos | ToDos are the integral parts of a Workitem. It empowers you to break down the bigger task into granular elements, and then prioritize, collaborate, and deliver those smaller tasks regularly so that the task gets completed on time, every time.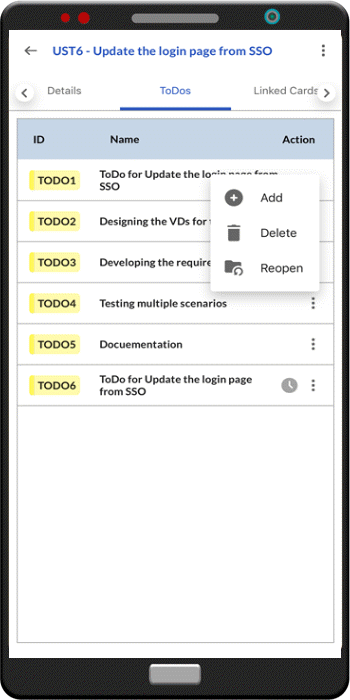
To a new ToDo, perform the following steps –
Learn how to manage time and log time in the ToDos section here. |
| Linked Cards | Linked Cards help you to set relationships between workitems and trace them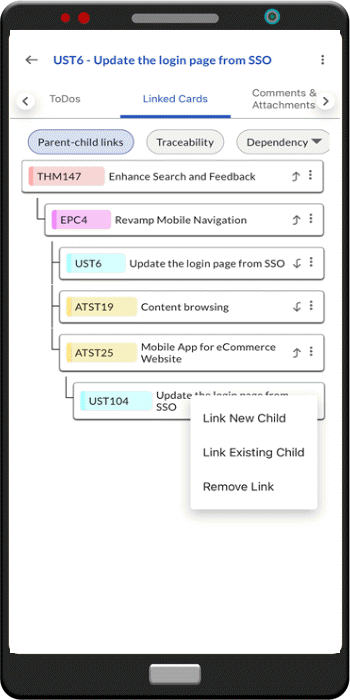 while working with them. You can set relationships between project items such as User Stories, Change Requests, Defects, Risks, etc., and link them to work in an integrated system. while working with them. You can set relationships between project items such as User Stories, Change Requests, Defects, Risks, etc., and link them to work in an integrated system.
You can link an existing workitem or create a new workitem and then link that to the current item. The links can be within the same project or in any other project. The Linked Cards section displays three segments- Parent-child Links, Traceability, and Dependency. Learn how to add or link the cards in the different segments here. |
| Workflow | In Nimble, workflows automate processes to produce outcomes. The system allows defining linear workflows for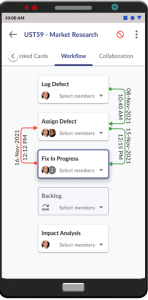 various jobs or processes, ensuring progress as workitems move forward. You can also edit the workflow tabs, assigning team members, by routing or rejecting them. Learn about them here. various jobs or processes, ensuring progress as workitems move forward. You can also edit the workflow tabs, assigning team members, by routing or rejecting them. Learn about them here.Note: Route and Reject options are available under the “more options” menu for each workitem. |
| Comments & Attachments | The Comments and Attachments segment any workitem help in collaborating with team members in the context of the workitem and serve as a good knowledge base.
Learn how to add comments and upload attachments here. |
| Activity Log | The Activity log displays the list of operations in reverse chronological order for activities performed such as updating, closing, reopening, etc. In the Activity Log, you can view the various versions and the differences between the two versions of a workitem. For more information, click here. |
| System Fields | All system fields or uneditable fields are listed in the System Fields segment. |
|
Note: The custom segments will also be displayed if created for a specific card type. |
My Projects
My Projects module in the mobile application provides an overview of all the projects you are involved in. By clicking on a specific project, you can seamlessly navigate to the Execution Board associated with that project. It’s important to note that project creation is exclusive to the web application. Projects created on the web app, to which you are a member, will be visible in the mobile app. While you can access all organization projects, your visibility is restricted based on the access rights.
Execution Board
The Execution Board serves as a dynamic space where you can manage and monitor project progress. It offers the flexibility to either start with a default value stream or tailor it to meet specific needs. Here, you can gain insights into workitems through cards that showcase relevant information.
Anatomy of Execution Board
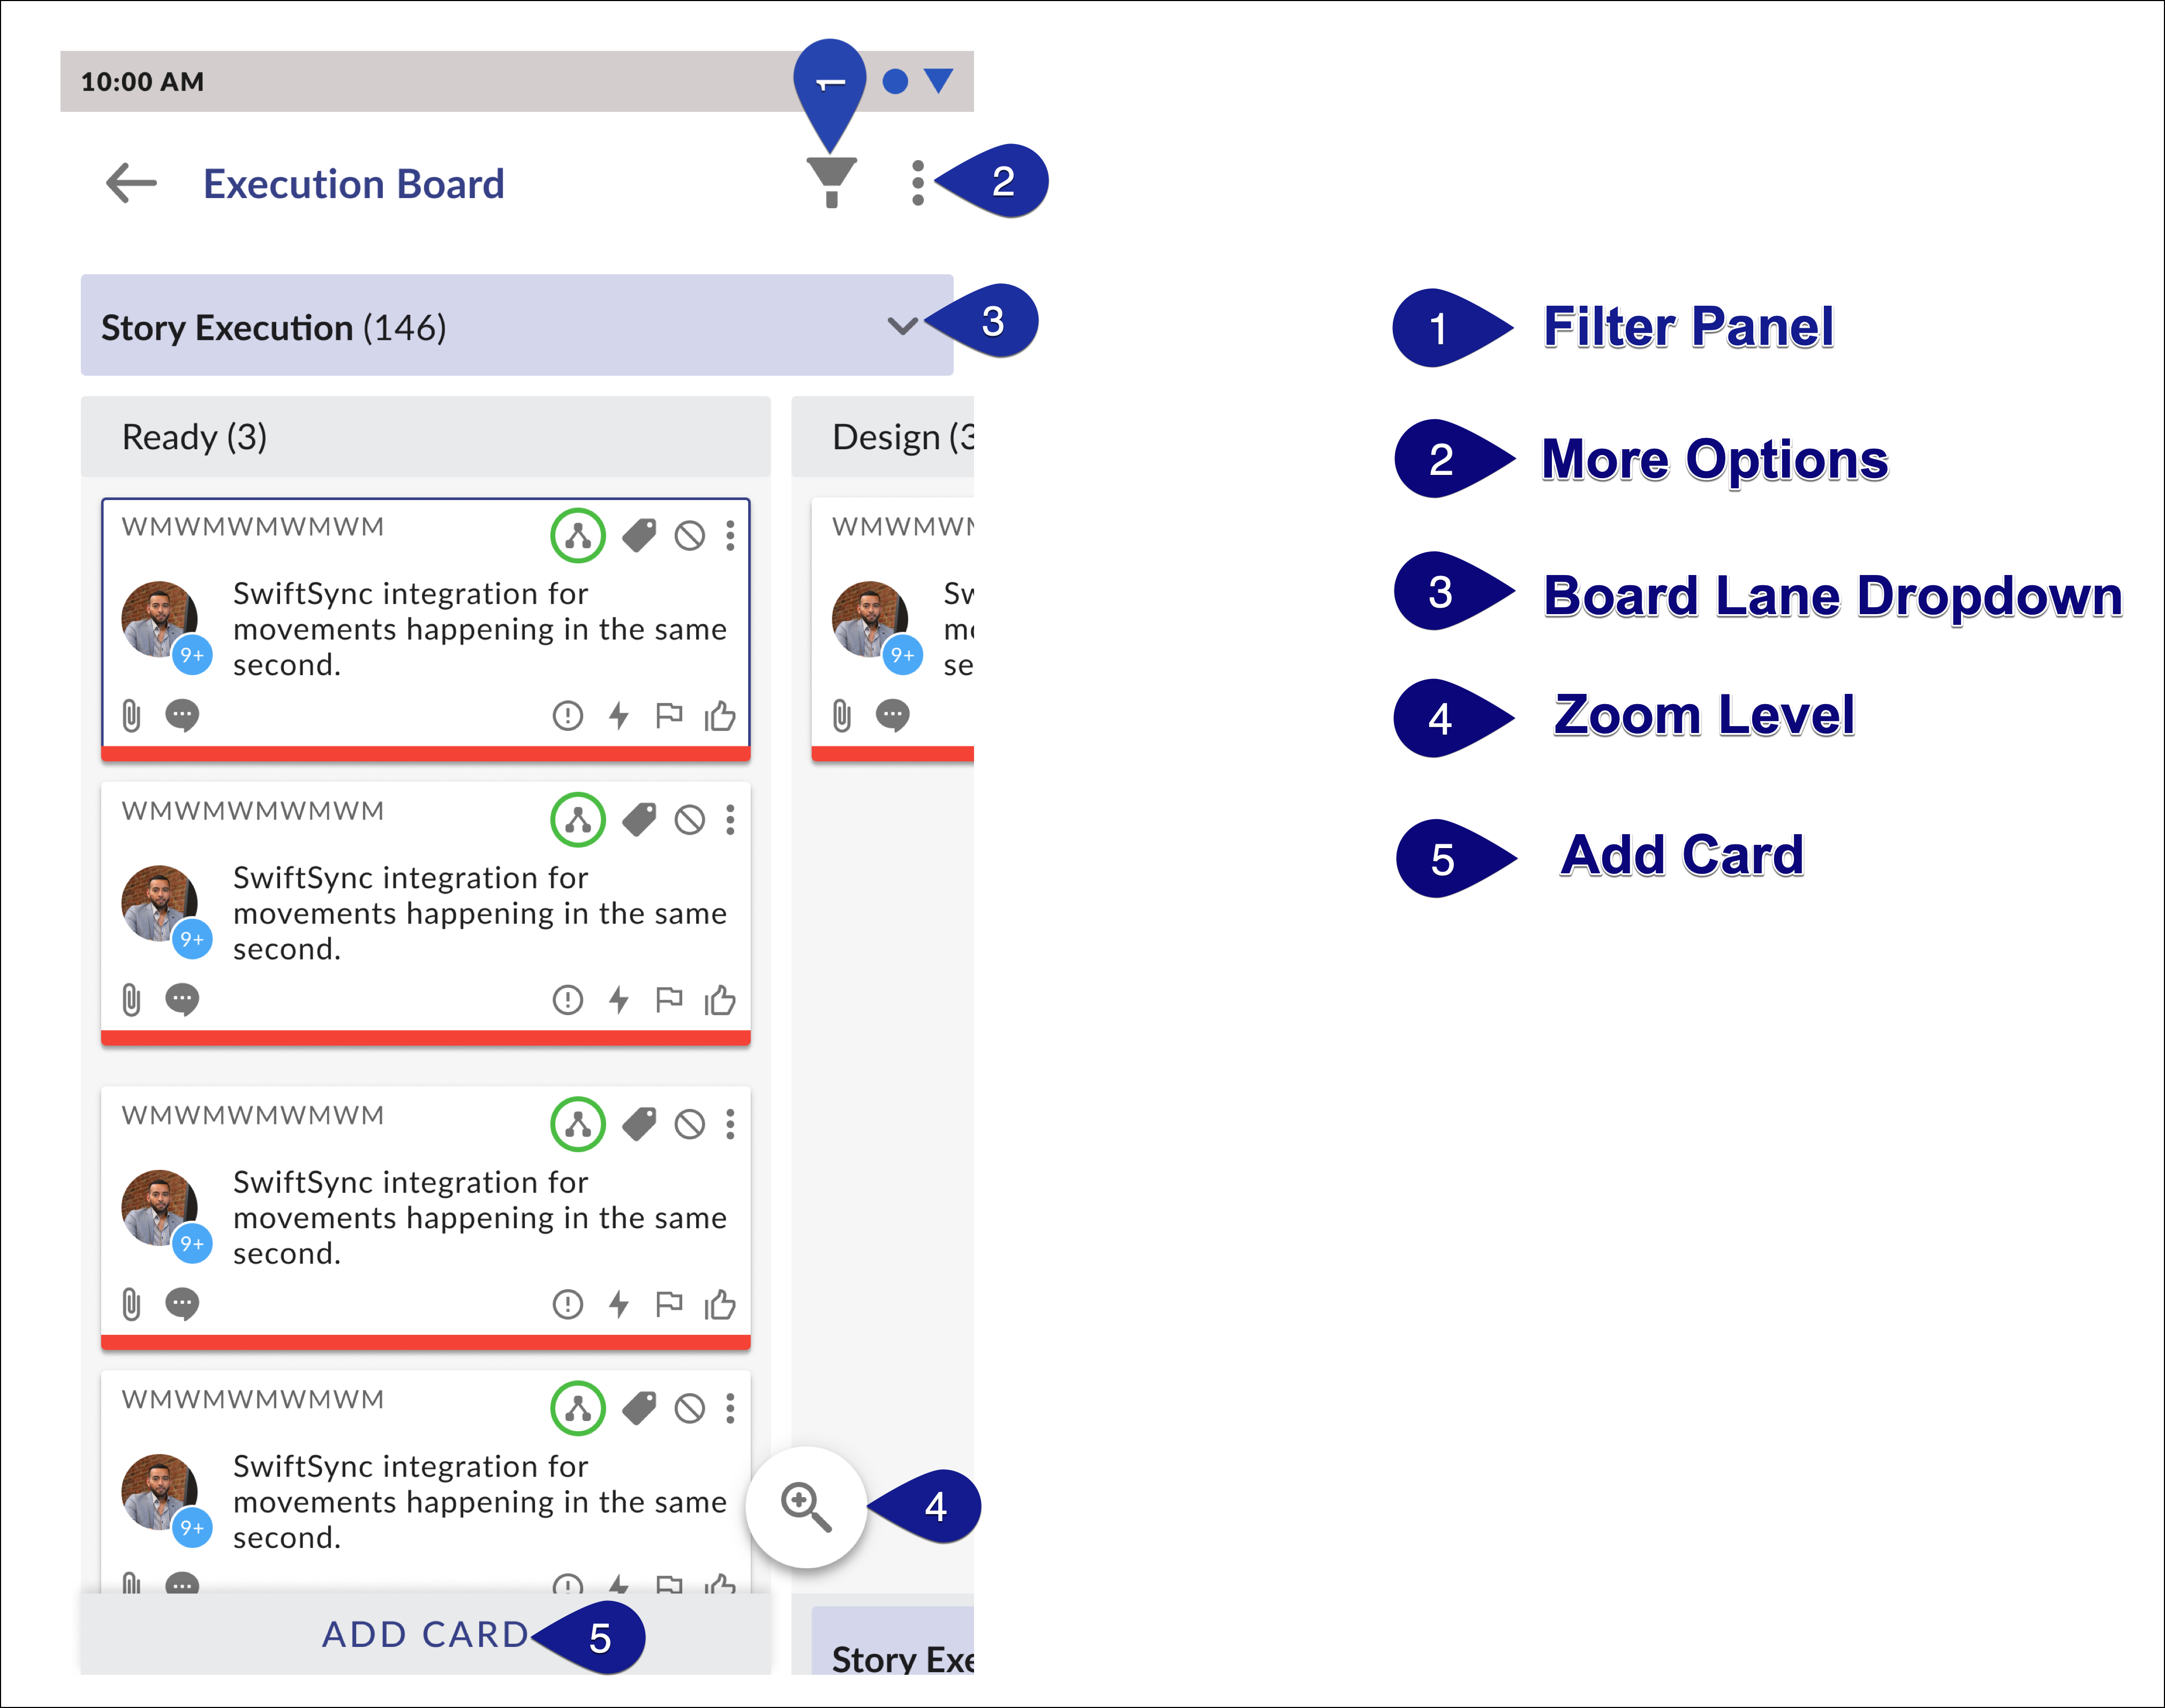
Simple Actions to Perform on Your Execution Board
- Add Card: Quickly initiate work item creation by clicking the “ADD” button. Learn more
- All Cards/My Cards: Choose between viewing all work items or only those assigned to you or your team.
- Filter: Apply filters to selectively view cards based on criteria such as Card Owner, Priority, Card Type, Release, etc.
- Zoom Level: Modify the visualization of workitems for better clarity.
- Lane Selector: Switch effortlessly between different lanes created for the project.
- Card Navigation: Clicking on a card takes you to work item sections such as Details, ToDo, Linked Cards, Comments, Attachments, etc. Learn more
- Attribute Navigation: Navigate using card attributes like block, parent-child, traceability, % Complete, Vote, Block, Flag, etc. Learn more
- Horizontal Swipe: Swipe left or right to navigate across different columns within a lane.
- Move Cards: Easily move the cards by dragging and dropping them from one column to another. Learn more
- Other Actions: Block, Mark as Done, Update, Delete, Block.
These features help you to efficiently manage and track the progress of your cards. For more information, please refer to the web help URLs provided above.
Also, please note that the features below are view-only. Depending on the configuration in the web application, the mobile application will be displayed.
- Card Aging: It is the visual representation in a card to highlight the aging or elapsed time since a card/workitem was initiated. Learn more
- Card Color Scheme: It highlights the cards with unique colors that help you focus your attention on those cards matching the selection criteria. Learn more
- Card Cover Image: It is usually displayed prominently on the card, providing a visual cue or context related to the task. Learn more
Time Tracking
Nimble’s Mobile Time Tracking module enables you to efficiently log and track the time you spend on workitems across various projects while on the move. When you navigate to the Time Tracking module, you will find a list of all the projects you are involved in as a Card owner or ToDo Owner for a workitem.
Please note that projects will only be visible to you if you are a card owner or ToDo owner for any workitem within the specific project.
How to Track Time on the Nimble Mobile App:
- Choose the date you want to track time for using the calendar widget at the top. It defaults to a weekly view.
- From the list of visible projects, select the required Project > Workitem, and then the ToDo/Task you are currently working on.
- Click on the time icon located next to the selected ToDo. This will open the Time Tracking panel, displaying the calendar widget with the chosen week, along with the project and workitem names already selected.
- Enter the time you spent on the ToDo for the required date (including decimals).
- Click SUBMIT to save your time instantly. If Timesheet Approvers are set, click SAVE and then ROUTE.
NOTE:
- The SAVE and ROUTE options are only enabled with configured Timesheet Approvers.
- You need an active network connection to submit your timesheet.
- You can only create a ToDo in the ToDo section of a workitem.
To learn more about the Time Tracking features in the web application, click here.
![]()
Add Global Workitem
Sometimes apart from Project Tasks, you need to log time for generic tasks. These are pre-defined in the organizations as ‘Global Tasks’, for example, Meetings, Training, etc. To add an existing Global Task –
- Click the Add icon.
- Select the global task from the list of pre-defined Global Tasks such as Company Meetings, Customer Overhead, Leave, Product Training, Power Outages, etc.
- You can view Global tasks below projects tasks, in the Time Tracking view.
Filter
The filter enables you a quick grouping or categorize timesheet data. The timesheet data can be filtered in several useful ways to enable quick overview or tracking of required timesheets. The filters available in the Time Tracking view are as follows.
1. Project
2. WorkItem Type
Notifications
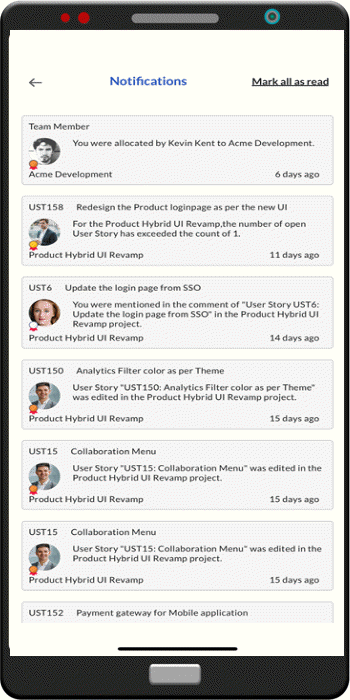 |
Track important updates by viewing the notifications about the Workitems that are assigned to you. Also, you will receive notifications if you have set the notification triggers in the web application.
The unread notifications are shown on the Whitesmoke background while the read ones are shown with white background. If you have new notifications, the number of notifications is displayed on the Notifications icon in red. Tapping a notification will open the workitem details. |
Support
Using the Settings icon, you will be directed to the customer support page for further queries.
Logout
Using this Logout icon, you log out from the account.