

Webhooks can be used to notify changes in Nimble cards or user data to other tools and applications. When a specific event occurs in the Nimble, a webhook message is sent to a predefined third-party URL, delivering real-time information about that event, and data it changed, to the specified tool.
Using webhooks, you can create any number of scenarios in which Nimble communicates directly with a specific tool whenever an event occurs in a project.
Please note that only the enterprise creator and organization admin have access at the administration level, whereas only the project manager and team lead have access at the project level.
Navigation
Project Level – Navigate to the breadcrumb at the top hover over the Project name, expand the Setup module, and select Webhooks. OR
Administration Level – In the left navigation panel, expand the Apps menu and select the Account Space. Hover over the top breadcrumb, expand the Administration module, and select Webhooks.
Create Webhook
Go to your destination (specified) tool and prepare the URL that Nimble will use before creating a webhook. This URL will then be used to create a webhook.
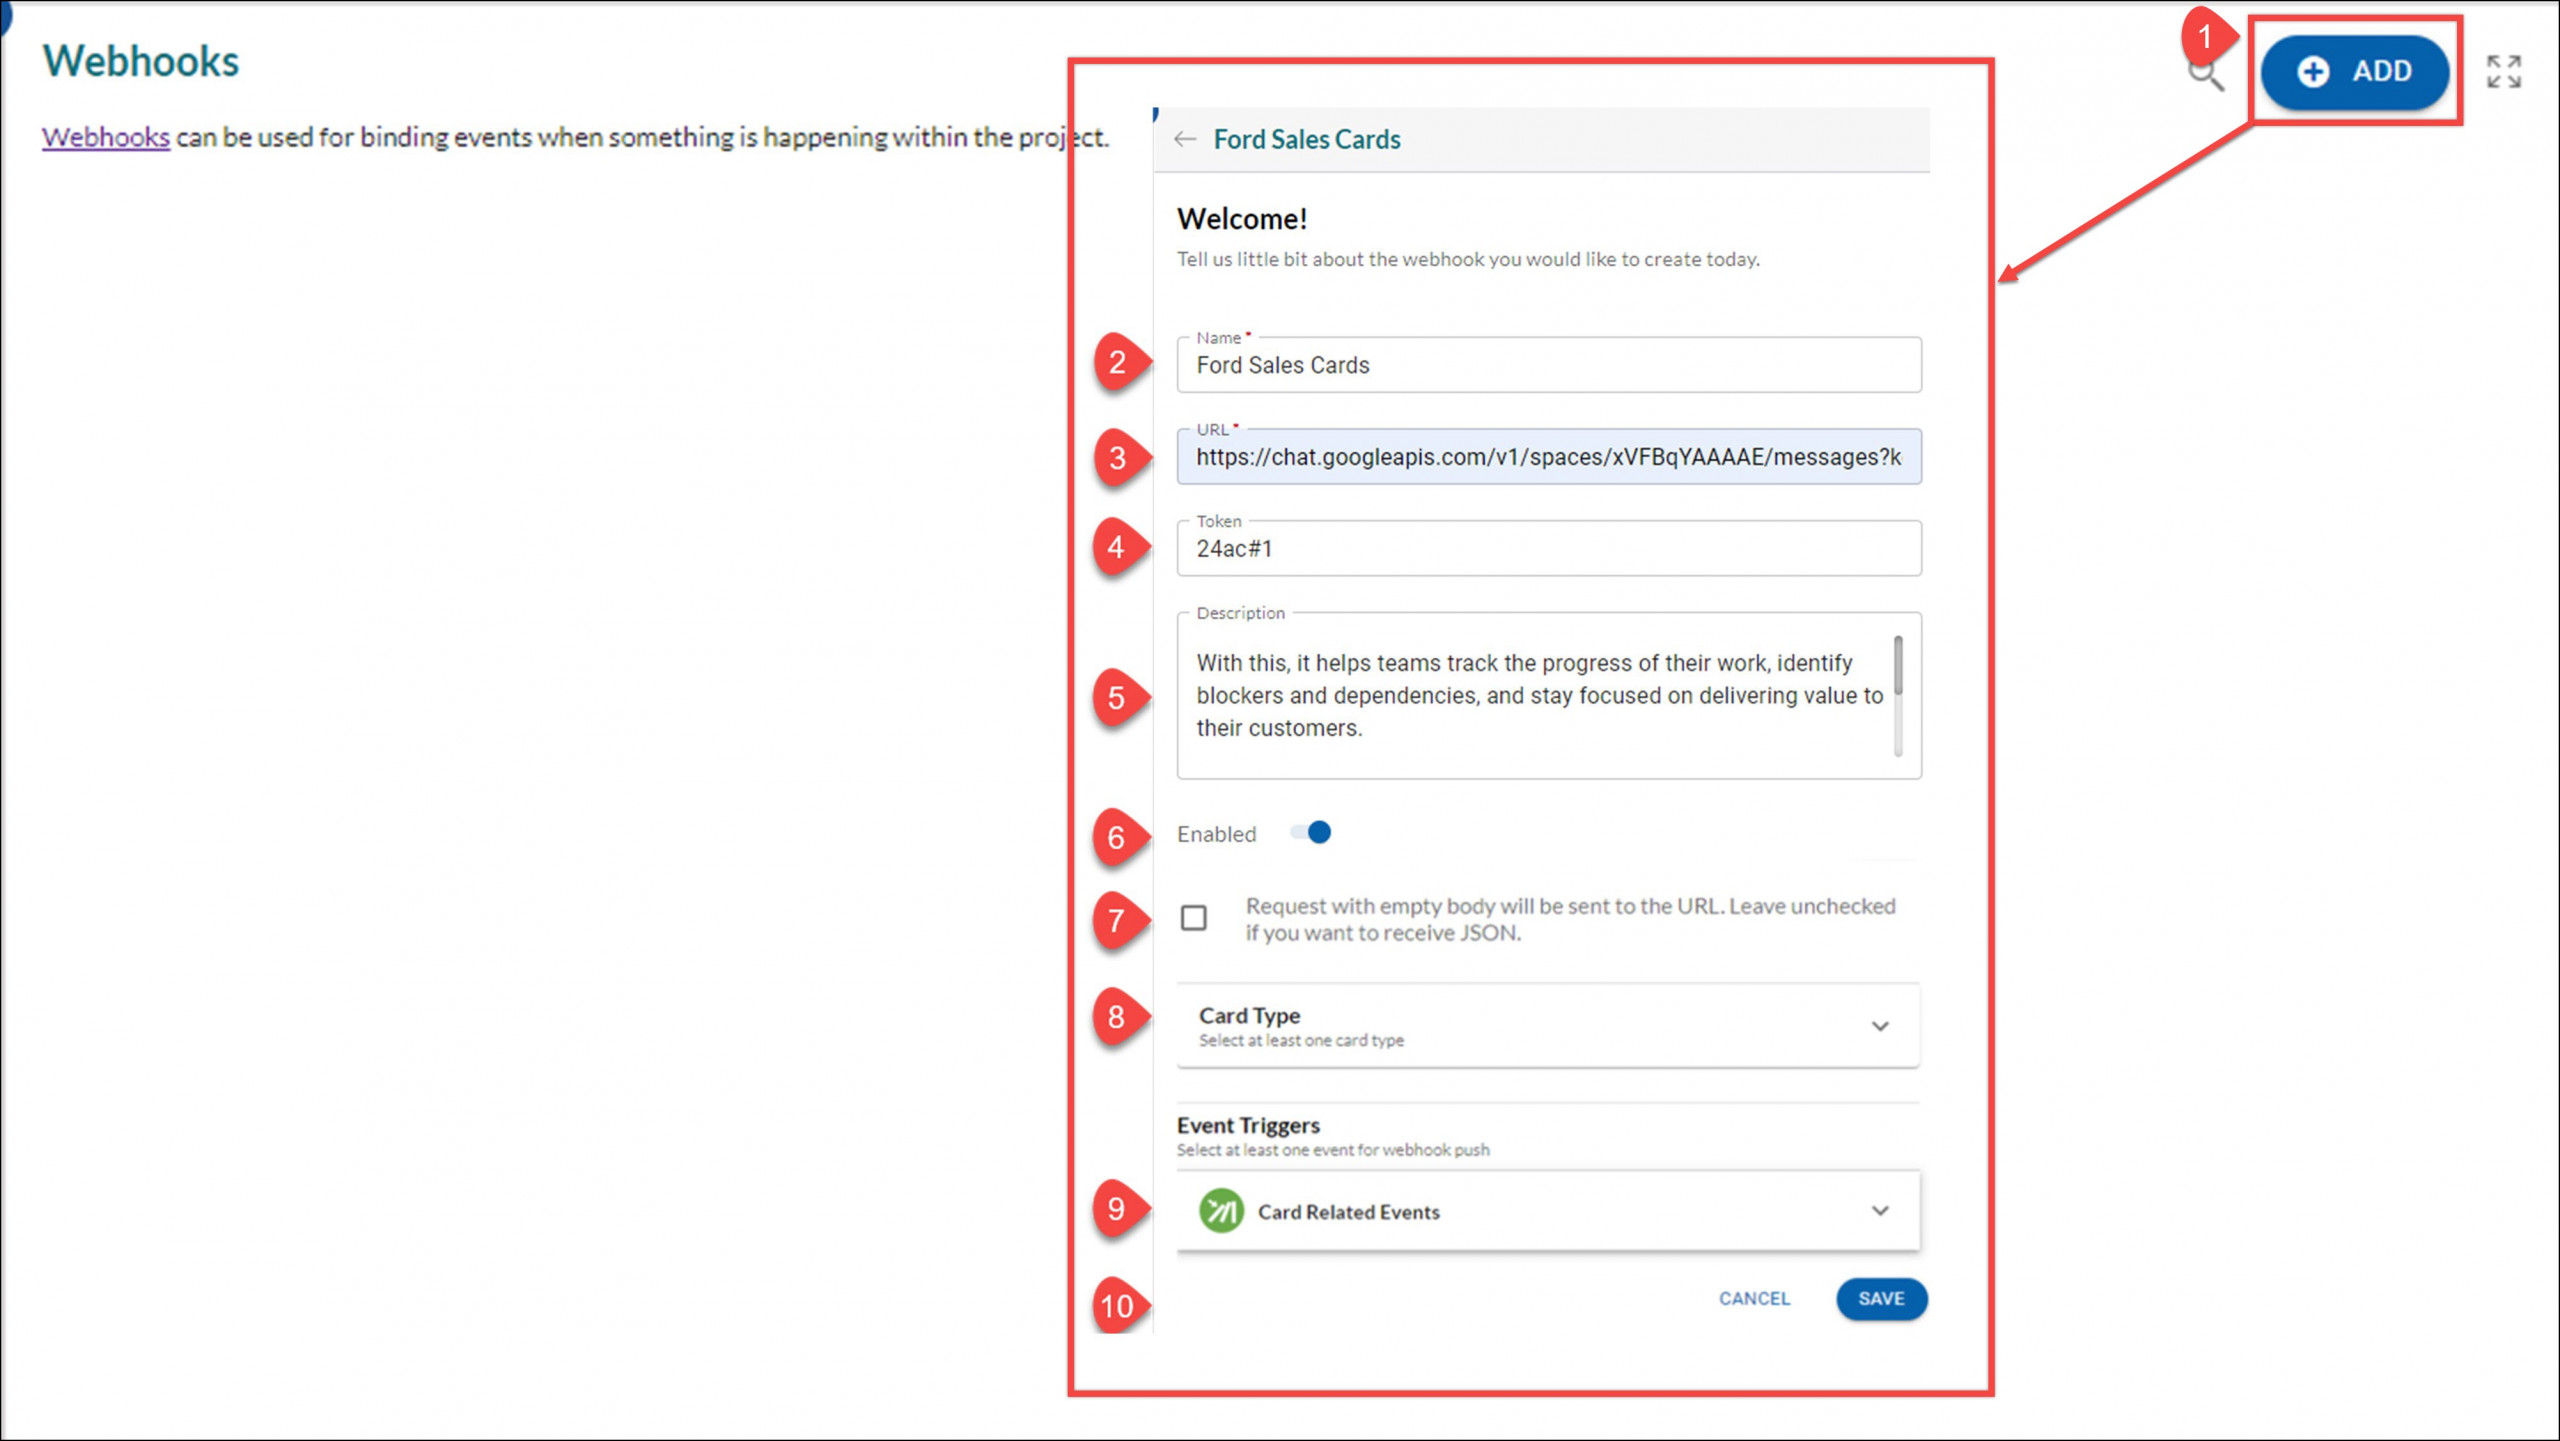
- Click the ADD button.
- Enter a Name identifying the webhook.
- Enter or paste the payload URL to post the information that will be called when the webhook is triggered.
- You can optionally specify a secret token if such a token-based validation mechanism is supported by the receiver.(Optional)
- Enter the Description to further identify the intent of the webhook. (Optional)
- Enable to make the webhook active, or Disable to make it inactive.
- Check the Box if only the action of the event needs to be sent, not the card details.
- In the Card Type section, select the required card type that will trigger the selected event.
- In the Event Triggers section, select the required events of the cards that will trigger sending your new webhook.
- Click the SAVE button. The new webhook will be stored, and then create a Webhook dialog will close.
The new webhook will now be shown in the Webhooks List.
View and Edit Webhook
- To view and edit a specific webhook, hover on the required webhook and then click the Edit button. The webhook details will appear.
- Make the desired changes to the selected webhook.
- Click the SAVE button to save the webhook Or the DELETE button to delete it.
Example of Webhook Response
Every Webhook sent to your endpoint will have an event field in its body. This field will contain the payload with the event’s data (card details).
{
"event": {
"realmId": "NIMBLEQA",
"accountId": "70051025",
"ownerType": "Org",
"ownerId": "70051526",
"itemType": "PREQ",
"itemId": "70051021",
"userId": "70052143",
"app": "nimble",
"entity": "com.Robinson.cloud.nimble.EForm",
"eventName": "addEForm",
"entityVersion": "1",
"apiVersion": "v1"
},
"content": {
"CM_Priority": "--None--",
"CREATEPROJECT": "Y",
"Category": "--None--",
"STARTDATE": "2022-11-29T00:00:00Z",
"PROCESSTEMPLATE": "--None--",
"CM_Description": "null",
"PreqCategory": "--None--",
"ISAGILE": "Y",
"CM_CreationDate": "2022-11-29T12:04:50Z",
"CM_CreatedBy": "70052143",
"CM_OverallStatus": "Open",
"CM_DUEDATE": "",
"TASK_ACT_TRACKING_MODE": "Timesheet",
"PROJECTMANAGER": "70052143",
"TRACEDPROJECT": "",
"EFORM_INSTANCE_ITEMID": "70051021",
"TRACKINGBY": "PC",
"PROJECTLEVEL": "--None--",
"CM_CurrentStageName": "",
"CM_Name": "olddemand",
"WBSORDERBY": "--None--",
"CM_ItemCode": "PREQ1",
"PROJECTTYPE": "--None--",
"ENDDATE": "2023-09-29T00:00:00Z",
"FinancialTemplate": "--None--",
"PROJECTCODE": "DEM000004",
"TASKMODULE": "STaRT Plus",
"CM_SeqNumber": "1"
}
}